










Crochet Crystal Pouch Necklace: Free Pattern & Video Tutorial
Introduction to the Crystal Pouch Necklace Trend
The crochet crystal pouch necklace has taken the handmade jewelry world by storm, blending the ancient art of crochet with the timeless appeal of natural crystals and gemstones. This unique accessory allows crafters of all skill levels to create a wearable piece that is both functional and deeply personal. Whether you are a seasoned crocheter or someone just picking up a hook for the first time, this project offers an accessible entry point into the world of fiber jewelry that yields stunning, professional-looking results.
What makes this style of necklace so captivating is the way it merges two beloved traditions: crystal healing and textile craftsmanship. Many people collect crystals for their beauty, their symbolic meanings, or their perceived energetic properties, but finding a way to carry them elegantly throughout the day can be a challenge. The crocheted pouch solves this problem beautifully, cradling your chosen stone in a delicate net of yarn or thread that keeps it secure while showing off its natural color and texture through the open lacework design.
Beyond their spiritual and aesthetic appeal, these necklaces have also become incredibly popular as handmade gifts. A crocheted crystal pouch takes only a modest amount of time to complete — typically between one and three hours depending on your experience level — which makes it an ideal project for crafters who want to produce meaningful, heartfelt presents without committing to a weeks-long undertaking. The combination of a thoughtfully chosen crystal and a hand-crocheted setting creates something truly one of a kind that cannot be replicated by any mass-market product.
Materials and Tools You Will Need
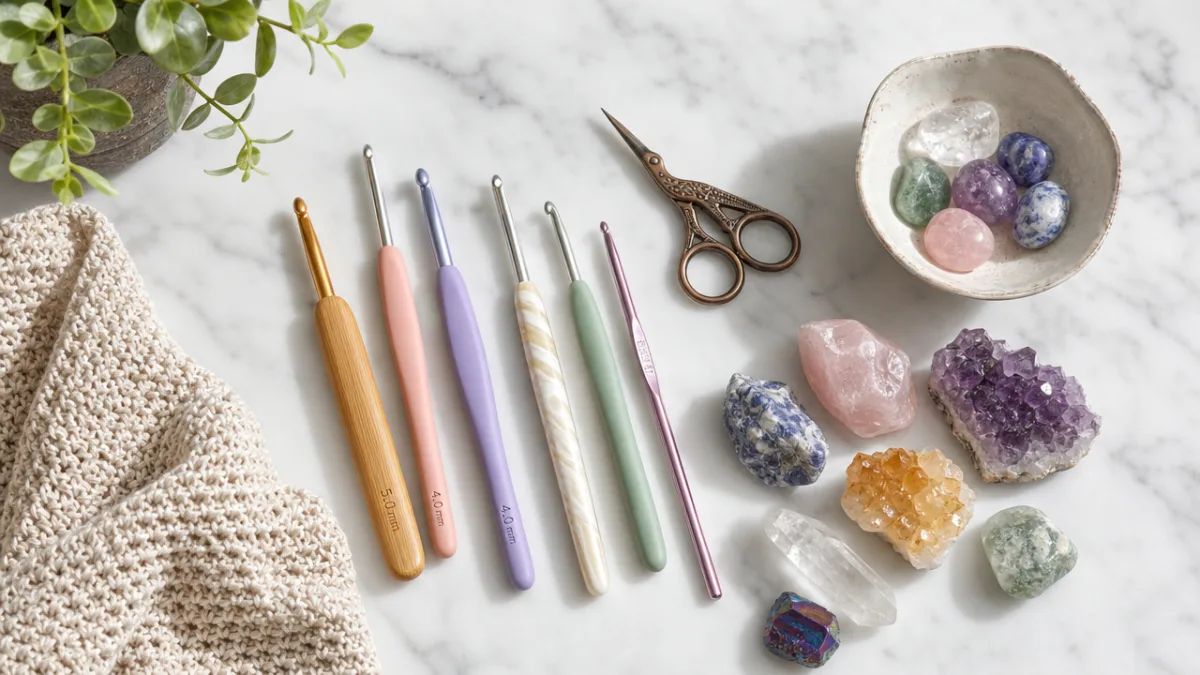
Before you begin crocheting your crystal pouch necklace, gathering the right materials will make the process smoother and more enjoyable. The yarn or thread you choose will have the single biggest impact on the final look of your piece, so it is worth spending a little time thinking about your options. Most crafters prefer a fine-weight thread for this project, such as a size 10 crochet cotton thread, because it produces a delicate, lacy fabric that drapes beautifully around the stone. However, thicker yarn can be used to create a more bohemian, chunky aesthetic that suits larger crystals like raw amethyst clusters or selenite wands.
The hook size you select should correspond to your chosen thread or yarn. For size 10 cotton thread, a steel crochet hook in size 7 or 8 (approximately 1.5mm to 1.65mm) is standard. If you are working with a lighter fingering-weight yarn, a hook between 2mm and 2.5mm will give you a tighter, more secure fabric that will hold your crystal safely. Always take a moment to check your gauge before beginning the project, especially if you are using a different yarn than the pattern specifies, because a looser gauge could cause your stone to slip out unexpectedly.
In addition to your hook and thread, you will need a few other supplies to complete the necklace. A tapestry needle is essential for weaving in your yarn ends neatly, and a pair of sharp scissors will make clean cuts on your thread. You will also need your chosen crystal or stone — smooth tumbled stones and cabochons tend to work best for beginners, as their uniform shapes are easiest to work around. Finally, you will need a length of cord, chain, or additional yarn to create the necklace component that allows you to wear your finished pouch.
- Size 10 crochet cotton thread or fine fingering-weight yarn in your preferred color
- Steel crochet hook sized appropriately for your thread (typically 1.5mm to 2.5mm)
- A tumbled crystal, polished stone, or cabochon of your choice
- Tapestry needle for weaving in ends
- Sharp scissors
- Necklace cord, leather string, or chain for wearing
- Optional: jump rings and lobster claw clasp for a more finished look
Understanding the Basic Crochet Stitches Required
One of the most encouraging aspects of the crystal pouch necklace pattern is that it relies on only a handful of fundamental crochet stitches, making it perfectly achievable for beginners while still offering enough variety to keep more experienced crafters engaged. The foundation of almost every crystal pouch pattern is the magic ring, also called a magic circle or adjustable ring. This technique allows you to start crocheting in the round without leaving a hole at the center of your work, which is crucial when you are creating a base that needs to hold a crystal securely. If you have not tried the magic ring before, the accompanying video tutorial walks through this step slowly and clearly.
From the magic ring, most patterns progress using a combination of single crochet, half double crochet, and chain stitches worked in continuous rounds. Single crochet stitches form the tightest, most solid fabric and are typically used at the base of the pouch where you need the most support for the crystal. As you work upward around the stone, many patterns introduce chain spaces or mesh-style stitch combinations that create the characteristic open, net-like appearance of the pouch. These openings not only look beautiful but also serve the practical purpose of letting the natural color and luster of the crystal shine through the finished piece.
The drawstring or closure at the top of the pouch is usually created through a simple sequence of chain stitches worked in a final round, forming a series of loops through which a cord can be threaded. This closing technique is elegant in its simplicity and requires no additional hardware or materials. Once the cord is threaded through these loops and pulled snug around the crystal, the pouch cinches closed around the stone, securing it firmly. A basic overhand knot or a sliding knot in the cord then allows the necklace to be adjusted to your preferred length.
- Create a magic ring and work your starting round of single crochet stitches into it.
- Increase evenly in each subsequent round to shape the base of the pouch to match your crystal.
- Work even rounds without increases until the pouch sides are tall enough to cup the stone.
- Introduce chain spaces or mesh rounds to create the decorative open-weave section of the pouch.
- Work the final drawstring round with evenly spaced chain loops around the opening.
- Thread your cord through the loops and cinch the pouch closed around the crystal.
- Adjust and knot the cord to create your desired necklace length.
Step-by-Step Pattern Instructions
Begin your crystal pouch by placing a slip knot on your hook and working a magic ring. Into the ring, work six single crochet stitches and pull the tail of the ring snug to close the center. This forms Round 1 of your pouch base. In Round 2, work two single crochet stitches into each stitch around, giving you a total of twelve stitches. This doubling technique increases the diameter of your base quickly and is the standard method for shaping a flat circle in crochet. At the end of each round, you may place a stitch marker to help track your progress, especially if you are new to working in continuous rounds without joining.
For Round 3, alternate between working two single crochet into one stitch and one single crochet into the next, repeating this pattern around to give you eighteen stitches total. Continue increasing in this manner for one or two more rounds until the flat base of your pouch is roughly the same diameter as the widest point of your crystal when viewed from above. This measurement step is important: if your base is too small, the crystal will not sit flat inside the pouch, and if it is too large, the stone will shift around and may eventually work its way out of the bottom. Taking a moment to hold your work against the crystal at this stage will save you from having to rework the piece later.
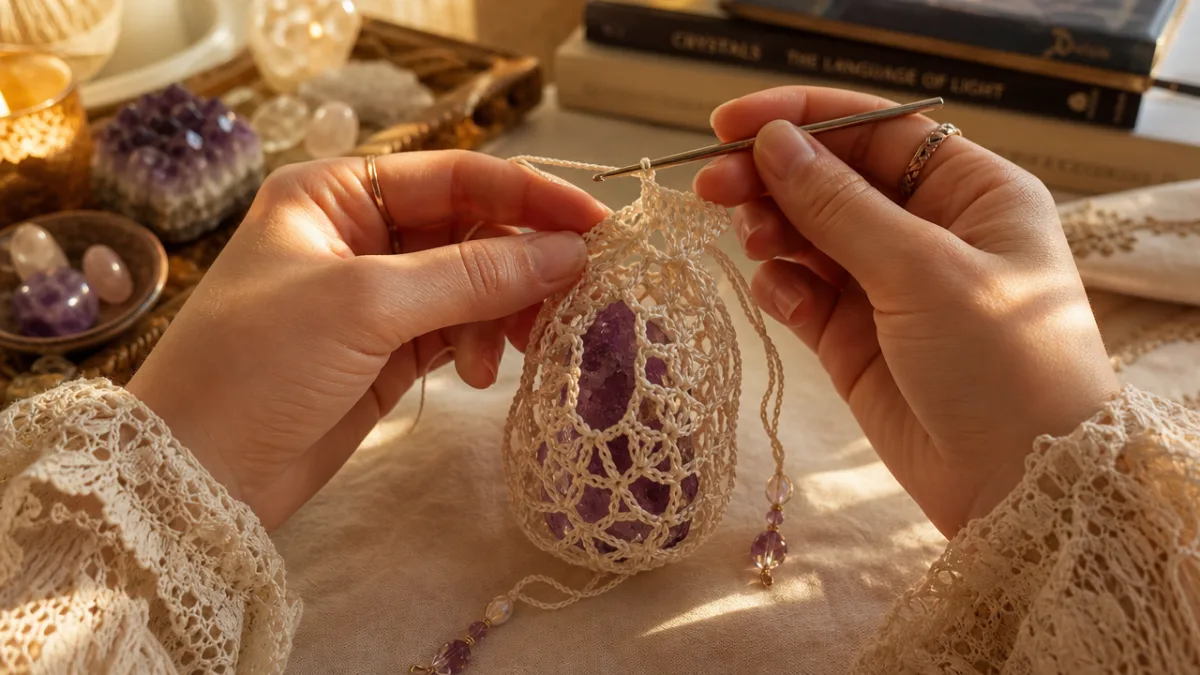
Once your base is the correct size, stop increasing and begin working even rounds of single crochet, which will build up the walls of the pouch around the sides of your crystal. Place the crystal inside the pouch as you work these rounds to check the fit regularly. When the walls of the pouch reach approximately the halfway point of your crystal’s height, it is time to transition into the decorative mesh section. Work a round of alternating single crochet and chain-two spaces, skipping a stitch between each chain space, to create the open lattice that will cradle the upper portion of your stone and show off its natural beauty.
Continue the mesh pattern for two to four rounds depending on the height of your crystal and the look you are going for. Taller, more columnar stones like selenite or tower points will need more mesh rounds, while rounder tumbled stones may need only two. Finish with a final round that creates the drawstring channel: work a single crochet into each stitch and chain-two space around the opening, then in one final pass, work a slip stitch followed by a chain-four loop into each stitch, spacing these loops evenly around the top. These loops will serve as the threading points for your necklace cord and give the finished piece its characteristic ruffled, feminine top edge.
Choosing the Right Crystal for Your Pouch
Selecting the crystal or stone for your pouch is one of the most enjoyable parts of this project, and there are dozens of beautiful options to consider. For beginners, smooth tumbled stones are the most forgiving choice because their rounded, uniform shapes sit comfortably inside the pouch and are unlikely to catch on or snag the thread. Popular tumbled stone choices include rose quartz, amethyst, labradorite, black tourmaline, and aventurine — each available in a wide range of sizes from small pebbles that sit delicately at the collarbone to larger focal stones that make a bold statement.
If you are feeling more adventurous, raw or rough crystals can create a strikingly organic look when paired with a crocheted pouch. Raw citrine points, raw rose quartz chunks, and natural pyrite clusters all photograph beautifully and carry a wild, earthy energy that many crystal lovers prefer over the polished look of tumbled stones. When working with raw crystals, you will need to measure carefully and potentially adjust your pattern slightly, since raw stones are rarely symmetrical. The key is to make sure the widest dimension of the stone can fit through the opening of the pouch after the drawstring is loosened, so you can insert and remove the crystal as needed.
Beyond aesthetics, many people choose their crystals based on the symbolic or energetic meanings traditionally associated with different stones. Rose quartz is widely regarded as a stone of love and compassion, making it a popular choice for gifts. Amethyst is associated with calm, intuition, and spiritual awareness. Black tourmaline is considered a protective stone, often worn as a talisman against negative energy. Citrine is linked to abundance, joy, and creativity. Whether or not you subscribe to crystal healing beliefs, considering the meaning of your chosen stone adds an extra layer of intention and personalization to your handmade necklace that transforms it from a simple accessory into something genuinely meaningful.
- Rose Quartz: Love, compassion, and emotional healing — ideal for gifts or self-care practice
- Amethyst: Calm, intuition, and spiritual clarity — excellent for meditation jewelry
- Black Tourmaline: Protection and grounding — a popular choice for everyday wear
- Citrine: Abundance and positivity — often worn to attract opportunity and joy
- Labradorite: Magic and transformation — its iridescent flash is stunning in an open-weave pouch
- Clear Quartz: Amplification and clarity — pairs well with any yarn color
Customizing Your Necklace and Finishing Touches
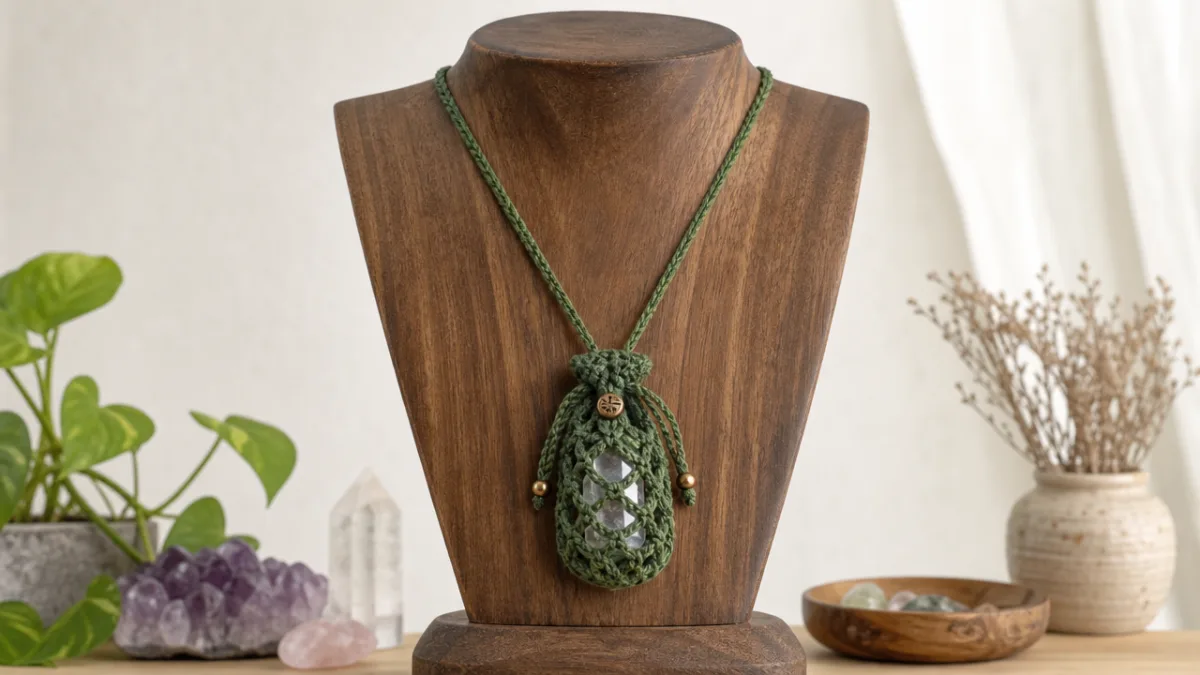
One of the greatest joys of making your own crystal pouch necklace is the vast scope for personalization that the pattern allows. The most immediate way to customize your piece is through color: yarn comes in virtually unlimited shades, and choosing a thread color that complements or contrasts with your crystal can completely transform the character of the finished necklace. Neutral tones like cream, ivory, and gold work beautifully with virtually any crystal and lend the piece a classic, timeless appeal. Bold jewel tones like deep teal, burgundy, or forest green create a more dramatic, witchy aesthetic that pairs particularly well with raw or dark-colored stones.
The necklace cord itself offers another avenue for personalization. A simple length of waxed cotton cord in a matching or contrasting color is the most straightforward option and creates a clean, minimalist look. Leather cord adds a rustic, boho feel and is especially appropriate for natural, undyed yarn pouches. For a more polished and jewelry-store-quality finish, you can thread your drawstring through a length of delicate metal chain and finish the ends with jump rings and a lobster claw clasp. Some crafters go even further, adding small seed beads or crystal chips to the cord itself, threading them between knots to create an embellished strand that complements the central stone.
Once you are happy with your pouch and cord, take a moment to block your finished piece if you used cotton thread. Blocking — the process of wetting your crochet work and pinning it into shape while it dries — opens up the mesh stitches and gives the pouch a more even, polished appearance. This step is particularly worthwhile if you are making the necklace as a gift or planning to photograph it for social media. After blocking, weave in any remaining yarn tails securely with your tapestry needle, trimming close to the fabric once the ends are anchored. Your crystal pouch necklace is now complete and ready to wear, gift, or sell at your next craft market.
Tips for Success and Common Mistakes to Avoid
Even simple crochet projects come with a learning curve, and the crystal pouch necklace has a few specific pitfalls that new crafters tend to encounter on their first attempt. The most common issue is making the pouch too loose, which causes the crystal to slip out through the bottom or sides. This usually happens when the crafter is working with a hook that is too large for their thread, or when they are crocheting with an unusually loose tension. If you notice your stitches looking floppy or open at the base, try dropping down one hook size and swatching again before restarting the project. A tighter, firmer base will hold even a heavier stone securely for years of regular wear.
Another frequent challenge is getting the sizing right for the specific crystal you have chosen. Because crystals are natural objects, no two are exactly alike, and following a pattern’s stitch counts rigidly without checking the fit against your actual stone can result in a pouch that is either too tight to close over the crystal or too large to hold it snugly. The best approach is to treat the pattern as a guide rather than a strict set of rules, pausing frequently to test the fit and adjusting the number of increase or even rounds as needed. After completing just a few pouches, you will develop an intuitive sense for how the fabric behaves and will be able to modify patterns on the fly with confidence.
Thread tangles are another frustration that many beginners encounter, particularly when working with fine steel hooks and size 10 cotton thread, which can twist and knot more easily than thicker yarn. To minimize tangles, work from a center-pull ball of thread rather than feeding from the outside of the skein, and allow your work to hang freely from your hook occasionally so any accumulated twist can unwind naturally. Keeping your working thread at a consistent tension throughout the project will also produce a more even, professional-looking fabric. Most importantly, do not be discouraged if your first pouch does not look exactly as you imagined — each one you make will be better than the last, and the learning process is a significant part of the pleasure of the craft.
Finally, pay careful attention to the video tutorial that accompanies this free pattern, particularly the sections that demonstrate the magic ring and the drawstring round. Written patterns can sometimes be ambiguous, and seeing these techniques performed in real time on video resolves almost every source of confusion instantly. If you find yourself stuck or uncertain about any step in the process, watching the relevant section of the tutorial two or three times before picking up your hook again is almost always more productive than pressing forward with uncertainty. The video also demonstrates how to insert the crystal into the finished pouch and how to tie the sliding knot in the necklace cord, two finishing details that make an enormous difference to the polished quality of the final piece.








What do you think?
It is nice to know your opinion. Leave a comment.