










11 Pen Holder Free Crochet Patterns: Creative Storage Solutions for Your Desk
The Art of Crocheted Desk Organization
Crochet is one of those crafts that just keeps surprising you with how many directions it can go. Most people picture blankets, scarves, or maybe a cozy sweater — but crochet fits surprisingly well into the world of home organization and desk accessories too. Pen holders are a perfect example. They sit right at that sweet spot between functional and creative, giving you something genuinely useful to work toward while still letting you play with stitches, colors, and texture.
There’s also something quietly special about putting a handmade organizer on your desk. No store-bought version carries that same energy — every stitch is a small record of time and care you put into it. Whether you love the look of natural cotton in soft neutrals or you’d rather go bold with bright acrylic colors, your pen holder ends up saying something about you. It turns what could be a pretty forgettable corner of your workspace into something that actually feels like yours.
The good news is that free crochet patterns for pen holders are all over the internet, and they genuinely span every experience level. Complete beginners who just learned to chain stitch will find approachable starting points, while more experienced crafters can dig into intricate textural designs that really show off what’s possible. The patterns we’re looking at here cover a wide range of techniques, materials, and approaches — which is part of what makes this little corner of crochet so much more interesting than it might first appear.
Why Choose Crochet for Your Pen Holder
Before jumping into specific patterns, it’s worth thinking about why crochet works so well for pen holders in the first place. Unlike knitting, crochet produces a denser, more structured fabric that holds its shape really well — especially when you’re working with cotton yarn or finish things off with a stiffening spray. That natural rigidity is exactly what you want from something meant to stand upright on a desk and hold pens, pencils, and scissors without flopping over.
The range of textures you can achieve is another big draw. The waistcoat stitch produces a fabric that almost looks woven, giving your finished holder a polished, sophisticated feel. The moss stitch adds a tweedy, layered texture that’s visually interesting without being complicated to work. If you want something more dimensional, cables and bobbles can add real three-dimensional character. And if you’d rather keep things clean and modern, simple single crochet worked in the round gives you a minimalist finish that looks right at home on a contemporary desk.
Cost is another reason to love this project. A single skein of cotton yarn — often just a few dollars — can stretch across multiple pen holders depending on the size and stitch pattern you choose. Compare that to buying decorative organizers at a home goods store, where even simple ones tend to carry a surprisingly high price tag, and making your own starts to look pretty appealing. If you’ve already got hooks on hand and some leftover yarn from other projects, you might end up making an entire set for next to nothing.
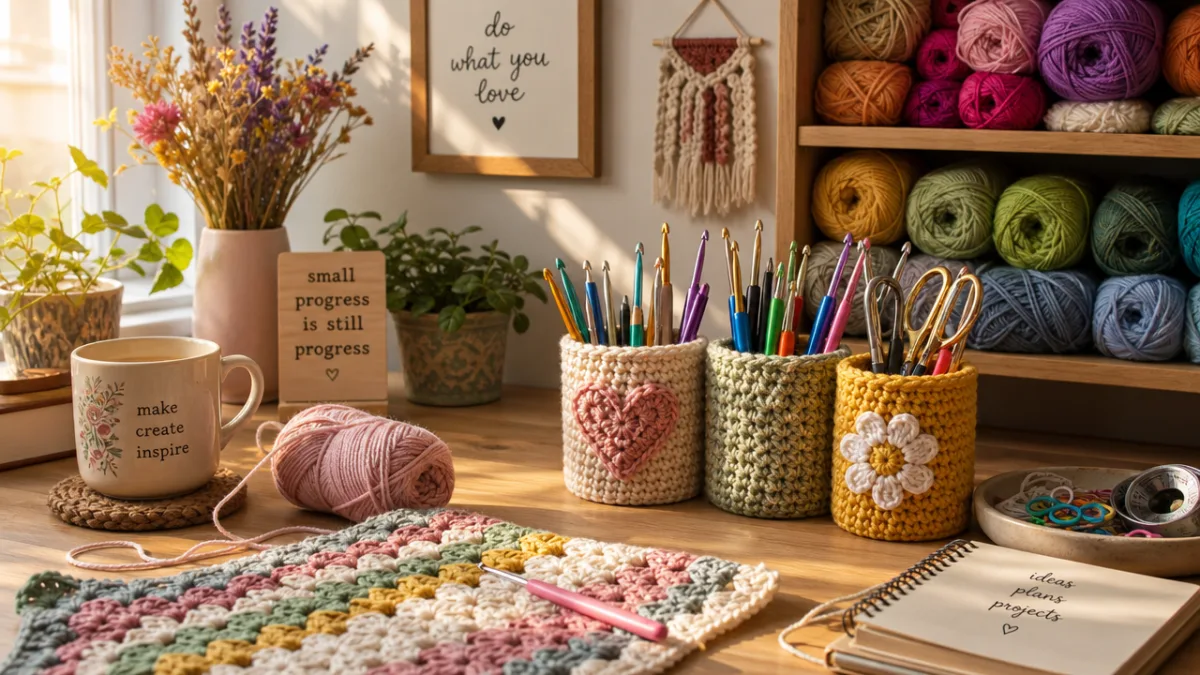
Beginner-Friendly Pen Holder Patterns
If you’re new to crochet or just prefer to keep things simple, there are some really solid free patterns out there that only ask for basic stitches and straightforward construction. The most beginner-friendly approach is working single crochet stitches in a continuous round, slowly building up the sides of a cylinder. No complicated shaping, no tricky stitch counts, no confusing abbreviations — it’s accessible even if you only learned to hold a hook last week.
One popular beginner pattern uses chunky cotton rope yarn on a large hook, which makes for a thick, sturdy holder that works up surprisingly fast — often in just an hour or two. The finished piece has a casual, bohemian quality that looks great alongside natural wood surfaces and houseplants, which makes it a go-to for crafters who lean toward earthy, organic styling in their spaces.
Another beginner-friendly option uses a simple ribbed pattern made by working into the back loop only of each stitch. It takes only a little more focus than regular single crochet, but the visual payoff is noticeably different — the ribbing creates flexible walls that can gently cradle your pens while adding a satisfying tactile texture to the exterior. Plenty of free versions of this pattern are floating around on crochet sites and platforms, most of them with step-by-step photo tutorials that walk you through the whole thing without assuming any prior knowledge.
Intermediate and Advanced Pattern Designs
Once you’ve got the basics down and you’re ready for something more challenging, the range of pen holder patterns opens up considerably. Tapestry crochet is a great place to start pushing yourself — it lets you create multicolored geometric designs by carrying unused yarn along the inside of your work and switching colors at specific points. You can end up with Aztec-inspired motifs, delicate florals, or bold abstract patterns that make your desk organizer look like a real piece of craft work.
Interlocking crochet is another technique worth exploring if you’re comfortable with more complex construction. It creates mesmerizing two-sided patterns by working two mesh layers at the same time, and when applied to a pen holder, the result is a richly detailed, almost lace-like exterior that looks far more complicated than it actually is once you get the hang of the logic behind it. Plenty of designers share interlocking crochet patterns freely as a way of introducing people to the technique, so it’s not hard to find good starting points.
Crochet cables — borrowed from the world of cable knitting — are another fantastic option for experienced crafters who want a really polished finish. Using front post and back post double crochet in specific sequences, you can create raised, rope-like designs that travel up the sides of your holder and give it the look of a cable-knit sweater. These designs tend to shine brightest in solid-color yarn, where the three-dimensional texture can do all the talking without competing with color changes. Natural undyed cotton or linen is especially lovely for this.
Materials, Tools, and Yarn Selection
Getting your materials right makes a real difference with pen holder projects. Cotton yarn is the go-to choice for most crafters working on desk accessories, and for good reason — it’s naturally stiff, durable, holds a defined shape without much fuss, and comes in an enormous range of colors. It’s also easy to care for and resists pilling over time, which matters for something that’ll live on your desk and get handled regularly.
For hook size, the general advice is to go slightly smaller than what the yarn label recommends. A tighter gauge produces a denser, firmer fabric that stands up on its own without needing extra support — which is exactly what you want for a container meant to hold things upright. Many crafters who specialize in crochet home goods suggest starting one full hook size down from the manufacturer’s recommendation and then adjusting from there depending on how the fabric feels as you work.
A few extra tools and materials can really elevate the finished result. Stiffening spray, which you’ll find at most craft stores, can be applied to a completed piece and left to dry in shape, giving you a much more rigid and polished container. Alternatively, a lot of crafters simply slip a cylindrical liner inside — a cleaned tin can, a plastic cup, or a purpose-made fabric insert all work well. Here’s a handy list of things worth having on hand before you start:
- Cotton or linen yarn in your chosen weight and color palette, ideally at least 100 meters per planned holder
- Crochet hooks in sizes appropriate to your chosen yarn, plus one size smaller for a firmer gauge
- Yarn needle or tapestry needle for weaving in ends cleanly and securely
- Stitch markers to track round beginnings and any pattern repeats
- Scissors, a ruler or tape measure, and row counter if needed
- Optional: fabric stiffener spray, a tin can or plastic cup for lining, and non-slip base padding
Linen yarn is also worth a mention if you haven’t tried it yet. It’s a bit pricier than cotton, but it has a lovely natural sheen, an organic earthy quality, and holds its shape beautifully — often without any stiffening at all. It softens a little with each wash while keeping its structure intact, and the slightly rustic look of linen fits perfectly with Scandinavian-inspired or natural home décor styles that have been having a real moment lately.
Customizing Your Pen Holder for Any Workspace
One of the best things about making your own pen holder is how much control you have over the final result. If you need something taller for long paintbrushes or rulers, you just work more rounds. If you want a wider, more open vessel that can hold a mix of supplies, you start with a bigger base. Nothing is fixed the way it is with something you’d pull off a store shelf.
Color is another place where you can really have fun. You might want to match your pen holder closely to the rest of your home office — coordinating with wall color, furniture, or existing accessories. Or you might use it as a chance to bring in a bold accent color that adds some energy to your workspace. Stripes are one of the easiest effects to pull off, since you can switch yarn at the start of each new round with minimal effort, and even a simple two-color stripe can completely change the feel of a basic cylinder.
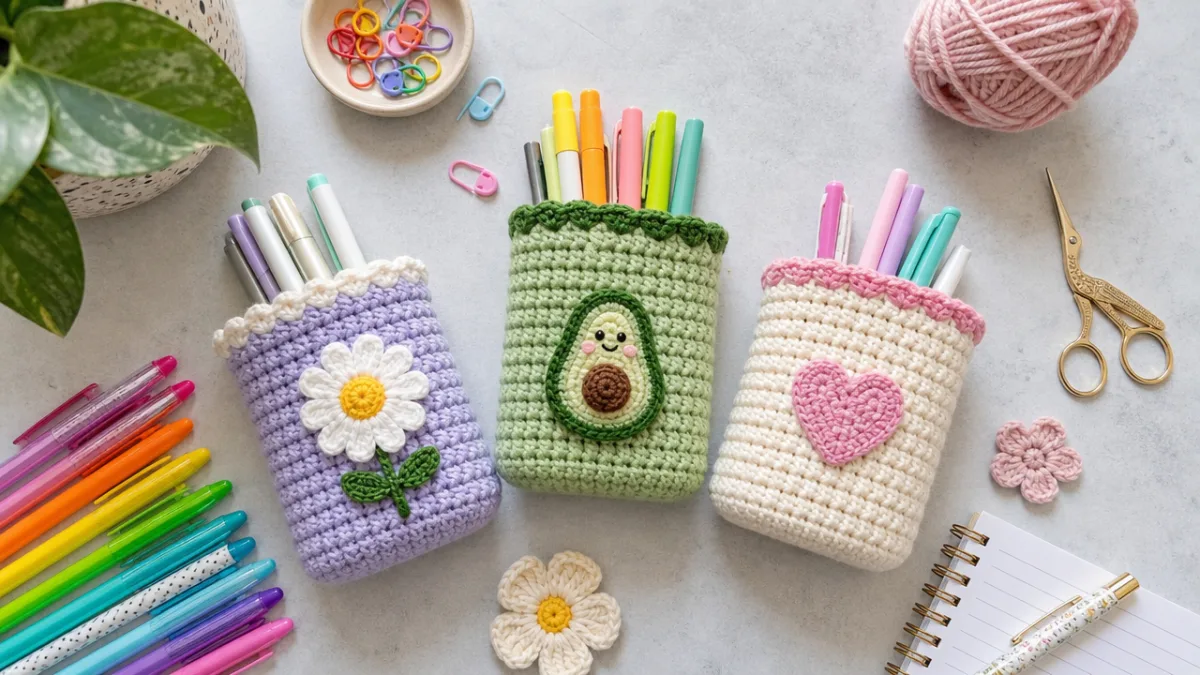
Beyond shape and color, embellishments are a great way to make your holder feel truly one-of-a-kind. Surface slip stitch embroidery lets you add monograms, small motifs, or abstract line work directly onto a finished piece. Crocheted flowers, leaves, or geometric appliqués can be made separately and sewn on. Beads, buttons, and woven leather cords can all work as decorative trim. Here are a few ideas that tend to be especially popular:
- Crocheted flowers in complementary or contrasting colors stitched along the upper rim
- Leather or suede cord woven through evenly spaced holes in a mesh pattern for a boho effect
- Wooden beads threaded onto yarn and incorporated into the stitch pattern as bobbles
- Surface embroidery using contrast yarn to add geometric lines, initials, or small pictorial motifs
- Tassel or fringe trim along the base or top edge for playful, bohemian styling
Caring for and Displaying Your Finished Pen Holders
Once your pen holders are done, a little care goes a long way toward keeping them looking great. Cotton and linen pieces can generally be hand washed in cool water with a gentle detergent — just reshape them while they’re still damp and let them air dry completely before putting anything back inside. It’s worth avoiding machine washing unless the yarn label explicitly says it’s fine, since the agitation can distort your stitches and mess with the structure over time.
When it comes to displaying them, grouping a few holders together tends to look better than spacing them out individually. Try clustering three holders of different heights, using each one to organize a different category of supplies — everyday writing tools in one, drawing supplies in another, and less-used things like rulers and letter openers in the third. Playing with height variation adds visual interest and makes the whole arrangement feel a lot more intentional.
If you find yourself making more than you need for your own desk, these also happen to make really thoughtful gifts. A handmade pen holder paired with a nice pen or a small notebook is a practical, personal present that works for birthdays, housewarmings, teacher appreciation, or office gift exchanges. The materials cost is low, simpler patterns don’t take long to finish, and the result genuinely feels like something someone made with care — because it is.








What do you think?
It is nice to know your opinion. Leave a comment.