










Welcome to My Craft Room: The Complete Guide to Spindle Base Inserts
What Is a Spindle Base Insert and Why Every Crafter Needs One
If you’ve ever tried to keep a craft space tidy, you already know the struggle — tools migrate, supplies scatter, and no matter how many times you reorganize, the surface is a mess again by Tuesday. A spindle base insert is one of those wonderfully simple fixes that you kick yourself for not trying sooner. It fits right into the hollow center of a spindle base and turns it into a rotating (or stationary) home for your most-reached-for tools. Scissors, markers, washi tape rolls, paintbrushes — everything gets its own spot and stays there.
The idea actually has roots in woodworking and fiber arts, where spindles were used to hold thread, yarn, or wire. At some point, clever crafters figured out that the same basic structure could work for just about anything — and once you add a custom liner or divider to the base, you’ve got individual slots and compartments that keep your tools separated and visible. No more dumping everything out to find the one pen you need.
What I really love about spindle base inserts is how flexible they are. You can make them from foam, cardboard, acrylic, wood, or even 3D-printed parts, and you can dial in the exact compartment sizes for your specific tools. A watercolor painter’s setup looks completely different from a scrapbooker’s or a knitter’s, and that’s totally fine — the whole point is that you’re building something that works for you. Once you’ve used one for a while, working without it starts to feel genuinely chaotic.
Choosing the Right Materials for Your Spindle Base Insert
The material you choose will shape everything — how long it lasts, how it looks, and how much work it takes to put together. Foam is hands-down the easiest starting point. High-density craft foam cuts cleanly with a utility knife or hot knife, bends without cracking, and can be layered to create compartments at different depths. It’s gentle on delicate tools like fine-tipped markers, calligraphy pens, or embossing styluses, and it’s light enough that it won’t tip over a base that isn’t super heavy.
If you want something that feels more permanent and polished, wood and acrylic are both great options. Thin plywood or balsa can be scored, cut, and glued into a precise grid or a radial divider pattern — it takes more effort, but the results look really sharp. Acrylic has a bonus going for it: it’s transparent, so you can actually see color-coded tools through the walls of the insert, which makes grabbing what you need incredibly fast. Both materials do require more tools to work with (a craft knife, small saw, or laser cutter), but if you’re up for the challenge, the finished piece can genuinely elevate your whole workspace.
Don’t overlook what you already have around the house, either. Cardboard tubes, toilet paper rolls, small tin cans, and even thick-walled drinking straws all work surprisingly well as insert components. Bundle a bunch of tubes together and drop them into the spindle base as a unit, and you’ve got a honeycomb-style organizer that’s sturdy, free, and has a wonderfully handmade quality that no store-bought product can really match. For crafters who care about sustainability, this approach feels especially satisfying.
Step-by-Step: Creating Your Own Spindle Base Insert
Before you cut anything, measure the inside of your spindle base carefully. Use a flexible measuring tape or wrap a strip of paper around the interior to get the circumference, then convert that to a diameter. Also measure the depth from the top rim down to the base. These two numbers run everything — every cut you make will reference them. Write them down somewhere you won’t lose them. A snug fit is what you’re going for; too loose and the insert rattles around, too tight and you risk cracking or warping the base.
With your measurements in hand, sketch out the compartment layout you want. Think about the tools you use most and how they’re sized — you might give one quarter of the insert to pens and markers, another to scissors and snips, and the rest to bulkier things like tape rolls or glue sticks. For round spindle bases, a radial design (dividers that fan out from a center point, like slices of pie) tends to work really well because it fills the circular space naturally without leaving awkward gaps near the edges.
Now you’re ready to start cutting. If you’re working with foam, cut a base disc to fit the bottom of the cavity, then cut your divider panels and score them gently along any fold lines where curves are needed. Glue each divider to the base and to neighboring dividers with craft glue or hot glue, pressing each joint for at least thirty seconds. Once everything is assembled, let it cure fully — overnight if you can wait that long — before loading in your tools. A well-built insert can honestly last for years.
Personalizing Your Craft Room with a Welcome Insert
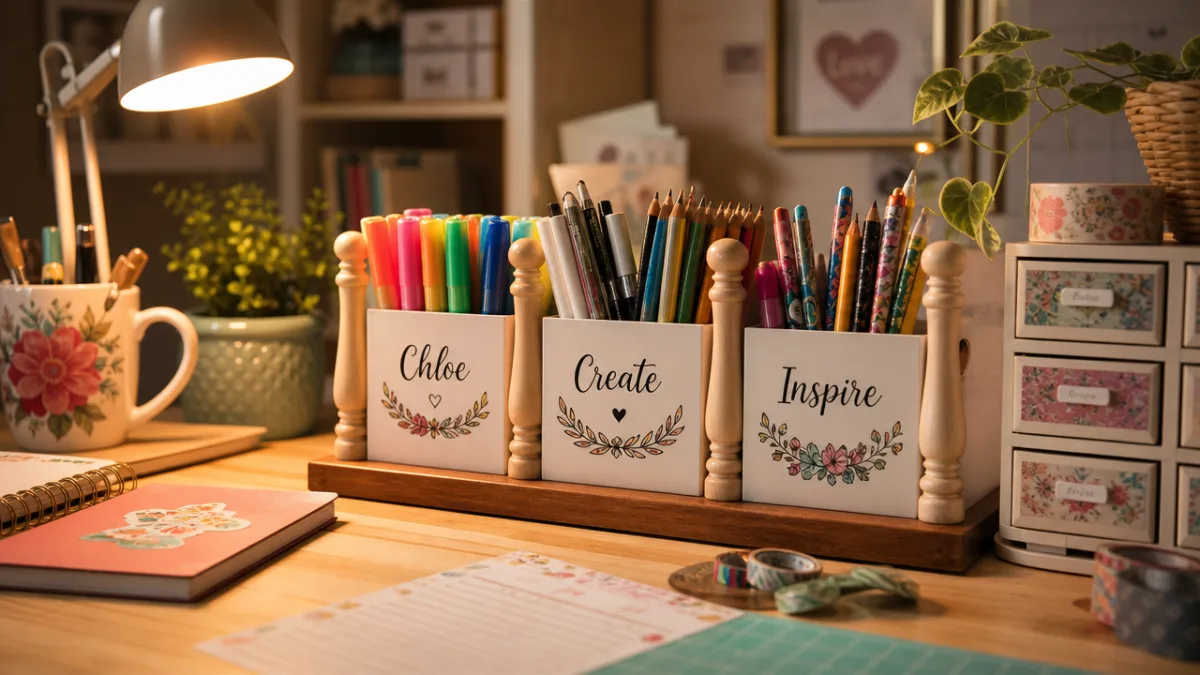
A “Welcome to My Craft Room” insert takes the whole concept a step further by giving you something that isn’t just useful but actually feels like yours. The top layer of the insert — the surface that faces up while it’s sitting on your table — is a natural spot for a small decorative label, a painted design, or a little hand-lettered phrase. It’s a tiny touch, but it does something real: it makes the craft room feel intentional and warm rather than just organized.
The personalization options are genuinely wide open. You could use a vinyl cutting machine to cut a label in your favorite font and stick it right onto a smooth foam or acrylic surface. Or you could stamp a pattern with pigment ink, hit it with a heat gun, seal it with matte medium, and add a hand-lettered name on top. Washi tape borders, pressed flowers set under a resin top coat, tiny fabric swatches — people have done all of these, and every one of them ends up looking totally different. That’s kind of the point.
It’s also worth thinking about how the insert fits into the rest of your craft room’s color scheme. If your space runs neutral — whites, grays, natural wood tones — a soft sage green insert or one wrapped in kraft paper sits right in. If your craft room is already full of color and pattern, a bold insert in complementary hues can be a fun focal point on the work table. Small as it is, the spindle base insert really does contribute to the mood of the whole room.
- Use a vinyl cutter to add personalized lettering or monograms to the visible top surface of the insert.
- Apply coordinating washi tape along the outer edges of dividers for a quick, removable pop of pattern and color.
- Paint or stamp the insert base in colors that complement your existing craft room palette before assembly.
- Embed a small printed photo, pressed botanicals, or decorative paper under a clear resin pour for a keepsake-quality finish.
- Add small charm rings or decorative brads to divider tops to make individual compartments easier to identify at a glance.
Organizing Your Tools Effectively Within the Insert
Building a great insert is only half the battle — how you actually load it matters just as much. The main thing to keep in mind is frequency of use. Whatever you reach for in nearly every session should live in the slots closest to the front of the base as you sit at your table. Stuff you only need occasionally can go in the back or in lower-priority compartments without causing any real inconvenience, since you won’t be hunting for it very often.
Height is another thing worth thinking through. Tall items — rulers, long-handled brushes, knitting needles — should go in deeper slots toward the back or center so they don’t block your view of shorter things. Smaller tools like glue sticks, ink pads, and little scissors do better in shallower compartments up front where they’re easy to spot and grab. If your spindle base spins, this height logic becomes even more useful, since you can rotate the whole organizer to bring the right cluster of tools forward depending on what phase of a project you’re in.
Labeling the compartments is one of those things most people skip at first and then wonder why they didn’t do it from day one. Even something as simple as masking tape and a fine-point marker does the job. When you’re cleaning up at the end of a session, knowing exactly where everything goes removes a small but real friction from the process — and when cleanup is easier, you actually do it. A tidy craft space is one you want to keep coming back to, and that starts with knowing where things live.
Tips for Maintaining Your Spindle Insert Over Time
Even a beautifully made insert will show wear eventually, especially if your craft room gets heavy daily use. A quick weekly check goes a long way — pull the tools out, wipe down the compartment walls with a dry or lightly damp cloth to get rid of dust and dried glue, and replace any dividers that have gotten bent, compressed, or come loose. Foam inserts in particular can flatten over time under heavier tools, so it’s worth keeping a few pre-cut replacement pieces on hand so a repair takes a couple of minutes rather than a full afternoon.
Making a spare insert from the same template as your original is one of those things that sounds overly cautious until the day you actually need it. When your primary insert finally gives out, being able to swap in a ready-made replacement without your tools landing in a pile is a genuinely nice thing. Store the backup somewhere flat and dry, away from direct sunlight — prolonged UV exposure can break down foam and weaken some adhesives faster than you’d expect.
Inspiring Ideas to Expand Your Craft Room Organization System
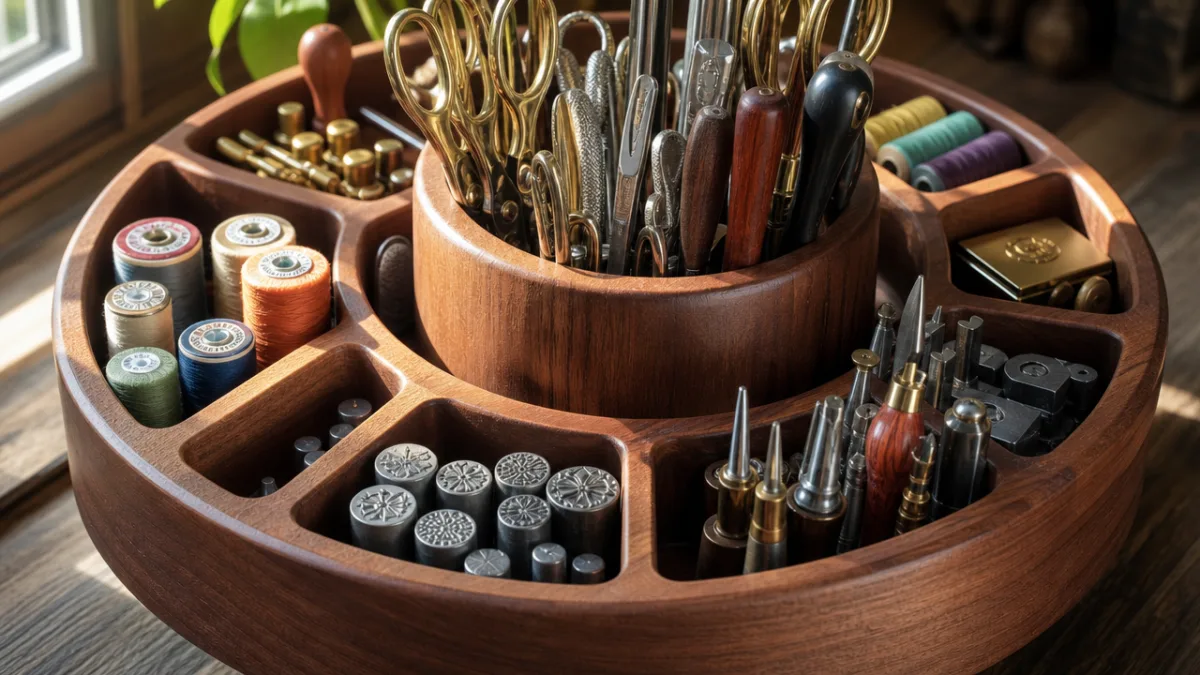
Once you see what a well-made spindle base insert does for your craft table, it’s pretty hard not to want more of them. Arranging several spindle bases in a row or cluster creates a cohesive system that handles a surprisingly wide range of supplies — and you don’t need expensive purpose-built furniture to pull it off. Assign each spindle to a category (drawing tools, adhesives, cutting implements) and the whole setup becomes self-explanatory, even to guests.
Wall-mounted versions are having a real moment right now, especially among crafters who want to keep their work surface as clear as possible. Attach a spindle base to a pegboard panel or a wooden wall rail and you’ve moved your entire tool organizer off the table without losing any of its functionality. The insert still does exactly what it does on a flat surface, but the vertical positioning opens up your workspace and creates a display that looks intentional and cool — especially when several are arranged at different heights.
If you end up with a design you’re proud of, it’s genuinely worth sharing it. Pinterest, YouTube, and crafting forums are full of people actively looking for exactly this kind of practical, satisfying solution. Good lighting, a clear write-up, and the right tags can get your idea in front of thousands of other crafters — and sometimes it sparks a whole thread of people riffing on your original design and making it even better. That kind of collaborative energy is one of the best things about the crafting community, and a spindle insert tutorial is a totally worthy addition to it.
Seasonal and Thematic Variations on the Classic Insert
One of the most fun things about spindle base inserts is how easy they are to swap out. Because they’re relatively quick and cheap to make, you can keep a little collection of themed ones and rotate them through the year. An autumn version wrapped in burnt orange fabric with compartment labels in a rustic script, a winter holiday edition in red and green with gold accents — these swaps take just a few minutes but completely change the feel of your craft table. It’s a small thing that somehow makes a big difference.
Project-based inserts are another approach worth trying. A dedicated watercolor insert sized specifically for brushes, water pens, masking fluid, and palette knives means you can drop that whole toolkit onto your table when you’re starting a painting session and put it away as a unit when you switch to something else. Everything context-specific stays grouped together, so when inspiration strikes you’re not spending the first twenty minutes of your session hunting things down.
At the end of the day, a “Welcome to My Craft Room” spindle base insert is about more than just where your scissors live. It’s a small, deliberate act of making your creative space actually work for you — a sign that you’ve thought about how you want to spend your time in there. Every time you sit down and reach for exactly the right tool without thinking about it, that’s the insert doing its job. Those moments add up, and over time they shape a craft room that feels like it’s genuinely on your side — one that makes you want to show up and make things.








What do you think?
It is nice to know your opinion. Leave a comment.