










Project Bucket Bag: A Complete Guide to the Sew Modern Bags Sewing Pattern
Introduction to the Project Bucket Bag
The Project Bucket Bag sewing pattern from Sew Modern Bags is one of the most beloved and versatile bag-making projects available to home sewists today. Whether you are a seasoned bag maker or someone just beginning to explore the world of handcrafted accessories, this pattern offers a rewarding experience that results in a genuinely beautiful and functional finished product. The bucket bag silhouette has remained a staple of fashion for decades, and making your own version allows for complete customization in terms of fabric, color, and hardware choices.
Sew Modern Bags has built a strong reputation in the sewing community for creating patterns that are not only stylish and on-trend but also accessible to a wide range of skill levels. The Project Bucket Bag pattern is no exception, offering clear instructions, detailed diagrams, and thoughtful design choices that make the construction process enjoyable from start to finish. The finished bag strikes a perfect balance between casual everyday use and polished, put-together style that elevates any outfit.
What sets this particular pattern apart from other bag-making projects is its clever construction and the way it incorporates modern design elements into a classic shape. The bucket bag format allows for generous interior volume without sacrificing the sleek exterior lines that make the style so appealing. With the right fabric selection and a bit of patience, the Project Bucket Bag can be completed in a single weekend and will likely become one of your most-used handmade accessories for years to come.
Materials and Tools You Will Need
Before diving into the actual construction of the Project Bucket Bag, it is essential to gather all the necessary materials and tools. Proper preparation is one of the most important factors in achieving professional-looking results, and having everything ready at your workspace before you begin will save you time and frustration during the sewing process. The pattern calls for exterior fabric, lining fabric, interfacing, and a selection of hardware components that give the bag its finished, structured appearance.
For the exterior fabric, you will want to choose something with body and durability, as a bucket bag is designed for everyday use and needs to hold its shape well. Canvas, waxed cotton, leather, faux leather, cork fabric, and heavyweight quilting cotton are all excellent choices that work beautifully with this pattern. The lining fabric can be something a little lighter and more playful, as it will only be visible when the bag is opened, making it a perfect opportunity to incorporate a fun print or contrast color that adds a delightful surprise element to the design.
In addition to fabric, the following supplies will be needed to complete the project successfully:
- Fusible interfacing in both woven and foam varieties for structure and padding
- A top-zipper or drawstring closure hardware set depending on your preferred style
- D-rings, swivel clips, and bag feet for the base
- An adjustable shoulder strap or chain strap of your choice
- A quality rotary cutter, cutting mat, and clear ruler for accurate fabric pieces
- Leather needle or denim needle for thicker fabrics
- Binder clips or wonder clips for holding layers together instead of pins in leather or faux leather
- A zipper foot attachment for your sewing machine
Having a well-organized workspace also makes a significant difference when tackling a bag-making project. Set up your cutting area separately from your sewing machine station if possible, and keep small hardware pieces in bowls or containers so nothing gets lost. Pressing tools including a quality iron and pressing ham will help you achieve crisp seams and professional-looking results throughout the construction process.
Understanding the Pattern Pieces and Cutting Instructions
One of the things that makes the Sew Modern Bags patterns so user-friendly is the clarity and organization of the pattern pieces and cutting instructions. The Project Bucket Bag pattern typically comes as a downloadable PDF that you print at home, and the pieces are designed to be taped together with minimal fuss. Each piece is clearly labeled with grain lines, notches, and cutting quantity instructions so that even less experienced sewists can confidently prepare their fabric pieces before sitting down at the machine.
The pattern includes pieces for the main body of the bag, the base, any exterior pockets, interior pockets, strap components, and any structural elements that give the bag its distinctive shape. It is highly recommended to read through the entire instruction booklet before cutting a single piece of fabric, as understanding the complete construction sequence helps you visualize how everything goes together and prevents costly mistakes. Many experienced sewists also recommend making a test run with inexpensive muslin fabric to check the sizing and fit before cutting into your chosen materials.
Interfacing application is a critical step in the preparation phase that should not be rushed. Each pattern piece that requires interfacing will be clearly noted in the instructions, and fusing the interfacing correctly according to the manufacturer’s guidelines ensures that it bonds properly and provides the intended level of structure. For foam interfacing in particular, careful pressing with a pressing cloth protects both the foam and your iron while still achieving a firm, even bond with the fabric.
Step-by-Step Construction Process
The construction of the Project Bucket Bag follows a logical sequence that builds from smaller components to the complete assembled bag. Most bag-making patterns begin with the construction of pockets, both interior and exterior, as these elements need to be attached to individual panels before the bag is sewn together. The exterior pocket, if included in your version of the design, is typically applied to the main body panel before any side seams are sewn, making it much easier to sew with full access to the fabric on all sides.
Once all pockets are constructed and attached, the main body of the bag is assembled by sewing together the exterior panels, then constructing the lining separately. Many bag patterns use a sew-and-turn method where the exterior and lining are sewn together at the top opening, turned right-side out, and topstitched for a clean finish. This technique creates beautifully neat top edges that look professionally made and are much more durable than other finishing methods because all raw edges are enclosed within the construction.
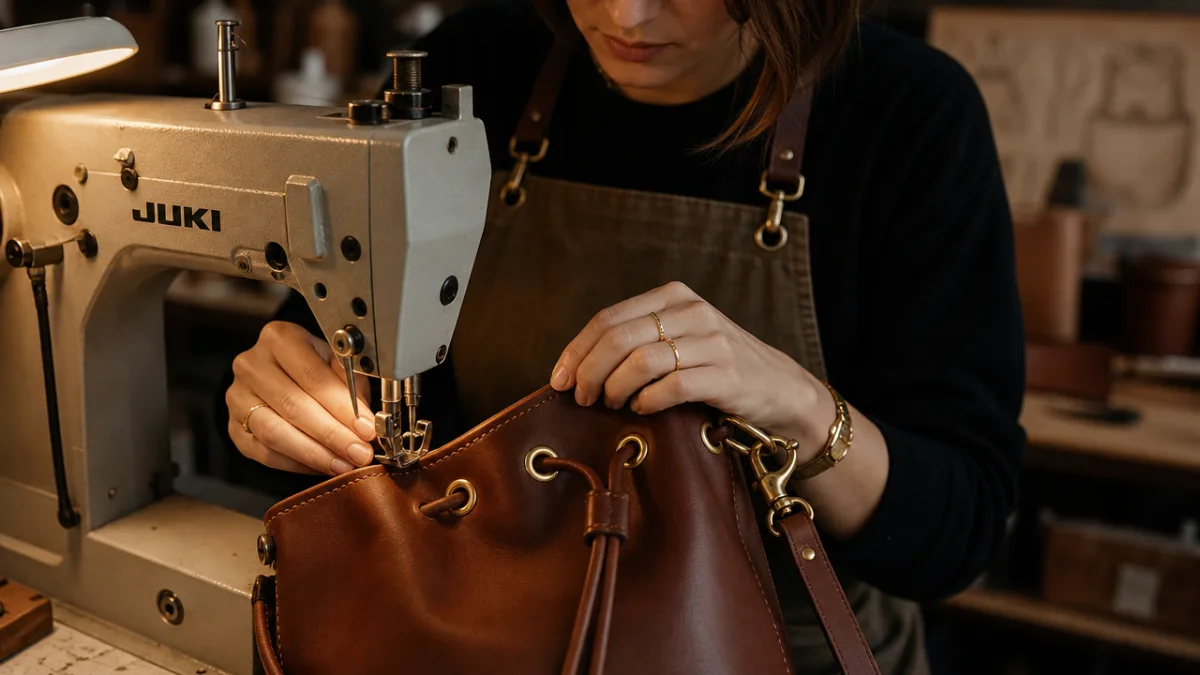
The base of a bucket bag is one of its most distinctive structural elements, and attaching it correctly is crucial to the overall shape and durability of the finished piece. The circular or oval base is typically constructed from several layers including the exterior fabric, interfacing, and a stabilizing layer, and it is pinned or clipped carefully to the bottom edge of the bag body before being sewn with a consistent seam allowance. Installing bag feet at this stage, before the base is fully attached, is much easier than trying to add them after the bag is completely assembled.
Hardware installation brings the bag to life and transforms a sewn textile construction into a polished, functional accessory. The process of setting rivets, installing D-rings, and attaching swivel clips requires a few specialized tools but is very satisfying and gives results that look completely professional. Follow the hardware manufacturer’s instructions carefully for any setting tools required, and always test on a scrap piece of your bag fabric before committing to the final installation on your finished piece.
Fabric and Color Combination Ideas
One of the greatest joys of making your own bag rather than purchasing one from a store is the incredible freedom of customization that handmade construction offers. The Project Bucket Bag pattern serves as a beautiful canvas for exploring different fabric combinations, textures, and color palettes that reflect your personal style. Because the bucket bag silhouette is clean and simple, it showcases fabric choices particularly well, making thoughtful material selection one of the most creative and rewarding parts of the entire project.
For a classic, versatile bag that works with many different outfits, consider pairing a neutral exterior fabric such as tan or camel canvas with a bold, graphic lining print in coordinating colors. This approach gives you a bag that reads as sophisticated and understated from the outside while offering a delightful pop of personality when it is opened. Alternatively, a rich jewel-toned exterior in emerald green, deep burgundy, or sapphire blue makes a statement piece that elevates even the simplest casual outfit.
Mixing textures is another excellent way to add visual interest to your finished bag. Consider these popular and beautiful combination ideas:
- Waxed canvas exterior paired with a vintage-inspired floral cotton lining for a rugged yet romantic aesthetic
- Black faux leather exterior with a bright geometric print lining for a modern, edgy look
- Natural cork fabric exterior with a tropical leaf print lining for an eco-conscious, fashion-forward design
- Heavyweight denim exterior with a colorful striped canvas lining for a casual, everyday carry option
- Mustard yellow canvas exterior with a Liberty Tana Lawn floral lining for a timeless, artisan aesthetic
Hardware finishes are another dimension of customization that significantly affects the overall look and feel of the finished bag. Brass and gold-toned hardware evokes warmth and vintage charm, while silver and gunmetal finishes lean more contemporary and cool. Matte black hardware has become increasingly popular for its sleek, architectural quality that pairs beautifully with both neutral and bold exterior fabrics. The hardware you choose should ideally be selected before you purchase your fabric so that you can ensure all the metal elements coordinate with the overall color palette of the design.
Tips for Achieving Professional Results
The difference between a handmade bag that looks truly professional and one that looks homemade often comes down to a handful of key techniques and habits that experienced bag makers develop over time. One of the most impactful of these is pressing seams carefully and thoroughly throughout the construction process. Pressing is different from ironing in that it involves lifting and setting the iron rather than sliding it across the fabric, and this technique prevents distortion of sewn pieces while creating crisp, flat seams that make a visible difference in the finished product.
Consistent seam allowances are equally important for achieving a bag that fits together correctly and looks polished at every stage. Always use a seam guide on your sewing machine, whether that means marking the throat plate with tape or using a magnetic or clip-on seam guide, and take care to maintain that consistent distance from the fabric edge throughout every seam. When sewing curves, such as the bottom seam attaching the base to the bag body, sewing slowly and carefully while gently guiding the fabric prevents puckering and uneven seams that would detract from the professional finish.
Topstitching is a finishing detail that adds both strength and visual appeal to the completed bag, and it is worth taking extra care to ensure that topstitching is straight, consistent, and properly tensioned. Practice on a scrap sandwich of the same fabric and interfacing layers you are using in your bag before topstitching on the actual project, especially when working with thicker or more slippery materials. Using a longer stitch length for topstitching, typically between 3 and 3.5mm, gives a clean, defined line that reads as intentional and professional rather than utilitarian.
Finishing the raw edges inside the bag before the lining is installed, or ensuring that the lining fully encloses all interior raw edges, is another mark of quality construction. Many bag makers also choose to hand-stitch the opening through which the bag is turned right-side out, rather than machine-stitching it, as this creates a nearly invisible seam that maintains the clean interior appearance. Taking these small additional steps adds only a modest amount of time to the overall project but makes a substantial difference in the quality of the final result.

The Sew Modern Bags Community and Pattern Resources
One of the wonderful benefits of choosing a pattern from Sew Modern Bags is the vibrant and supportive community that has grown up around the brand and its patterns. Online communities on social media platforms, particularly Instagram and Facebook groups dedicated to bag making, are full of sewists who have completed the Project Bucket Bag and are happy to share their experiences, answer questions, and celebrate each other’s finished projects. Searching hashtags related to the pattern will quickly reveal an inspiring gallery of variations that demonstrates just how versatile and customizable the design truly is.
The pattern itself typically comes with detailed, well-photographed instructions that guide you through every step of the construction process, but additional resources are available for those who want extra support. Video tutorials created by the designer or by members of the sewing community can be invaluable for visualizing tricky steps like installing hardware, sewing curves, or achieving clean corners. Many bag-making YouTubers have created comprehensive walk-throughs of popular Sew Modern Bags patterns, and these visual guides are particularly helpful for newer sewists who benefit from seeing each technique demonstrated in real time.
Investing in quality patterns from independent designers like Sew Modern Bags also directly supports small businesses within the creative sewing industry, which is something many modern sewists feel strongly about. When you purchase a pattern, you are supporting not only the designer but also the ecosystem of testing, editing, illustration, and customer service that goes into creating a truly excellent sewing pattern. The Project Bucket Bag represents a genuine value in this regard, offering a pattern that you will return to again and again as you explore new fabric combinations and make bags as gifts for the special people in your life.
Whether you are building your first handmade bag collection or adding to a well-established roster of made-by-hand accessories, the Project Bucket Bag sewing pattern from Sew Modern Bags offers an experience that is as enjoyable as the finished product is beautiful. From the satisfying process of selecting and cutting your materials to the proud moment of installing the final piece of hardware and trying the bag on for the first time, this project encapsulates everything that makes bag making such a beloved and deeply satisfying creative pursuit. The skills you develop completing this pattern will serve you well across countless future sewing projects, and the bag itself will be a constant reminder of what careful craftsmanship and creative vision can produce.








What do you think?
It is nice to know your opinion. Leave a comment.