










Painted Twig Raft Boat for Frogs and Fairies: A Complete Crafting Guide
The Magic of Nature-Inspired Miniature Crafts
There’s something genuinely magical about building tiny worlds out of things you found outside. This painted twig raft boat — made with frogs and fairies in mind — sits right at that sweet spot between imaginative play and getting your hands dirty in the best possible way. It’s the kind of project that makes you slow down, wander around the garden looking for just the right stick, and end up with something that looks like it floated out of a storybook. Kids love it. Adults secretly love it just as much.
Nature crafts like this one have made a real comeback lately, and it’s easy to see why — families are looking for activities that don’t involve a screen and actually get everyone outside for a bit. The great thing about a twig raft is that you don’t need to buy anything special. Almost everything comes from your backyard or a nearby park, which makes it one of those rare crafts that anyone can do, regardless of age, budget, or whether they consider themselves “crafty.” The imperfections are part of the charm, and no two rafts ever turn out the same.
The frog and fairy theme is what really takes it somewhere special, though. While you’re building and painting, you start daydreaming about who’s going to ride on this thing — maybe a little green tree frog gripping a cattail rudder, or a fairy perched at the front with a dragonfly-wing sail catching the breeze. That storytelling side of it is what keeps kids engaged long after the craft is done, and honestly, it keeps adults thinking too.
Gathering Your Natural Materials
The first step — and probably the most fun — is heading outside to gather your materials. Grab a small basket or bag and start looking for straight twigs that have already fallen on their own. You’re aiming for sticks about as thick as a pencil and somewhere between six and ten inches long. That size gives you a raft that feels balanced and looks just right. Willow, birch, and apple wood are lovely because they tend to be smooth and straight, but honestly, any dry fallen wood will do the job.
While you’re out there, keep an eye out for a few extras. Thinner twigs or sturdy grass stems can work as lashing material or little decorative details. A slightly thicker twig with a natural fork at the top is perfect for a mast. Flat bits of bark can become a tiny deck or a seat. If you’re near a pond or stream, look for smooth pebbles to use as ballast or decoration, and grab any interesting dried seed pods you find — they add a great organic texture to the finished piece.
Before you start building, take a few minutes to sort through what you’ve collected. Lay your main raft twigs side by side and pick out the seven to nine most similar ones — matching diameter and length will make construction a lot easier and give you a cleaner finished look. Then sort everything else into rough piles: binding twigs in one spot, decorative bits in another, mast candidates off to the side. It sounds fussy, but it really does save you from rummaging around mid-project when you’re in the zone.
- Main raft twigs: 7–9 pieces, roughly pencil-width, 6–10 inches long
- Binding twigs or twine: thin, flexible stems at least 12 inches long
- Mast twig: one slightly thicker or forked branch, 4–6 inches tall
- Bark pieces: flat sections for decking or seating areas
- Decorative extras: seed pods, smooth pebbles, dried moss, small feathers

Building the Raft Frame
Building the frame is wonderfully hands-on, and even little kids can join in with a bit of guidance. Start by laying your main twigs parallel to each other on a flat surface, spacing them about half an inch apart — that’s your raft deck right there. Then take two binding twigs or a length of natural jute twine and lay them perpendicular across the deck twigs, one near each end. These crosspieces are what hold the whole thing together and keep it from falling apart the moment someone picks it up.
When it comes to actually securing everything, you’ve got two main options. The first is craft glue or a low-temperature hot glue gun — fast, sturdy, and great when you’re working with younger kids who don’t have the patience for fiddly knotting. The second is wrapping natural twine or thin wire tightly around each joint in a cross-hatch pattern, which gives the raft a much more rustic, handcrafted look. A lot of people end up combining both — a dot of glue for strength, wrapped with twine for the look of it — and that’s probably the best of both worlds.
Once the base is assembled and fully dried, it’s time for the mast. Place your mast twig near the center — or just slightly forward of center — and secure it with glue and a snug twine wrapping at the base. If it has a natural fork at the top, even better: that’s a perfect little cradle for a sail. A piece of dried corn husk, a felt pennant, or even a flat real leaf attached to a bit of thread all make wonderfully charming sails that really complete the look of the whole thing.
Painting and Decorating Your Twig Raft
This is the part where it really comes to life. Acrylic craft paints are your best friend here — they stick well to natural wood, dry fast, and come in every color imaginable. For a fairy-themed raft, soft pastels work beautifully: blush pink, lavender, mint green, pearl white. Apply them as light washes so the wood grain shows through, and you get this dreamy, ethereal quality that feels just right. For a frog-themed boat, go deeper — emerald, teal, golden yellow, burnt orange. Think lily pads and pond reeds and the rich colors of a summer wetland.
Before you open any paint, lightly sand any rough patches on the twigs with fine-grit sandpaper. It helps the paint go on more smoothly and saves your brush from catching on splinters. Then lay down a thin base coat of white or pale cream over the whole raft and let it dry completely — this makes your colors pop so much more in the layers that follow. Speaking of layers, go thin and patient. Build up color gradually rather than slapping on one thick coat. The results are genuinely so much better.
Once the base colors are down, that’s where the real fun starts. A toothpick dipped in paint makes perfect tiny dots for polka dot patterns. A fine detail brush opens up a whole world of little flowers, mushrooms, stars, and swirling vines. A touch of gold or silver paint along the edges adds a magical shimmer without being overdone. And if you mix a little craft glitter into your final layer of mod podge sealer, you get sparkle plus a bit of waterproofing — which is genuinely handy if this raft is going anywhere near actual water.
- Fairy palette: blush pink, lavender, mint green, pearl white, gold accents
- Frog palette: emerald green, teal, golden yellow, burnt orange, brown
- Decoration techniques: dotting, fine-line florals, mushroom motifs, star patterns
- Finishing touches: mod podge sealer, glitter, metallic edge highlights
- Natural additions: pressed flowers, tiny dried leaves, bits of lichen
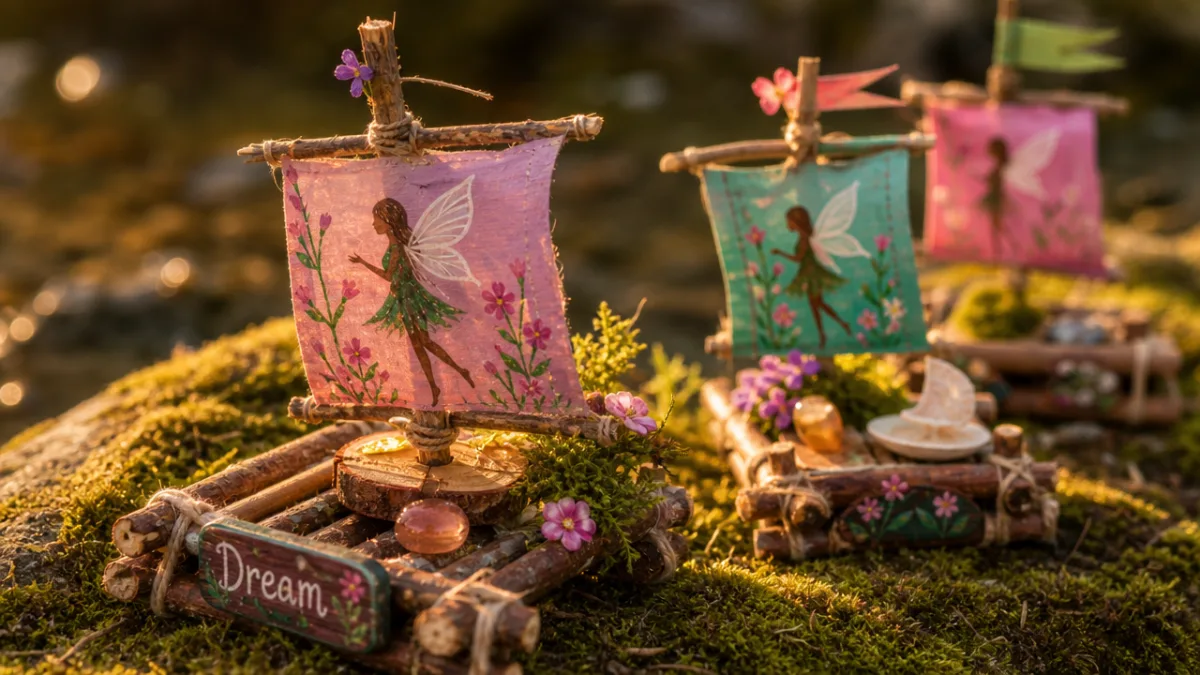
Creating the Frog and Fairy Passengers
A raft without passengers feels like it’s missing something, and making tiny frog or fairy figures to go with it is its own whole adventure. For frogs, air-dry clay is great — shape a round little body, add splayed legs, paint it a cheerful green with bright button eyes and a big grin. But honestly, painted river pebbles might be even more lovable. A large oval stone becomes the body, smaller pebbles glued on top become bulging eyes, and a curved line of paint gives you that classic frog smile. Kids are absolutely delighted by these every time.
Fairy figures can go in a few different directions depending on how ambitious you’re feeling. Wire-and-bead fairies are a favorite: bend floral wire into a basic figure shape, thread seed beads along the limbs, add a tiny skirt cut from organza or tulle, and glue on miniature butterfly or dragonfly wings (easy to find cheaply online). For something more naturey, you can build a fairy from an acorn cap hat, a seed pod body, and flower petal skirts held together with craft glue — the kind of thing that looks like it genuinely belongs in a forest.
To attach your passengers, a small amount of strong craft glue or a careful dab from a hot glue gun does the trick. Pose them somewhere that makes sense — sitting at the bow looking out, or standing by the mast like they’re steering — and let the glue cure fully before you move anything around. If you’d rather keep the figures removable so kids can play with them, a tiny blob of poster putty or beeswax underneath each one holds things in place on the shelf but still lets little hands reposition the crew for their next voyage.
Displaying, Gifting, and Playing with Your Twig Raft Boat
Once it’s finished, you’ve got a lot of options for what to do with it. As a display piece, it looks wonderful tucked into a fairy garden among miniature plants, pebble pathways, and tiny mushroom ornaments. Indoors, a shallow tray filled with blue glass pebbles or sand makes a gorgeous base — set the raft on top as the centerpiece and surround it with pressed flowers, small crystals, and a sprig of dried lavender. It becomes this little scene that people can’t help but stop and look at.
As a gift, there’s something about a handmade twig raft that carries real weight. It’s so clearly personal and carefully made that people just get it. Package it in a small wooden box lined with moss or dried flower petals, tie it with natural twine, and tuck in a handwritten note about where you gathered the materials and what went into making it. Grandparents, teachers, and anyone who values handmade things over store-bought will genuinely treasure it. And kids who make something with a specific person in mind get the experience of creative generosity early — which is a lovely thing to give them.
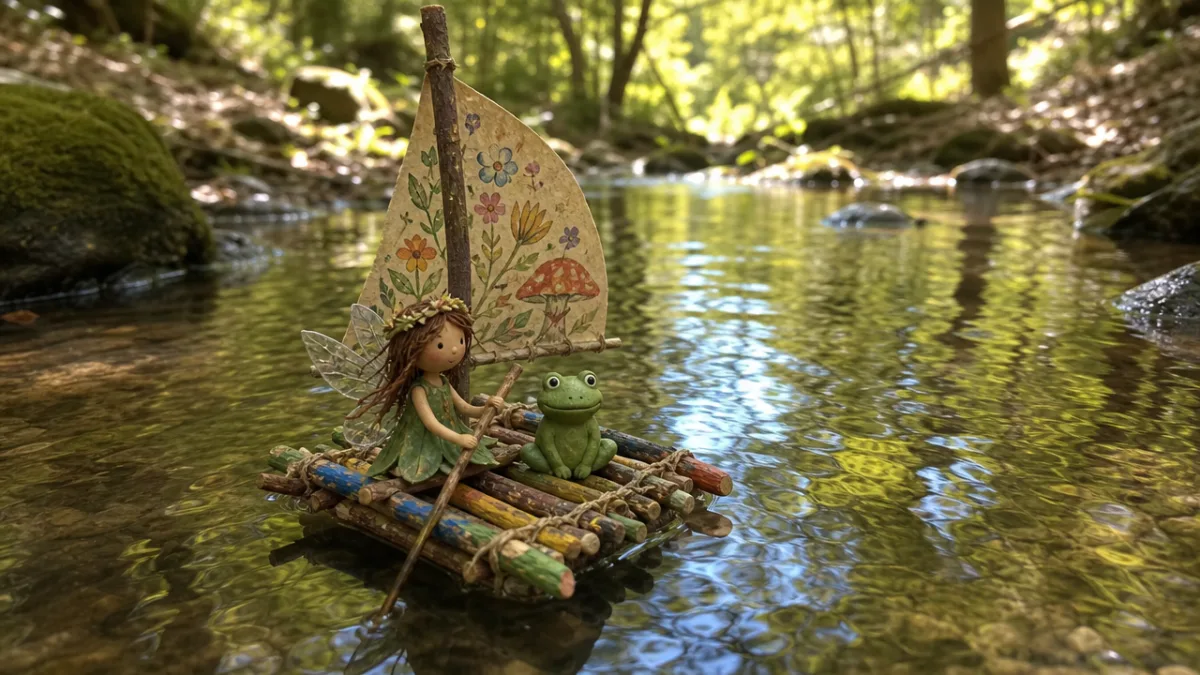
For actual water play, a well-sealed raft will float in a shallow stream, garden pond, or even a big bowl of water for an afternoon. Give it two or three coats of mod podge or a spray sealant before it gets wet, and make sure to retrieve it promptly after each session so it can dry out completely. With a little care, it’ll hold up through plenty of voyages. There’s something genuinely wonderful about watching a tiny painted fairy raft float on still water with a pebble frog at the helm. It’s the kind of sight that makes you smile no matter how old you are.
Tips for Crafting with Children and Building a Lasting Tradition
The best thing you can do when making twig rafts with kids is get out of the way a little. Show them the basic steps once, set out the materials, and then let them take over. If the paint goes on crooked or the twigs aren’t perfectly lined up, that’s fine — that’s the whole point, actually. The quirks in a child-made craft are what make it precious. Your job is to encourage, admire, and step in only when there’s a genuine problem to solve, not to steer them toward the result you had in mind.
This project also scales really well for groups. Birthday parties, summer camps, school nature programs, family reunions — set up a long table with shared supplies and let everyone work at their own pace. The social side of it is one of the best parts. When hands are busy with something creative, conversations open up naturally. Kids especially tend to talk during side-by-side activities in ways they won’t in a face-to-face setting, which makes craft time genuinely valuable for connection, not just creativity.
Think about making this a seasonal tradition that changes a little each year. A spring raft might have cherry blossom petals pressed into the surface and a fairy dressed in fresh green. An autumn version could feature tiny acorns, red and gold leaves, and a little squirrel at the helm. A midsummer raft might carry a dragonfly totem and be painted in deep jewel tones. Coming back to the same project through different seasons builds something meaningful — a ritual, and a growing collection of handmade things that together become a record of years spent outside, gathering, imagining, and making.
And please, photograph them. Take a picture of each finished raft before water play or gifting or everyday wear takes its toll, and keep those images somewhere you’ll actually find them again. Over the years, that little archive becomes remarkable. You’ll be genuinely amazed at how much a child’s fine motor skills, color instincts, and storytelling imagination grow when you can compare rafts from one year to the next. The painted twig raft boat is a small thing, made from almost nothing, but it opens up something much bigger — a little handmade door into wonder that costs nearly nothing and gives back more than you’d expect.








What do you think?
It is nice to know your opinion. Leave a comment.