










Kids Craft DIY Airplane Ideas: A Complete Guide to Creative Aviation Fun
Introduction to DIY Airplane Crafts for Kids
There is something magical about the idea of flight that has captivated children for generations. From the moment kids spot an airplane streaking across the sky, their imaginations take off right alongside it. DIY airplane crafts offer a wonderful way to channel that natural curiosity and wonder into hands-on creative projects that build skills, encourage imaginative play, and create lasting memories between parents and children.
Airplane crafts are among the most versatile and accessible projects you can tackle with kids of virtually any age. Whether you are working with a three-year-old who loves to scribble and paste, or a ten-year-old who enjoys more detailed construction challenges, there are airplane craft ideas scaled perfectly for every developmental stage. The best part is that most of these projects require only simple household materials that you likely already have on hand, making them both budget-friendly and spontaneous.
Beyond the sheer fun of making something tangible, DIY airplane crafts deliver impressive educational value. Children practice fine motor skills when cutting, folding, and gluing. They explore basic principles of aerodynamics even if they do not know the word yet. They develop spatial reasoning, patience, and the satisfying experience of following a process from beginning to end. This guide walks you through the best airplane craft ideas, materials, techniques, and tips to make every project a soaring success.
Why Airplane Crafts Are Especially Beneficial
Crafting in general supports child development across multiple domains, but airplane crafts carry some unique advantages. Because planes are objects children see in real life, making a craft version creates a bridge between the abstract and the concrete. A child who builds a paper airplane suddenly has a more personal relationship with the concept of flight, and that connection can spark deeper questions about science, history, and engineering that parents and educators can nurture over time.
Airplane projects also lend themselves beautifully to storytelling and dramatic play once the craft is complete. A child who has made their own cardboard biplane is far more likely to invent elaborate adventures for it than a child who simply received a toy off a shelf. That imaginative engagement is cognitively rich and emotionally rewarding, giving the craft a long life well beyond the afternoon it was made.
Essential Materials and Tools for Airplane Crafts
One of the greatest joys of DIY airplane crafts is how little you actually need to get started. The most classic airplane project of all, the paper airplane, requires nothing more than a single sheet of paper. Expanding from there, a well-stocked craft supply of basic materials opens the door to dozens of creative variations. Gathering your supplies before you sit down with the kids makes the experience smoother and more enjoyable for everyone involved.
Paper and cardboard are your foundational materials. Printer paper, construction paper, cardstock, cereal boxes, toilet paper rolls, paper towel tubes, and corrugated cardboard all serve different purposes depending on the complexity and size of the airplane you want to build. Toilet paper rolls are particularly beloved for quick crafts because their cylindrical shape naturally suggests the fuselage of a plane and requires very little imagination to see the finished product even before you begin decorating.
Beyond paper products, you will want a reliable collection of adhesives including white craft glue, a glue stick, and a low-temperature hot glue gun for older children working with adult supervision. Scissors appropriate for the child’s age, markers, crayons, watercolor paints, and acrylic paints round out the decorating supplies. For more ambitious builds, wooden craft sticks, foam sheets, plastic straws, and even repurposed bottle caps can add structural interest and dimensional texture to airplane projects.
Organizing Your Craft Space for Success
Setting up a dedicated and well-organized craft area before you begin makes a significant difference in the enjoyment and productivity of any craft session. Lay down a protective covering on your work surface, whether that is a plastic tablecloth, newspaper, or a silicone craft mat. Have a small container of water nearby if you are using watercolor or washable paints, and keep paper towels or rags within easy reach for inevitable spills and sticky fingers.
Sort your materials into clearly visible groupings so children can see their options without feeling overwhelmed. When kids can easily reach and identify their supplies, they make more creative choices and feel more autonomous in the process, which boosts engagement and confidence. Label bins or trays with pictures for younger children who cannot yet read, so they can participate in both the setup and cleanup phases of the craft session without adult intervention.
Classic Paper Airplane Designs for All Skill Levels
The paper airplane is perhaps the most iconic children’s craft in existence, and for very good reason. It requires no glue, no scissors, and no special materials whatsoever. All you need is a flat piece of paper and a willingness to follow a series of folds. Yet within that simple framework exists an astonishing variety of designs, each with its own flight characteristics, aesthetic appeal, and degree of folding complexity. Starting with paper airplanes is a wonderful entry point for even the youngest crafters.
The classic dart design is typically the first paper airplane most people learn, and it remains popular because it is straightforward to fold and flies impressively well with a firm throw. From there, you can progress to the wide-winged glider design, which trades speed for graceful, floating flight. The glider is particularly satisfying for children who love to watch their creation drift slowly across a room, riding invisible currents of air with an almost meditative elegance that feels genuinely magical compared to the dart’s swift trajectory.
For older children and tweens who want a greater challenge, more advanced designs like the Nakamura lock, the Hammerhead, or the stunt plane offer fascinating folding sequences and dramatically different flight behaviors. Some of these designs loop, spin, or hover in ways that feel almost impossible given that they are made from a single sheet of paper. Working through these more complex folds together is an excellent bonding activity and a genuine exercise in patience, precision, and the rewarding payoff of persisting through difficulty.
Decorating and Personalizing Paper Airplanes
Once children have mastered the folding, the decorating phase becomes its own creative playground. Markers and colored pencils work best on paper airplanes since wet media like paint can warp and weaken the paper, affecting flight performance. Children can design their own airline liveries, complete with custom logos, passenger windows, tail markings, and registration numbers, turning a simple folded sheet into a fully realized aircraft with its own identity and backstory.
Encourage children to think about their airplane as belonging to a fictional airline they invent themselves. What is the airline called? What destinations does it fly? What does the uniform of the flight crew look like? These narrative extensions transform a five-minute craft into a creative writing and imaginative play experience that can occupy an afternoon. Older children might even design a small boarding pass or luggage tag to accompany their airplane, extending the activity into literacy and art simultaneously.
Toilet Paper Roll and Cardboard Tube Airplane Crafts
Toilet paper rolls and cardboard tubes represent one of the most beloved categories of recycled craft materials, and they shine particularly brightly in airplane projects. The hollow cylindrical shape is a perfect analog for an airplane fuselage, and because the basic form is already three-dimensional, children can see the finished project taking shape almost immediately, which keeps motivation and enthusiasm high throughout the crafting process. These crafts are especially well-suited to preschoolers and early elementary-aged children.
To make a basic toilet paper roll airplane, you will need one roll for the body, two wing shapes cut from cardstock or a cereal box, one smaller piece for the tail fin, and a small triangular nose cone made from folded cardstock. Glue or tape the wings onto the sides of the roll, the tail fin onto the back end, and the nose cone onto the front, and you have a recognizable airplane in just a few minutes. The real fun comes in the painting and decorating stage, where children can apply any color scheme, pattern, or detail they can imagine.
You can also use paper towel tubes for larger airplane builds that allow for more elaborate detailing. A paper towel tube airplane can accommodate a string of small circular windows drawn or punched along its sides, a more sculpted nose cone, propeller details made from flat cardstock cut into blade shapes, and even a tiny pilot figure visible through the cockpit window. These larger versions make impressive display pieces and can be hung from the ceiling of a child’s bedroom with a length of string for a charming aviation-themed decoration that costs almost nothing to create.
Adding Propellers, Landing Gear, and Details
The details are what transform a simple tube-and-cardboard construction into something that genuinely looks and feels like an airplane. Propellers can be cut from cardstock in a simple X or plus shape, with each blade slightly twisted by hand to give the impression of a real rotating propeller. Attach them to the nose of the airplane with a brass fastener so they can actually spin, which adds an element of kinetic delight that children find irresistible and can spend long minutes happily spinning.
Landing gear can be fashioned from bent pipe cleaners or small rolled cardboard tubes glued to the underside of the fuselage, with wheels cut from cardboard circles or repurposed bottle caps. These small structural additions dramatically increase the realism of the finished craft and give children a sense of the complexity of real aircraft engineering. Even very young children can participate in this stage by choosing which color wheels to attach or which stickers to apply to the wings and body of the finished airplane.
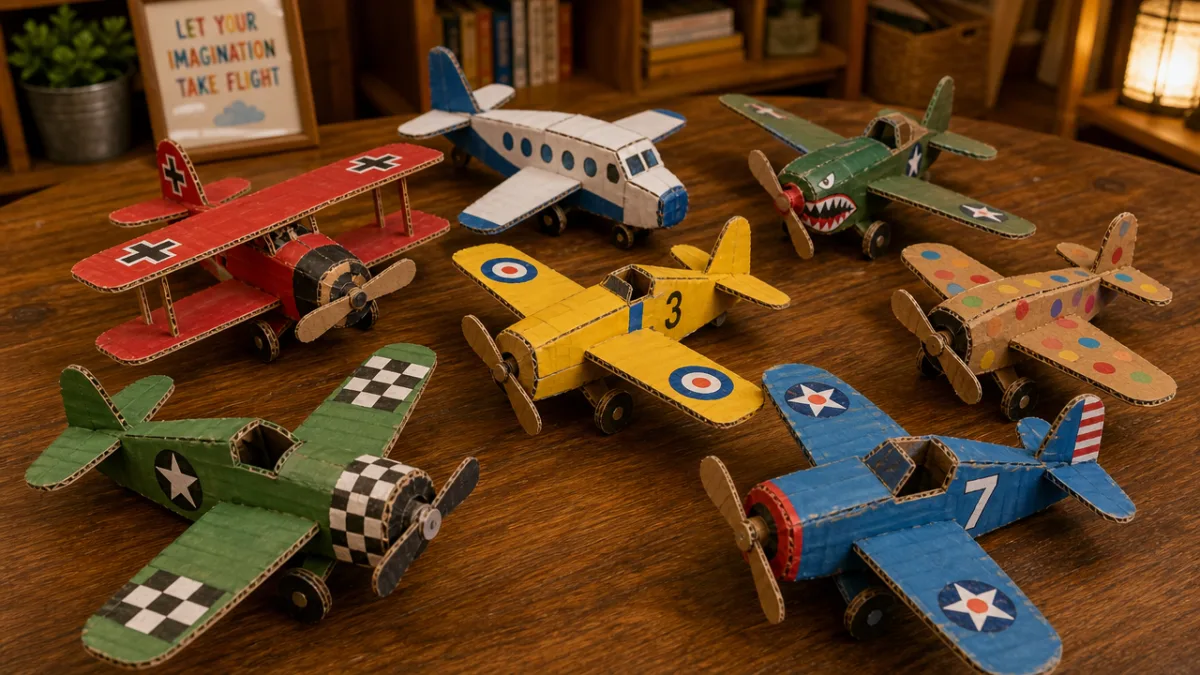
Foam and Balsa Wood Airplane Projects
For families ready to step up to more durable and sophisticated airplane crafts, foam sheets and balsa wood offer exciting new possibilities. Foam craft sheets, available at any craft store in a rainbow of colors, are light, easy to cut with regular scissors, and surprisingly sturdy when assembled carefully. They allow children to construct airplanes that are genuinely capable of gliding through the air with real aerodynamic performance, not just symbolic flight like a cardboard decoration.
A basic foam glider can be constructed by cutting a fuselage shape, two wing shapes, and a tail assembly from foam sheets, then slotting them together through small cuts made in each piece. No glue is required for this style of assembly, which means the airplane can be disassembled, adjusted, and reassembled repeatedly as children experiment with different wing sizes, wing positions, and tail configurations. This iterative process is a natural introduction to the engineering design cycle and teaches children that failure is simply useful information that guides the next attempt.
Balsa wood kits, which are widely available at hobby and craft stores, represent the upper end of DIY airplane crafting for kids and are best suited to children aged eight and older working with attentive adult supervision. Balsa is incredibly lightweight and easy to cut with hobby knives, but those sharp tools require adult handling and careful safety protocols. The reward for the extra caution and effort is a beautifully structured airplane that can be sanded smooth, painted with model paint, and displayed with genuine pride as a serious craft achievement.
Flight Testing and Performance Adjustments
One of the most exciting and educational aspects of foam and balsa wood airplane crafts is the flight testing phase. Unlike decorative cardboard airplanes made primarily for display, foam gliders and balsa models are designed to actually fly, which means children get immediate and visceral feedback about whether their design choices were successful. Launch the airplane gently, observe how it behaves, and use that observation to guide adjustments to the wings, weight distribution, or tail angle.
If the plane dives sharply toward the ground, the nose may be too heavy or the wings positioned too far forward. If it climbs steeply and then stalls, the nose may be too light. These cause-and-effect relationships between design choices and flight outcomes are genuine physics lessons delivered through play, and children absorb them quickly because the feedback is immediate, sensory, and deeply satisfying when they finally achieve a long, smooth, graceful glide across the yard or down a hallway.
Themed Airplane Crafts and Creative Extensions
Once children have explored the core airplane craft formats, themed projects offer a wonderful way to connect aviation crafts with other interests, holidays, learning units, or imaginative worlds. A dinosaur-piloted biplane, a space-themed rocket plane hybrid, a holiday airplane decorated with stars and snowflakes, or a superhero jet with lightning bolt decals can each spark a completely new wave of creative energy and storytelling that keeps the craft tradition feeling fresh and endlessly renewable across many sessions.
Seasonal themes are particularly effective for keeping airplane crafts on the rotation throughout the year. In spring, children can create airplanes decorated with flowers and butterflies. In summer, airplanes can become beachside skywriters with trailing banners. In autumn, fall-leaf camouflage patterns make for striking decorative planes. Winter brings the opportunity for sparkling, glitter-dusted planes that look as though they are flying through a snowstorm, or holiday airplanes delivering gifts around the world. Each seasonal variation reinforces the same core craft skills while keeping the content feeling new and timely.
Airplane crafts also connect beautifully with learning units about geography, history, and science. After studying the Wright Brothers, children can attempt to recreate a simple biplane design inspired by the Flyer. After learning about World War II, older children might craft historically inspired aircraft and then research the real planes that served as their models. After a unit on weather and atmosphere, children can explore how different atmospheric conditions affect flight and try to engineer a paper airplane that performs differently in indoor versus outdoor conditions.
Group Projects and Classroom Airplane Activities
Airplane crafts scale wonderfully to group settings, making them ideal for birthday parties, classroom activities, scout meetings, and family gatherings. A paper airplane decorating and distance-flying competition requires minimal supplies and setup but delivers enormous amounts of fun and friendly competitive engagement. Each child decorates their own plane, then everyone lines up at the same starting point and launches together, measuring whose plane travels farthest, stays airborne longest, or performs the most impressive trick flight.
For a more collaborative group project, a mural-scale airplane scene painted on butcher paper or a classroom wall can incorporate individual airplane crafts made by each child. Each participant makes their own airplane in whatever style they choose, and all the planes are then displayed together flying through a shared sky, with clouds, sun, birds, and landscape elements painted or drawn by the group collectively. This kind of cooperative art project builds community, celebrates individual creativity within a shared context, and produces a display that the whole group feels proud of.

Tips for Making Airplane Craft Time Successful and Stress-Free
The most important ingredient in any successful kids’ craft session is a relaxed and encouraging adult presence. Children pick up on adult stress and frustration quickly, and if a caregiver is anxious about mess or impatient about the pace, children will feel that pressure and their enjoyment will diminish accordingly. Give yourself plenty of time, set realistic expectations for the finished product, and remind yourself that a joyfully made imperfect airplane is infinitely more valuable than a frustrated attempt at a flawless one.
Prepare as much as possible in advance so that the session itself can flow without interruption. Pre-cut wing shapes for younger children who do not yet have the scissor skills to manage cardboard. Pre-mix paint colors so children can focus on applying them rather than waiting for adult preparation. Have a clear, simple plan for the sequence of steps so you can guide children through the process without having to stop and figure out what comes next while they grow restless. That upfront preparation pays enormous dividends in the quality of the experience for everyone involved.
Finally, celebrate the finished product with genuine enthusiasm and find a way to display or use each airplane so that children feel their work was meaningful and worthy of appreciation. Hang completed planes from the ceiling with thread, line them up on a windowsill, take photographs and print them for the child’s room, or send them to a grandparent with a handwritten note about the crafting adventure. These small acts of recognition communicate to children that their creativity matters and that the time invested in making something by hand is always worthwhile, a lesson that will serve them beautifully throughout their lives.
Encouraging Ongoing Creativity Beyond the Craft Table
The best DIY airplane crafts are not endpoints but launching pads, and with the right encouragement, a single afternoon of airplane crafting can blossom into a sustained interest in aviation, engineering, art, or all three. Keep a craft supplies bin stocked and accessible so children can return to airplane making whenever inspiration strikes, rather than having to ask permission and wait for an adult to gather materials. Autonomy over the creative process dramatically increases how often and how enthusiastically children pursue it.
Consider building a small library of airplane-themed picture books and chapter books that children can explore alongside their crafting. Stories about aviation pioneers like Amelia Earhart, the Wright Brothers, and Bessie Coleman bring the history of flight to life in ways that deepen the meaning of crafting airplanes. Documentaries about how modern aircraft are designed and manufactured, appropriate to the child’s age, can spark fascinating conversations and ambitious new craft ideas that combine what children have learned with what they can imagine and build with their own hands.








What do you think?
It is nice to know your opinion. Leave a comment.