










I Turned Paper Into a Magic Jar Card ✨ — A Complete Guide to This Enchanting DIY Project
What Is a Magic Jar Card and Why Everyone Is Obsessed With It
If you have spent any time scrolling through Pinterest lately, you have almost certainly stumbled upon the whimsical world of magic jar cards. These delightful paper creations are handmade greeting cards designed to look like little glass jars filled with tiny, meaningful objects — stars, hearts, flowers, letters, and all manner of miniature treasures. The effect is genuinely magical: when someone opens one of these cards, they are met with the illusion of a three-dimensional jar bursting with love and intention, all crafted entirely from paper and a few simple supplies.
What makes magic jar cards so special is the combination of simplicity and impact. Unlike elaborate paper engineering projects that require weeks of practice and expensive tools, a jar card can be completed in an afternoon by crafters of virtually any skill level. The basic structure relies on layering cut paper shapes inside a card-shaped frame that mimics the look of a mason jar, a potion bottle, or any vessel you choose. The result looks far more complex and impressive than the actual process warrants, which is precisely why this trend has taken the handmade card community by storm.
These cards have become particularly beloved as gifts because they feel deeply personal. Every element inside the jar can be customized to reflect the recipient — their favorite colors, meaningful symbols, private jokes, or heartfelt messages written on tiny scrolls. You are not just giving a card; you are giving a curated collection of paper moments sealed inside a jar of affection. It is the kind of gift that people keep on their desks or pin to their bulletin boards long after the occasion has passed, which is more than can be said for most store-bought cards.
Gathering Your Materials: Everything You Need Before You Begin
Before you sit down to make your first magic jar card, taking the time to gather all your materials will make the creative process far smoother and more enjoyable. The beauty of this project is that it does not demand a significant financial investment. Most of the supplies can be found at your local craft store, dollar store, or even raided from your existing stash of paper goods. The key materials fall into a few broad categories: the card base, the jar template elements, the fillings, and the adhesives and tools that hold everything together.
For the card base and jar structure, you will want cardstock in a neutral or complementary color. White, kraft brown, and soft grey all work beautifully as jar bodies because they evoke the look of glass or ceramic without competing with the colorful fillings inside. You will also want a piece of acetate or clear plastic sheeting if you wish to simulate the glass front of the jar — this optional step elevates the finished card considerably and is worth tracking down. Patterned scrapbook paper, vellum, and tissue paper are wonderful for adding texture and variety to the jar’s contents.
The tools you will rely on most heavily include a craft knife or precision scissors, a bone folder for crisp folds, a cutting mat, a ruler, and your adhesive of choice. Double-sided tape and a thin-nozzle glue pen give you the most control when attaching tiny paper pieces. A circle punch, star punch, and heart punch are extremely helpful for creating uniform fillings quickly, though patient crafters can absolutely cut these shapes by hand. Optionally, fine-tipped pens, watercolors, or metallic markers can add color and detail to your jar and its contents.
- Cardstock (multiple colors): The structural backbone of both the card base and the jar shape itself.
- Scrapbook paper or patterned paper: Ideal for creating colorful, textured fillings and decorative jar lids.
- Clear acetate sheet: Simulates the glass panel of the jar for a polished, realistic look.
- Shape punches (stars, hearts, circles, flowers): Speeds up the process of creating multiple small fillings.
- Double-sided tape and glue pen: Provides clean, precise adhesion for all paper layers.
- Bone folder and cutting mat: Essential for professional-looking folds and safe, accurate cuts.
- Fine-tipped pens and metallic markers: For adding written messages, outlines, and decorative details.
Designing Your Jar: Choosing a Theme and Layout That Feels Like You
One of the most delightful stages of making a magic jar card is the design phase, where you get to decide exactly what story your jar is going to tell. Before cutting a single piece of paper, spend a few minutes thinking about who will receive this card and what feeling you want it to evoke. A birthday jar might be filled with tiny confetti circles, number cutouts, and scrolls bearing wishes. A friendship card could overflow with tiny stars, paper flowers in the recipient’s favorite color, and miniature envelopes sealed with a dot of washi tape. A holiday jar might feature snowflakes, pine trees, and gold foil stars.
The jar shape itself is also a design decision worth considering carefully. Classic mason jars with their distinctive ridged bodies and wide-mouth lids are the most popular choice and immediately read as charming and rustic. Apothecary bottles with their narrow necks and rounded shoulders suggest something more mysterious and magical — perfect for fantasy-themed cards or gifts to someone who loves witchy aesthetics. Simple round jam jars feel warm and domestic, while tall, slim potion vials have an elegant, almost fairy-tale quality. Sketch a few silhouettes before committing to one; the jar shape sets the tone for everything inside it.
Color palette is another design element that can make or break the visual impact of your finished card. Cohesive cards use two to four colors for the jar fillings, ensuring that the inside of the jar looks curated rather than chaotic. A palette of soft pinks, creams, and gold reads as romantic and elegant. Bold primary colors feel cheerful and energetic, perfect for children’s cards. Deep jewel tones — burgundy, forest green, midnight blue — feel luxurious and sophisticated. If you are working with a clear acetate panel on the front, remember that the background color of your card base will show through and become part of the overall palette.
Step-by-Step: How to Build Your Magic Jar Card From Start to Finish
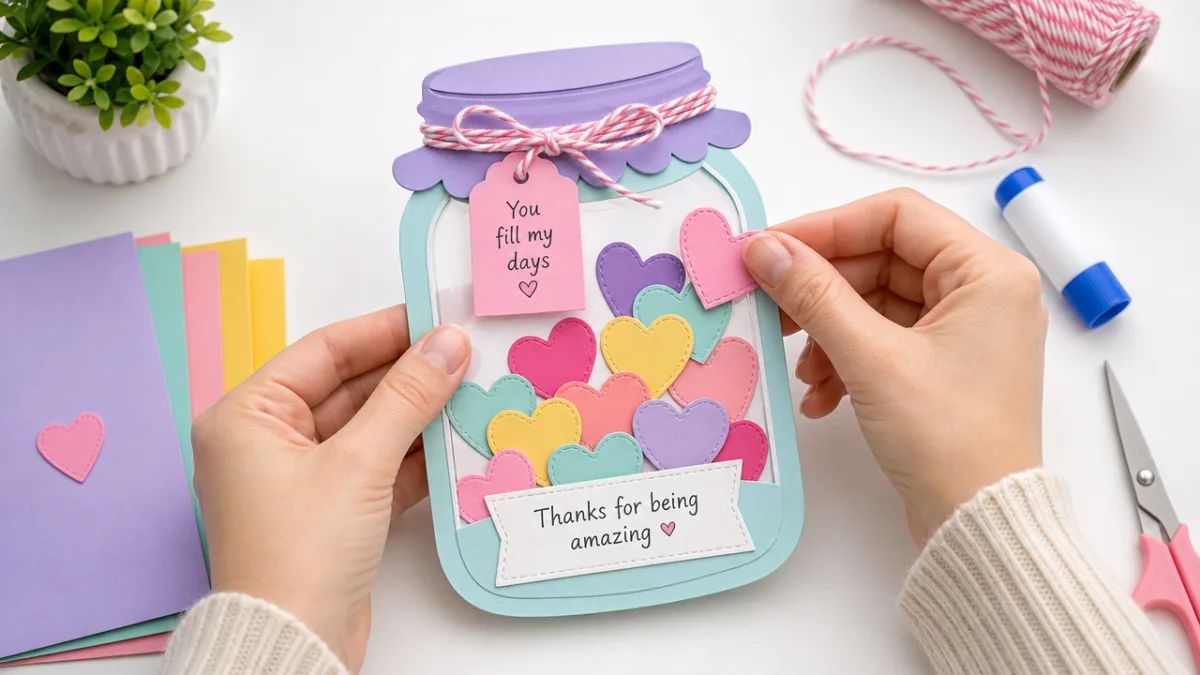
Begin by cutting your card base from a folded piece of cardstock. A standard card size of four by six inches or five by seven inches works well, but you can scale up or down based on your preference. Score and fold the cardstock cleanly using your bone folder, then set it aside. Next, draw or trace your jar silhouette onto a separate piece of cardstock. This piece will become the decorative frame that sits on the front of your card, with the jar shape cut out from its center to create a window-like opening. Cut this shape out carefully using your craft knife, taking your time on any curves to keep the lines smooth.
If you are using a clear acetate panel, cut a piece slightly larger than the jar opening and adhere it to the back side of your jar frame using double-sided tape along all edges. This creates the illusion of glass when the frame is viewed from the front. Now prepare your jar fillings by punching or cutting all your tiny shapes — stars, hearts, circles, flowers, miniature paper scrolls, and anything else you have chosen. Layer these shapes onto the front face of your card base, building up depth by using foam adhesive squares under some pieces to create dimension. Group similar colors together and leave some empty space near the top of the jar to suggest the jar is not completely packed.
Once your fillings are arranged and adhered, carefully attach the jar frame (with its acetate panel, if using) on top of the card base, aligning it so the window perfectly frames your arrangement of paper treasures. Use strong double-sided tape around the entire perimeter of the frame back to ensure a secure bond. Add the jar lid detail — a simple rectangle of patterned paper or kraft card with a circular lid piece on top works beautifully. Finish the outside with any additional decorative details: a twine bow around the jar neck, a tiny tag, washi tape accents along the card edges, or a stamped or hand-lettered sentiment beneath the jar.
- Cut and score your card base to the desired size, folding cleanly with a bone folder.
- Trace and cut your jar silhouette frame from a second piece of cardstock, creating the window opening.
- Attach a clear acetate panel behind the jar frame opening for a glass effect.
- Punch or cut all your tiny filling shapes from colorful paper — stars, hearts, flowers, scrolls, and more.
- Layer and adhere your fillings to the card base face, using foam squares for added dimension.
- Attach the jar frame over the fillings, aligning the window to frame your arrangement perfectly.
- Add the jar lid detail using patterned paper cut into a rectangle and circle.
- Decorate the exterior with twine, washi tape, tags, and a hand-lettered or stamped message.
Creative Variations: Ten Ways to Make Your Magic Jar Card Unique
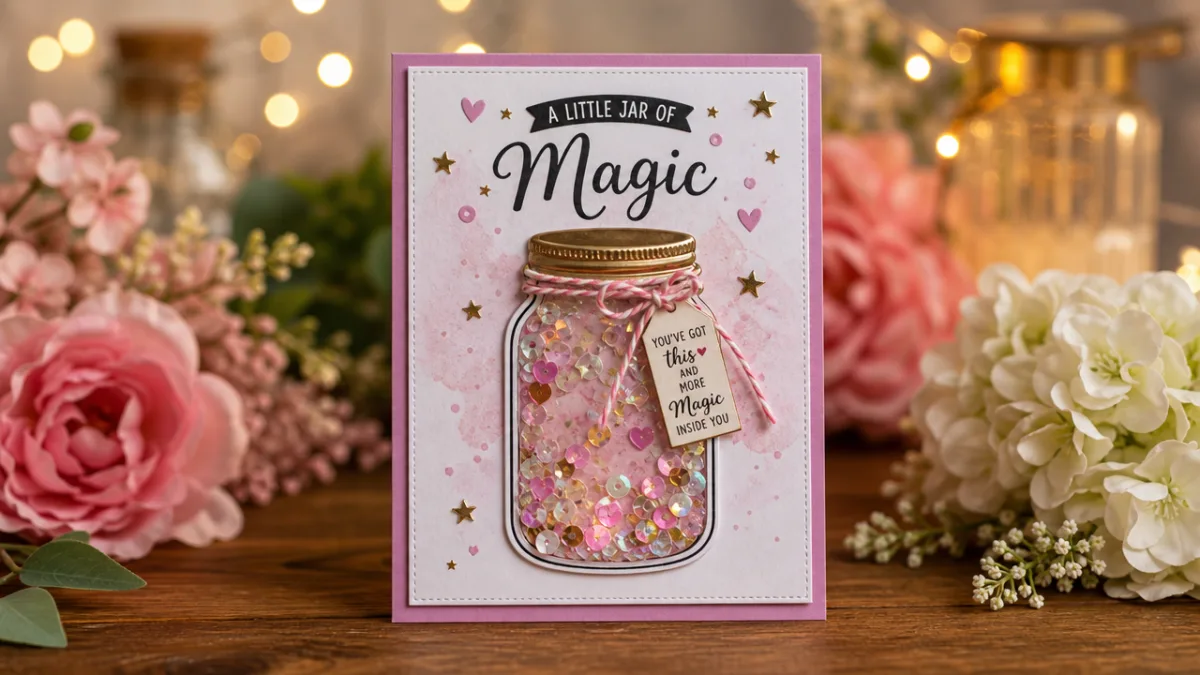
Once you have mastered the basic magic jar card, a whole universe of creative variations opens up before you. One of the most popular adaptations is the shaker jar card, which adds a clear acetate front to the jar frame as described earlier but also incorporates loose sequins, glitter, or tiny foam pieces inside a sealed chamber between the card face and the frame. When the recipient shakes or tilts the card, the fillings move around behind the acetate, creating a genuinely interactive and joyful experience. This version requires a border of foam adhesive strips to create the sealed chamber, but the effect is absolutely worth the extra effort.
Another beautiful variation is the botanical jar card, in which the jar is filled entirely with pressed or paper flowers, leaves, sprigs of lavender, and delicate fern fronds. Paper versions of these botanicals can be incredibly realistic when cut from the right shades of green, cream, and blush and given subtle vein details with a fine pen. These cards have a romantic, vintage herbarium quality and pair beautifully with kraft card bases and neutral-toned envelopes. Similarly, a stargazing jar card fills the vessel with tiny paper stars, crescent moons, and planets, making it a perfect gift for astronomy lovers or anyone who dreams in constellations.
For a more personalized approach, consider the memory jar card variation, in which you fill the jar with miniature representations of significant shared moments: a tiny paper camera for a photographer friend, a small book for a reader, a little coffee cup for a colleague who runs on espresso, a musical note for someone who sings. Each tiny element functions as a private reference to the relationship between maker and recipient, transforming the card into something narrative and deeply intimate. This version requires a bit more hand-cutting and planning, but the look of recognition on the recipient’s face when they spot each little element is entirely priceless.
- Shaker jar card: Sealed acetate chamber with loose sequins or glitter that moves when tilted.
- Botanical jar card: Filled with paper flowers, leaves, and herbs for a vintage herbarium look.
- Stargazing jar card: Stars, moons, and planets for astronomy lovers and dreamers.
- Memory jar card: Miniature symbols representing shared moments and inside jokes.
- Advent jar card: Tiny numbered scrolls inside, each containing a small holiday message or task.
- Watercolor jar card: Jar filling painted with soft watercolor washes instead of cut paper pieces.
- Seasonal jar card: Themed to spring blossoms, summer sunshine, autumn leaves, or winter snowflakes.
- Love letter jar card: Filled exclusively with tiny folded paper notes bearing heartfelt written messages.
Tips for a Professional Finish: Avoiding Common Mistakes
Even experienced crafters encounter a few predictable pitfalls when making magic jar cards for the first time, and knowing what to watch for can save you significant frustration. The most common issue is overcrowding the jar filling. It is tempting to pack in as many tiny elements as possible, but a visually balanced jar composition actually leaves some breathing room between pieces. Think of it the way a florist thinks about an arrangement — not every inch needs to be occupied. Leaving deliberate gaps and allowing some of the card base color to show through gives the eye a place to rest and actually makes the individual elements more readable and charming.
Adhesive choices matter far more than most beginners realize. Liquid glue, while widely available and familiar, is risky for tiny paper pieces because it can seep out from under small shapes and create shiny, visible residue on your card face — a problem that is nearly impossible to fix once dry. Double-sided tape cut into small pieces with scissors, or a dedicated glue pen with a fine tip, will give you the precise, clean bonds that professional-looking cards require. For your foam dimension squares, pre-cut foam adhesive dots are far easier to manage than cutting strips by hand. Investing in quality adhesives is one of the single most impactful upgrades you can make to your card-making process.
Cutting quality is the other area where small improvements yield dramatically better results. Always use a sharp blade — a dull craft knife drags and tears paper rather than slicing cleanly through it, leaving rough, fibrous edges on curves and corners. Change your blade tip regularly; most experienced paper crafters change blades after every significant project. For cutting the jar frame window, go slowly on any curved sections and rotate the cutting mat rather than the knife when navigating tight curves. Taking an extra five minutes to cut cleanly at this stage will be immediately visible in the finished card and will separate a homemade-looking result from one that could genuinely pass for a professional product.
Sharing, Gifting, and Building a Paper Crafting Practice Around This Project
Magic jar cards have become such a beloved project in the paper crafting community partly because they photograph so beautifully and translate so well to social media sharing. The combination of three-dimensional depth, colorful fillings, and the charming jar silhouette makes for an inherently photogenic finished object. If you plan to share your creations on Pinterest, Instagram, or a crafting blog, photograph your cards near a window in natural daylight with a simple, uncluttered background — white foam board, a wooden table, or a piece of linen fabric all work wonderfully. Prop the card upright at a slight angle and consider adding a few loose paper scraps, a spool of twine, or a small flower nearby to give the image context and warmth.
From a gifting perspective, magic jar cards solve a problem that many thoughtful people face: the desire to give something genuinely handmade and personal without the time investment of a large craft project. A single jar card can be completed in one to two hours once you are comfortable with the process, making it realistic to create several for a batch of birthday or holiday cards. Pairing the card with a simple small gift — a packet of seeds, a handmade bookmark, a single wrapped chocolate — creates a gift bundle that feels generous and considered without requiring a large budget. These cards are also extraordinarily well-suited as accompaniments to cash or gift cards, transforming an impersonal gift into something layered with care.
For those who find themselves making card after card and enjoying the process more each time, the magic jar card can serve as an entry point into a broader and deeply rewarding paper crafting practice. The skills developed here — precise cutting, thoughtful composition, layered construction, and intentional color selection — are directly transferable to other paper arts including pop-up cards, art journaling, bookbinding, and mixed media collage. Many crafters who begin with a single jar card end up building a dedicated creative space, accumulating an ever-growing collection of papers and punches, and discovering a practice that provides genuine relaxation and a sense of tangible accomplishment in a world that increasingly asks us to produce things that have no physical form at all.








What do you think?
It is nice to know your opinion. Leave a comment.