










The Very Hungry Caterpillar DIY: A Complete Creative Guide
Introduction to the Very Hungry Caterpillar Craft Tradition
If you grew up with Eric Carle’s The Very Hungry Caterpillar, you already know why it’s still capturing hearts more than fifty years after it was first published. Those bold, cheerful illustrations — all that vivid green and red and orange — have a way of sticking with you. And for parents, teachers, and craft lovers, they also happen to be incredibly fun to recreate. Whether you’re throwing a first birthday party, decorating a nursery, or just looking for something to do with a restless toddler on a rainy afternoon, this book has inspired some genuinely wonderful DIY projects over the years.
Part of what makes this such a great DIY subject is how approachable it is. The characters are simple enough that a three-year-old can make something recognizable, but there’s enough color and charm here that adults can create genuinely stunning pieces too. It really does work for everyone, no matter your skill level or how much time you have to spend.
This guide walks you through the whole thing — what supplies to grab, how to put together some of the most popular projects, and how to make the finished results look their best. Whether you’re a seasoned crafter or someone who’s never picked up a glue gun in their life, you’ll find plenty here to work with.
Essential Materials and Tools for Your Hungry Caterpillar DIY
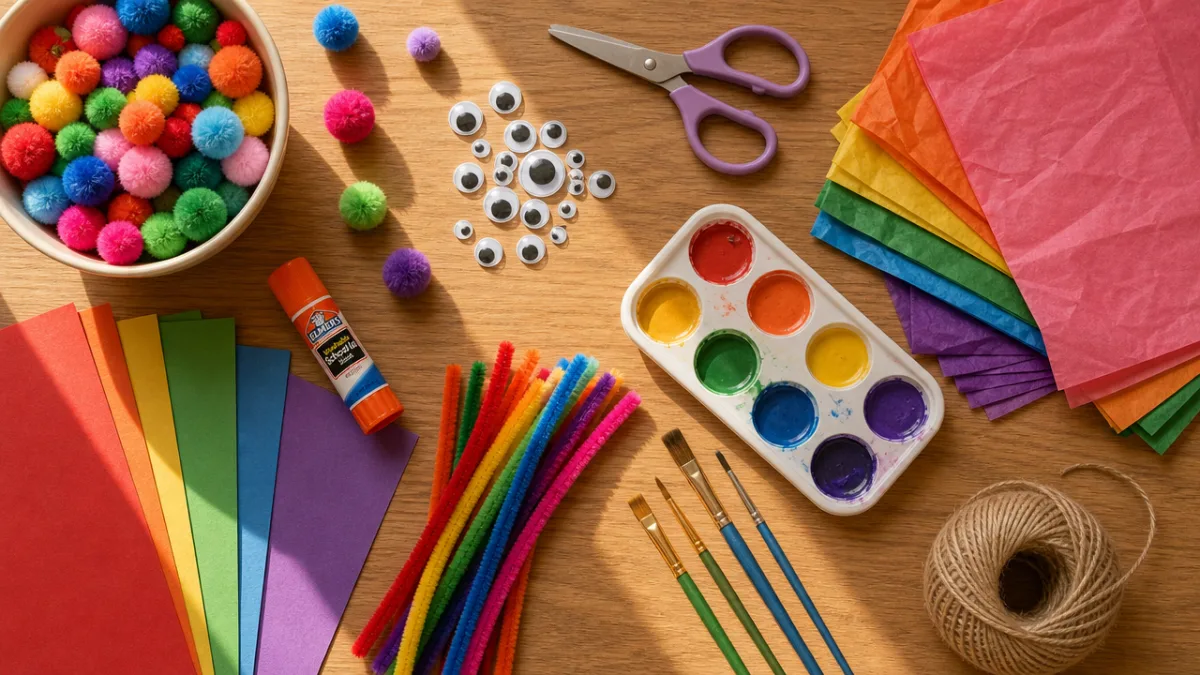
Getting your supplies sorted before you start makes everything go a lot more smoothly, especially if you’re crafting with kids. For most Very Hungry Caterpillar projects, you’re working with a pretty specific color palette: bright green, red, orange, yellow, and brown. Acrylic paint in those shades is your best friend here because it works on pretty much any surface — paper, fabric, wood, foam. Craft stores usually carry affordable multi-packs that have everything you need, so you don’t have to hunt down individual colors.
For paper-based projects, construction paper, cardstock, and tissue paper in those same colors are the staples. If you want to go a step further, Eric Carle actually built his signature look by layering colored tissue paper with paint — and the good news is that technique is completely doable at home. All you need is some colored tissue paper, white school glue mixed with a little water, and a foam brush. It sounds almost too simple, but the results are genuinely beautiful, and kids aged three and up tend to love doing it.
Beyond that, a well-stocked toolkit for these projects should include:
- Scissors (child-safe ones if little hands are involved)
- Glue sticks and liquid craft glue
- Googly eyes in a few different sizes
- Green and red pom-poms for 3D caterpillar bodies
- Pipe cleaners for antennae and details
- Foam sheets in assorted colors
- A hole punch for making those perfect circular food cutouts
- Markers and colored pencils for outlines and finishing touches
- Ribbon and twine for hanging anything you want to display
Having all of this on hand means you can switch between project types without grinding to a halt. A lot of these supplies are easy to find at dollar stores or discount craft retailers, so you can stock up without spending a fortune. One practical tip: sort everything into labeled trays or containers before you sit down with the kids. It sounds like a small thing, but it genuinely saves time and keeps the session from turning into a chaotic scramble for the tape.
Creating the Classic Hungry Caterpillar: Step-by-Step Paper Craft
The paper circle caterpillar is probably the most classic version of this craft, and for good reason — it’s quick, beginner-friendly, and looks great when it’s done. You can finish it in under thirty minutes, and it works for pretty much any age group with minor adjustments.
Start by cutting seven to ten circles from green construction paper or cardstock, each about two inches across. Then cut one slightly larger circle in red for the head. Arrange the green circles in a gentle curving line, overlapping them slightly so they look connected, and glue each one down where it overlaps the next. Attach the red head at one end. Once everything’s dry, stick on a pair of googly eyes, draw a smile with a black marker, and add two short green pipe cleaners bent at the tips for antennae. It comes together fast and the result is completely charming — kids absolutely love it, and it looks great on a wall or a classroom bulletin board.
If you want to take it up a notch, try doing Eric Carle’s tissue paper technique on each circle before assembling. Tear small pieces of green tissue paper in a few different shades, layer them over each circle with diluted glue, and let them dry. The layered effect adds real texture and depth — suddenly it goes from a simple kids’ craft to something that actually looks like it belongs in the book. These textured versions work beautifully as wall art, birthday banners, or classroom decorations that people will actually want to hold onto.
Party Decorations: Bringing the Caterpillar World to Life
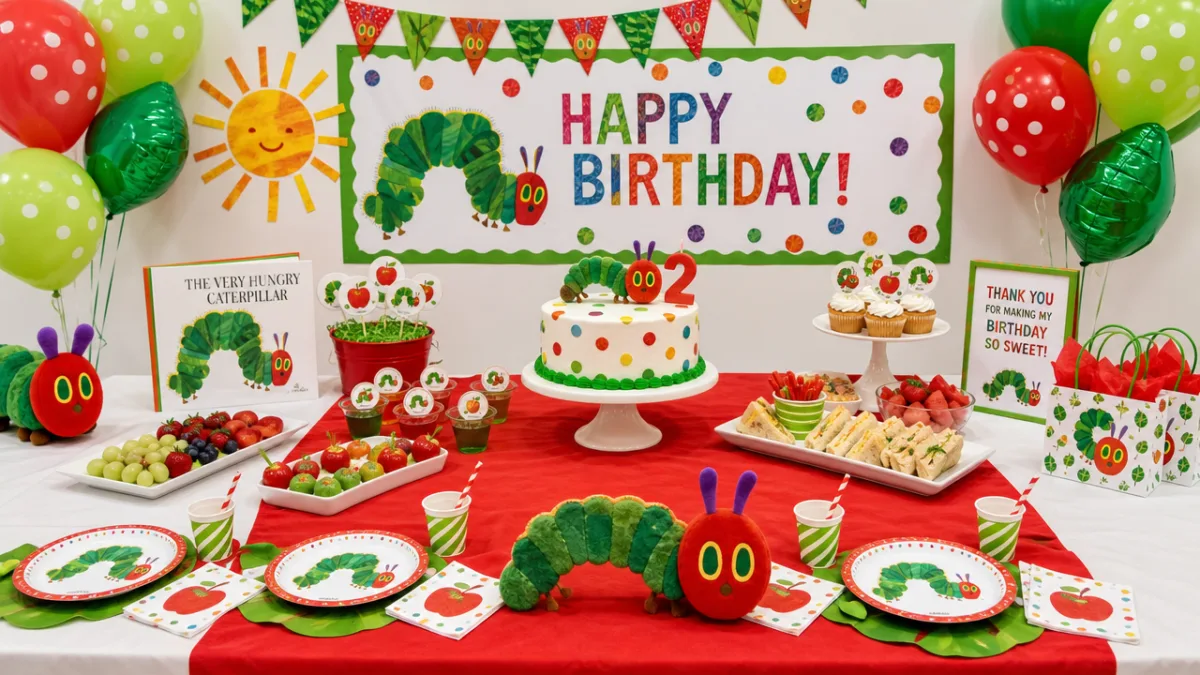
The Very Hungry Caterpillar is one of the most popular themes for first birthday parties, and making your own decorations is a great way to get that cohesive, pulled-together look without paying party store prices. A banner made from alternating red and green circles strung on twine is one of the easiest wins here — it immediately sets the tone the moment guests walk in. Cut your circles from cardstock for durability (a large circle punch makes this much faster), then write one letter per circle to spell out “Happy Birthday” or your little one’s name.
Balloon arrangements are another easy DIY that photographs really well. Stack green balloons vertically and top them with a single red balloon, then add googly eyes and pipe cleaner antennae with a bit of tape. These caterpillar balloon columns look great framing a dessert table, standing by the entrance, or acting as a photo backdrop. No special skills required — just basic inflation and a little creativity.
Food presentation is honestly where this theme really gets to shine. A few ideas that tend to work really well:
- Arrange green grapes in a winding line with a strawberry at one end for an edible caterpillar on the snack table.
- Put together a fruit platter featuring all the foods from the book — apples, pears, plums, strawberries, oranges — with small book-themed labels for each.
- Frost cupcakes in green, add candy eyes and a red candy head, and cluster them together to form an edible caterpillar.
- Use a leaf-shaped cookie cutter on green Jell-O or sandwich wraps to sneak in a nod to the caterpillar’s leafy home.
- Label the dessert table with a handwritten sign referencing the book’s famous “very hungry” line.
For centerpieces, fill small green flowerpots with floral foam and insert paper flowers and leaf shapes cut from green cardstock. Set a little paper caterpillar beside each one, tie a strip of red and green ribbon around the pot, and you’ve got something that looks intentional and sweet. The bonus here is that these double nicely as party favors — guests can take them home, which means your DIY work gets appreciated long after the party’s over.
Nursery and Room Decor: Long-Lasting Hungry Caterpillar Creations
Not everything has to be a one-day project. The Very Hungry Caterpillar also lends itself beautifully to pieces that will live on a wall for years. A hand-painted wooden sign with the caterpillar and a quote from the book is a lovely example — meaningful, durable, and genuinely artisanal-looking when it’s done well. Grab a pre-cut wooden plaque from a craft store, sand it smooth, prime it with a coat of white gesso, and paint your scene with acrylics. Finish with a matte varnish and you’ve got something that holds up through all the early years.
Fabric is another great route for nursery décor, especially if you want something soft and safe around little ones. A felt wall hanging featuring the caterpillar, the sun, the moon, and the leaf doesn’t require any sewing at all — adhesive felt sheets and fabric glue will do the job. Layer your cut shapes on a piece of neutral felt stretched over a wooden embroidery hoop, tie it up with ribbon, and hang it. It’s tactile, warm, and adds real charm to a nursery without any sharp edges or heavy materials.
For something more ambitious, a fabric growth chart with the caterpillar climbing toward a butterfly at the top is a wonderful long-term project. It does involve some basic sewing or iron-on hem tape, but the result is a personalized, practical piece that families tend to treasure. Add height markers at regular intervals, embroider or paint the child’s name at the bottom, and you’ve made something no store-bought product can really replicate.
Educational and Sensory Hungry Caterpillar Activities
One of the things that makes this book so enduring is that it’s genuinely educational — it teaches counting, sequencing, color recognition, and even a little nutrition, all wrapped up in a story kids love. That makes it a natural fit for DIY activities that support learning in a hands-on way.
A felt board set is one of the best options here. Cut out the caterpillar, the foods he eats throughout the week, and the butterfly, and let kids retell the story on their own. It builds narrative comprehension and memory in a tactile, low-pressure way. Store the pieces in a small fabric pouch to keep things tidy, and you’ve got an activity that kids will come back to again and again.
Sensory bins are another great option, especially for toddlers and preschoolers. Fill a shallow plastic container with green-dyed rice or green kinetic sand — it’s the caterpillar’s leaf world in miniature. Bury small plastic fruits, tiny caterpillar figures, and leaf-shaped foam cutouts throughout for kids to dig out and discover. This kind of open-ended play encourages curiosity and imaginative storytelling while keeping everything grounded in a familiar, beloved book.
For early math, a simple counting mat works really well. Glue images of each day’s food from the book onto a piece of laminated cardstock with numbered circles beside them, and let kids place small red pom-poms into the “holes” the caterpillar ate — just like the die-cut pages in the actual book. It’s a clever, concrete way to make counting feel meaningful rather than abstract, which matters a lot for kids who are still building their number sense from the ground up.
Tips for Crafting with Children and Displaying Finished Projects
Crafting with kids is genuinely wonderful, but it goes a lot more smoothly when you pitch the activity at the right level. For two- and three-year-olds, stick to the most sensory and forgiving elements: stamping circles with sponges, tearing tissue paper, pressing stickers onto a pre-drawn caterpillar outline. These kids don’t need precision — they need something that feels satisfying and immediate. Structure the craft so their contribution is real and visible, even if it doesn’t look exactly like the example.
Kids aged four to six can handle quite a bit more — cutting along drawn lines, gluing components in sequence, adding detail with markers. This age group does really well when they can see a finished example to reference as they work, so it’s worth making a sample version before the session begins. Keep the atmosphere light, and try to praise the process rather than the outcome. Remind them that the caterpillar himself was messy and imperfect in the best possible way — that tends to land well and gives every kid’s version its own charm worth celebrating.
Once things are finished, how you display them makes a real difference. A few simple strategies that work well:
- Frame flat paper crafts in inexpensive dollar store frames for an instant gallery-wall effect.
- Laminate smaller pieces and stick magnets on the back so they live on the fridge without getting damaged.
- String caterpillar banners along a length of twine across a bedroom wall for a whimsical garland.
- Photograph finished projects and compile them into a printed photo book — a lovely keepsake of the creative process.
- Wrap and label finished crafts as handmade gifts for grandparents or family members who will genuinely treasure them.
The most important thing, really, is remembering that the making matters as much as the result. The time you spend covered in glue with a toddler, or watching a six-year-old painstakingly cut out the most lopsided circle you’ve ever seen, is the actual point of the whole thing. Eric Carle made an entire artistic world out of simple materials and a love of color and story — and every handmade caterpillar carries a little of that same spirit forward into the hands of whatever small person helped you make it.








What do you think?
It is nice to know your opinion. Leave a comment.