










How to Make a Macramé Wall Hanging for Beginners: A Complete Guide
Macramé has made a stunning comeback in recent years, transforming from a 1970s craft revival into a beloved modern art form that graces the walls of stylish homes, boho apartments, and creative studios everywhere. If you have ever admired those beautifully textured fiber art pieces and wondered whether you could create one yourself, the answer is a resounding yes. Macramé wall hangings are one of the most beginner-friendly fiber arts you can explore, requiring no special equipment and only a handful of basic knots to get started. Whether you are looking for a weekend project or a new creative hobby, this guide will walk you through everything you need to know.
Understanding Macramé: A Brief History and Why It’s Perfect for Beginners
Macramé is the ancient art of knotting cord or rope into decorative patterns, and its roots stretch back thousands of years to Arabian weavers in the 13th century who used knotting techniques to finish the edges of hand-loomed fabrics. The craft traveled through Europe via Moorish influence, eventually becoming a popular pastime among sailors who knotted rope during long voyages at sea. In the 19th century, it became fashionable in Victorian parlors, and by the 1970s, macramé had exploded into mainstream culture with plant hangers, wall art, and furniture all crafted from knotted cord. Today, it enjoys a vibrant renaissance among crafters of all skill levels.
What makes macramé particularly wonderful for beginners is its forgiving nature. Unlike knitting or crocheting, you do not need to learn an entirely new language of abbreviations and stitch counts. The entire craft is built on variations of just a few foundational knots, and once you master two or three of them, you can create breathtakingly complex-looking pieces. There is also very little financial investment required to start — a spool of macramé cord, a wooden dowel, and a pair of scissors are genuinely all you need for your first project. The barrier to entry is low, but the creative ceiling is extraordinarily high.
Beyond the practical advantages, macramé has a deeply meditative quality that many crafters find therapeutic. The repetitive motion of forming knots, the tactile pleasure of working with natural cotton rope, and the slow, satisfying emergence of a pattern from raw materials all combine to create a calming, focused creative experience. Studies on craft-based mindfulness suggest that repetitive hand movements can reduce cortisol levels and promote a state similar to meditation. Many people who take up macramé report that their practice sessions become a cherished part of their self-care routine, offering a screen-free creative escape that produces something beautiful and tangible.
Gathering Your Supplies: Everything You Need to Get Started
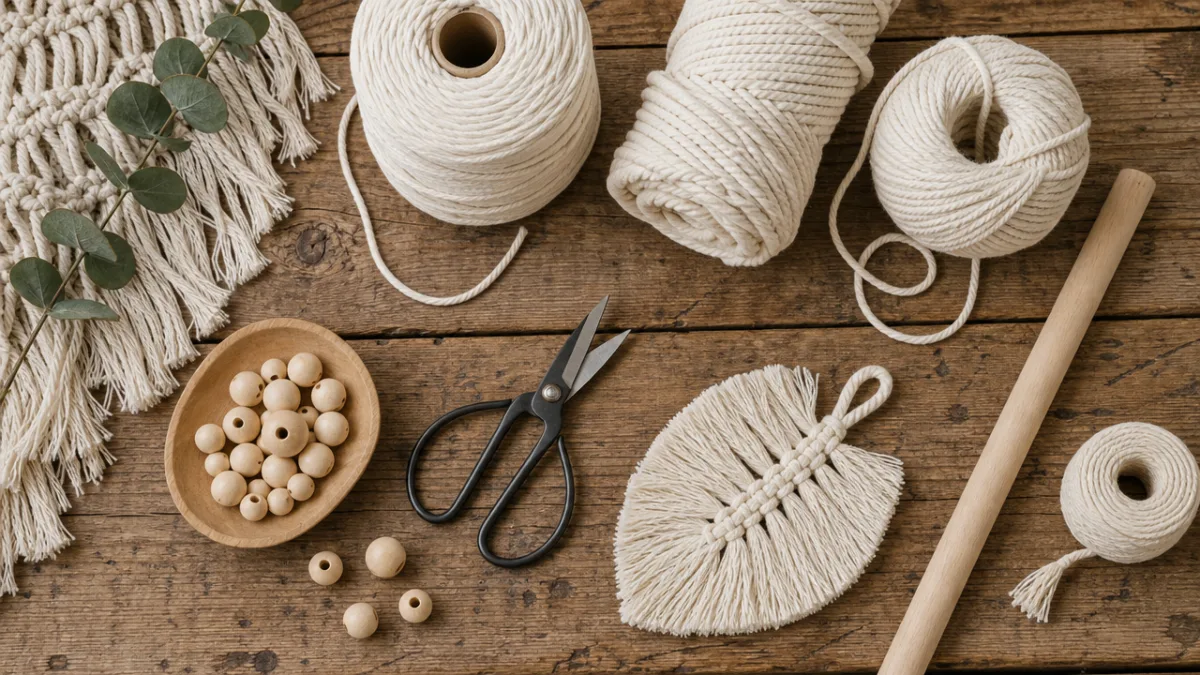
Before you begin your first macramé wall hanging, you will want to gather a small collection of essential supplies. The most important decision you will make as a beginner is choosing the right cord. Macramé cord comes in several materials including cotton, jute, hemp, and nylon, but for beginners, single-strand or three-strand twisted cotton cord is almost universally recommended. It is soft on your hands, holds knots beautifully, and comes in a wide range of natural and dyed colors. For a standard beginner wall hanging, a three-millimeter or five-millimeter cord thickness works wonderfully, giving your knots good definition without being too bulky or too fine to work with comfortably.
In addition to your cord, you will need a few more items to complete your supply kit. A wooden dowel serves as the anchor from which your entire piece will hang, and you can find these at most craft or hardware stores for just a few dollars. The length of your dowel will determine the width of your finished wall hanging, so choose one that suits the space where you plan to display your work. You will also want a sturdy clothes rack, curtain rod, or even a door hook to hang your dowel from while you work, as macramé is typically created hanging vertically. A tape measure, scissors with a sharp blade, and a comb or pet slicker brush for fringing are the only other tools you truly need.
Here is a simple checklist of supplies to gather before you begin:
- Single-strand or three-strand twisted cotton macramé cord (3mm or 5mm thickness recommended)
- A wooden dowel, driftwood piece, or metal ring as your mounting base
- Sharp scissors for clean cord cuts
- A tape measure or ruler for cutting consistent cord lengths
- A clothes rack or hook for hanging your work while you knot
- A fine-tooth comb or pet slicker brush for brushing out fringe
- Optional: wooden beads, feathers, or dried botanicals for embellishment
When estimating how much cord to buy, a good rule of thumb for beginners is to cut each working strand to approximately four to five times the desired finished length of your wall hanging. This accounts for the fact that knotting consumes cord significantly — sometimes up to two-thirds of your original length — and having extra is always better than running short mid-project. For a wall hanging approximately 60 centimeters long, you would cut working cords to around 250 to 300 centimeters each. Most beginner projects require between 20 and 40 individual cords, so purchase your cord with generosity in mind.
Learning the Essential Knots: Your Macramé Foundation
The beauty of macramé lies in the fact that an enormous variety of patterns and textures can be achieved using only a small vocabulary of knots. For a beginner wall hanging, you really only need to master three foundational knots: the lark’s head knot, the square knot, and the half hitch. These three techniques form the backbone of the vast majority of macramé designs you will encounter in tutorials, pattern books, and online communities. Do not let the unfamiliar names intimidate you — each of these knots is genuinely simple, and with a little practice, they will quickly become second nature to your hands.
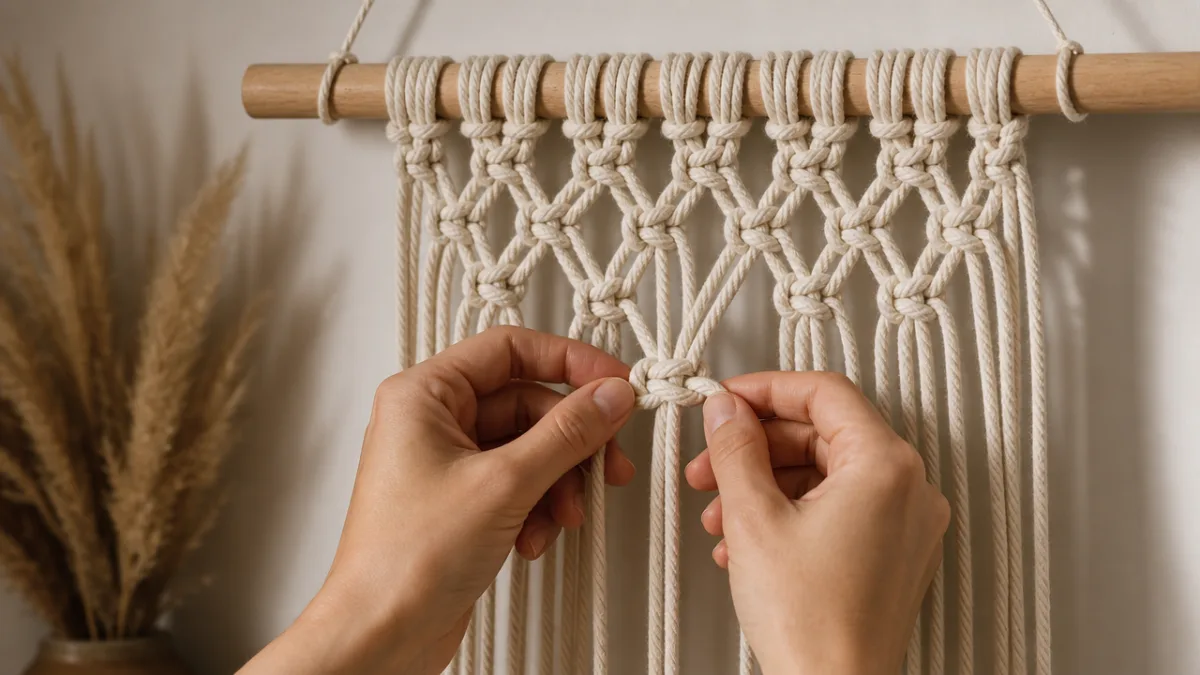
The lark’s head knot is almost always the first knot you will make on any project, as it is the method used to attach your working cords to your dowel or mounting base. To create a lark’s head knot, fold a length of cord in half to find its midpoint, loop that midpoint over the top of the dowel from front to back, and then pull both loose ends up through the loop and tighten. That is truly all there is to it. This creates a secure anchor from which your two working strands hang down, ready to be incorporated into your design. The folded loop sits neatly over the dowel and gives your finished piece a clean, polished starting edge.
The square knot is arguably the most important knot in all of macramé and will form the bulk of most beginner projects. It is worked with a group of four cords — two outer working cords and two inner filler cords — and creates a flat, symmetrical knot that can be repeated in rows to build up structured, geometric patterns. The square knot is actually made in two steps, each a half square knot, and the direction in which you begin determines which way the knot spirals. A continuous series of half square knots creates a beautiful spiral twist called a half hitch spiral, while alternating full square knots create a flat ladder-like pattern. Experimenting with these variations is one of the great pleasures of learning macramé.
The diagonal double half hitch knot, sometimes simply called the double half hitch, is what allows macramé artists to create diagonal lines, chevrons, diamonds, and other angular geometric shapes within their work. It is made by wrapping one cord around a designated carrier cord twice in the same direction, creating two tight half hitches that sit snugly against each other. By changing the angle of the carrier cord and working across a row of working cords, you can create clean diagonal lines that give macramé wall hangings their characteristic graphic quality. Though it takes a little more practice than the square knot, the double half hitch opens up an exciting world of patterning possibilities.
Creating Your First Wall Hanging: A Step-by-Step Walkthrough
Now that you understand the basic knots, it is time to bring them together into your first complete wall hanging. Begin by cutting your cords to length — for a beginner piece approximately 50 centimeters wide and 60 centimeters long, cut 20 cords each measuring around 250 centimeters in length. Find the center of each cord and attach it to your dowel using the lark’s head knot described earlier. When all 20 cords are attached, you will have 40 working strands hanging from your dowel. Hang the dowel from your working hook or rack at a comfortable height, slightly above your waist, so that you can see and access the full length of your hanging as you work.
For the body of your wall hanging, begin working square knots across your rows of cords. Take the first four cords from the left and tie a square knot, then move to the next four cords and repeat, continuing across the entire width of your piece. This creates your first row. For the second row, skip the first two cords, then take the next four and tie a square knot, continuing across the row and leaving the last two cords unknotted. This alternating pattern creates the classic macramé mesh that is both beautiful and structurally elegant. Continue alternating rows in this fashion, working downward for as many rows as your design requires, typically between eight and fifteen rows for a beginner piece.
As you gain confidence in your square knotting rhythm, you can begin to experiment with adding texture and visual interest to your piece. Try creating a cluster of knots in one area by tying multiple square knots stacked closely on top of one another with the same set of four cords — this creates a raised bobble effect that catches light beautifully. You can also intentionally leave sections unknotted to create open negative space, which brings a light, airy quality to your finished piece. Do not be afraid to step back frequently and assess the overall composition of your work from a short distance, as this perspective often reveals whether adjustments in spacing or density would improve the overall visual balance.
Once you are satisfied with the body of your wall hanging, it is time to create the fringe at the bottom, which is one of the most satisfying and transformative steps in the entire process. Trim the remaining cord ends to your desired fringe length, using scissors to create a straight horizontal cut, an inverted V shape, or a curved arc depending on the silhouette you prefer. Once trimmed, use your comb or slicker brush to unravel the twisted fibers of each cord end, brushing downward with firm strokes until the cord blooms into a soft, full, fluffy fringe. This step is genuinely magical — watching tight twisted cords transform into flowing fiber is one of macramé’s most rewarding moments.
Styling and Displaying Your Macramé Wall Hanging
Once your wall hanging is complete, the joy of macramé continues as you find the perfect way to display your creation. The first step is to attach a hanging cord to your dowel so that the piece can be suspended from a wall hook or nail. Cut a length of cord approximately 40 to 50 centimeters long, tie one end securely to the left side of your dowel and the other end to the right side, creating a gentle arc that you can loop over a hook. For a more decorative finish, you can wrap the cord tightly along the full length of the dowel before tying it off, adding a polished, intentional look to what might otherwise be an exposed wooden rod.
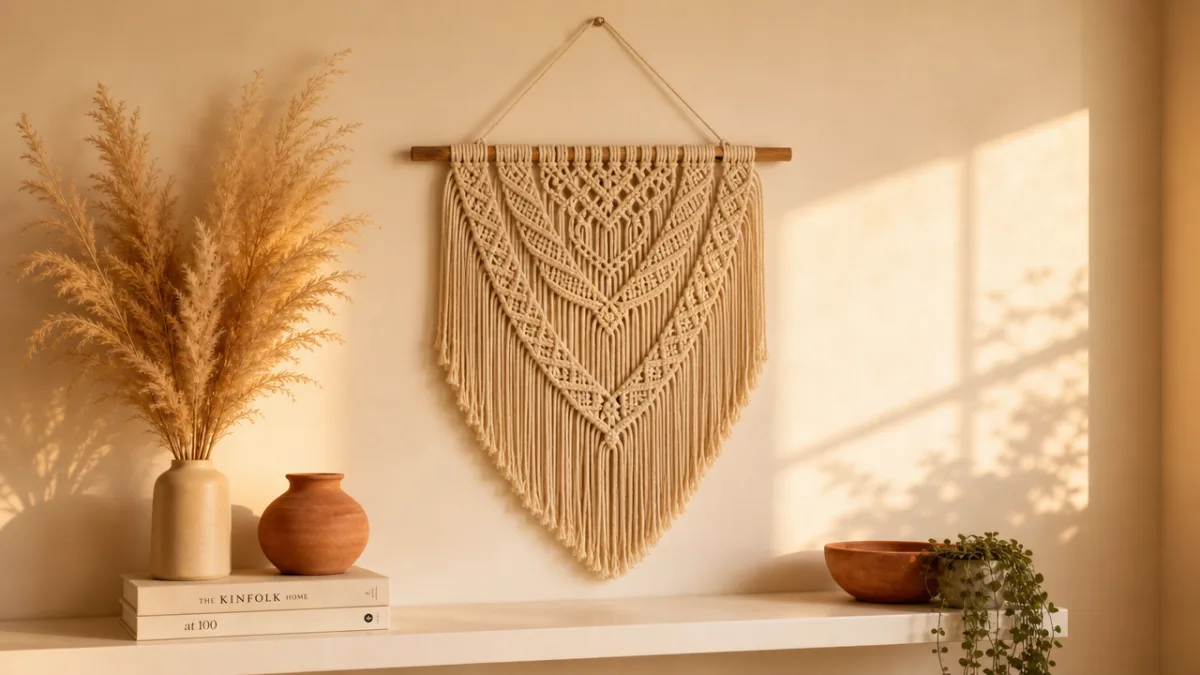
Macramé wall hangings work beautifully in a wide variety of interior settings, and their neutral, natural palette makes them extraordinarily easy to incorporate into existing décor. In a Scandinavian-inspired minimalist space, a simple white cotton hanging against a white or pale gray wall creates a subtle, sculptural texture that adds warmth without visual noise. In a boho-eclectic room filled with plants, layered textiles, and warm wood tones, a larger, more elaborate macramé piece can serve as a dramatic focal point above a bed, sofa, or fireplace. Even in a mid-century modern interior, the natural fiber and geometric patterns of macramé can feel right at home alongside clean-lined furniture and organic materials.
Consider the scale of your wall hanging in relation to the wall space and furniture below it. As a general rule of interior styling, artwork and wall décor should be hung so that its visual center sits approximately 145 to 150 centimeters from the floor, which corresponds roughly to average eye level. When hanging macramé above a piece of furniture such as a sofa or bed, aim to leave between 20 and 30 centimeters of space between the furniture and the bottom of the hanging. A piece that is too small for its wall can look timid and lost, so do not be afraid to make your next project larger — many experienced macramé artists create statement pieces spanning a meter or more in width.
Caring for your macramé wall hanging will ensure it remains beautiful for many years. Natural cotton fiber can attract dust over time, especially in homes with pets or in well-traveled spaces, so a gentle shake or a light going-over with a hairdryer on a cool setting every few months will keep it looking fresh. If your piece needs deeper cleaning, hand washing in cool water with a gentle detergent is the safest option — never put macramé in a washing machine, as the agitation can tangle and distort your carefully crafted knots. Allow the piece to dry completely flat or hanging outdoors in gentle sun before displaying it again, and reshape the fringe while damp for the best results.
Growing Your Skills: Next Steps and Creative Inspiration
Completing your first macramé wall hanging is both an ending and a beginning. Once you have experienced the satisfaction of creating something beautiful with your own hands from a few lengths of cord, you will almost certainly find yourself eager to try more ambitious projects. The natural progression for many macramé artists is to explore more complex knotting patterns — the Josephine knot, the berry knot, and the gathering knot all offer new textural possibilities that can elevate your work significantly. Online platforms such as YouTube, Pinterest, and Instagram are treasure troves of free tutorials and inspiration at every skill level, and the global macramé community is famously generous with knowledge and encouragement.
As your confidence grows, consider experimenting with color. While natural unbleached cotton has a timeless, organic appeal, macramé cord is available in hundreds of dyed shades, and incorporating color into your work opens up an entirely new dimension of creative expression. You can create gradient effects by transitioning between light and dark shades of the same hue across the width of a piece, or create bold geometric color blocking by using distinctly contrasting colors in different sections. Dyeing your own cord with natural dyes made from plants, flowers, and spices is another rabbit hole worth exploring — the unpredictable, organic results of botanical dyeing complement the handmade quality of macramé beautifully.
Beyond wall hangings, the skills you develop as a macramé beginner translate directly into a whole world of other projects. Plant hangers were perhaps the craft’s most iconic application during its 1970s peak, and they remain enormously popular today as indoor gardening and houseplant culture continue to grow. Macramé techniques can also be applied to home accessories including table runners, lampshades, curtain panels, decorative baskets, and even furniture such as hammock chairs and bed canopies for the truly ambitious crafter. Wearable macramé has also experienced a revival, with bracelets, necklaces, bags, and even garments featuring intricate knotwork finding their way onto runways and into boutiques.
Joining a macramé community, whether online or in person through a local craft group or workshop, can accelerate your learning dramatically and connect you with fellow fiber art enthusiasts who share your passion. Many cities now offer macramé workshops hosted by local artists, which can be a wonderful way to learn new techniques in a hands-on environment with immediate expert guidance. Craft fairs and artisan markets are also wonderful venues for studying the work of experienced macramé artists up close, noting how they use scale, texture, negative space, and embellishment to create pieces of genuine artistic sophistication. Every piece you see is a lesson in what is possible with rope and knots.
Ultimately, what makes macramé so enduringly appealing is its perfect balance of accessibility and depth. On one hand, anyone can pick up a length of cord and create something genuinely attractive within an afternoon, with no prior artistic training or expensive equipment required. On the other hand, macramé rewards years of dedicated practice with ever-greater levels of technical mastery and artistic expression — there is always a more complex knot to learn, a more ambitious composition to attempt, or a new material to incorporate. It is a craft that grows with you, meeting you where you are and offering a creative challenge perfectly calibrated to your current level. So hang up your dowel, cut your first cords, and tie your first lark’s head knot — a deeply satisfying creative journey awaits you.








What do you think?
It is nice to know your opinion. Leave a comment.