










How We Built My Craft Table: A Complete DIY Guide
There is something deeply satisfying about sitting down at a workspace you built with your own two hands. A craft table is not just a surface to work on — it is the heart of a creative studio, the place where ideas become tangible, where fabric meets scissors and paint meets canvas. When we decided to build a custom craft table rather than buy one, we knew we were taking on a meaningful project, but the result far exceeded our expectations in both function and beauty.
The inspiration came from years of frustration with store-bought options. Commercial craft tables often fall short in at least one critical way: they are too small, too shallow, too tall, or simply not configured for the specific crafts you love. We needed a table that could handle large fabric layouts for quilting, provide storage for dozens of supply categories, and still look beautiful in a dedicated craft room. No flat-pack furniture was going to check all those boxes.
This article walks you through every stage of our build, from the initial planning and measurement phase through material selection, construction, finishing, and final setup. Whether you are an experienced woodworker or a confident beginner with a few basic tools, the principles here will help you create a craft table perfectly tailored to your creative life. The project took us one full weekend plus a few weeknight sessions, and the investment of time was absolutely worth it.
Why a Custom Craft Table Changes Everything
Before diving into the build, it is worth pausing to consider why a custom table makes such a transformative difference. When you design your own workspace furniture, you are not compromising on a single dimension. You choose the exact height that keeps your shoulders relaxed during long sessions. You decide the exact depth that lets you reach every corner without straining. You determine how many drawers, cubbies, and open shelves the design will include based on what you actually own and use regularly.
For quilters, a table that is slightly higher than standard dining height — around 36 to 38 inches — can eliminate the back pain that comes from bending over fabric for hours. For paper crafters, deep drawers perfectly sized for 12-by-12 scrapbooking paper make a dramatic difference in organization. For mixed-media artists who work with bulky materials, open lower shelves that accommodate large bins and baskets are a game changer. None of these specific adaptations are available in a standard off-the-shelf product at any reasonable price point.
There is also the matter of pride and motivation. Research into creative productivity consistently shows that the environment in which we work significantly affects our mood, focus, and output. A beautiful, well-organized, personally designed space signals to your brain that this is a place of intention and creativity. Every time you walk into your craft room and see the table you built, you feel a small but real surge of accomplishment that primes you to create. That psychological benefit alone justifies the weekend of effort.
Planning and Measuring Your Space
The planning phase is where the entire success of a DIY furniture project is either secured or undermined. Rushing through measurements or making assumptions about what will fit is the single most common reason DIY builds end in frustration. We spent two full evenings doing nothing but measuring, sketching, and revising our plan before a single board was purchased. That investment of planning time saved us from at least three significant mistakes we identified during the process.
Start by measuring your room carefully, noting not just the floor space but the height of windows, the location of electrical outlets, and the swing radius of any doors. Our craft room had a window that sat low on one wall, which meant any table placed along that wall needed to be under 30 inches tall to keep the natural light from being blocked. That single constraint shaped the entire design. We also mapped every outlet location because we knew we would need easy access to power for cutting machines, a heat press, and a task light.
Once you understand your space constraints, think through your workflow. Where do you bring materials in? Where do finished projects go? How do you move around the table when working on a large project? We discovered through this exercise that we wanted the table positioned in the center of the room rather than against a wall, which meant we needed finished edges and attractive storage on all four sides. This insight completely changed the design from a simple wall-mounted shelf table to a freestanding island-style piece.
Sketching Your Design and Creating a Cut List
With your measurements in hand, begin sketching your design on graph paper or in a simple design application. We used free graph paper and a ruler, keeping the sketch to scale at one square per inch. Draw multiple views — top, front, and side — so you can visualize every component. At this stage, decide on the number and placement of drawers, shelves, and any special features like a cutting mat inset, a pegboard back panel, or a lip to keep tools from rolling off the edge.
From your completed sketch, generate a detailed cut list. A cut list is simply a written inventory of every piece of wood you need, with its exact dimensions, the material it should be made from, and how many of that piece you require. Being systematic here prevents costly mistakes at the lumber yard and helps you calculate your total material needs accurately. We organized our cut list by material type — plywood panels, solid wood boards, and hardwood edging — which made the shopping trip much more efficient.
Review your cut list against your sketch at least twice, checking that every component has been accounted for. It helps to walk through the assembly in your head as you review: here is the tabletop, sitting on these four legs, connected by these apron boards, with these drawer frames sitting inside this frame. If any component is missing from your list, you will catch it now rather than mid-build. We found one missing cross-support piece during this review that would have been genuinely problematic to add after assembly had begun.

Selecting Materials for Durability and Beauty
Material selection for a craft table involves balancing durability, workability, cost, and aesthetics. The tabletop in particular deserves careful thought because it will take the most abuse — cutting, gluing, painting, pressing with irons, and bearing the weight of heavy bins and equipment. We chose a three-quarter-inch birch plywood for the main tabletop substrate, then covered it with a replaceable sheet of hardboard cut to size. This combination gives us a flat, strong, smooth surface that can be flipped or replaced when it becomes too marked up to use comfortably.
For the base structure — the legs, aprons, and drawer frames — we selected poplar, a hardwood that is relatively affordable, machines cleanly, takes paint beautifully, and is strong enough for furniture applications. If you prefer a natural wood finish, maple or oak would be better choices because they display attractive grain patterns when stained or oiled. Poplar’s grain is somewhat bland but perfectly suited to painted finishes, which aligned with our plan to paint the base a warm white and let the natural birch top provide the warm wood tone.
For the drawer boxes, we used half-inch Baltic birch plywood, which is exceptionally strong for its thickness and looks clean with a simple clear coat finish. The drawer faces, which are the visible fronts that define the aesthetic of the piece, were cut from a single sheet of three-quarter-inch birch plywood so the grain pattern would be continuous across the entire front of the table. This is a detail borrowed from fine cabinetry that adds a visual sophistication far beyond what the material cost would suggest.
Hardware, Fasteners, and Finishing Supplies
The hardware you choose can make or break both the functionality and the visual polish of a furniture piece. For drawer slides, invest in full-extension soft-close slides rather than the cheaper partial-extension versions. Full-extension slides allow you to access the entire depth of the drawer, which is critical in a craft table where you need to reach items at the back. Soft-close mechanisms prevent the jarring slam that can knock supplies off the tabletop and, over time, loosen joints in the drawer box.
We selected simple brushed brass cup pulls for the drawers and matching bin pulls for the lower cabinet doors. Brass hardware against white paint with a natural birch top creates a warm, slightly vintage aesthetic that feels both functional and beautiful. Hardware is relatively inexpensive compared to lumber, so this is not the place to cut costs. Upgrading from the cheapest option to the mid-range option typically costs only a few dollars per piece but produces a dramatically more finished result.
For fasteners, we used a combination of wood glue, pocket hole screws, and finish nails. A pocket hole jig is one of the most valuable tools for furniture beginners because it creates strong, hidden joints without requiring the skill or equipment of traditional joinery. We also kept a selection of wood filler, sandpaper in grits from 80 through 220, and a high-quality primer and paint on hand. The finishing process takes almost as long as the construction phase and should never be rushed if you want a professional result.
The Construction Process Step by Step
We began construction on a Saturday morning with all materials precut and organized in the garage. Having every component labeled and stacked before assembly begins is a practice borrowed from professional cabinet shops, and it makes the build feel controlled and efficient rather than chaotic. Each piece was labeled with painter’s tape noting its position in the final assembly — left side panel, right side panel, top drawer rail, and so on. This simple step prevented confusion during a complex assembly sequence.
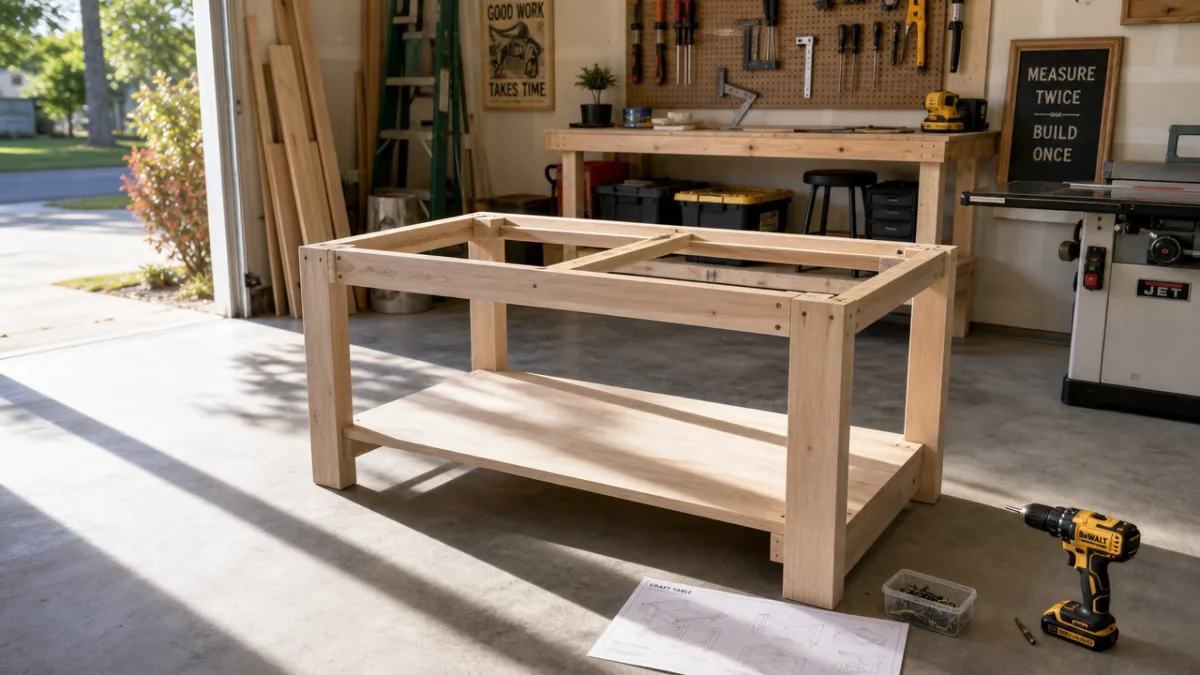
The base frame went together first, with the four legs connected by the apron boards using pocket hole screws and glue. We clamped each joint tightly and allowed the glue to set for thirty minutes before moving to the next joint. Patience during glue-up is one of those disciplines that separates furniture that lasts decades from furniture that wobbles and loosens within a few years. A rushed glue-up that does not cure fully before stress is applied is structurally compromised from the very beginning.
With the base frame complete and square — always check for square by measuring diagonally corner to corner, and adjust until both measurements match — we installed the drawer frames. Each frame was built as a separate unit and then slid into its opening in the base, fastened with screws from inside the frame. This modular approach made it easy to ensure every drawer opening was perfectly square before installation, rather than having to correct errors in the context of the larger assembly.
Installing Drawers and Adding the Tabletop
Drawer installation is the step that most beginners approach with anxiety, and it does require careful attention, but the process is straightforward when taken one step at a time. Begin by installing the drawer slides in the opening according to the manufacturer’s instructions, using a spacer to ensure consistent height. Then install the corresponding slide hardware on the drawer box. Slide the drawer box in partially and check for smooth operation before pushing it fully closed. Adjust the height or side position as needed before fully fastening the slides.
We installed eight drawers in total, ranging from shallow drawers for stamps and punches to deep drawers for bulky supplies like ribbon spools and interfacing. Each drawer was tested for smooth operation before we moved on, and we adjusted several of them using the small adjustment screws built into the soft-close slide mechanism. The process took most of Sunday morning, but the result — eight perfectly gliding, silently closing drawers — felt enormously satisfying.
The tabletop installation was the final major structural step, and in some ways the most gratifying. We attached the plywood tabletop to the base using figure-eight fasteners recessed into the apron boards, which allow the wood to expand and contract seasonally without cracking. The hardboard work surface was then laid on top and secured with a few dabs of construction adhesive around the perimeter, allowing it to be pried off and replaced when worn. Seeing the tabletop drop into place and suddenly transform the collection of parts into a recognizable piece of furniture was genuinely thrilling.
Finishing, Painting, and Sealing the Surface
The finishing phase began with thorough sanding of every surface. We started with 80-grit paper to knock down any mill marks or planer ridges in the poplar, then worked progressively through 120, 150, and 220 grit. Between each grit, we wiped down every surface with a tack cloth to remove dust. This progressive sanding process creates a surface that accepts primer and paint uniformly, resulting in a finish that looks smooth even under close inspection and direct light.
We applied two coats of a high-quality shellac-based primer to the painted components, sanding lightly with 220-grit between coats. Primer is the foundation of a durable paint finish on wood, and skipping it or using a cheap product will show up in the final result as uneven sheen, poor adhesion, or a finish that chips at the first brush of a tool. After priming, we applied three coats of a satin cabinet paint in warm white, again sanding lightly between coats with a fine 320-grit paper. The result was a smooth, durable finish with excellent washability.
The birch plywood components — the tabletop substrate, the drawer boxes, and the drawer faces — received a different treatment. We applied two coats of a water-based polyurethane in a satin finish, which enhances the natural warm tone of the birch while providing excellent resistance to moisture, glue, and the general abuse a craft table endures. Water-based polyurethane dries quickly, has minimal odor compared to oil-based options, and cleans up with soap and water, making it the practical choice for indoor furniture projects.
Adding Organizational Features and Finishing Touches
With the structural build and finishing complete, we turned our attention to the organizational features that would make the table truly functional as a craft workspace. We added a pegboard panel to one end of the table using a simple frame that held it a half-inch away from the table surface, creating space for pegboard hooks. This end panel provides hanging storage for scissors, rulers, and frequently used tools, keeping them visible and accessible without occupying drawer space.
We also installed a power strip along the inside of one apron, routing the cord down through a hole in the apron to a wall outlet behind the table. This gives us four easily accessible outlets at tabletop height for the cutting machine, iron, and task light, without any cords trailing across the floor. Small organizational details like this — thought through during the planning phase and executed during the build — are what separate a functional workspace from a merely decorative one.
The final touches included adding felt drawer liners in the shallow supply drawers, installing small label holders on each drawer front, and placing non-slip furniture pads under each leg to protect the floor and prevent the table from shifting during enthusiastic cutting sessions. We also added a small bead of color-matched caulk along the joint between the tabletop and the apron to seal out any debris and give the junction a clean, finished appearance. These details take perhaps two additional hours but they elevate the entire project from a homemade piece to something that looks genuinely professional.

Setting Up Your New Craft Table for Maximum Productivity
Once the table was in place and the hardware installed, we spent an afternoon thoughtfully organizing every supply category into its new home. This setup process is not just unpacking — it is an opportunity to audit your supplies, discard what is outdated or unused, and make intentional decisions about where each category of supply should live based on frequency of use and workflow logic. Supplies you reach for every session should be in the most accessible drawers at the most comfortable height. Rarely used supplies can go in less convenient locations.
We organized the drawers in a roughly priority-based system, placing the most frequently accessed supplies in the drawers at the front of the table at a standing-comfortable height. Cutting tools, measuring implements, and the supplies specific to current projects occupy these prime positions. Seasonal supplies, large-quantity backstock, and specialty tools used only for specific project types live in the deeper lower drawers or on the shelves below the main work surface. This intentional organization makes the table genuinely faster to work at because the supplies you need are always exactly where you expect them.
Labeling every storage location is the final and arguably most important organizational step. When supplies have a labeled home, you know where to return them after use, which means the table stays organized over time rather than gradually reverting to chaos. We used a label maker to create clean, consistent labels for every drawer and every shelf section. The small investment of time in labeling pays compound returns over the lifetime of the table because it builds the habit of proper storage into every craft session from the very beginning.
Maintaining Your Craft Table Over Time
A well-built craft table will last for years, but some basic maintenance practices will keep it functioning beautifully. The hardboard work surface should be inspected periodically and replaced when it becomes too marked or stained to provide a clean cutting surface. Replacement hardboard sheets can be cut to size at any home improvement store for just a few dollars, making this an economical renewable surface. We plan to replace ours roughly once a year depending on how heavily it is used.
The drawer slides benefit from an occasional application of a dry lubricant spray, particularly if the table is in a humid environment where wood swelling can cause slides to feel stiff. The painted surfaces can be cleaned with a damp cloth and mild soap; avoid abrasive cleaners that will scratch the paint finish. If chips or scratches appear in the painted surface, touch them up promptly with a small brush and the original paint color before they spread or allow moisture to penetrate the wood beneath.
Perhaps the most important maintenance practice is keeping the table organized. The beautiful storage system only remains functional if supplies are returned to their labeled homes consistently. Building the habit of a five-minute end-of-session tidy into your crafting routine ensures that every time you sit down to create, your workspace is ready for you. A tidy, well-maintained craft table is not just a practical asset — it is a daily reminder that your creative life is worth the investment of care and attention.








What do you think?
It is nice to know your opinion. Leave a comment.