










How to Make Handmade Paper: A Quick, Cozy Style Discovery
The Art of Handmade Paper: A Timeless Craft Reimagined
There’s something genuinely magical about making paper with your own hands. Long before factories existed, papermaking was a cherished craft passed down through generations of artisans across Asia, Europe, and the Middle East. These days, it’s having a real moment — crafters, artists, and curious homebodies are rediscovering it as a way to slow down and make something tangible and beautiful. Handmade paper has a warmth and character that no commercial sheet can touch, which is exactly why people love using it for journals, greeting cards, artwork, and home décor.
What makes papermaking such a good fit right now is how naturally it slots into that cozy, slow-living lifestyle so many of us are leaning into. Candlelight, a warm mug of tea, soft textures, your hands busy with something meaningful — papermaking checks every single one of those boxes. The process is unhurried by nature. It asks you to actually pay attention rather than rush, and there’s something genuinely restorative about that. It’s the kind of afternoon activity that leaves you feeling calmer than when you started.
Whether you’ve been crafting for years or you’re just getting curious, handmade papermaking is way more accessible than it looks. You don’t need a fancy studio or pricey equipment. Honestly, most of what you need is probably already around your house, and anything else is easy to find at a local craft store. This guide will walk you through the whole process, from pulling your materials together to lifting that first gorgeous, dripping sheet off the mold.
Gathering Your Materials: What You Need to Get Started
Before you get your hands wet, you’ll want to gather a few supplies. The list is short, affordable, and very beginner-friendly. The most essential piece of equipment is a mold and deckle — basically two frames, one with a fine mesh screen stretched across it and one without, that work together to form individual sheets of paper. You can pick one up at a craft store, or if you’re feeling handy, you can build your own from wooden frames and window screen mesh, which is a satisfying little project on its own.
You’ll also need a large plastic tub or basin — something deep enough to fully submerge your frame. This is where your pulp lives while you’re pulling sheets, so bigger is better. You’ll need a blender or food processor too, but keep it dedicated to craft use only, since you’ll be blending paper pulp in it and you definitely don’t want that doubling as your smoothie maker. Round out your setup with some old towels or felt sheets (these are your couching cloths), a sponge, a rolling pin or brayer, and a flat board for drying your finished sheets.
One of the most fun parts of papermaking is how many different materials you can use as your fiber source. For beginners, recycled paper scraps are the perfect starting point — old newspapers, egg cartons, junk mail, tissue paper, or used wrapping paper all work beautifully, and each one gives your finished sheet a slightly different texture and color. That variety makes experimenting endlessly interesting. Once you’re more comfortable, you can start exploring natural plant fibers like cotton linter, flax, hemp, or abaca — even iris leaves and corn husks — each one lending its own organic, earthy quality to the paper.
Preparing Your Paper Pulp: The Foundation of Every Sheet
Getting your pulp right is probably the most important step in the whole process, because the quality of your pulp directly shapes how your finished paper looks, feels, and holds together. Start by tearing your paper materials into small pieces, roughly one to two inches across. Smaller pieces blend more easily and give you a smoother pulp, while slightly larger ones can create some nice texture if that’s the look you’re after. Soak everything in warm water for at least thirty minutes — overnight is even better — to really soften up the fibers before blending.
Once your paper scraps are thoroughly soaked, transfer them to your blender in small batches with plenty of water. A good starting ratio is about one cup of soaked paper to three or four cups of water. Blend on medium for thirty to sixty seconds until you’ve got a smooth, even slurry with no visible clumps. The result — called pulp or slush — should have the consistency of watery oatmeal or a very thin smoothie. Blend in short bursts if your blender is struggling, and don’t overfill the jar. Repeat until all your paper is blended.
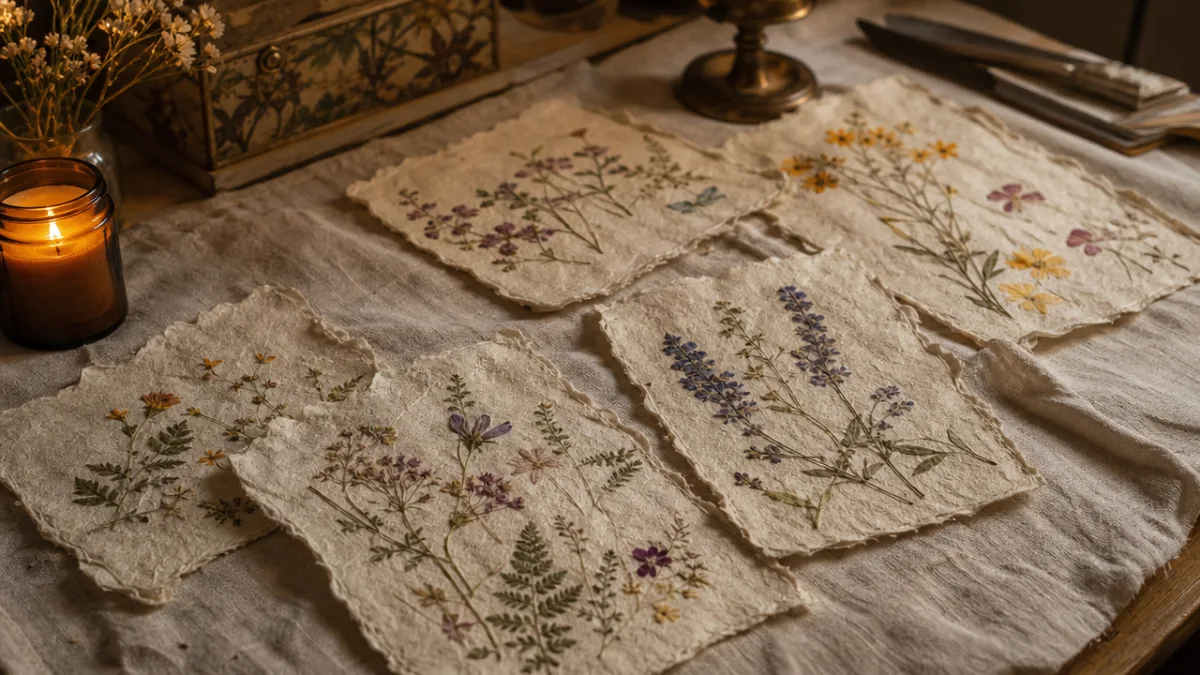
Pour all your blended batches into the large tub and add water until it’s about two-thirds full, then stir everything together well so the fibers are evenly distributed. This is also the moment to get creative with embellishments. Toss in dried flower petals, a sprig of lavender or rosemary, small bits of colored thread, tea leaves, or a pinch of glitter. These additions get suspended in the pulp and become permanently embedded in your paper as it forms, and the results are honestly stunning — every sheet becomes something totally one-of-a-kind.
Pulling Your First Sheet: The Magic Moment
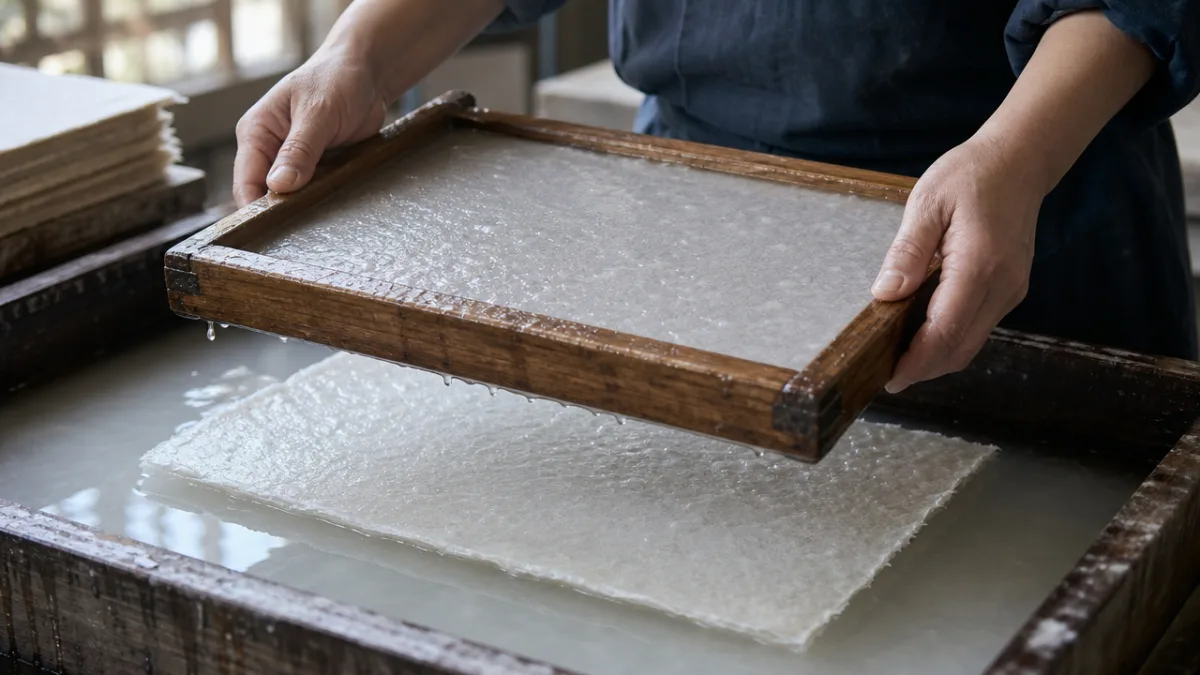
Here’s the part everyone gets excited about — pulling your first actual sheet of paper. Hold your mold and deckle firmly together with the mesh side facing up and the deckle resting on top to form a framed window. Tilt the frames at about a forty-five degree angle, insert them into the far end of the vat, then level them out as you scoop upward in one smooth, confident motion. You’re aiming to capture an even layer of pulp fibers across the whole mesh surface in a single fluid sweep.
As you lift the mold and deckle out of the water, keep them level and let the excess water drain back into the vat. You’ll see a wet sheet of paper taking shape on the mesh as the water falls away — and yes, it’s every bit as satisfying as it sounds. Give the frame a gentle shake side to side and front to back to help the fibers knit together, which makes for a stronger finished sheet. This little motion is called “the shake of the hand” and it genuinely makes a difference. Hold everything level until the heavy dripping slows down, which usually takes about thirty to sixty seconds.
If your first sheet looks thin or has holes, just add more pulp to the vat and try again. Too thick and chunky? Add more water, give it a stir, and go for another pull. Every single attempt teaches you something about how much pulp to use and how to move your hands, so approach the learning curve with curiosity rather than frustration. A lot of papermakers actually love the rustic quality of their early imperfect sheets — they have a handcrafted charm that perfectly formed sheets sometimes lack.
Couching, Pressing, and Drying: Bringing Your Paper to Life
Once you’ve pulled a sheet, the next step is couching — transferring that wet paper from the mesh onto an absorbent surface. Lay one of your couching cloths or felt sheets on a firm, flat surface and dampen it lightly. Position the mold at the edge of the cloth, mesh side down, and roll it forward in one smooth press, applying gentle, even pressure as you go. This transfers the delicate wet sheet from the mesh to the cloth without tearing it. Lift the frame away carefully and your paper should be resting right there on the cloth.
Once the sheet is couched, lay another damp cloth on top and press down firmly with a sponge to draw out as much water as you can. This step really matters — it compacts the fibers and dramatically speeds up drying. After sponging, place a wooden board on top and apply steady pressure. Sitting or even standing on it works great. The more water you get out now, the faster and more evenly the paper will dry, and the flatter and smoother your finished sheet will be.
For drying, you’ve got a few good options depending on your timeline and the finish you want. For a flat, smooth sheet, carefully peel the paper from the couching cloth while it’s still slightly damp and smooth it against a clean board or window, then let it air dry completely. For a more textured, organic look, just leave it on the cloth and let it dry naturally on a flat surface — this can take anywhere from a few hours to a full day depending on humidity. A hair dryer on a low heat setting can speed things up nicely if you hold the sheet flat while you work.
Creative Uses and Cozy Style Inspirations for Your Handmade Paper
Once you’ve got a collection of beautiful sheets drying around your workspace, the possibilities really are endless. Handmade paper has a warmth and personality that fits so naturally into a cozy, intentional home aesthetic. One of the most popular things to make is greeting cards and gift tags — the kind that people actually keep long after the occasion is over. Because every sheet is unique, every card you make tells its own little story. No store-bought card can come close to that.
Journaling and bookbinding are two other wonderful ways to use what you make. You can fold and stitch your sheets into simple pamphlet-style notebooks, or get a little more ambitious with hardcover journals using basic bookbinding techniques (there are tons of great tutorials online). There’s something really grounding about writing your daily thoughts on paper you made yourself — it feels both humble and luxurious at the same time. Handmade paper also makes incredibly beautiful wrapping paper, especially layered with dried flowers, twine, and a handwritten tag for that aesthetic that never gets old.
Beyond practical uses, handmade paper is just plain gorgeous on its own. Sheets embedded with botanical inclusions look breathtaking in a window frame where light can filter through them, picking out every petal and fiber — it’s genuinely like stained glass made from plants. You can also use your paper as a background for watercolor painting, calligraphy, or pressed flower art. The texture alone elevates whatever you put on it, making even the simplest marks feel more intentional and considered.
If you want to share the joy of it, consider hosting a small papermaking afternoon with friends. Set up a simple station with a vat, a mold and deckle, and a few pulp options alongside little bowls of dried flowers, spices, and thread. Add warm drinks, some background music, and a relaxed pace, and you’ve got the ingredients for an afternoon people will genuinely remember. There’s something about that first sheet-pull moment that lights people up, and getting to watch your friends experience it for the first time is one of the best things about this craft.
Tips, Troubleshooting, and Growing Your Practice
Like any craft, papermaking has its learning curve, and there are a handful of issues that come up pretty consistently for beginners. Uneven sheets with thin spots or holes are probably the most common — this usually means there wasn’t quite enough pulp in the vat, or the mold moved unevenly during the pull. The fix is simple: add more pulp, stir thoroughly before each pull, and keep practicing your scooping motion until it feels natural and fluid. Slowing down and being deliberate really helps while you’re getting the hang of it.
Tearing during couching or peeling is another one you’ll likely run into. This usually means the fibers haven’t bonded well enough, or the sheet is just a bit too thin and fragile. Try blending your pulp a little longer to encourage better fiber formation, and make sure you’re pressing out enough water before you try to move or peel the sheet. Patience genuinely is the secret ingredient here — give your sheets the time they need to drain and firm up, and most tearing problems will sort themselves out.
As you get more comfortable with the basics, there are so many interesting directions you can take your practice. Here are some ideas for expanding your papermaking skills and creativity:
- Experiment with natural dyes like turmeric, beet juice, or a strong brew of tea added directly to your pulp vat for beautifully colored sheets without any synthetic pigments.
- Try layering two different colored pulps on the same sheet to create gradient or marbled effects — the results are genuinely stunning and no two sheets ever look the same.
- Explore plant fiber papermaking using processed cotton linter, kozo, or gampi for papers with exceptional strength, a lovely translucency, and a refined quality that really stands out.
- Cut custom deckles from cardboard or foam to create shaped papers — hearts, circles, and other decorative forms are a fun way to make your work feel more intentional and personal.
- Look into the Japanese washi-making tradition for inspiration and technique — it’s one of the most refined and beautiful papermaking traditions in the world and a wonderful rabbit hole to fall down.
The thing to hold onto as you develop your practice is this: every sheet you make is a small act of creation. In a world full of mass-produced everything and digital noise, taking water, fiber, and a little bit of your attention and turning it into something beautiful is quietly radical. Whether you make one sheet a month or you end up converting your entire spare room into a papermaking studio, this craft will keep rewarding your curiosity and patience in ways you probably won’t expect. Welcome to something really, truly wonderful.








What do you think?
It is nice to know your opinion. Leave a comment.