










DIY Origami Bear Craft Projects: A Complete Guide to Folding Your Own Paper Bears
The Art and History of Origami Bears
Origami, the ancient Japanese art of paper folding, has captivated creative minds for centuries. While the traditional crane remains the most iconic origami figure, the origami bear has carved out its own beloved niche in the paper-folding world. Bears hold deep cultural significance across many traditions, representing strength, warmth, and companionship, which makes them a particularly meaningful subject for this meditative craft. The combination of geometric precision and expressive results is what draws so many people to folding paper bears in particular.
The history of paper folding in Japan dates back to the 6th century, when Buddhist monks introduced paper to the country. Over time, the practice evolved from ceremonial use into a rich artistic tradition. Animals were among the earliest and most popular subjects, as they allowed folders to explore the relationship between flat material and three-dimensional form. Bears, with their rounded bodies and distinctive ears, present a wonderful folding challenge because the folder must suggest softness and organic curvature using only crisp, angular folds.
Today, origami bears appear in an enormous variety of styles, from simple models suitable for young children to incredibly complex diagrams that challenge seasoned folders with decades of experience. Whether you are drawn to a cute, minimalist bear face suitable for a greeting card or a full-bodied three-dimensional bear that can stand on its own, there is a pattern perfectly matched to your skill level and creative vision. This diversity is part of what makes the origami bear such an enduring and rewarding project.
Why Bears Make Perfect Origami Subjects
Bears occupy a special place in the origami world for several reasons beyond mere popularity. Their body structure, with a compact torso, four sturdy legs, rounded ears, and a distinctive snout, translates remarkably well into origami geometry. Each of these features can be suggested through specific folding techniques such as reverse folds, squash folds, and petal folds, giving even beginner-friendly models a convincing sense of character. The result is a figure that is immediately recognizable and genuinely delightful to create and display.
From an educational standpoint, origami bears serve as excellent teaching tools. When introducing children or beginners to paper folding, a simple bear face model provides early success that builds confidence while quietly teaching foundational concepts like valley folds and mountain folds. As students progress, more complex bear models introduce advanced techniques in a context that remains emotionally engaging because the end result is something charming and appealing. This motivational quality keeps learners returning to the craft and pushing their skills forward.
Essential Materials and Paper Selection
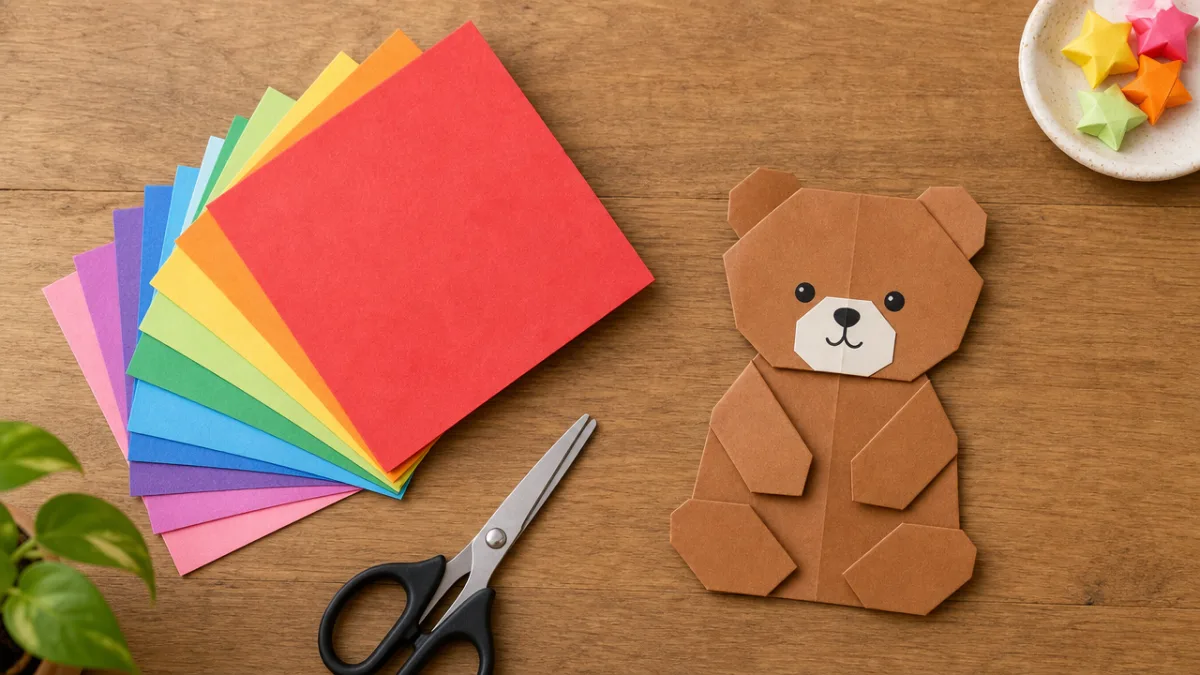
Choosing the right paper is one of the most important decisions you will make before beginning any origami bear project. Traditional origami paper, known as kami, is thin, crisp, and available in a wonderful array of colors and patterns. It folds cleanly and holds creases well, making it ideal for most bear projects. Kami is typically available in squares ranging from 6 centimeters to 35 centimeters, and the size you choose should reflect the complexity of your chosen design and the level of detail you want to achieve in the finished figure.
For more advanced or display-quality bears, many folders prefer washi paper or tissue-foil, which is made by laminating tissue paper to aluminum foil. These specialty papers allow for extremely precise shaping and hold complex three-dimensional forms far more effectively than standard kami. Washi paper also carries beautiful textures and patterns that can add a layer of visual interest to your finished bear, making each piece feel truly unique. The slightly heavier weight of washi can also make structural elements like legs and ears easier to shape and position.
Standard printer paper, while not ideal, can work perfectly well for practice sessions and learning new folds. It is thicker than kami and can become bulky in areas requiring many layers, but its ready availability makes it excellent for working through a new pattern before committing to nicer materials. Craft stores and online retailers also carry specialty origami paper packs themed around animals, often featuring brown, tan, and cream tones that are especially well-suited to creating realistic or stylized bears. Having a variety of paper weights and sizes on hand gives you the flexibility to experiment freely.
Tools and Workspace Setup
While origami is famously a tool-free craft, a few simple accessories can significantly improve the quality and enjoyment of your folding sessions. A bone folder, a small smooth tool traditionally made from bone or plastic, allows you to score and burnish creases to a crisp, precise edge that fingers alone cannot always achieve. Sharp, clean creases are the foundation of beautiful origami, and investing in a bone folder is one of the best decisions a serious folder can make. Even a simple ruler used as a folding guide can make a noticeable difference in the accuracy of your angles.
Your workspace matters more than most people realize when it comes to origami. A clean, flat, hard surface is essential because working on soft or uneven surfaces introduces subtle distortions into your folds that accumulate as the model grows more complex. Good lighting is also important, as you need to clearly see fold lines and alignment points, especially when working with darker papers. Many experienced folders keep a dedicated craft table with good overhead lighting specifically for their origami practice, treating it as the intentional, focused activity it truly is.
Step-by-Step Guide to a Simple Origami Bear Face
The origami bear face is the perfect starting point for anyone new to folding bears. It requires only a single square of paper and can be completed in under ten minutes, yet it produces a charming, expressive result that works beautifully as a card decoration, gift tag, or standalone display piece. Before beginning, take a moment to pre-crease your paper by folding it in half both diagonally and vertically, then unfolding, so that you have a set of reference lines to guide your subsequent folds. These pre-creases make aligning later steps significantly easier.
Begin by placing your square of paper colored-side down on your work surface. Fold the paper in half diagonally to form a triangle, with the point facing upward. This triangle forms the basic shape from which the bear face will emerge. Next, fold the two upper corners downward and slightly outward to form the ears, making sure to position them symmetrically and at an angle that suggests the rounded ears of a bear rather than the pointed ears of a cat or fox. The precise angle and size of these ear folds are what give your bear its personality, so take your time here and adjust until you are satisfied.
Fold the bottom corner of the triangle upward slightly to create the chin, and then fold the very tip of the bottom back down a small amount to form the snout area. Flip the model over and use a pencil or fine marker to draw in the eyes and nose. You can add a small dot for each eye and a rounded triangle for the nose, or use stickers and stamps for a more decorative effect. The finished bear face is wonderfully expressive and can be customized endlessly through paper color, pattern, and the details you add to the face. Brown and tan papers create naturalistic bears, while bright colors produce playful, whimsical results.
Common Mistakes and How to Avoid Them
One of the most frequent issues beginners encounter when folding bear faces is asymmetry, where one ear sits higher or at a different angle than the other. This almost always stems from rushing through the ear folds without carefully measuring and aligning each side. A helpful technique is to fold both ear flaps simultaneously, holding them together to check that they mirror each other perfectly before creasing firmly. If you fold one at a time, always compare the second to the first before committing to the crease. Taking an extra thirty seconds at this stage prevents a lopsided result that is difficult to correct later.
Another common mistake is using paper that is too small for a first attempt. Working with squares smaller than 15 centimeters makes alignment and precision much more challenging and can lead to frustration that discourages continued practice. Starting with 20- or 25-centimeter squares gives you much more room to work and makes each fold easier to see and execute accurately. As your skills develop and your muscle memory for the pattern improves, you can progressively work with smaller paper for more delicate, refined results.

Intermediate and Advanced Origami Bear Projects
Once you have mastered the basic bear face, a whole world of more complex and rewarding projects opens up. The full-body sitting bear is a natural next step, as it builds on many of the same foundational folds while introducing techniques for creating a three-dimensional form with legs, a body, and a head that all connect as one cohesive figure. This model typically requires a larger sheet of paper, at least 25 centimeters square, and will take anywhere from 20 to 45 minutes for someone with intermediate folding experience. The satisfaction of completing your first standing bear figure is genuinely memorable.
More advanced projects include the modular origami bear, which involves folding multiple individual units and assembling them together to create a figure with more realistic proportions and greater structural integrity. These modular designs often allow for customization, letting you adjust the size of the body, the length of the legs, or even add accessories like a small origami bow or honey pot alongside your bear. While the individual units are often simple folds, assembling them requires patience and a good understanding of how the pieces interlock, making this an excellent project for intermediate folders looking to challenge themselves.
At the advanced end of the spectrum, complex origami bears designed by masters like Hideo Komatsu or Roman Diaz can take hours to complete and require paper with exceptional folding properties. These designs feature realistic textures, articulated limbs, and extraordinary detail in the face and fur suggestion. Following diagrams for these complex models is a profound exercise in patience, spatial reasoning, and fine motor precision. Many advanced folders consider a beautifully executed complex bear to be among the most rewarding achievements in the origami craft, comparable to completing a challenging musical piece or finishing an intricate painting.
Creative Variations and Personalization Ideas
One of the most exciting aspects of origami bears is the enormous range of creative variations you can explore once you have the basic techniques in hand. Consider folding a family of bears in graduated sizes to create a sweet display grouping, or fold bears in unexpected colors and patterns to create fantastical versions that exist outside the natural world. Metallic papers produce bears with a shimmering, jewel-like quality that makes them perfect as ornaments or decorative accents for special occasions. Patterned papers featuring florals, geometric prints, or seasonal motifs add another layer of visual storytelling to each figure.
You can also integrate your origami bears into larger craft projects. Attach small bear faces to hand-written cards or thank-you notes for a personal touch that recipients are sure to treasure. Create a mobile by suspending several bears of different sizes from a wooden dowel using fine thread, making a charming nursery or bedroom decoration. Bears can also be displayed inside small glass domes or shadow boxes, turning each finished figure into a miniature work of art that deserves its own showcase. Combining origami with other crafts like watercolor, journaling, or photography opens up even more creative possibilities.
Sharing, Gifting, and Building a Creative Practice
Origami bears make genuinely wonderful gifts because each one represents time, attention, and care invested by the maker. Unlike mass-produced gifts, a handfolded bear carries a personal quality that is immediately felt by the recipient. For maximum impact, consider pairing your origami bear with a handwritten note explaining which paper you chose and why, or describing what the bear symbolizes for you in the context of your relationship with the recipient. This kind of intentional gifting transforms a small paper figure into something genuinely meaningful and memorable that many people keep for years.
Social media platforms like Pinterest and Instagram have created vibrant communities of origami enthusiasts who share photos, tutorials, and inspiration with one another. Participating in these communities is a wonderful way to accelerate your learning, discover new designers and patterns, and find motivation during periods when your own practice feels stuck or repetitive. Many folders document their progress over months and years, creating a visual record of skill development that is deeply satisfying to look back on. Sharing your work, even imperfect early attempts, contributes to a generous and encouraging creative community that welcomes folders at every level.
Building a sustainable origami practice means approaching the craft with patience and curiosity rather than fixating on immediate results. Dedicate short, regular sessions to folding rather than occasional marathon attempts, as consistent practice builds muscle memory and spatial intuition far more effectively than sporadic bursts of effort. Keep a collection of your finished bears, even the imperfect ones, as tangible evidence of your growth. Over time you will develop not just technical skill but a genuine personal aesthetic, a sense of which papers you love, which models resonate with you, and which techniques feel most natural in your hands.

Resources for Continuing Your Origami Journey
The internet has made origami learning more accessible than ever before, with thousands of free video tutorials, downloadable diagrams, and active community forums available to anyone with a connection. YouTube channels dedicated entirely to origami offer step-by-step video instruction that allows you to pause, rewind, and watch tricky steps as many times as needed. For those who prefer written instructions, the British Origami Society and Origami USA both maintain extensive libraries of diagrams, and their websites are excellent starting points for finding new bear patterns sorted by difficulty level.
Books remain invaluable resources for serious origami enthusiasts. Titles such as Origami Animals by Robert Harbin, Works of Satoshi Kamiya, and numerous volumes by John Montroll provide richly illustrated diagrams and design theory that deepen your understanding of the craft beyond what any single tutorial can offer. Owning a library of origami books also gives you the pleasure of browsing at leisure, discovering models you might never have searched for online, and developing a broader perspective on the range and depth of origami as an art form. Many folders report that books sparked entirely new directions in their practice that changed their relationship with the craft profoundly.
Local origami clubs and workshops offer the unique benefit of learning alongside others in person, where an experienced folder can immediately identify and correct subtle issues with your technique that are almost impossible to diagnose from a photo or video alone. Many cities host regular meetings through local chapters of national origami organizations, and craft stores frequently offer short workshops that are ideal for beginners. Attending even a single in-person session can accelerate your progress dramatically and introduce you to a community of like-minded creative people whose enthusiasm and knowledge will enrich your origami journey for years to come.








What do you think?
It is nice to know your opinion. Leave a comment.