










Easy DIY Crochet Basket Tutorial for Beginners: A Complete Step-by-Step Guide
Introduction to Crochet Baskets: Why This Project Is Perfect for Beginners
If you’re just getting into crochet and wondering what to make first, a basket might be the perfect place to start. Seriously — these things are so forgiving. Unlike a sweater or a lace doily where every stitch has to be just right, a basket can handle a little inconsistency in your tension or the occasional wonky stitch and still come out looking great. Plus, you end up with something you’ll actually use: a place to stash your yarn, organize your bathroom counter, or corral all those little kitchen odds and ends that never seem to have a home.
Another thing that makes baskets so great for beginners is how few stitches you actually need to know. The single crochet — which is usually the very first stitch anyone learns — does most of the heavy lifting here. There are no complicated stitch combinations to memorize, no tricky charts to decode. The rhythm is repetitive in the best way, which means your hands naturally get faster and more consistent the longer you work. By the time you finish your first basket, you’ll already be a noticeably better crocheter than when you started.
And the creative possibilities? Pretty wide open. You can keep it small and simple for holding jewelry, or go big enough to store a throw blanket. One color looks clean and modern; a few colors together makes something bold and fun. The basic structure scales up or down to fit whatever you have in mind, and the materials are easy to find, easy on the wallet, and genuinely pleasant to work with even when your hands are still figuring out the whole yarn-and-hook thing.
Materials You Will Need Before You Begin
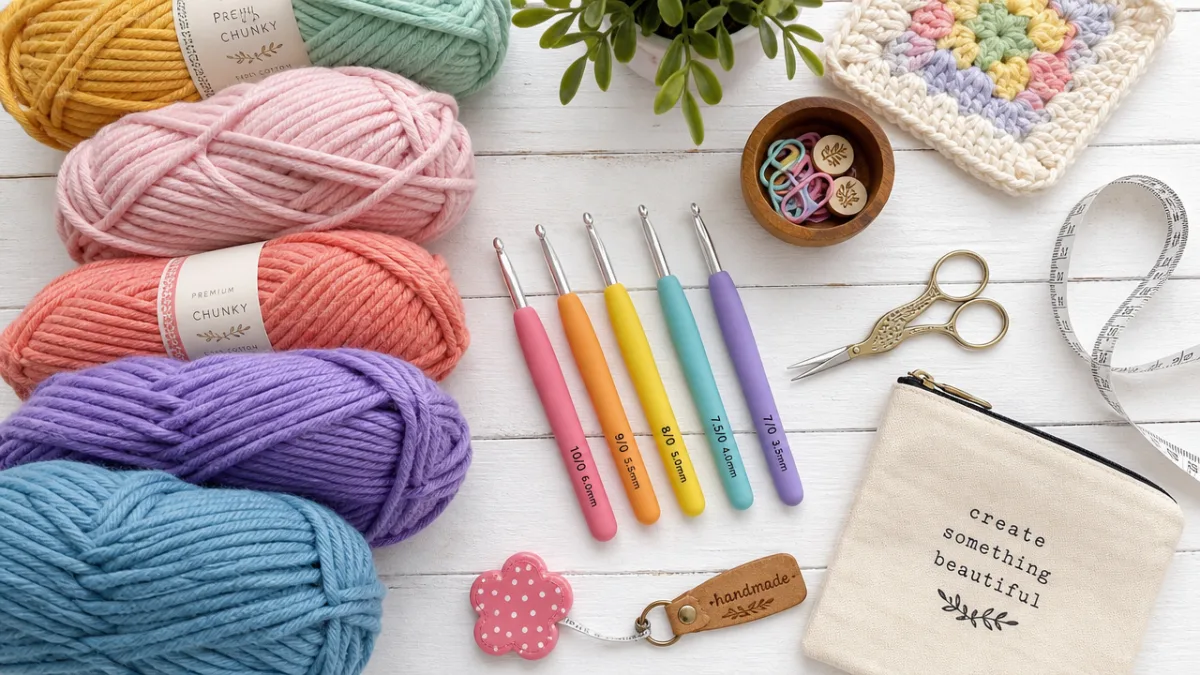
Before you dive in, take a few minutes to gather everything you need so you’re not hunting around mid-project. The most important thing is your yarn — you’ll want something thick and chunky, specifically what the yarn world calls “super bulky” or a size 6 weight. The reason you want something chunky is that thicker yarn produces a stiffer, more structured fabric, which is what keeps your basket from flopping over when you set it down. Cotton or a cotton blend is a popular choice here because it holds its shape really well and has a satisfying heft to it, but wool or acrylic works just fine too if that’s what you have on hand.
Your hook size should match your yarn — for super bulky, that’s usually somewhere between 9mm and 12mm. Here’s a little trick though: going one hook size smaller than what the yarn label recommends will give you a tighter, denser fabric, which means better structure for your basket. A lot of experienced crocheters do this deliberately, and it really does make a difference in how well the finished basket holds its shape.
Beyond yarn and hook, you’ll want a pair of scissors close by, a yarn needle (sometimes called a tapestry or darning needle) for weaving in your ends when you’re done, and a stitch marker to track where each round starts. That last one sounds like a small thing, but when you’re working in the round as a beginner, a stitch marker can save you a lot of confusion. A little plastic clip works great, but so does a safety pin or even a scrap of contrasting yarn tied into a loop.
- Super bulky weight yarn (approximately 200-300 yards depending on basket size)
- Crochet hook sized 9mm to 12mm
- Sharp scissors
- Yarn needle for weaving in ends
- Stitch marker to track round beginnings
- Measuring tape for checking dimensions as you work
Understanding the Basic Stitches and Techniques
Before you pick up your hook, it’s worth spending a couple of minutes getting familiar with the techniques this pattern uses. The first one you’ll encounter is the magic ring, also called a magic circle or adjustable ring. This is how you start the base of your basket, and the reason people love it is that it lets you begin crocheting in the round without leaving an annoying hole in the center. If it feels too fiddly at first, don’t stress — you can also chain four stitches and join them into a loop, which gets you to basically the same place.
Then there’s the single crochet, which is the main stitch you’ll be using throughout. To make one: insert your hook into the stitch, yarn over and pull up a loop so you’ve got two loops sitting on your hook, then yarn over again and pull through both of them. That’s it — one single crochet done. It makes a nice tight, dense fabric that’s perfect for something functional like a basket. If you’ve never done it before, it’s worth practicing on a little swatch first to get a feel for your tension before you start the real thing.
The other technique worth knowing ahead of time is working in continuous rounds, which is what gives crochet baskets their clean, seamless look. Instead of finishing each round with a slip stitch and a chain, you just keep going in a spiral. This is exactly where your stitch marker earns its keep — pop it into the first stitch of each round so you always know where you are. A lot of beginners actually find this method easier than working in joined rounds once they get used to following the marker, because there’s no stopping and starting, just a steady, satisfying spiral working its way upward.
Step-by-Step Instructions for Crocheting Your Basket
Start by making a magic ring and working six single crochet stitches into it. Pull the tail snug to close up the center completely, then clip your stitch marker into that first stitch. Those six stitches are the very heart of your basket’s base — everything else grows outward from here in a circle, so it’s worth making sure they’re firm and even before moving on.
In round two, work two single crochet stitches into each of those six stitches, bringing your total up to twelve. For round three, alternate between increasing (two stitches into one) and working a regular stitch, going all the way around for eighteen stitches total. Keep building from there — each round, you’ll add six more stitches by spreading your increases evenly — until the base is as wide as you want it. For a medium basket that’s good for yarn or household bits and pieces, somewhere between six and eight inches across is a sweet spot.
When the base looks right, it’s time to start building up the walls. The transition from flat base to vertical sides is done by working one round of single crochet through the back loops only — that’s the loop that faces away from you as you look at your work. This creates a neat, defined fold that gives your basket that crisp, intentional-looking crease between the bottom and the sides. After that one transitional round, go back to working through both loops as normal, keep your stitch count steady with no more increases, and just keep going until the walls are as tall as you’d like. Three to five inches usually works well for most purposes.
- Create a magic ring and work 6 single crochet stitches into the ring
- Round 2: Work 2 single crochet into each stitch (12 stitches total)
- Round 3: Alternate one increase and one regular stitch around (18 stitches total)
- Continue increasing by 6 stitches per round until base reaches desired diameter
- Work one round through back loops only to create the wall fold
- Continue in single crochet without increases until walls reach desired height
- Fasten off and weave in all loose ends with your yarn needle

Adding Handles and Finishing Touches
Once your walls are at the height you want, you can add handles if you’d like — they make the basket easier to carry and give it a much more finished, intentional look. The simplest approach is to chain a loop of stitches at two points directly opposite each other along the top rim. Find your two spots, join your yarn with a slip stitch at the start of the first handle, chain about fifteen to twenty stitches (depending on how big you want the loop), skip the same number of stitches along the rim, then slip stitch back into the basket to anchor it down. Repeat on the other side.
If you want handles that can actually hold some weight without stretching, work a row of single crochet back across each chain — one stitch into each chain stitch. This gives you a double-layered handle that’s noticeably sturdier and more comfortable to grip. You can also run a slip stitch all the way around the top rim of the basket once the handles are in place, which tidies up that edge and helps it keep its shape over time.
The last step is weaving in all your loose yarn ends, which is a little tedious but really matters for how the finished basket looks and holds up. Thread each tail onto your yarn needle and weave it through several stitches on the inside of the basket, changing direction a couple of times so it locks in place, then trim the excess close to the fabric. If your basket turned out a bit floppier than you hoped, try lightly spraying it with liquid starch or a mix of water and white craft glue, then shape it with your hands while it’s still damp and let it dry completely. It’s a technique a lot of experienced crocheters swear by — it can make a handmade basket look surprisingly polished and store-bought.
Creative Variations and Ideas for Customizing Your Basket
One of the best things about making your own basket is that you can make it look exactly how you want. Color blocking is one of the easiest ways to do something visually interesting — just cut your current yarn at the start of any round and join a new color with a slip knot. You could make the base one color and the walls another, go for bold horizontal stripes, or do a gradient where you shift through shades of the same color as you work your way up toward the rim. All of these look great and they’re all achievable with the exact same basic technique.
Once you’re comfortable with plain single crochet, it’s fun to start playing with texture. The waistcoat stitch (also called the center single crochet or knit stitch) creates a surface that honestly looks like it was knitted, which gives the basket a really sophisticated feel. The half double crochet is another option — it’s a bit taller and softer than single crochet, and it’s lovely for baskets meant to hold gentle things like yarn, fabric scraps, or baby toys. Mixing up stitch textures within the same basic structure is a great way to keep building your skills while still making something you’ll actually want to use.
For embellishments, the sky’s pretty much the limit. Leather handles from a craft store swapped in for crocheted ones give an instantly modern, minimalist look that feels really polished. A crocheted flower or a little bow in a contrasting color adds charm, especially if you’re making the basket as a gift. And if you want to take it a step further, lining the inside with a circle of cork or a piece of fabric adds structure, protects whatever you’re storing in there, and transforms the whole thing from a cute craft project into something that looks genuinely boutique-worthy.

Tips for Troubleshooting Common Beginner Mistakes
Every beginner runs into a few snags along the way, and baskets are no exception. The most common one is a base that starts curling up at the edges instead of lying flat. When that happens, it almost always means your increases are too spread out — you’re not adding enough extra stitches to keep up with the growing circumference of the circle. The fix is simple: just add an extra increase or two distributed evenly around the next round, and the flatness should start to come back as you keep working outward.
The opposite problem — a base that ruffles and waves like a bowl of lettuce — means you’re increasing too fast. More stitches are being added than the fabric needs to lie smooth. If you start to see ruffling, work one or two rounds with no increases at all and let the fabric catch up. It feels counterintuitive when your goal is to make the base bigger, but it works, and your circle will straighten right back out.
Uneven tension is the other thing almost every beginner deals with, and it shows up more in a basket than in other projects because the fabric is supposed to be dense and consistent. If parts of your basket look looser or tighter than others, pay attention to how firmly you’re holding your hook and yarn — crocheting when you’re relaxed almost always produces more even results than crocheting when you’re tired or stressed. And honestly? Tension just improves with time and practice. The basket you’re making right now, lumps and all, is teaching your hands exactly what they need to know for every project after this one.
- Base curling upward: add more increases spread evenly around the next round
- Base ruffling: work one or two rounds without increases to let the fabric settle
- Uneven tension: relax your grip and practice regularly to build consistency
- Losing track of rounds: always use a stitch marker and count stitches frequently
- Floppy walls: try a smaller hook size or use starch spray after finishing
- Visible seam on walls: switch to continuous rounds instead of joined rounds
More than anything, just be patient with yourself. Crochet rewards persistence way more than any kind of innate talent, and every mistake you make is genuinely teaching you something useful about how yarn and hook work together. Your first basket probably won’t look like the perfectly styled ones you see on Pinterest — but it’ll be something you made with your own hands, and that counts for a lot. Put it somewhere you’ll see it every day, let it remind you what you’re capable of, and then pick up your hook and start the next one with a little more confidence than you had when you started this one.








What do you think?
It is nice to know your opinion. Leave a comment.