










“`html
DIY Wall Grid: The Ultimate Guide to Creating a Stylish Organizational Display
What Is a DIY Wall Grid and Why You Need One
A DIY wall grid is one of those rare home decor projects that actually manages to be beautiful and useful at the same time. At its core, it’s just a simple structure — wire mesh, wooden dowels, copper pipes, whatever you like — arranged in a grid pattern and hung on your wall. But once it’s up, you can clip photos, notes, plants, small shelves, and all kinds of other things onto it using hooks, clips, or little S-connectors. What you end up with is a display that’s always changing, always personal, and keeps the things you actually need right where you can see them.
Wall grids have gotten really popular lately, and honestly it makes a lot of sense. So many of us are working from home, living in smaller spaces, or just wanting our rooms to feel a bit more intentional and personal. A wall grid hits all of those notes — it adds texture and visual interest to a blank wall without committing to paint or wallpaper, and it works just as well in a home office as it does in a bedroom corner or a kitchen nook. Interior designers love them for exactly that reason.
The biggest argument for making your own instead of buying one? Total creative freedom. Store-bought grids tend to come in a limited range of sizes, materials, and finishes, and they can be surprisingly pricey for something so simple. When you build it yourself, every dimension, every material, every finish detail is your call. You can match your existing decor, fit an awkward wall perfectly, and keep the whole thing well under budget. Plenty of DIY wall grids come in under twenty dollars and take just an afternoon to put together.
Materials and Tools You Will Need
Getting your materials together before you start is genuinely the most important thing you can do to make this project go smoothly. The most common choice is wire mesh or hardware cloth, which you can find at pretty much any hardware store in various roll sizes and wire gauges. Thicker gauge wire gives you a chunkier, more industrial look, while finer mesh feels lighter and more delicate — great if you’re going for a Scandinavian or minimalist vibe. If you’d rather work with wood, thin dowels or strips of balsa or pine create a warmer, more organic feel that pairs really nicely with bohemian or cottage-style spaces.
For a wire mesh grid, the shopping list is short and cheap. You’ll need a piece of mesh cut to your desired size, wire cutters or heavy-duty scissors, sandpaper or a small file to knock down any sharp edges, spray paint or metallic paint in whatever color you’re going for, and some binder clips, S-hooks, or clothespins for actually hanging things. For mounting, grab wall anchors, screws, and a drill — or heavy-duty adhesive strips if you’d rather skip the drill entirely. And don’t overlook a level; it’s the difference between a grid that looks intentional and one that quietly drives you a little crazy every time you walk past it.
If you’re going the wooden route, the list shifts a bit. You’ll want thin wooden strips or dowels, wood glue, small nails or brads, a miter saw or hand saw, sandpaper in a few grits, and your finish of choice — paint, stain, or clear varnish all work well. A staple gun can really speed things up when you’re securing pieces at intersections. Whatever material you pick, having everything ready before you start saves you that annoying mid-project hardware store run and lets you just get into a rhythm and keep moving.
- Wire mesh or hardware cloth in your preferred gauge and dimensions
- Wire cutters, pliers, and work gloves for handling raw wire edges safely
- Spray paint or brush-on paint in black, white, gold, copper, or any accent color
- Mounting hardware including wall anchors, screws, and a power drill
- Decorative clips, S-hooks, clothespins, or mini binder clips for hanging items
- A measuring tape, pencil, and level for precise placement

Step-by-Step Instructions for Building Your Wall Grid
Start by figuring out where your grid is going and how big it should be. Measure the wall space, think about how it’ll relate to the furniture and decor around it, and mark the rough dimensions lightly on the wall with a pencil. Then transfer those measurements to your wire mesh or wood. Cutting wire mesh takes a little patience — use a firm, steady hand and always wear gloves, because cut wire edges are sharper than they look. Once it’s cut, run a file or sandpaper along all the edges until there are no jagged points left.
Next up is the finish. If you want that classic, clean look you see in modern apartments and studio spaces, matte black spray paint is hard to beat. If you’re going for something warmer and a little more luxe, metallic gold or copper spray paint can make basic hardware store mesh look genuinely expensive. Either way, lay the mesh flat on a protected surface somewhere with good ventilation, apply two thin coats, and let each one dry fully before you move on. Rushing this step is tempting, but it really does affect the final result — thin coats build up evenly without dripping or streaking.
Mounting is where you’ll want to slow down and be precise, but it’s not complicated. Hold the painted grid up against the wall in the position you want, use your level to confirm it’s straight, and mark the mounting points with a pencil. Drill your pilot holes, insert wall anchors, and secure the grid with small screws — decorative washers look nice here if you want a more finished look. Thread the screws through the wire squares at regular intervals around the perimeter so the weight is distributed evenly. If you’re renting or just don’t want to drill, several brands of heavy-duty removable adhesive strips can hold a lightweight wire grid just fine, as long as you stick to the manufacturer’s weight limits.
- Measure your wall space and decide on the final dimensions of your grid.
- Cut wire mesh or wooden strips to size and smooth all raw edges thoroughly.
- Apply two thin coats of spray paint and allow to dry completely between coats.
- Hold the grid against the wall, use a level to confirm alignment, and mark mounting points.
- Drill pilot holes, insert anchors, and secure the grid with screws or adhesive strips.
- Add clips, hooks, and decorative elements to complete the display.
Creative Styling Ideas for Your Wall Grid
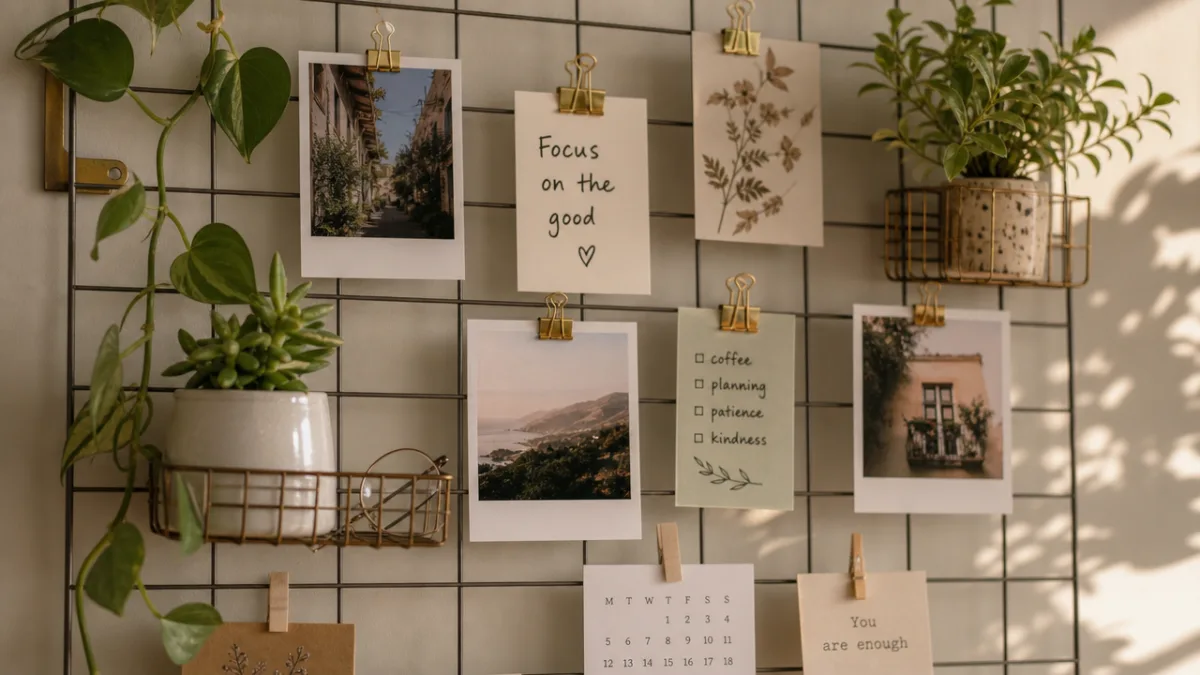
Once the grid is on the wall, the fun part starts. The approach that tends to work best — and stay interesting longest — is treating the grid like a mood board that’s always evolving. Pick a few anchor pieces to start with: maybe a small framed print, some dried botanicals, and a notepad holder. Then build around those, adding and swapping things as your needs and tastes shift. Because nothing is nailed down, you can completely change the look on a slow Sunday afternoon without any real effort or commitment.
For a home office, wall grids are pretty much unbeatable. You can clip up project notes, hang a small calendar or weekly planner, tuck in a corkboard panel for pinning important papers, and wire a simple jar into place for pens. Then break up all that functionality with things that actually make you feel good while you’re working — a postcard from somewhere you love, a print with a quote that means something to you, a little succulent in a hanging planter, or some warm fairy lights threaded through the wires. The mix of practical and personal is what makes a workspace feel like yours rather than just a desk in a room.
In a bedroom or living room, the grid leans more decorative. Layer prints and photos in different sizes, mix black-and-white images with colorful pieces for contrast, and add some texture with a small macrame hanging or a woven textile. Plants work beautifully here too — suspend small pots or air plants using wire loops or a bit of leather cord. One of the nicest things about having a wall grid is the seasonal refresh. Warm-toned prints and dried grasses in autumn, some twinkle lights and greenery in winter, fresh florals and brighter colors come spring — it’s a genuinely easy way to make your space feel alive and current throughout the year.
- Mix framed prints of different sizes for a gallery-wall effect without nails in the wall
- Hang trailing plants such as pothos or string of pearls in small clip-on pots
- Use the grid as a recipe display in the kitchen, clipping current favorites for easy reference
- Create a children’s art gallery by regularly rotating your child’s drawings and school projects
- Add small mirrors to reflect light and make the display feel more dimensional
- Incorporate natural elements like dried flowers, feathers, or small branches for texture
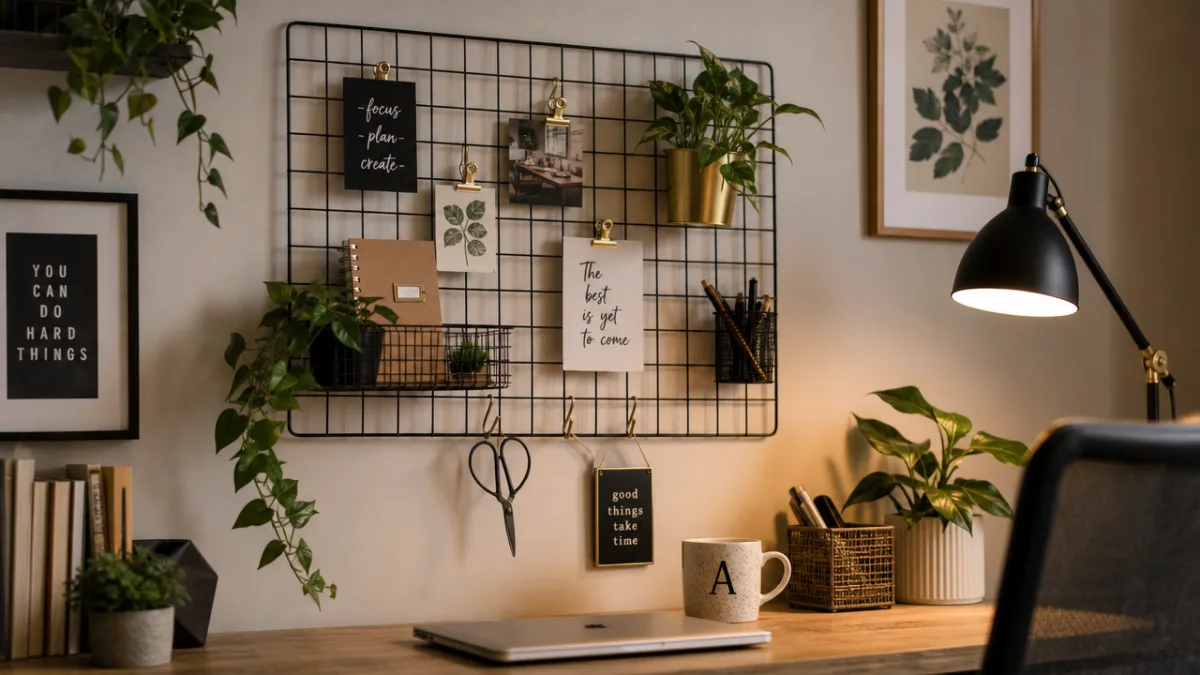
Customization and Variations on the Classic Wall Grid
Once you’ve got the basic concept down, there’s a lot of room to get creative with where you take it. The classic square wire mesh grid is really just a starting point. You could build a set of three smaller grids arranged side by side across a wide wall for something that feels bold and almost architectural. Or try cutting your mesh into a completely different shape — a large circle, a hexagon, even a loose organic outline — and framing it with thin copper tubing bent to follow the edge. That kind of detail takes a simple project and turns it into something genuinely artistic.
Switching up your materials opens up whole new directions. A wooden lattice structure painted crisp white has a cottage or Mediterranean feel that works really well in a kitchen or bathroom. Brass rod stock in place of wire mesh gives you an ultra-glamorous, high-end look that costs a fraction of what designer versions go for. Even how you mount it can become part of the design: threading a visible wooden dowel through the top row of wire and hanging it from that has a really lovely Scandinavian quality, while mounting the grid inside a vintage wooden frame gives it a contained, gallery-ready look that sits comfortably in even more traditional rooms.
The finishing options are just as interesting. Instead of a single solid color, try a gradient effect — spray one color from the top and blend a second color in toward the bottom. Specialty paints that create a verdigris or rust patina give the finished grid a beautifully aged, handmade quality. And if you prefer something cleaner and more minimal, leaving wire mesh in its natural silver or galvanized finish paired with simple black-and-white accessories creates a contemporary display that holds up really well over time. Whatever you choose, the key is thinking about the grid as part of the room rather than as a standalone object — your finish and accessory choices will land much better when they feel like they belong in the space.
Maintenance, Troubleshooting, and Keeping Your Grid Looking Its Best
One of the great things about a wall grid is how low-maintenance it is once it’s up. The main thing you’ll need to do is dust it periodically, which is easy enough with a soft cloth or the brush attachment on your vacuum. If your grid is in the kitchen where cooking grease and steam can build up, a slightly damp cloth followed by a dry one does the trick. Just avoid harsh chemical cleaners on painted surfaces — they can cause the paint to fade or peel, especially if you didn’t seal the finish with a clear topcoat after painting.
Over time, binder clips and clothespins can lose a bit of their spring tension, and they may leave small marks on paper prints. Replacing them is cheap and takes minutes, and it makes a surprising difference to how the whole display looks. If you notice any part of the grid starting to pull away from the wall, it’s worth tightening the screws or swapping out the adhesive strips before it becomes a bigger issue. For grids mounted with screws, a quick check every six months or so to make sure everything’s still snug is a simple habit that keeps things safe and looking good long term.
If you find that your original design isn’t quite working anymore — maybe the grid feels too small after you rearranged the furniture, or the color clashes after a room repaint — don’t feel locked in. Wire mesh grids can be extended by adding extra sections beside or below the original and connecting them with small wire loops or cable ties in a matching finish. A grid that started life as a home office command center can just as easily become a nursery display or a mudroom organizer — all it takes is changing what you hang on it. That flexibility is really what makes this more than just a one-time project; it’s something that can genuinely grow and change with you and your home.
One last thought: take photos of your grid at different stages and after each seasonal refresh. Having that visual archive is surprisingly useful — you’ll find yourself going back to old arrangements for inspiration — and it’s also just satisfying to see how the space and your own taste have shifted over time. If you feel like sharing, the DIY community on Pinterest, Instagram, and home decor forums is full of people who will genuinely appreciate what you’ve made, and you’ll almost certainly come away with ideas for your next iteration. The wall grid has always been a project built on shared creativity, and that’s a big part of why it keeps resonating.
“`








What do you think?
It is nice to know your opinion. Leave a comment.