










DIY Fabric Bracelet Tutorial: Create Beautiful Handmade Jewelry from Scratch
Introduction to Fabric Bracelets and Why You Should Make Your Own
Fabric bracelets have been a beloved form of handmade jewelry for centuries, appearing in cultures around the world as symbols of friendship, craftsmanship, and personal style. Whether you are a seasoned crafter or someone just beginning to explore the world of DIY jewelry, fabric bracelets offer an incredibly accessible and rewarding creative outlet. The materials are affordable, the techniques are learnable at any skill level, and the results are genuinely beautiful accessories you can wear with pride or gift to someone you love.
One of the most compelling reasons to make your own fabric bracelets is the freedom to customize every detail. When you buy jewelry at a store, you are limited to whatever the designer decided to create. But when you make your own, you choose the colors, the patterns, the width, the closure style, and the overall aesthetic. You can match a bracelet to a specific outfit, replicate a favorite color palette, or experiment with bold combinations you would never find on a retail shelf. This creative control transforms a simple craft into a deeply personal form of self-expression.
Beyond the creative benefits, making fabric bracelets is also an excellent way to practice mindfulness and reduce stress. Working with your hands, focusing on repetitive motions like knotting or weaving, and watching something beautiful take shape from raw materials can be deeply meditative. Many crafters report that jewelry making gives them a calming sense of focus and accomplishment that is hard to find in other hobbies. Once you complete your first bracelet, you will understand why so many people find this craft genuinely addictive in the best possible way.
Materials and Tools You Will Need Before Getting Started
Gathering the right materials before you begin is one of the most important steps in any DIY project, and fabric bracelets are no exception. The good news is that you probably already have many of the basic supplies at home, and anything you need to purchase is widely available at craft stores or online. Starting with quality materials will make the process smoother and the finished product more durable and visually appealing. Do not be tempted to skip this preparation step — having everything on hand means you can work without interruption and maintain your creative momentum.
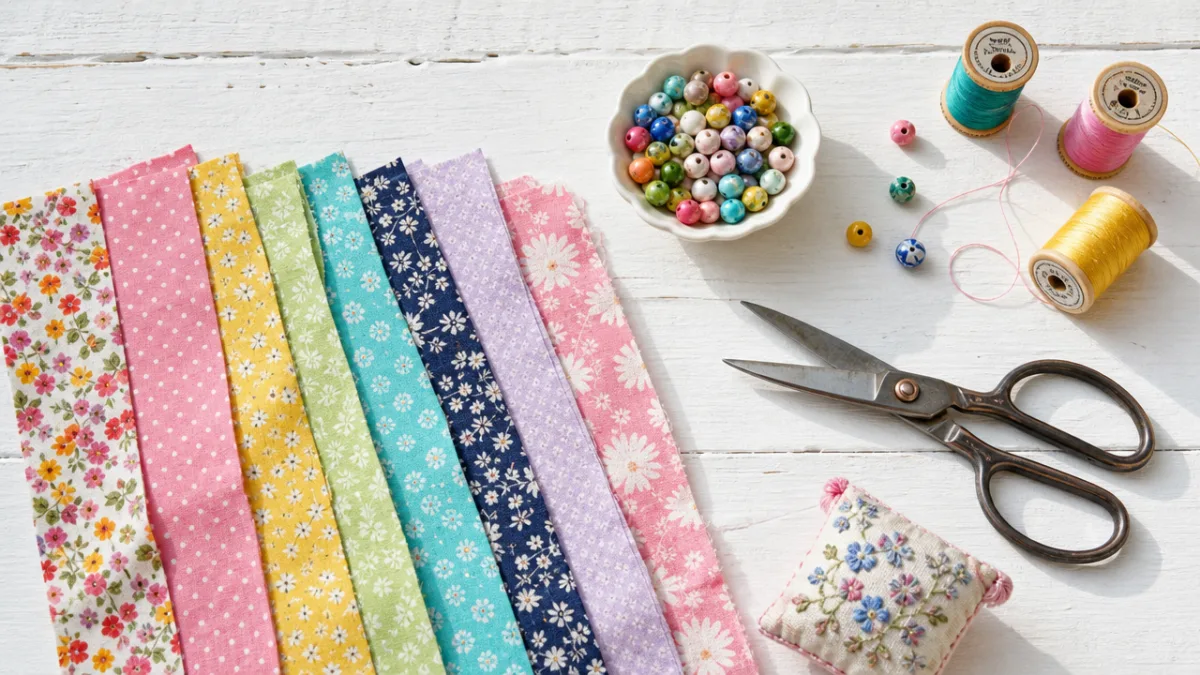
For a standard fabric bracelet, your core materials will include fabric strips or ribbon, which can be cut from old clothing, purchased by the yard, or sourced from a fabric scrap bin. Cotton, linen, and silk all work beautifully, though beginners tend to find cotton the easiest to work with because it holds knots well and does not slip. You will also need a pair of sharp fabric scissors, a ruler or measuring tape, a safety pin or piece of tape to anchor your work to a surface, and a needle and thread or fabric glue for finishing the ends. Optional but highly recommended additions include decorative beads, charms, buttons, or embroidery floss for embellishment.
When selecting your fabric, pay close attention to pattern scale and color contrast, as these elements will significantly affect the finished look of your bracelet. Smaller patterns tend to read more clearly on the narrow width of a bracelet, while large prints can become muddy or unrecognizable once cut into strips. For your first project, consider starting with two or three complementary solid colors so you can focus on learning the knotting or weaving technique without the added complexity of matching patterns. As your confidence grows, you can experiment with more ambitious fabric combinations and decorative elements.
Here is a quick reference list of everything you may need:
- Fabric strips or ribbon in your chosen colors (each strip approximately 1 inch wide and 24 inches long)
- Sharp fabric scissors or a rotary cutter and cutting mat
- Ruler and fabric marking pen or chalk
- Safety pin or clip to anchor your work
- Needle and coordinating thread for finishing
- Fabric glue or Fray Check to seal raw edges
- Decorative beads, charms, or buttons (optional)
- Lobster clasp or button for closure
- Small bead or loop for the button closure (if using)
Preparing Your Fabric and Setting Up Your Workspace
Before you begin cutting and knotting, taking a few minutes to properly prepare your fabric and organize your workspace will save you considerable frustration later. Start by washing and pressing your fabric if you are working with yardage or repurposed clothing. Washing removes any sizing or finishes that might affect how the fabric handles, and pressing ensures your strips will lie flat and cut more accurately. A wrinkled or stiff piece of fabric is much harder to work with and can produce uneven results, especially when you are learning a new technique for the first time.
To cut your fabric strips, lay the fabric flat on a cutting mat or clean hard surface and use a ruler to measure strips of consistent width — typically between half an inch and one inch wide, depending on the style of bracelet you plan to make. A rotary cutter will give you the cleanest, most consistent cuts, but sharp fabric scissors work perfectly well if you take care to cut in smooth, steady lines. The length of your strips will depend on your wrist size and the style of bracelet, but a safe starting length for most braided or knotted styles is about 24 to 30 inches per strip. It is always better to cut strips longer than you think you need, since excess can be trimmed at the end.
Once your fabric is cut, gather your strips and anchor one end to your work surface using a safety pin clipped to a pillow, a piece of tape on your desk, or a clipboard. Having your work securely anchored is essential for maintaining consistent tension throughout the braiding or knotting process. Uneven tension is the most common beginner mistake and leads to bracelets that look lumpy or misshapen. Take a moment also to arrange your strips in the order you want them to appear in the finished bracelet, so you are not fumbling to find the right color mid-project and losing your place in the pattern.
Step-by-Step Braiding and Knotting Techniques
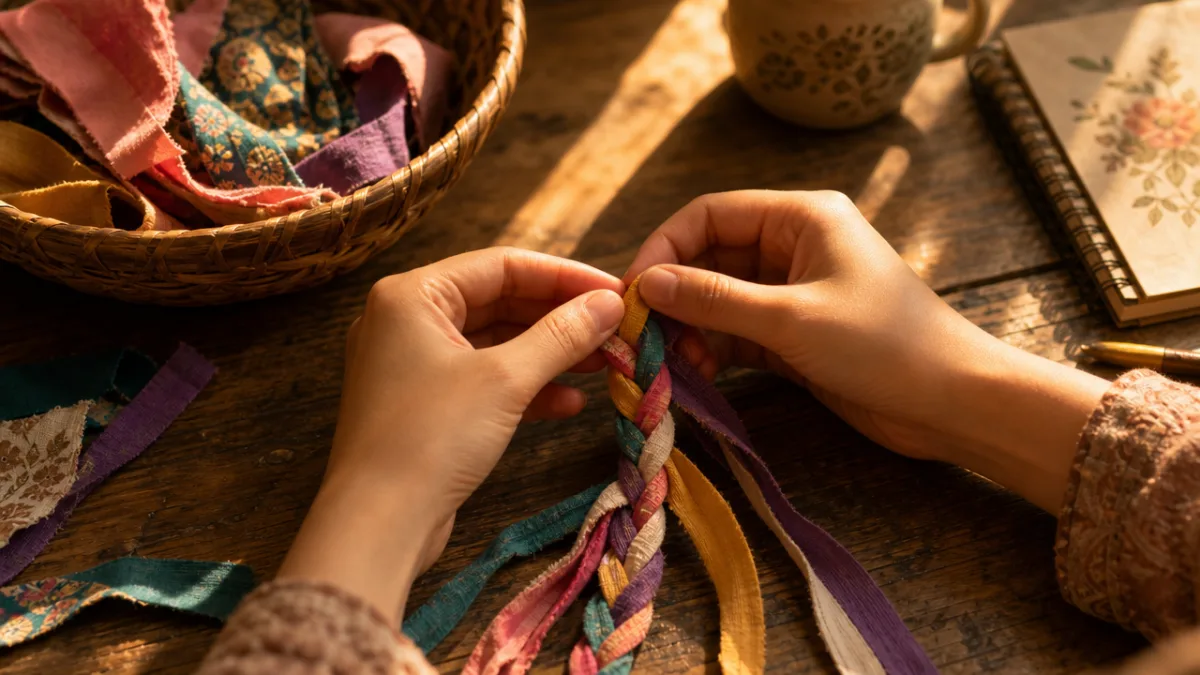
The most classic and beginner-friendly fabric bracelet is the simple three-strand braid, and mastering this technique opens the door to a wide variety of more complex styles. Begin by aligning your three fabric strips at one end, tying them together in a simple overhand knot about an inch from the top. This knot will become part of your closure later, so make it neat and intentional rather than just functional. With your work anchored securely, divide the strips so one is in the center and one is on each side. You will always work the outside strips toward the center, alternating left and right in a consistent rhythm.
To braid, take the right strip and cross it over the center strip, placing it in the middle. Then take the left strip and cross it over the new center strip, placing it in the middle. Continue this left-over-center, right-over-center pattern, maintaining consistent tension throughout. The key to a beautiful braid is keeping the tension even — neither too tight, which puckers the fabric, nor too loose, which creates a sloppy, open braid. Check your work every few inches by gently stretching the bracelet slightly and observing whether the braid looks uniform. If you notice inconsistencies, take the time to undo a few passes and redo them more carefully.
For those who want to try something more intricate, the square knot friendship bracelet technique using fabric strips produces a lovely textured result with endless color arrangement possibilities. This method uses four strips arranged in two pairs. Cross the left strip over the two center strips and under the right strip, then bring the right strip under the center strips and up through the loop created by the left strip. Pull both outer strips outward to tighten the knot. Repeating this process consistently creates a chain of square knots down the length of the bracelet. For a spiral effect, always start your knots from the same side; for a flat, symmetrical look, alternate the starting side with each knot.
Here are some popular bracelet styles you can create with fabric strips:
- Simple Three-Strand Braid: Classic, quick, and perfect for beginners. Works beautifully with three contrasting or complementary colors.
- Square Knot Bracelet: Creates a flat, woven look. Excellent for incorporating multiple colors in chevron or diagonal stripe patterns.
- Twisted Braid: Made by always crossing strips in the same direction, producing a natural spiral that looks elegant and complex.
- Woven Fabric and Bead Bracelet: Incorporates beads between knots or braiding passes for added dimension and sparkle.
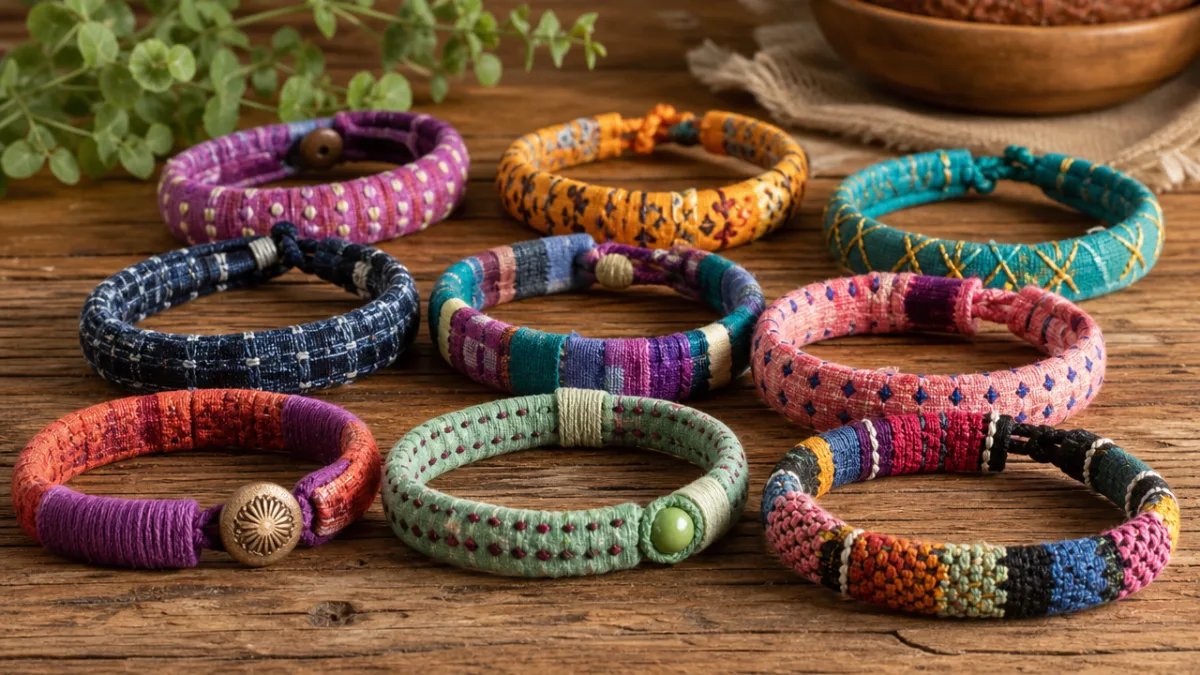
- Wrapped Bangle: Involves wrapping fabric strips tightly around a wire or plastic bangle base, secured with glue, for a sleek modern look.
Adding Embellishments and Personal Touches
Once you have mastered the basic structure of your bracelet, adding embellishments is where your creativity truly gets to shine. Beads are among the most popular additions to fabric bracelets, and the variety available is staggering — glass beads, wooden beads, seed beads, metal charms, clay pendants, and vintage buttons can all be incorporated in different ways. The simplest method is to thread a bead onto one of your fabric strips before knotting or braiding it into place, so the bead sits on the surface of the bracelet, held securely by the knot on either side. This technique requires no special tools and creates a charming, handmade aesthetic that looks intentional and polished.
Embroidery floss is another fantastic embellishment option that pairs beautifully with fabric strips. You can wrap strands of floss around sections of the bracelet to create color blocks, tie small decorative knots at intervals, or even stitch small patterns directly onto a wider fabric base before assembling the bracelet. Metallic embroidery floss adds a luxurious shimmer that elevates the overall look considerably. If you enjoy combining crafts, you might also consider incorporating small pieces of lace, fringe made from unraveled fabric edges, or thin strips of leather alongside your fabric for a boho-inspired mixed-material effect.
Personalization options go far beyond decorative elements. Consider dyeing your own fabric using natural dyes made from plants, berries, or spices to create completely unique, one-of-a-kind color gradients. You can also use fabric paint or stamps to add patterns or images to plain fabric strips before cutting them into bracelet components. Fabric markers make it easy to write names, words, or short phrases directly onto a wider bracelet panel — a lovely option for friendship bracelets or gifts for someone special. The more you experiment, the more you will discover that the possibilities for personalization are genuinely limitless.
Finishing, Closing, and Caring for Your Fabric Bracelet
The finishing stage is just as important as the braiding or knotting process, because a well-finished bracelet looks professional and lasts significantly longer than one with raw, fraying ends. Once you have completed the body of your bracelet and it is the correct length for your wrist — accounting for the closure — it is time to secure the end. Tie off your work with a tight overhand knot, mirroring the one you made at the beginning. Then, using a needle and thread or a small amount of fabric glue, tack the tail ends down neatly so they are hidden behind the knot rather than splaying out in an untidy fringe.
For closures, you have several excellent options depending on the style of your bracelet and your personal preference. A button-and-loop closure is the most traditional and charming option for fabric bracelets: sew a small button to one end and create a loop of knotted fabric or cord at the other end sized to slip snugly over the button. A lobster clasp attached with a small jump ring gives a more jewelry-like, adjustable finish and works well for bracelets you want to be able to put on and remove easily without help. Slide knot closures, where two overhand knots slide along a shared cord, create a fully adjustable bracelet that fits a wide range of wrist sizes with no hardware at all.
To care for your fabric bracelet and ensure it stays beautiful for as long as possible, treat it with the same respect you would give any delicate fabric item. Remove your bracelet before swimming, bathing, or applying lotion or perfume, as prolonged moisture and chemical exposure can weaken both the fabric and any adhesive used in the finishing process. When not wearing your bracelet, store it flat or loosely coiled rather than tightly wound, which can distort the shape of braided or knotted work over time. If the bracelet gets dirty, hand wash it gently with mild soap and cool water, reshape it while damp, and allow it to air dry completely before wearing it again.
To keep your bracelets organized and in good condition, consider these simple storage and care tips:
- Store bracelets in a flat jewelry tray or hung on a small pegboard hook to prevent tangling and distortion.
- Keep fabric bracelets away from direct sunlight when stored, as prolonged UV exposure can fade even colorfast fabrics over time.
- Apply a small amount of Fray Check or clear nail polish to any raw fabric edges that show signs of fraying, refreshing it as needed.
- If a bead or embellishment comes loose, re-secure it promptly before the surrounding structure begins to unravel.
- Label or photograph your bracelets with a note of the fabrics and techniques used so you can recreate favorites or build on successful designs in future projects.
Gifting, Selling, and Sharing Your Handmade Fabric Bracelets
Once you have built a small collection of handmade fabric bracelets, you may find yourself wanting to share them with others — and there are many wonderful ways to do so. Handmade bracelets make genuinely thoughtful and personal gifts for friends, family members, and colleagues. Unlike store-bought gifts, a handmade bracelet communicates that you invested your time, creativity, and care into creating something specifically for the recipient. For extra personalization, choose fabric colors or patterns that reflect the recipient’s personality, incorporate a charm that references an inside joke or shared memory, or add their initial using a small metal letter bead.
If you find that your enthusiasm for bracelet making is producing more bracelets than you can possibly gift or wear yourself, you might consider selling your work. Platforms like Etsy, local craft fairs, farmers markets, and pop-up shops are all excellent venues for handmade jewelry. Before pricing your work, take the time to calculate your actual material costs, factor in the time you spend making each piece, and research what comparable handmade bracelets are selling for in your market. Many new sellers make the mistake of underpricing their work, which undervalues handmade craftsmanship and makes it difficult to sustain the hobby financially over time. Your time and skill have genuine value, and your pricing should reflect that.
Sharing your process and finished work on social media platforms like Pinterest, Instagram, and TikTok is another rewarding way to connect with the broader crafting community. Many passionate hobbyists have built significant online followings simply by documenting their creative process honestly and enthusiastically. Posting step-by-step tutorials, sharing fabric sourcing tips, and engaging genuinely with comments and questions from followers creates a sense of community that enriches the hobby considerably. You may also discover new techniques, color inspirations, and material sources by following other bracelet makers and participating in the vibrant, supportive world of handmade jewelry online.
Making fabric bracelets is ultimately about far more than the finished product. It is about the joy of creating something with your own hands, the satisfaction of learning a new skill, and the delight of sharing something beautiful with people you care about. Whether you make one bracelet to wear yourself or eventually produce dozens to share, sell, or give away, each one represents a moment of creativity and intention that has real value in a world full of mass-produced goods. Start with the simplest technique, gather a few strips of your favorite fabric, and discover for yourself why this ancient craft continues to captivate makers of all ages and backgrounds around the world.








What do you think?
It is nice to know your opinion. Leave a comment.