










“`html
DIY Cute Chocolate Box: The Ultimate Guide to Handcrafted Sweet Gifts
Why Handmade Chocolate Boxes Make the Most Meaningful Gifts
There’s something about getting a gift that someone actually made with their own hands. A handmade chocolate box carries a kind of emotional weight that no store-bought present can come close to. When you sit down to put one of these together, you’re pouring your creativity, your patience, and a whole lot of affection into every fold and every carefully placed truffle. The person receiving it knows, without you having to say a word, that they were worth the effort — and honestly, that feeling is priceless.
Beyond the sentimental side of things, handmade chocolate boxes let you personalize everything. The size, the color scheme, what goes inside, all the little decorative touches — you get to tailor every single detail to fit the person you’re making it for. Whether it’s a birthday, an anniversary, Valentine’s Day, Mother’s Day, or just a “thinking of you” kind of moment, a DIY chocolate box can be customized in ways that anything off a store shelf simply can’t match. It ends up feeling genuinely thoughtful rather than just… convenient.
There’s also something really satisfying about the making itself. Working with your hands keeps your mind engaged, melts away stress, and gives you that great feeling of stepping back and looking at something you actually built. A lot of people find the whole process — measuring, cutting, folding, decorating — almost meditative. And when you finally fill that box with chocolates and hand it over to someone you care about, the joy is doubled: the joy of making, and the joy of giving.
Materials You Will Need to Get Started
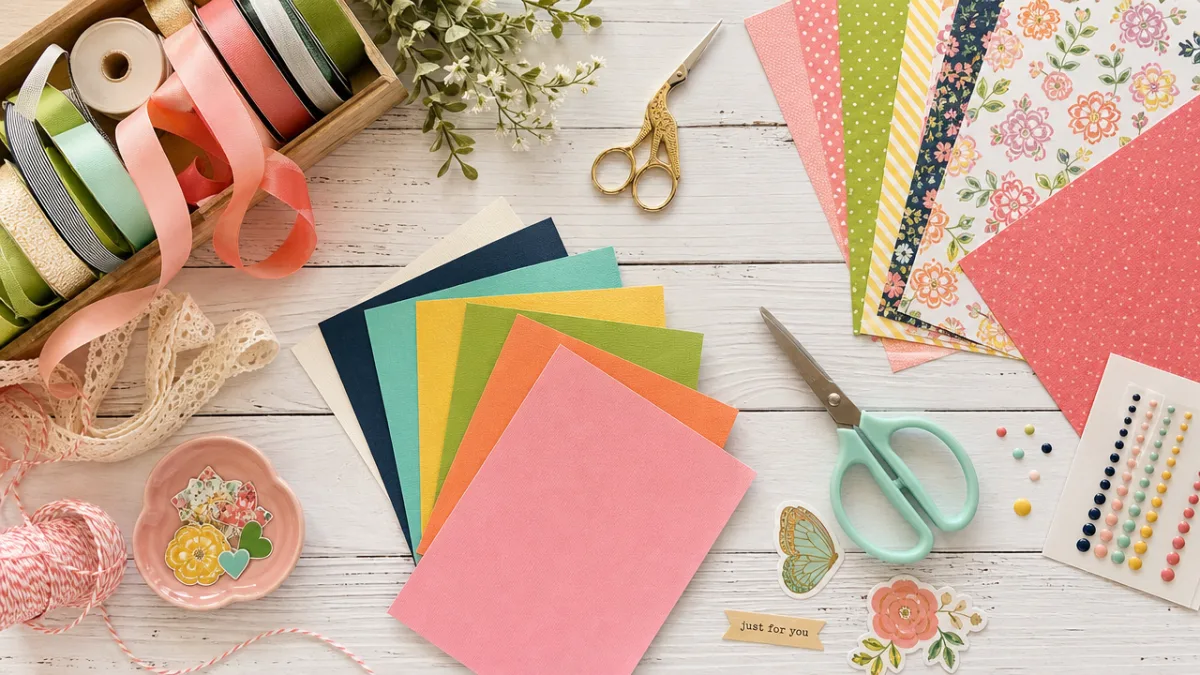
Before you dive in, it’s worth taking a few minutes to pull everything together. The foundation of a great DIY chocolate box is good quality cardstock or thick decorative paper — something sturdy enough to hold its shape once folded, but flexible enough to score and crease without cracking. Decorative scrapbooking paper is a fantastic option here because it comes in such a huge range of patterns, colors, and textures, from pretty florals to elegant metallics to fun polka dots.
Along with your paper, you’ll want a solid set of crafting tools. A bone folder or scoring tool is a game-changer for getting those crisp, clean folds that make the box look polished and professional. A metal ruler and a craft knife or sharp scissors are a must for cutting clean, straight lines. A cutting mat will protect your table and make the whole cutting process much smoother. For adhesive, it depends on the weight of your paper — a glue stick, double-sided tape, or craft glue all work well, just pick whichever suits your materials best.
For decoration, the sky’s really the limit, and a lot of it comes down to your own style and what the recipient would love. Some popular choices are satin or velvet ribbon, twine, dried flowers, washi tape, paper blooms, stickers, stamps, lace trim, and tiny gems or pearls. If the box is for a specific occasion, a handwritten tag or printed label adds a really lovely personal touch. And don’t forget the inside — a little tissue paper, some crinkle filler, or a thin foam insert makes the chocolates look incredible and keeps them from shuffling around.
- Thick cardstock or decorative scrapbooking paper in your chosen color scheme
- Bone folder or scoring tool for clean, crisp folds
- Metal ruler, craft knife, and self-healing cutting mat
- Strong adhesive such as double-sided tape or craft glue
- Ribbon, twine, or other decorative ties for the exterior
- Tissue paper or crinkle paper filler for the interior
- Embellishments such as dried flowers, gems, stickers, or stamps
- A pencil and scoring stylus for marking fold lines
Step-by-Step Instructions for Building Your Chocolate Box
Your first step is finding or creating a template. If you’re just starting out, I’d really recommend going with a printable template — it takes all the guesswork out of the measurements and makes sure everything lines up nicely when you put it all together. You can find free templates online for all kinds of box styles, from simple squares and rectangles to more elaborate heart shapes or hexagons. Print it out on plain paper first to check the sizing before you commit to your good cardstock.
Once you’ve got your template traced onto the cardstock, use your craft knife and ruler to cut along the outer edges. Take your time here — rushing leads to wobbly edges that take the polish off the finished product. After cutting out the main shape, go through and score every fold line with your bone folder and scoring tool. This step makes a real difference: scoring before you fold stops the cardstock from cracking or tearing and gives you those sharp, satisfying creases that make the box look neat and intentional.
With everything scored, start folding the panels up to form the walls of the box. Apply adhesive to the glue tabs shown on the template and press each one firmly against the neighboring panel. Hold each join for at least thirty seconds so the adhesive can bond before you move on. Once the base is assembled, repeat the whole process for the lid, keeping in mind that the lid needs to be just slightly larger than the base so it sits over it snugly without being a struggle to open. Let everything dry completely before you start decorating or adding any chocolates.
- Print and test your chosen template on plain paper before transferring to decorative cardstock.
- Trace the template carefully onto your cardstock and cut along all outer edges with a craft knife and ruler.
- Score all fold lines using a bone folder and scoring stylus for clean, professional creases.
- Fold up the side panels and apply adhesive to the glue tabs, pressing each joint firmly.
- Assemble the lid using the same process, ensuring it fits snugly over the base.
- Allow the completed box to dry fully before decorating or filling.
Creative Decoration Ideas to Make Your Box Truly Unique
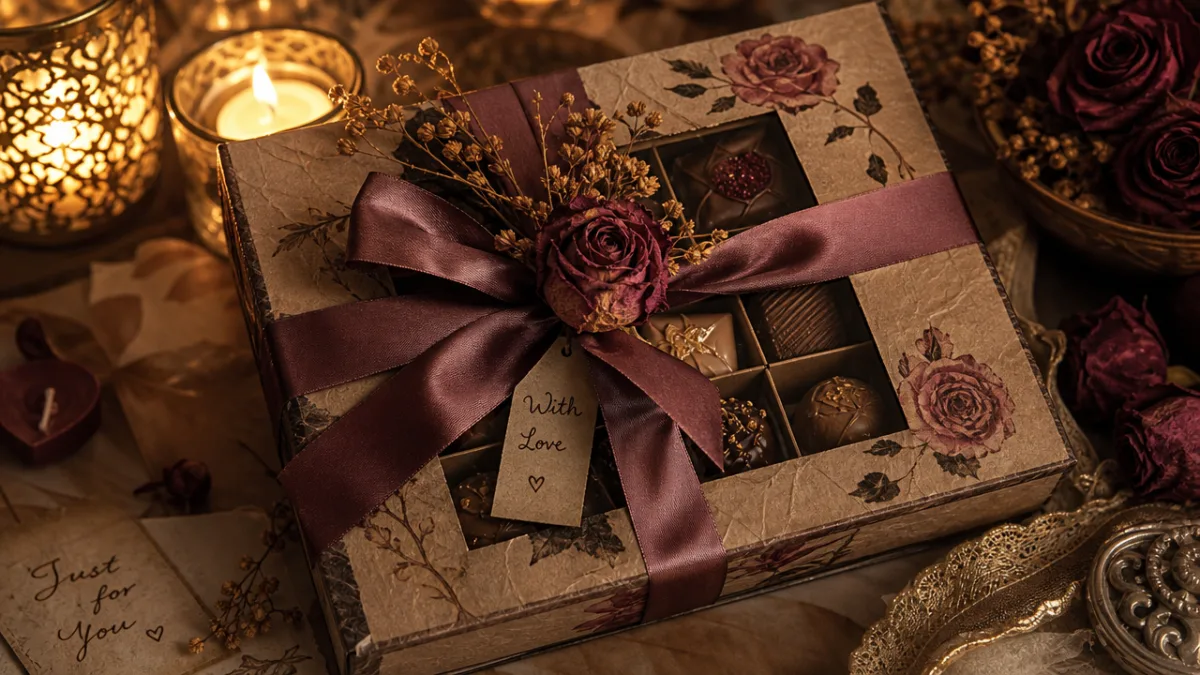
Once your box is dry and fully assembled, this is where things get really fun. Decorating it to match the occasion — and the person — is the best part of the whole project. Ribbon is one of those classic choices that never really goes out of style. A wide satin ribbon in a color that complements the box, tied into a full, generous bow on top of the lid, instantly makes it look like something out of a high-end gift shop. You can also layer two ribbons of different widths for extra dimension, or play with contrasting colors if you want something bold and eye-catching.
Floral accents are another gorgeous option, especially for romantic occasions like anniversaries or Valentine’s Day. Dried roses, lavender sprigs, dried orange slices, or paper flowers hot-glued to the lid give the whole thing a charming, handcrafted, artisan feel. If you’re going for something more rustic or earthy, wrapping twine around the box and tucking in a little sprig of eucalyptus or rosemary creates a really lovely organic look. For a more playful vibe, washi tape in fun patterns is a quick and easy way to add colorful borders or geometric details to the outside panels.
This is also where you can really make the box feel personal. A handwritten tag with a heartfelt note, a custom label with the recipient’s name, or even a small photo tucked inside the lid can turn a beautiful box into something truly meaningful. Rubber stamps in metallic ink add elegant little motifs — stars, hearts, botanical designs — that look incredibly intentional and professional. If you’re making it for a kid or a lighthearted celebration, go all out with glitter, stickers, and colorful foam shapes. The main thing is to let the recipient’s personality be your guide and have fun with it.
Choosing and Arranging the Chocolates Inside Your Box
The presentation on the inside of the box matters just as much as the outside, so it’s worth putting a little thought into it. Before any chocolates go in, line the interior with a layer of tissue paper in a color that works with your box, or go for crinkle paper filler if you love that more textured, gift-boutique look. You can also cut a piece of thin foam or corrugated cardboard to fit the base, cover it with decorative paper, and create a structured surface that keeps the chocolates exactly where you put them.
When it comes to choosing the chocolates themselves, think about variety — different shapes, sizes, and flavors make the whole thing feel more luxurious and curated. Round truffles, square pralines, heart-shaped pieces, long thin chocolate batons — each has a different visual profile, and mixing them together creates a really appealing, layered composition. Chocolates with beautiful finishes make a big difference too: gold foil-wrapped truffles, colorful candy-coated pieces, or handmade chocolates dusted with cocoa or touched with edible gold leaf all look absolutely stunning when arranged thoughtfully.
The arrangement itself is a little art form. Start with your largest chocolates and position them first, either symmetrically or in a deliberate pattern that anchors the design. Then fill in the gaps with smaller pieces, using your crinkle filler to prop things up and hide any empty spots. One trick worth knowing: odd numbers tend to look more visually pleasing than even numbers in arrangements, so aim for groupings of three or five where you can. And if you want to take it up a notch, small paper or foil candy cups for each individual chocolate look incredibly professional and keep the pieces from touching and sticking together.
- Line the box interior with tissue paper or crinkle paper filler before adding chocolates
- Choose a variety of shapes, sizes, and flavors for visual interest and indulgence
- Arrange the largest chocolates first, then fill in gaps with smaller pieces
- Use small paper or foil candy cups to give each chocolate its own neat space
- Aim for odd-numbered groupings for a more visually balanced arrangement
- Consider adding a few non-chocolate elements such as caramels, nougat, or dried fruit for variety
Tips for Gifting, Storing, and Making Multiple Boxes at Once
If you’re making a whole batch of these — for a wedding, party favors, a holiday gift set — working in stages is the way to go. Instead of finishing one box completely before starting the next, move through all of them at the same time: cut all your cardstock pieces first, then score all the fold lines across every box, then do all the assembly, and so on. It’s so much more efficient than going box by box, and it also means everything ends up looking consistent and cohesive.
Storing the finished boxes before you’re ready to give them does take a little care, especially in warmer weather or if you’ve used temperature-sensitive chocolates. Keep them somewhere cool and dry, out of direct sunlight, to stop the chocolates from melting or getting that chalky white bloom on the surface. If you’re using fresh or perishable chocolates, try to fill the boxes no more than a day or two before they’ll be handed over. Commercially packaged chocolates with a longer shelf life give you a bit more wiggle room on timing.
Think about the full gifting experience when you’re ready to present the box. Nestling it inside a plain gift bag with tissue paper peeking out the top looks effortlessly chic, or wrapping the whole thing in translucent cellophane tied with a ribbon lets the box itself be on full display. A handwritten card or tag makes the whole thing feel so much more personal. And if you’re handing it over in person, mentioning that you made it yourself will mean more than you might expect — knowing that someone spent their time and creativity on you is genuinely one of the most touching things.
And if your first attempt doesn’t quite turn out the way you pictured it — that’s completely okay, honestly. Crafting is a skill, and it gets better every time you do it. Your second box will be an improvement on your first, and by your tenth you’ll be wondering what you ever found tricky about it. Treat the early ones as learning experiences, note what you’d tweak next time, and try to enjoy the process. At the end of the day, what makes a DIY chocolate box special isn’t perfection — it’s the love and intention that went into making it. That’s the part the recipient will feel, every time.
“`








What do you think?
It is nice to know your opinion. Leave a comment.