










Creating a Paper Chain Snake Toy: A Complete Guide to This Beloved Craft
Introduction to the Paper Chain Snake Toy
The paper chain snake is one of those crafts that never really goes out of style. Kids and adults have been making them for generations, and it’s easy to see why — all you need is some paper, a pair of scissors, and a bit of imagination. Once it’s done, the snake wiggles and writhes in this surprisingly lifelike way when you hold it by the tail. It’s genuinely hard to put down, which says a lot for something made out of paper strips.
What makes this craft especially great is how it sits right at the intersection of art and play. When kids make their own toys, they feel a real sense of ownership over them — something no store-bought toy can replicate. There’s something deeply satisfying about holding a finished snake that you built loop by loop, watching it sway like it’s actually alive. That feeling of “I made this” is pretty hard to beat, no matter how fancy or expensive the alternative might be.
Paper crafts have a long, rich history across cultures all over the world — think origami in Japan or papel picado in Mexico. People have always found ways to transform a simple sheet of paper into something remarkable. The paper chain snake fits right into that tradition. It’s approachable enough for young beginners, but engaging enough that older kids and adults who enjoy working with their hands will find it just as fun. Whether you’re a parent, a teacher, or just someone who loves a good craft project, this guide covers everything you need to know to get started.
Materials and Tools You Will Need
One of the best things about this craft is how little you actually need. There’s no specialty store trip required, no online order to wait for. Chances are, most of what you need is already somewhere in your home, classroom, or office. That’s what makes the paper chain snake such a great pick for a spontaneous afternoon project or a last-minute classroom activity — low prep, low cost, high payoff.
The paper you choose will have a bigger impact on the finished product than you might expect. Plain printer paper is perfect for beginners — it’s easy to work with and gives you a clean, crisp look that decorates nicely. Construction paper opens up a whole rainbow of color options for more vibrant results. Tissue paper creates something more delicate and translucent if you’re going for a lighter feel, while cardstock produces a sturdier snake that holds up well to enthusiastic play from younger kids.
Here is a basic list of what you will need to get started:
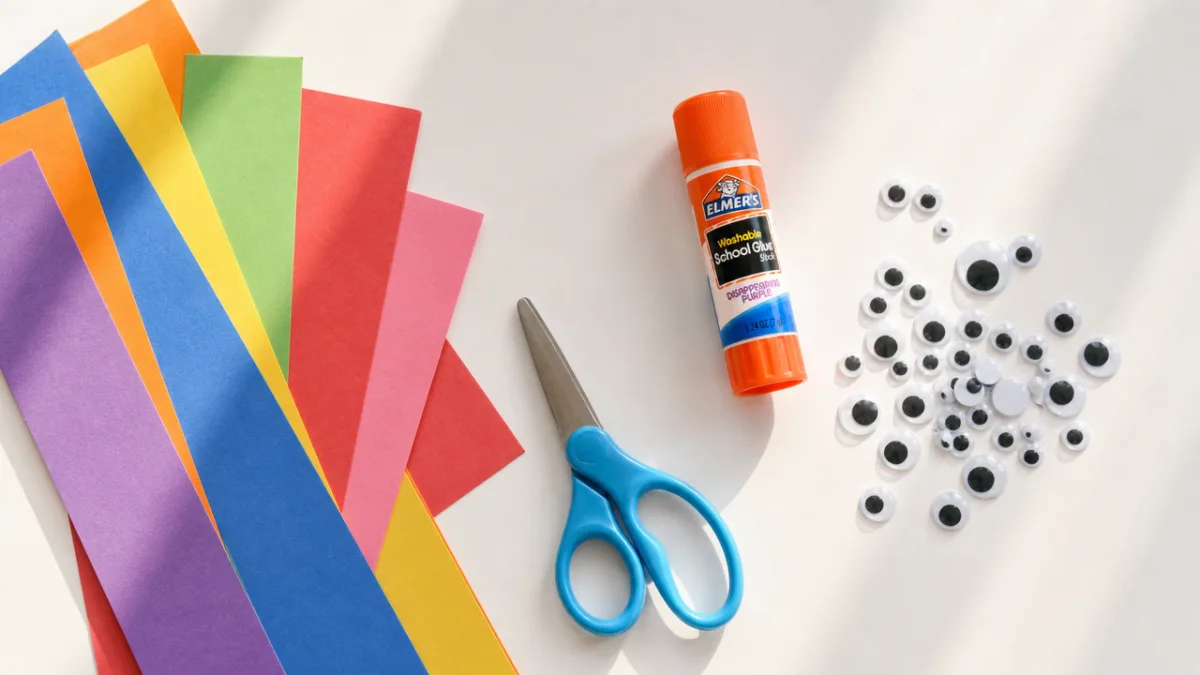
- Several sheets of colored paper or construction paper in your chosen colors
- A pair of scissors suitable for the age group participating in the craft
- A glue stick, white glue, or a stapler for securing the loops together
- A ruler or paper trimmer for cutting uniform strips
- Markers, crayons, or paint for decorating
- Googly eyes or drawn eyes for the snake’s head
- A small piece of red paper or ribbon for the forked tongue
Once you’ve got the basics down, optional materials can take your snake from fun to truly spectacular. Glitter glue adds that sparkle kids seem hardwired to love. Patterned washi tape does a surprisingly convincing job of mimicking real snake scales. Metallic paper gives an exotic, eye-catching look, and stickers or foam shapes add texture and dimension. The beauty of this craft is that it’s wide open for customization — there’s no wrong way to make it your own.
Step-by-Step Instructions for Making Your Paper Chain Snake
Start by cutting your paper into strips — these will become the interlocking links of the snake’s body. Aim for strips about one inch wide and six to eight inches long, though you can adjust those dimensions depending on how big you want your snake to be. Cutting them consistently gives you a neater look, but honestly, slight variations aren’t the end of the world. They can actually make the body look a bit more organic, like a real snake’s segments.
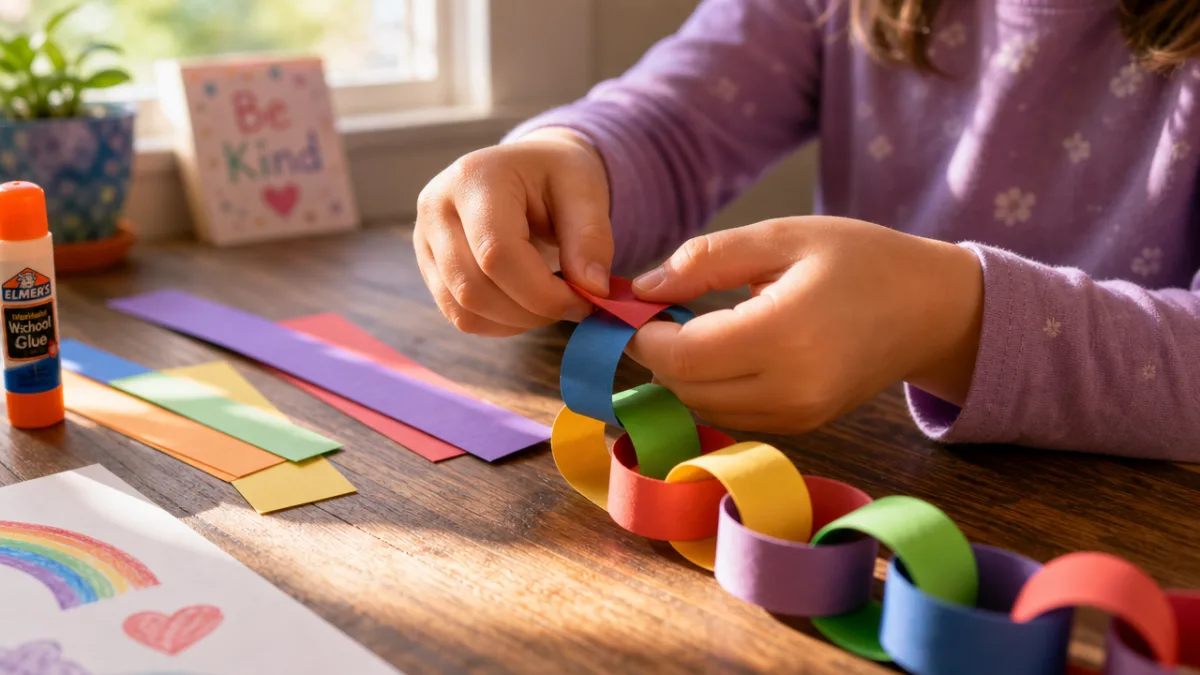
The chain-linking technique sounds more complicated than it is. Take your first strip and bend it into a loop, overlapping the ends by about half an inch, then glue or staple it shut. This first loop will end up being part of the tail. For the second strip, thread it through that first loop before closing it into its own loop the same way. Keep going, threading each new strip through the previous loop before sealing it. That’s really all there is to it — just keep building link by link until you’ve got the length you want.
It’s worth thinking about your color sequence before you start cutting. Planning ahead lets you create patterns — alternating two colors, building a rainbow gradient, or working out a more complex repeating design. Laying your strips out in order before you start linking makes the whole process much smoother and means you won’t get halfway through and realize your pattern went off-track three links ago.
Creating the Snake’s Head
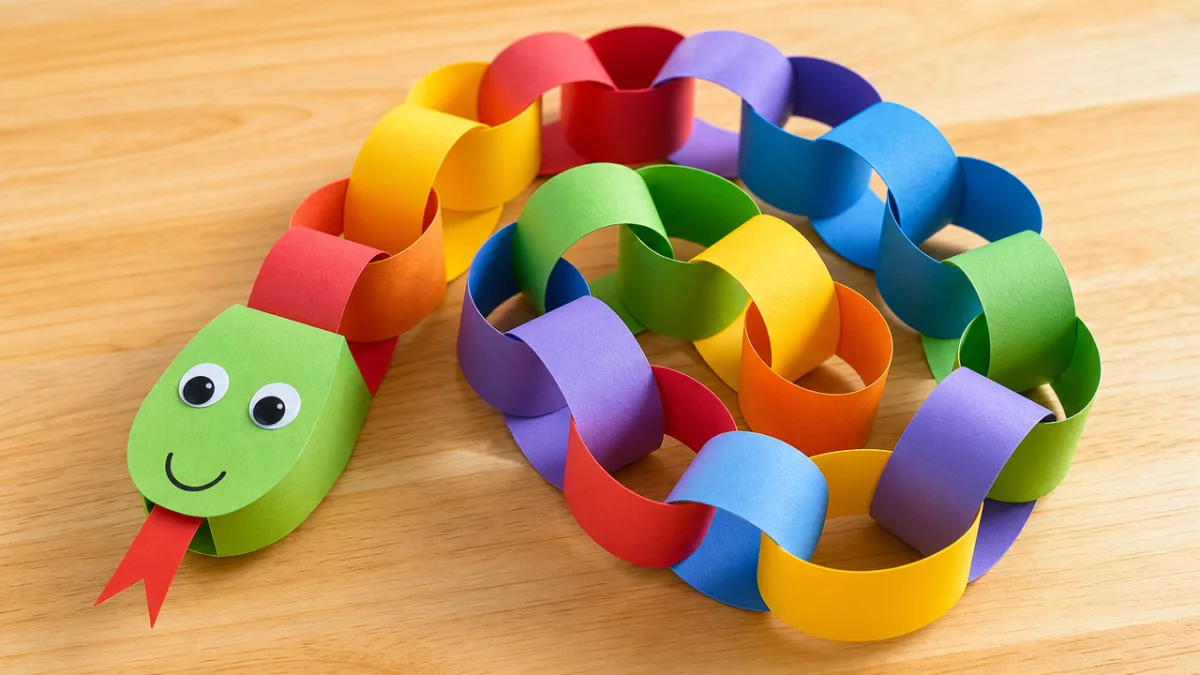
The head is what turns a paper chain into an actual snake, so it deserves a little extra care. Cut a slightly wider oval or teardrop shape to serve as the head, making it proportionate to the rest of the body. A contrasting color works really well here — it creates a visual focal point that makes the snake instantly recognizable. Make sure the head is large enough to fit the eyes, tongue, and any other details you want to add.
To attach the head securely, fold a small tab at its base and glue or staple it firmly to the inside of the first loop. Let the glue dry all the way before you start playing with it — a wobbly head is the most common thing that goes wrong with paper chain snakes, and a little patience here saves a lot of frustration later. If you’re using a stapler, a small dab of glue around the staple adds extra insurance and helps the whole thing last longer.
Adding the Finishing Touches
The eyes are what really bring the snake to life. Googly eyes are always a hit because they give the snake that goofy, expressive personality kids love. But drawing eyes with markers works just as well, especially if you want your snake to have a specific look or mood. For the tongue, cut a small forked shape from red paper or fold a bit of ribbon, and attach it to the underside of the snout so it peeks out just past the tip — it makes a surprisingly big difference in how snake-like the whole thing looks.
Educational Benefits of Making Paper Chain Snakes
Beyond being a lot of fun, this craft quietly delivers a whole range of developmental benefits. For younger kids, the cutting, threading, and linking all build fine motor skills and hand-eye coordination — the same foundational skills that show up in writing and drawing. The repetitive rhythm of building the chain is also great for developing focus and patience, which pays off in all kinds of ways as kids grow.
Math sneaks in naturally too, in a way that feels more like play than schoolwork. Kids count strips to reach a target length, recognize and continue color patterns, and get an intuitive feel for measurement and proportion as they decide how wide or long to cut their strips. Teachers have used paper chain crafts for years to introduce or reinforce early math concepts, and the snake adds a fun narrative layer that makes the whole thing feel purposeful rather than abstract.
There’s also something genuinely valuable about the creative freedom this project offers. Unlike a worksheet or a structured task, the paper chain snake asks kids to make real choices — about color, pattern, size, decoration. Those choices reflect something about who they are and what they find appealing. When kids are trusted to make meaningful creative decisions, they develop confidence in their own judgment, and that confidence tends to spread into other areas of their lives in ways that are hard to quantify but easy to notice.
Variations and Creative Adaptations
Once you’ve got the basic version down, there’s a lot of room to play around. One of the most popular adaptations is scaling the whole thing up for a classroom setting, where each student or small group contributes a section and the class assembles everything into one giant snake that might stretch the length of the room. It’s a satisfying way to turn an individual craft into a group project, and kids get a real kick out of seeing how all their separate pieces come together into something much bigger than any one person could have made alone.
Seasonal and holiday themes are another easy way to keep the craft feeling fresh. Halloween calls for black and orange with a spooky expression. Christmas snakes in red and green look surprisingly charming coiled under a tree. Around Chinese New Year, gold and red paper chains nod to the colors of the traditional dragon — the snake practically transforms into a miniature version of the famous dragon dance. The structure stays the same; it’s just the color palette and decoration that shift to suit the occasion.
For crafters who want to push further, there are some really interesting three-dimensional techniques worth trying. Accordion-folding or pleating each strip before linking it gives the body more sculptural presence and makes it catch the light in a more interesting way. Patterned scissors with decorative edges leave a scalloped or zigzag border on each link that genuinely looks like scales. Some people even work pipe cleaners or wire into the structure so the finished snake can be posed in coiled positions instead of just hanging limp.
Using Alternative Materials
The chain-linking technique works beautifully with materials beyond paper. Fabric strips cut from old t-shirts or colorful cloth scraps produce a soft, tactile snake that’s gentle enough for very young children and far more durable than paper. Fabric versions don’t even need glue — you can just knot each strip through the previous loop, which makes it a great no-mess option. Felt works especially well since it doesn’t fray and has a satisfying weight to it.
Recycled materials open up another whole avenue of possibilities. Magazine pages, with their glossy, colorful surfaces, produce snakes with a wild, collage-like quality. Newspaper strips give a vintage, monochromatic look that takes watercolor paint beautifully after assembly. Aluminum foil creates a shimmering, metallic snake that looks stunning coiled in a bowl or hung as a mobile. Beyond the visual appeal, making something from materials that would otherwise be thrown away is a natural, low-key way to talk with kids about sustainability and creative reuse.
Tips for Success and Troubleshooting Common Problems
The most common issue people run into is inconsistent strip widths, which makes the finished chain look uneven or lumpy. The fix is simple: cut all your strips before you start linking, using a ruler to mark guidelines on the paper first. If you have a rotary cutter and self-healing mat, they make cutting large batches of strips fast and precise. For younger kids who are still working on their scissor skills, pre-cutting the strips lets them focus on the more appropriate tasks of linking, decorating, and playing — which is usually where their interest lies anyway.
Glue choice matters more than you might think. Glue sticks are generally the best bet for kids — they’re easy to control, dry faster than liquid glue, and don’t create the soggy, papier-mache disaster that can happen when enthusiastic young hands get hold of a bottle of white glue. That said, if the snake is going to get a lot of rough play, a stapler makes the most secure and lasting connections. Using a stapler with adult supervision for younger kids is a good middle ground — quick, sturdy, and safe.
It’s also worth thinking about how you’ll store or display the finished snake, especially if you’ve put real time and effort into decorating it. Paper chain snakes are more fragile than they look — moisture, crushing, and rough handling can all take a toll. Storing it loosely coiled in a box or paper bag protects it from getting squashed while still letting air circulate so any lingering moisture from the glue doesn’t cause warping. For display, hanging the snake vertically from a hook or tack shows off its full length nicely, while coiling it in a shallow bowl makes for a charming decorative piece that tends to get a lot of comments from visitors.
If the head keeps detaching no matter what you try, reinforce the connection with a small patch of paper. Cut a little square, fold it over the tab at the head’s base and the first chain link together, and glue it firmly around both sides. That patch spreads the stress of movement over a larger area, which dramatically reduces the chances of the head popping off mid-play. And if links in the body are coming apart with use, a small dab of strong craft glue at each join — followed by fully drying before play resumes — should restore everything to solid working order.








What do you think?
It is nice to know your opinion. Leave a comment.