










Beaded Pipe Cleaner Snowflakes: A Complete Guide to Creating Sparkling Winter Decorations
Introduction to Beaded Pipe Cleaner Snowflakes
Beaded pipe cleaner snowflakes are one of those craft projects that just hit different — approachable enough that you won’t feel overwhelmed, but satisfying enough that you’ll actually be proud of what you made. The combination of bendy pipe cleaners and shimmery little beads produces something that genuinely looks magical, and once you start hanging them around your home, you’ll wonder why you ever bought ornaments at all. Tree decorations, window hangings, gift toppers — these little guys work everywhere.
Part of what makes this craft so lovable is how cheap and easy the materials are to find. Pipe cleaners (you might also see them called chenille stems) are sold practically everywhere craft supplies exist, and the same goes for beads. What’s wild is how much better the finished product looks than you’d expect given what went into it — people will genuinely think you bought these somewhere. And since kids can jump in with just a bit of supervision, it’s a perfect holiday activity for the whole family.
Snowflake crafts have been a part of winter traditions for centuries — think paper cutting in Eastern Europe, or those gorgeous blown-glass ornaments from Germany. There’s something deeply human about wanting to bring a little of that cold, crystalline beauty inside where it’s warm. Beaded pipe cleaner snowflakes fit right into that tradition, just with materials you can grab at any craft store. And just like real snowflakes, every single one you make will turn out a little bit different.
Materials You Will Need
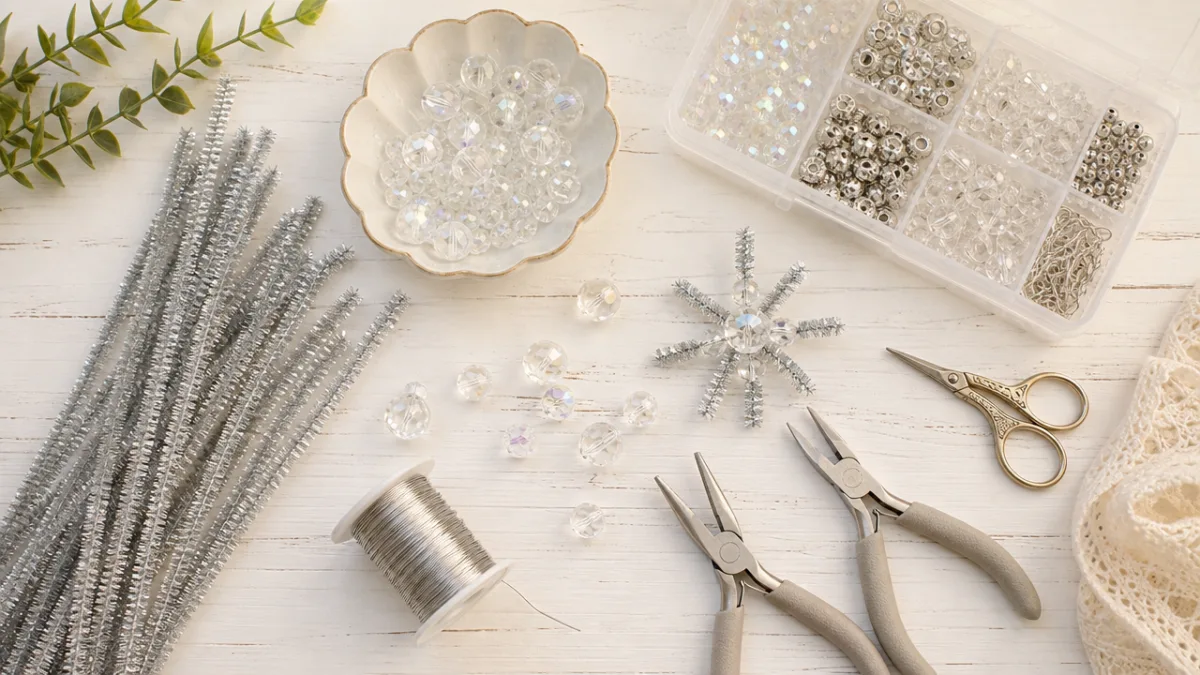
Getting your supplies sorted before you sit down to craft will save you a lot of frustration. The obvious starting point is pipe cleaners — go for white, silver, or iridescent ones if you want that authentic frosty snowflake look. Standard 12-inch pipe cleaners are great for a medium-sized snowflake, though you can find shorter or longer ones depending on how big you want to go. Metallic silver or gold pipe cleaners add a really festive sparkle that’s hard to beat.
For the beads, you’ve got a lot of room to play. Seed beads give you a fine, delicate result with lots of tiny sparkle points. Pony beads are chunkier and much easier for little hands to manage, making them a great pick for kid-friendly versions. If you really want your snowflakes to glow, faceted crystal beads are worth the slight splurge — they catch light in the most beautiful way. You can stick to one bead type throughout, or mix things up for a more textured, layered look.
Beyond those two main players, you only need a few extras. Needle-nose pliers are handy for tidying up wire ends, though plenty of people get by just fine without them. Wire cutters let you trim pipe cleaners to whatever length you need. You’ll also want some ribbon or fishing line for hanging, and working on a flat tray or felt mat is a game changer for keeping your beads from rolling all over the floor.
- White, silver, or iridescent pipe cleaners (chenille stems)
- Seed beads, pony beads, or crystal/faceted beads in your chosen colors
- Needle-nose pliers (optional but helpful)
- Wire cutters or strong scissors
- Thin ribbon or fishing line for hanging
- A flat tray or felt mat to work on
- Ruler for measuring consistent lengths
Step-by-Step Instructions for Basic Snowflakes
Start by cutting three pipe cleaners to the same length — about six inches each works well if you’re starting with standard 12-inch stems. Lay them flat and cross them at their midpoints so you’ve got a six-pointed star shape. Then twist them all together firmly at the center so the arms stay put and are spaced evenly, about 60 degrees apart from each other. Don’t rush this part. A solid central twist is what holds the whole thing together, so it’s worth taking a moment to get it right.
With your framework ready, it’s time for the fun part — adding beads. Most people like to start at the center and work outward along each arm. Just slide beads on in whatever pattern feels good to you: alternating colors, little clusters with gaps in between, or a single eye-catching bead near each tip. Honestly, there’s no wrong way to do this. Follow your instincts and see what happens.
Once every arm is beaded to your liking, bend the very tip of each pipe cleaner back on itself to make a small loop. This does two things: it locks the beads in so they won’t slide off, and it gives each arm a clean, finished look. You can also curl those tips into little spirals if you want to get decorative. Then step back and take a look at the whole snowflake. Nudge any arms that have drifted out of place and gently reshape until the symmetry feels right to you.
Variations and Advanced Techniques
Once the basic six-armed snowflake feels comfortable, you can start exploring some really fun territory. A popular next step is adding sub-branches to each arm, which mimics the way real ice crystals branch out into more complex shapes. Cut small pieces of pipe cleaner — an inch or two long — and twist them onto the main arms at intervals, then thread beads onto those mini branches too. The result is a much more intricate, dimensional snowflake that looks absolutely gorgeous in a window.
You can also have a lot of fun mixing pipe cleaner colors within a single snowflake. Alternating arms in pale blue and white, or fading from silver at the tips to a deeper icy blue toward the center — both look stunning. Playing with bead finishes adds another layer of interest: transparent beads next to opaque white ones create a nice sense of depth. Some crafters go even further and add tiny charms, miniature stars, or small crystal drops at the tips of the arms for extra personality.
If you’re ready to go all in, try making a three-dimensional snowflake. Build two flat snowflake forms, then join them at their centers at a perpendicular angle so you’ve got a snowflake with actual volume. It takes a little more planning and you’ll want a really firm central twist to keep both forms held together securely, but when you hang it up and watch it slowly turn in the air, it’s genuinely spectacular. This one is a showpiece — give it a spot where people will actually see it.
- Master the basic flat six-pointed form before attempting variations
- Try adding sub-branches for a more realistic snowflake silhouette
- Experiment with color gradients and mixed bead finishes
- Combine multiple flat forms to create three-dimensional versions
- Add charms, crystals, or accent pieces at the tips for extra detail
- Scale up using longer pipe cleaners for dramatic large-format snowflakes
Display Ideas and Decorating Tips
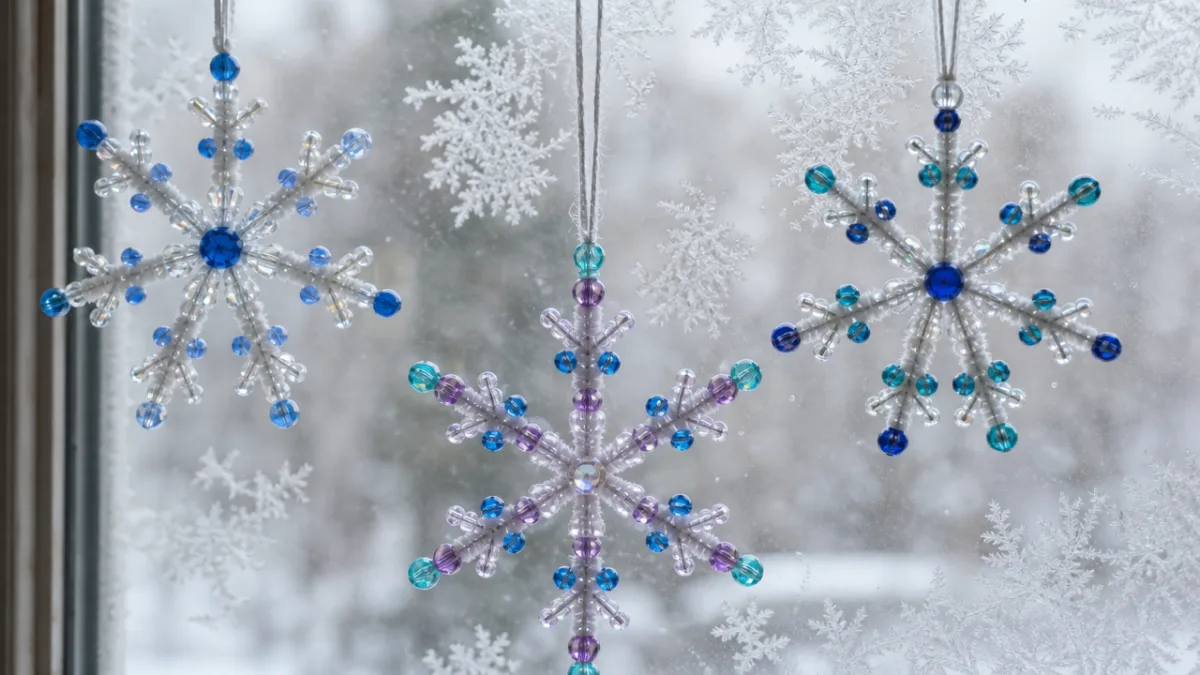
How you display these snowflakes really does make a difference, and with a little creativity you can turn them into a proper decorative statement rather than just a craft project propped on a shelf. The classic move is hanging them on the Christmas tree, where they nestle in among the branches and catch the light from nearby fairy lights. Just thread a loop of thin silver or white ribbon through the central twist and you’ve got an instant, elegant hanging mechanism.
Window displays might actually be even more beautiful. Hang a bunch of snowflakes at different heights from a curtain rod or tension rod, using threads of varying lengths to get that cascading, layered look. When light — sunlight or even just the glow of streetlights — comes through the beads, you get these tiny scattered points of light moving across your walls and ceiling that are genuinely enchanting. It has the same quality as a mobile, always shifting slightly, always catching your eye.
And don’t overlook these as gift wrap toppers. Tying one onto the ribbon of a wrapped present instantly elevates the whole package, and the recipient gets a bonus little decoration they can actually keep and use year after year. They’re also lovely tucked into wreaths and garlands, or laid flat on a mirrored tray as part of a holiday table centerpiece. Wherever you put them, they tend to earn compliments.
Crafting with Kids: Making It a Family Activity
This is honestly one of the best things about this craft — it genuinely works for the whole family. Kids as young as four or five can thread large pony beads onto pipe cleaners with just a little help, while older kids can tackle the central twist and shaping the arms on their own. There’s something about sitting around a table beading together that naturally opens up conversation, and the decorations you make carry that extra layer of meaning because they actually came from everyone.
To keep things running smoothly with kids involved, do a bit of prep work ahead of time. Pre-cut the pipe cleaners to the right lengths and sort beads into small dishes or a muffin tin by color and size. That way, the kids can focus on the creative part rather than getting bogged down in setup. A simple reference image of a finished snowflake — printed out or even just a quick sketch — gives them something to aim for while still leaving plenty of room for their own choices about colors and patterns.
The snowflakes kids make have a way of becoming some of the most treasured decorations in the house. There’s something about a handmade ornament that store-bought ones just can’t replicate, and the little beaded snowflake a six-year-old made with great concentration has a way of showing up in the decoration box year after year for a very long time. It’s worth writing the maker’s name and the year on a small tag in permanent marker — a small gesture that future family members will genuinely be glad you made.

Care, Storage, and Longevity
With even a little care, these snowflakes can look just as good ten holiday seasons from now as they do the day you make them. The main things to protect them from are crushing, tangling, and moisture. If an arm gets bent out of shape, you can usually coax it back — but bending pipe cleaners back and forth repeatedly will eventually weaken the wire inside, so it’s much better to store them carefully than to have to repair them every year.
The best storage approach is laying them flat in a shallow box, separated by layers of tissue paper or bubble wrap. Even better is hanging them individually from small hooks inside a box lid so they’re suspended rather than resting on anything — that way the arms keep their shape completely. Avoid sealing them in airtight plastic bags, since condensation can build up inside and dull the finish on metallic pipe cleaners or fade the coating on painted beads over time.
If a snowflake does come out of storage looking a bit sad and misshapen, don’t worry — it’s usually fixable. Gently flex the arms back into alignment, using a ruler as a guide if that helps. If the central twist has loosened, needle-nose pliers can tighten it right back up without disturbing any of the surrounding beads. The beads themselves — especially glass and crystal ones — are essentially indestructible and will last indefinitely. So as long as you treat the pipe cleaner structure kindly, these decorations will be around for a very long time.








What do you think?
It is nice to know your opinion. Leave a comment.