










How to Make a Colander Planter: A Brilliant Frugal Gardening Project
Why Colander Planters Are a Game-Changer for Frugal Gardeners
There’s something genuinely satisfying about turning an old kitchen item into something your garden actually loves. A colander planter is one of those ideas that sounds almost too simple — and then you try it and wonder why you ever bothered with anything else. That beat-up colander sitting in the back of your cabinet, the one you’ve been meaning to donate for years? It turns out it was practically designed for growing plants.
The secret is drainage. Every container gardener learns pretty quickly that soggy roots are a plant’s worst enemy, and getting drainage right is honestly the whole game. With a colander, that problem is already solved before you even get started. The holes are everywhere — across the base, up the sides — so water escapes naturally and roots get the air they need. No drilling, no propping, no fussing.
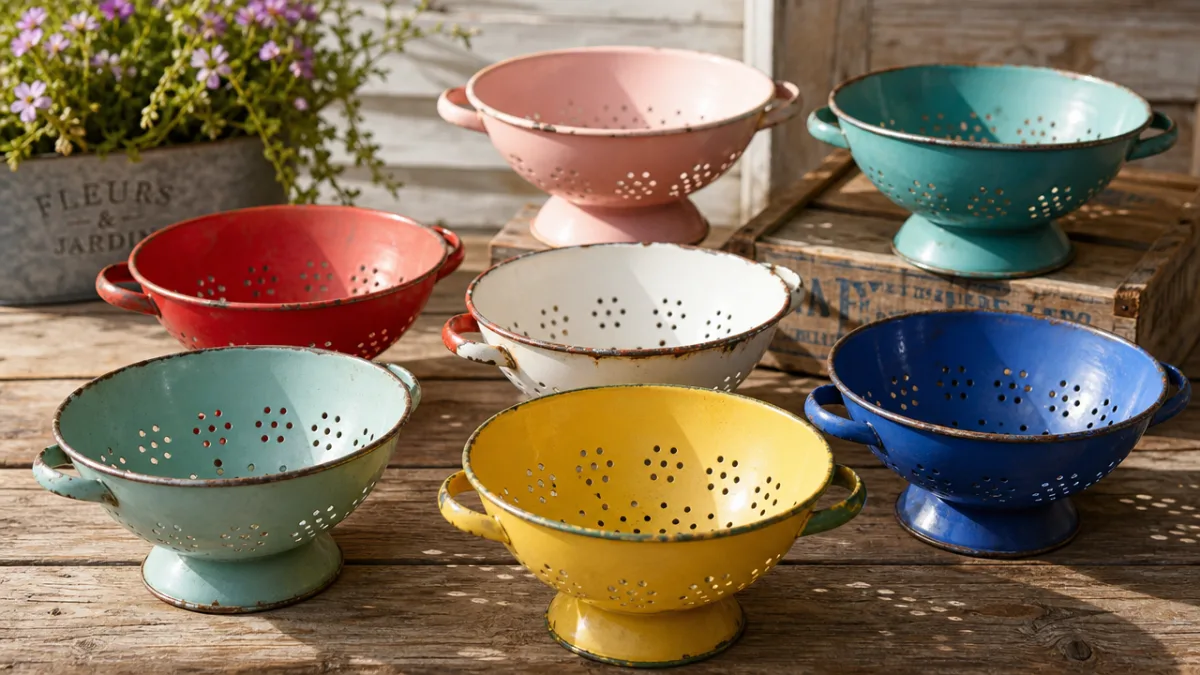
And the looks don’t hurt either. Colanders come in such a wonderful range — cherry red enamel, cobalt blue vintage pieces, sleek stainless steel — that they bring a kind of charm to a porch or patio that a plain terracotta pot just can’t match. Whether your outdoor space is rustic, retro, or more modern, there’s a colander out there that fits right in.
Where to Find Colanders for Your Planter Project
Part of the fun of this project is the hunt. Thrift stores like Goodwill, Salvation Army, and your local charity shop are honestly the best places to start — colanders turn up constantly, and you’ll often pay somewhere between fifty cents and two dollars for one. Those mid-century enamel colanders in bright, bold colors are especially great finds. They’re sturdy, they’re beautiful, and they look incredible spilling over with trailing plants or summer flowers.
Garage sales and estate sales are worth hitting too, particularly in early spring or late summer when people are cleaning out their kitchens. Sometimes you’ll stumble across a whole set of matching colanders in different sizes, which is a total jackpot — group them together on porch steps and the effect is really something. Flea markets and antique malls can turn up great pieces as well, though you’ll usually pay a little more. For the right vintage find, it’s often still worth it.
Don’t forget to look closer to home first. You’d be surprised how many people have a colander they never use shoved to the back of a cabinet and would happily hand over. Facebook Marketplace and local buy-nothing groups are also fantastic — people give away kitchenware all the time for free or next to nothing. With a little patience and an eye out in the right places, you can end up with a whole collection of colander planters for practically nothing.
What You Will Need to Get Started
This is a refreshingly short supply list, which is a big part of why this project is so appealing. Once you have your colander, you’re most of the way there. If you do any container gardening already, there’s a good chance you have most of this stuff on hand. Here’s what to pull together before you start:
- A colander — any size, material, or style will work, though larger colanders give you more planting room
- Coco coir liner or burlap — used to line the colander and hold the soil in place while still allowing drainage
- Potting mix — use a high-quality container potting mix, not garden soil, which compacts too easily
- Plants or seeds — choose varieties suited to your climate, sun exposure, and the size of your colander
- Optional: a hanging basket chain or hook — if you want to hang your colander planter from a porch, fence, or shepherd’s hook
- Optional: slow-release fertilizer granules — to mix into the potting medium for longer-lasting nutrition
The liner is really the key piece here, and it’s worth understanding why. Because colanders have so many holes, potting mix will just fall straight through without something to hold it in. Coco coir liners — the kind sold at garden centers and home improvement stores for a few dollars — are the best option because they’re porous enough to keep drainage working while still keeping your soil where it belongs. They’re also made from a natural, sustainable material, and honestly they look lovely peeking through the holes of a metal colander.
If coco coir isn’t available or you’d rather spend nothing at all, burlap does the job beautifully. Cut a piece to fit the inside of your colander, press it into shape against the base and sides, and you’re ready to fill. Old burlap sacks, coffee bean bags, or even the fabric from cheap garden pots can all be cut down and used. In a real pinch, a few overlapping layers of newspaper will hold things together for a season — though it will break down over time and need replacing.
Step-by-Step Instructions for Making Your Colander Planter
Once you’ve got your materials together, the actual assembly takes maybe fifteen minutes — and most of that is the enjoyable part. Start by fitting your coco coir liner or burlap inside the colander. If you’re using a pre-formed liner made for a hanging basket, you may need to trim it a bit to match your colander’s shape. Press it firmly against all the interior surfaces, making sure the base is fully covered and the sides come up high enough to hold your soil in. Tuck in any loose edges at the top or trim them neatly so things look tidy.
With the liner in place, it’s time to add your potting mix. If you’re using slow-release fertilizer granules, stir them into the soil first according to the package directions. Then add the potting mix gradually, pressing it down gently with your hands as you go to get rid of any big air pockets. Fill to about an inch below the rim — you want a little space so water doesn’t immediately run off the surface when you water. The soil will settle a bit after the first good watering, so keep a little extra on hand to top it off.
Now for the fun part: planting. Tuck your transplants into small wells you’ve made with your fingers or a dibber, spaced appropriately for whatever you’ve chosen to grow. If you’re starting from seed, follow the depth and spacing guidance on the packet. Once everything is in, water thoroughly until you see water running freely from the holes. That first deep watering settles the soil around the roots and gives your plants a solid start. Set the finished planter in the right light for your plants, and take a moment to appreciate what you just made.

The Best Plants to Grow in a Colander Planter
Plant choice matters here, and it depends a lot on how big your colander is. They vary wildly in size — from small strainers that hold barely a cup of soil to big pasta pot-sized ones that can handle a generous planting — so your options will shift accordingly. That said, some types of plants are just naturally well-suited to the well-drained, airy conditions a colander creates, and knowing which ones those are makes your decisions a lot easier.
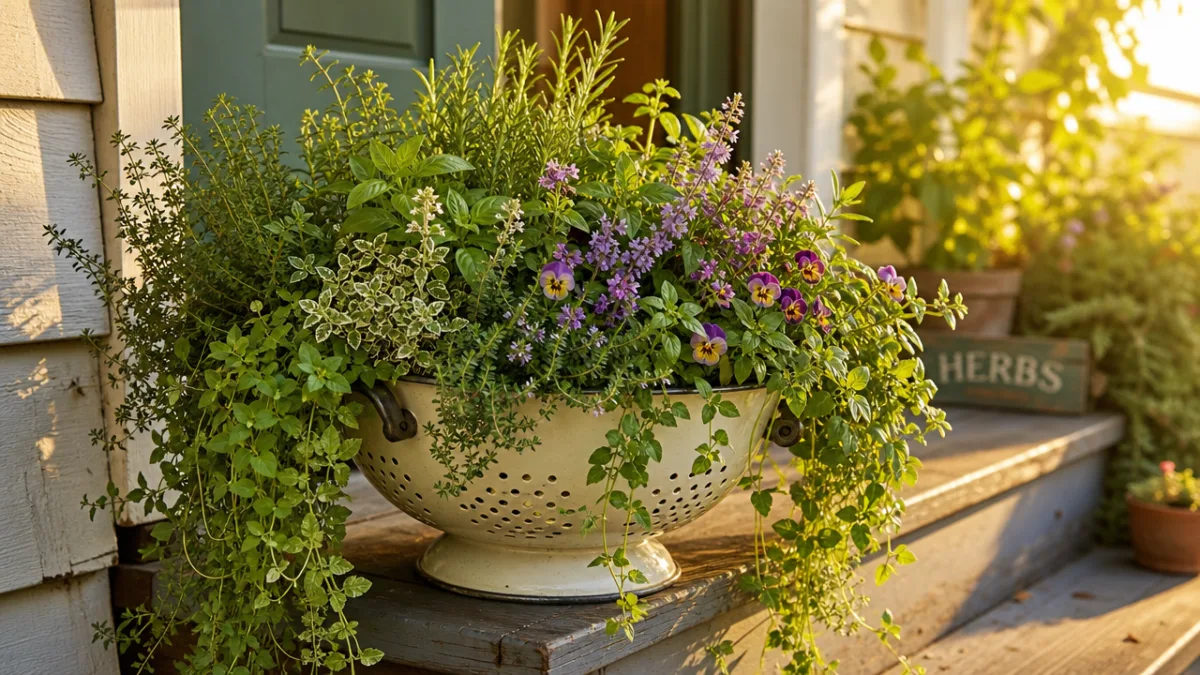
Herbs are honestly the most natural fit, which makes sense given where a colander comes from. Thyme, oregano, chives, parsley, cilantro, and basil all do wonderfully in containers and love the drainage a colander provides. A medium-sized colander planted with a mix of kitchen herbs is both beautiful and genuinely useful — you get a creative, eye-catching planter and a steady supply of fresh herbs steps from your kitchen door. That’s frugal gardening at its most satisfying.
Trailing annuals and cascading flowers are another excellent direction, especially if your colander will be displayed at eye level or hung somewhere that lets the trailing habit really show off. Some particularly good varieties to consider:
- Nasturtiums — fast-growing, edible flowers that trail beautifully and thrive with minimal fertilizer
- Lobularia (sweet alyssum) — low-growing, fragrant, and incredibly prolific with tiny white or purple blooms
- Calibrachoa (million bells) — a miniature petunia relative that cascades in waves of color all season long
- Trailing petunias — classic, bold, and available in an enormous range of colors and patterns
- Dichondra — grown for its striking silver or green foliage that drapes dramatically over the edge of any container
- Creeping Jenny — a vivid chartreuse groundcover that spills beautifully and tolerates varying moisture levels
Strawberries are worth a special mention because the pairing is almost suspiciously perfect. The runners strawberry plants put out will drape over the sides of the colander like a lush, productive curtain, and the fruit hangs free of the soil — which means less rot and much easier picking. An ever-bearing variety will give you fruit all season long, and the whole thing looks attractive enough to sit proudly on a patio table or porch railing. It’s the colander planter at its most cleverly, deliciously useful.
Caring for Your Colander Planter Through the Season
All that excellent drainage does come with a trade-off: colander planters dry out faster than regular containers. In hot weather, especially if your colander is a dark metal sitting in full sun, you might find yourself watering every single day — sometimes twice. Get in the habit of checking by pressing a finger about an inch into the soil. If it feels dry at that depth, it’s time to water. And when you do water, go deep — water until it’s running out of the holes, rather than giving quick surface sprinkles that never really reach the roots.
Fertilizing regularly is just as important, because all that watering also washes nutrients out of the soil faster than in a traditional pot. If you mixed slow-release granules in at planting time, you’re off to a good start — but topping up with a liquid fertilizer every two weeks through the growing season will keep your plants lush and productive. A balanced liquid fertilizer works well for most ornamentals. For herbs and vegetables, something a bit higher in nitrogen during the leafy growth phase and then a shift toward more phosphorus and potassium once they start to flower or fruit will serve them well.
When the season wraps up, take a few minutes to clean your colander properly so it’s ready to go again next year. Pull out the spent plants and compost them if they’re disease-free. Empty out the old potting mix — it can go in the compost or be worked into garden beds, since after a full season it won’t have much structure or nutrition left. Wash the colander well with warm soapy water, rinse it thoroughly, and let it dry completely before you store it. If there’s any rust showing on a metal colander, a light scrub with steel wool and a wipe-down with a little cooking oil will protect it through the off-season and keep it looking good for many seasons ahead.
Creative Variations and Display Ideas for Colander Planters
Once you’ve made your first one, you’re probably going to want to make more. The project is just that easy and rewarding, and there are so many ways to take it further. A grouping of three colanders in graduating sizes, planted with complementary varieties and arranged on porch steps, creates the kind of display that looks like it came from a curated garden shop — even though the whole thing cost you a few dollars at a thrift store. Try mixing enamel with stainless steel, or pulling all your colanders into the same color family for a more intentional, put-together feel.
Hanging colander planters are a great way to add vertical interest without much effort. Most colanders already have handles, so hanging them is as simple as adding some S-hooks, a length of decorative chain, jute rope, or macramé cord — whatever suits your style. Line them up along a fence or hang a row from the eave of a porch and you get a beautiful living wall effect for very little money. Shepherd’s hooks inserted into garden beds work well too, letting you bring color and height to spots where planting in the ground isn’t really an option.
If you’re working with limited space — a balcony, a small urban plot, or even just a single porch corner — colander planters are genuinely one of the best tools you have. They’re lighter than ceramic or terracotta, so moving and rearranging them as the light changes through the season is actually easy. Their side drainage holes mean they can sit in plant stands or on tiered shelving without pooling water underneath. And they simply look good — creative and considered, not makeshift at all. The colander planter is about as clear a proof as you’ll find that gardening frugally and gardening beautifully aren’t in conflict. At their best, they’re exactly the same thing.








What do you think?
It is nice to know your opinion. Leave a comment.