










DIY Twisted Spiral Taper Candles: A Complete Guide to Hand-Crafting Beautiful Home Décor
There’s something genuinely satisfying about making your own home décor from scratch, and twisted spiral taper candles are one of those projects that looks incredibly impressive but is actually pretty approachable once you know what you’re doing. These candles — with their graceful helical shapes and long, elegant silhouettes — have become a go-to element in modern interior design, showing up on dinner tables, mantlepieces, and styled shelves everywhere. And the best part? They look way harder to make than they actually are.
The resurgence of candle-making as a hobby isn’t just a trend — it reflects a real shift toward slowing down and making things with your hands. There’s something meditative about the whole process, and candle-making hits a sweet spot between creative expression and actual usefulness. A hand-twisted taper isn’t just a candle; it’s a little sculptural object that carries a bit of your personality into the room. It’s functional, it’s beautiful, and you made it.
This guide covers everything you need to know to make your own twisted spiral taper candles at home — from picking the right materials and understanding how the wax behaves, to nailing the twisting technique and showing off your finished candles in style. Whether you’ve never made a candle in your life or you’re just looking to add something new to your craft rotation, you’ll have everything you need to get great results from your very first batch.
Understanding the Materials You Will Need
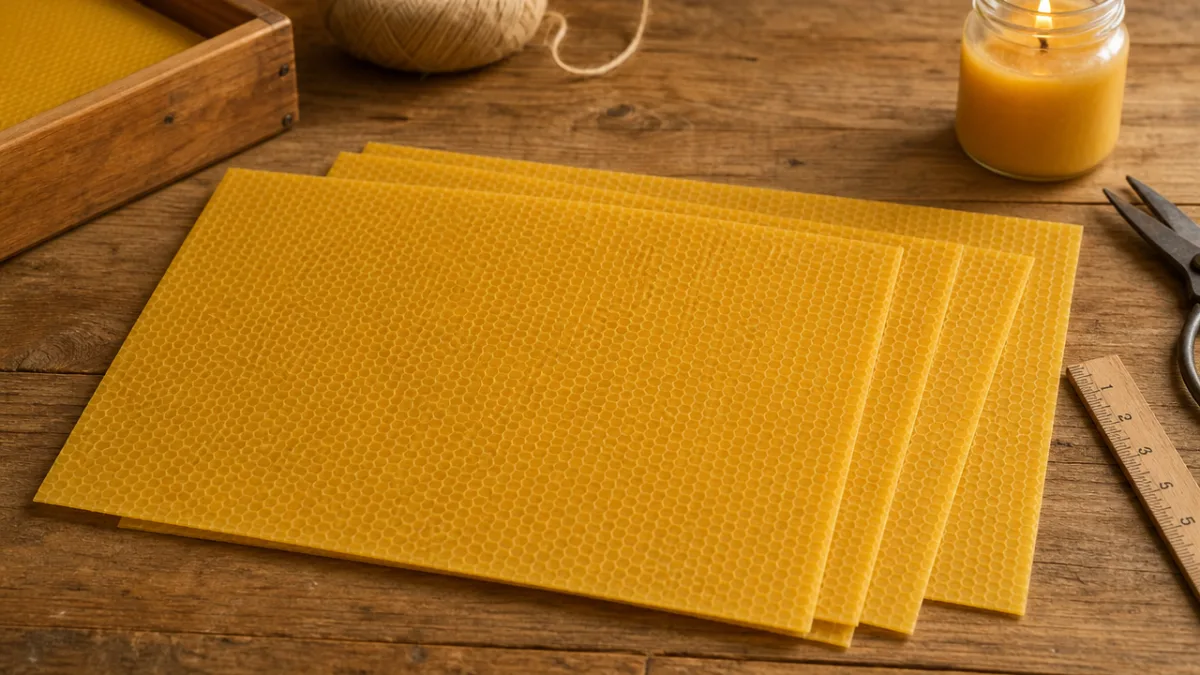
Before you jump in, it’s worth taking a few minutes to understand what you’re actually working with. The most important material is your wax, and for this technique, beeswax sheets are really the way to go. Unlike paraffin or soy, beeswax gets soft and pliable when it’s warmed up, which is exactly what you need to shape and twist it by hand. It also has a gorgeous natural honey scent and a warm golden color that gives the finished candles an organic, handmade quality that’s hard to fake.
Beeswax sheets are easy to find at craft stores or online, usually sold in packs of varying sizes. The standard sheet is about 8 by 16 inches, which is a perfect size for a classic taper. You’ll also need wicking — square-braided cotton wick is your best bet for beeswax tapers because it burns cleanly and evenly without a lot of smoke or dripping. Cut it a little longer than your finished candle so you have enough to light comfortably.
As for tools, nothing fancy is required. A flat, clean work surface is essential — a cutting mat or a smooth table works great. You’ll want a ruler and either a craft knife or sharp scissors for cutting your wax sheets cleanly. The most important tool, honestly, is a hair dryer: it’s perfect for warming the wax gently and evenly without overheating it. Some crafters also keep a bowl of warm water nearby as an alternative, but a hair dryer is a bit easier to control.
- Beeswax sheets in your preferred color (natural honey, white, or dyed varieties all work beautifully)
- Square-braided cotton wick, sized appropriately for the diameter of your candle
- A craft knife or sharp scissors for clean, precise cuts
- A ruler or measuring tape for consistent sizing
- A hair dryer or other gentle heat source
- A clean, flat, heat-resistant work surface
- Optional: scented essential oils for adding fragrance to your finished candles
Preparing Your Workspace and Wax Sheets
Good preparation makes everything easier — and in candle-making, it really does make a noticeable difference in your results. Before you start, clear off your work surface completely and give it a good wipe-down. Beeswax has a tendency to pick up whatever it touches, so a clean surface means cleaner candles. Lay down a silicone mat or a sheet of parchment paper for a non-stick base that wax won’t cling to.
Temperature matters a lot here, so it’s worth understanding a bit about how beeswax behaves. When it’s cold, it becomes brittle and will crack if you try to manipulate it. At room temperature — ideally somewhere between 70 and 75°F — it’s workable but still pretty firm. A quick pass with a hair dryer transforms it into something almost clay-like: soft, flexible, and easy to roll and twist without any cracking. Try to work in a warm room, and keep your hair dryer handy throughout the whole process.
When you’re ready to start, unroll your wax sheets carefully and let them come up to room temperature if they’ve been stored somewhere cool. Give each sheet a quick look for cracks or thin spots, and set aside anything damaged — you can always use those bits for smaller projects later. If you’re planning to make several candles, it’s worth cutting all your sheets to size before you begin rolling. A matched pair of tapers that are consistent in size and twist looks so much more polished than two slightly different ones, and the few extra minutes of prep time upfront is absolutely worth it.
Rolling the Basic Taper Shape
With everything prepped and ready, it’s time to actually start making your candle. The first step is rolling the basic taper shape — no twisting yet, just building the foundation. Lay your beeswax sheet flat on your work surface with one of the shorter edges facing you. Place your wick along this bottom edge, leaving about half an inch hanging off one end (that’ll be the base) and about an inch hanging off the other end (that’s the part you’ll light).
Start rolling by folding that bottom edge up and over the wick, pressing firmly so the wax grips the wick tightly with no gaps. This first fold is genuinely the most important step — if the wick isn’t properly embedded, the candle won’t burn evenly. From there, keep rolling upward with steady, even pressure, keeping everything as tight and uniform as you can. The natural texture of beeswax helps it stick to itself, so the rolling actually comes together pretty easily once you get a feel for it.
When you’re getting close to the top edge of the sheet, you have a small design decision to make. If you want the classic taper shape that narrows toward the top, start applying a tiny bit more pressure along the upper edge as you finish rolling — this compresses it slightly and creates that tapered point. If you prefer a more uniform cylindrical shape, just keep the pressure consistent all the way through. Once you’ve rolled the whole sheet, press the final edge firmly against the body of the candle to seal it, then run your warm fingers along the seam to gently melt it closed so you can’t see the join.
Mastering the Twist Technique
Here’s the moment that makes the whole project — the twist. This is the step that looks intimidating from the outside, but it’s genuinely more forgiving than you’d expect. The two things you really need are warmth and patience. The wax has to be soft enough to twist without cracking, and you need to move slowly and deliberately to get smooth, even spirals rather than lumps and kinks.
Start by warming your rolled taper evenly with the hair dryer, holding it about six to eight inches away and keeping it moving so you don’t overheat any one spot. You’ll know it’s ready when the wax feels slightly soft and gives just a little when you press it gently — not sticky or melty, just with a bit of give. Hold the candle at both ends, base wick in your non-dominant hand and top wick in your dominant hand, with a firm but relaxed grip.
To create the twist, slowly rotate your dominant hand away from you while your non-dominant hand stays mostly still or rotates slightly in the opposite direction. The key is to work gradually — inch the twist up from the base toward the tip in small steps rather than trying to do the whole thing in one go. Whenever the wax starts to feel stiff or resistant, warm it up again before continuing. For a classic spiral, you’re aiming for about two to three full rotations along the length of a standard eight-inch taper, but you can go tighter or looser depending on what looks good to you.
- Warm the rolled candle evenly with a hair dryer until slightly pliable throughout
- Hold the candle at both ends with a firm, comfortable grip
- Begin rotating your dominant hand slowly and deliberately away from your body
- Work progressively from base to tip, re-warming as needed
- Aim for two to three full rotations for a classic spiral effect
- Once twisted, lay the candle on a flat surface to cool and set in its new shape
- Allow at least 30 minutes of cooling time before handling or displaying the finished candle
Troubleshooting Common Issues
Even people who’ve been making candles for years run into problems sometimes, and knowing what to look for — and how to fix it — will save you a lot of frustration. The most common issue is cracking during the twist, and it almost always comes down to the wax not being warm enough before you started rotating. If you see hairline cracks appearing, stop right away and apply more heat. In a lot of cases, gently warming the cracked area and then pressing and smoothing it with your fingers will close the crack up so you can barely see it.
Uneven spirals are another thing beginners commonly deal with. They usually happen when the pressure or speed isn’t consistent during the twist, or when the candle wasn’t warmed evenly to begin with. If your spiral looks bumpy or lopsided, don’t worry — warm the whole candle again, use your palms to smooth everything out, and try the twist again more slowly. A lot of crafters find it helpful to actually practice the rotating motion with their hands before picking up the candle, just to get the feel of it.
If your candle twists beautifully but then slowly relaxes back into its original shape as it cools, the wax was probably a little too warm when you twisted it. Try working with wax that’s just barely pliable rather than noticeably soft, and as soon as you’ve finished twisting, move the candle somewhere cool to help it set quickly. Some people even pop their twisted tapers in the fridge for ten or fifteen minutes — it speeds up the process and helps the spiral hold its shape reliably.
Color, Fragrance, and Finishing Touches
Once you’ve got the basic technique down, the fun really starts — personalizing your candles with color, scent, and little finishing details that make them feel like yours. Beeswax sheets come in a surprisingly wide range of colors: the natural warm gold of unbleached wax, crisp white, deep burgundy, sage green, dusty rose, slate blue — pretty much anything you can think of. You can make a monochromatic set for something sleek and modern, or mix colors for something more playful and eclectic.
One of the most striking ways to add visual interest is the dual-color or ombre roll. For a dual-color candle, cut two sheets of different colored wax and press them together along one long edge before rolling. The two colors show up distinctly in the finished spiral, which looks absolutely beautiful. For an ombre effect, you can use sheets that are already gradient-dyed, or create your own by layering thin strips of progressively lighter or darker wax across the sheet before you roll. When you twist the candle, those color shifts spiral right along with it — it’s a genuinely stunning effect that’s not nearly as complicated as it looks.
Adding fragrance is simpler than you might think. Just apply a very small amount of skin-safe essential oil to the surface of your wax sheet before rolling — lavender, eucalyptus, vanilla, sandalwood, and sweet orange all pair really nicely with the natural honey scent of beeswax. Use a cotton ball or your fingertip and go easy with it: two or three drops spread across the sheet is usually plenty. Too much oil can actually interfere with how the wax holds together, so less is genuinely more here.
Displaying and Gifting Your Finished Candles
How you display your finished candles matters almost as much as the candles themselves. The right holder really lets the spiral form shine — tall, slender brass or silver holders are a classic choice that complements the elegance of the twist without overshadowing it. For something more contemporary, matte black iron or sculptural ceramic holders create a beautiful contrast against the warmth of the beeswax.
On a dining table, grouping twisted tapers in varying heights creates a really dynamic centerpiece. Try mixing candles with two, three, and four rotations to play with how tight the spirals look, or use two or three complementary colors for a cohesive but varied arrangement. Adding natural elements around the base — a few sprigs of eucalyptus, some fresh flowers, or a handful of polished stones — grounds the whole thing and gives it that effortlessly considered look.
Handmade twisted tapers also make genuinely impressive gifts for pretty much any occasion. A matched pair nestled in tissue paper and tied with natural twine is a lovely housewarming present. A set of four in seasonal colors is perfect for the holidays. For something extra special, tuck in a small card mentioning the fragrance notes you used and the fact that you made them by hand — people really do appreciate knowing that. You could even pair a set of lit tapers with a second unlit set and some holders, so the recipient gets everything they need to create their own beautiful display.
Safety Considerations and Candle Care
Like any candle, twisted tapers need a little common sense when you’re burning them. Always use stable, heat-resistant holders that can catch any drips and keep the flame away from anything flammable. Don’t leave burning candles unattended, and keep them out of reach of kids and pets. Beeswax burns more slowly and cleanly than paraffin, but the same basic fire safety rules apply. Before each lighting, trim the wick down to about a quarter of an inch — it makes a real difference in how cleanly and evenly the candle burns.
One of the charming quirks of beeswax candles is that they develop a soft, slightly hazy coating on their surface over time called a bloom. It’s completely natural — it happens when the softer components of the beeswax migrate to the surface — and it doesn’t affect how the candle burns at all. A lot of people actually love the look, since it adds to the rustic, handmade feel. But if you’d prefer a glossier finish, just buff the surface gently with a soft cloth or rub it between your warm hands to bring the shine back.
Storing your candles properly will keep them looking great until you’re ready to use or display them. Keep them away from direct sunlight, which can fade the colors and cause the wax to soften unevenly. Store them flat or upright in a cool, dry spot, and don’t stack anything heavy on top of them — sustained pressure can distort the twisted shape. Wrapping each candle loosely in tissue paper before storing protects the surface from dust and small scratches. Take good care of them and they’ll last for years, bringing a little warmth and beauty to your home every time they come out.








What do you think?
It is nice to know your opinion. Leave a comment.