










DIY Leaf & Flower Pressed Candles: A Complete Guide to Nature-Inspired Elegance
Introduction: The Art of Pressed Botanical Candles
Pressed botanical candles have emerged as one of the most enchanting craft trends in recent years, blending the timeless tradition of candle making with the delicate beauty of preserved plant materials. These stunning creations capture the intricate details of leaves, petals, and flowers within a luminous wax shell, producing a glowing, almost ethereal effect when lit. Whether you are an experienced crafter or a complete beginner, making your own pressed candles is a deeply satisfying project that results in something genuinely beautiful you can display, gift, or use yourself.
The concept is elegantly simple: real botanical specimens — think fern fronds, rose petals, maple leaves, wildflowers, or eucalyptus sprigs — are pressed flat and then adhered to the surface of a pillar candle using a thin layer of melted wax. The outer layer of translucent wax holds the botanicals in place while allowing the warm glow of the flame to illuminate the plants from within, casting gorgeous, organic shadows and warm amber light throughout a room. The result looks like something you might find in an artisan boutique, priced well beyond reach, yet it is entirely achievable at home with modest materials.
What makes pressed botanical candles particularly appealing is their versatility and personalization potential. You can tailor your candle to any season, color palette, or aesthetic — delicate cherry blossoms for spring, rich autumn leaves for fall, tropical greenery for summer, or stark white dried florals for a winter minimalist look. They make extraordinary gifts for weddings, housewarmings, birthdays, and holidays. This guide will walk you through everything you need to know, from gathering and pressing your botanicals to applying them to candles with a professional finish.
Gathering and Pressing Your Botanicals
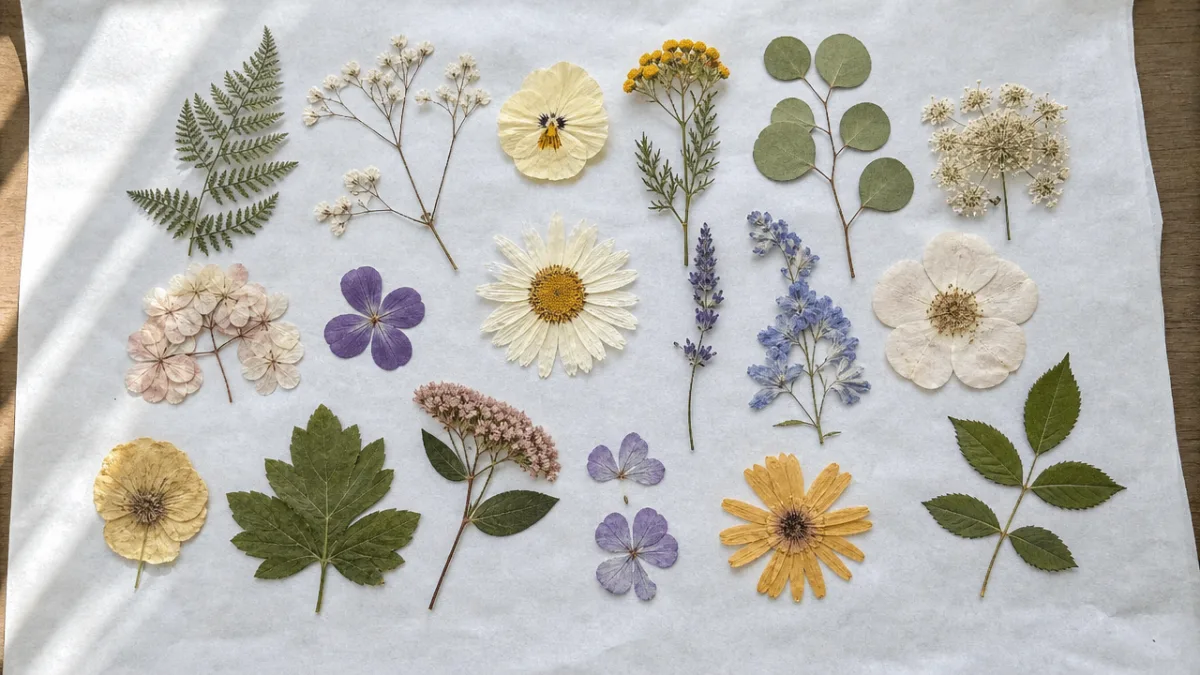
The foundation of any great pressed botanical candle is the quality and variety of the plant material you use. The best botanicals for this craft are those that press flat easily, retain their color well when dried, and are thin enough to allow light to pass through them when placed on a candle. Some of the most popular and effective choices include pansies, lavender sprigs, fern fronds, maple or ginkgo leaves, rose petals, violas, delphinium, eucalyptus, baby’s breath, and cosmos flowers. Thicker, more succulent plants or very bulky flower heads tend to be less suitable since they may not adhere smoothly to the candle’s curved surface.
When collecting botanicals, timing matters considerably. For flowers, harvest them in the morning after the dew has dried but before the afternoon heat causes wilting. Choose blooms that are just reaching their peak — not fully open and beginning to fade, but not tight buds either. For leaves, mid-season specimens that have fully developed their color and texture but have not yet begun to show signs of age work best. Avoid anything with insect damage, mold, or tears, as these imperfections will be very visible on the finished candle. If you are collecting from your garden or a natural area, make sure you are doing so responsibly and with permission where needed.
To press your botanicals, you have two main methods available. The traditional approach involves placing your specimens between two sheets of parchment paper inside a heavy book, stacking additional books on top for weight, and leaving them undisturbed for two to four weeks. A faster alternative uses a microwave flower press, which can produce pressed specimens in just a few minutes. Once pressed, your botanicals should be completely flat and papery-dry, with no residual moisture. Store them between sheets of parchment in a flat box until you are ready to use them, as humidity can cause them to curl or develop mold.
Materials and Tools You Will Need
Before you begin the candle-making portion of this project, it is important to assemble all of your materials so the process goes smoothly. The most time-sensitive steps involve working with melted wax, which can cool and harden quickly, so having everything within reach before you start is essential. A well-organized workspace makes the difference between a frustrating experience and a fluid, enjoyable craft session. Clear a large, flat, heat-safe surface and protect it with newspaper or a silicone mat to catch any wax drips.
Here is a comprehensive list of what you will need to complete your pressed botanical candles:
- Plain white or cream pillar candles in your desired size — smooth-sided candles without texture work best for adhering botanicals cleanly
- Paraffin wax or a clear soy coating wax, available at craft stores — this is used to seal the botanicals onto the candle surface
- A double boiler or a heatproof measuring cup placed in a pot of simmering water for melting wax safely
- A natural-bristle paintbrush or a foam brush — used to apply the melted wax in thin, even coats
- Tweezers or small craft tongs to position the delicate botanicals without damaging them
- A heat gun or hair dryer on a low setting, which can help smooth out wax layers or re-melt surfaces between coats
- Wax paper or a silicone mat to rest the candles on while you work
- Your fully pressed and dried botanical specimens, organized and ready to use
In terms of the candles themselves, you have flexibility in sizing. Smaller votive or 3-inch pillar candles are excellent for beginners because there is less surface area to manage and they work up quickly. Larger 4-inch or 6-inch pillars allow for more elaborate botanical arrangements and make a more dramatic statement. Some crafters prefer to work with battery-operated flameless candles to eliminate any fire-safety concerns around the organic material, and this is a completely valid and beautiful option as well, particularly for households with children or pets.
Step-by-Step Application Technique
Begin by setting up your double boiler and melting a small amount of paraffin or coating wax over low to medium heat. You only need the wax to become fully liquid — do not allow it to get so hot that it begins to smoke, as overheated wax can be a fire hazard and may also cause discoloration. Keep the wax at a steady low melt temperature throughout the process. While the wax is melting, lay out your pressed botanicals on a nearby surface in the arrangement you plan to use, so you can work quickly once you begin applying them to the candle.
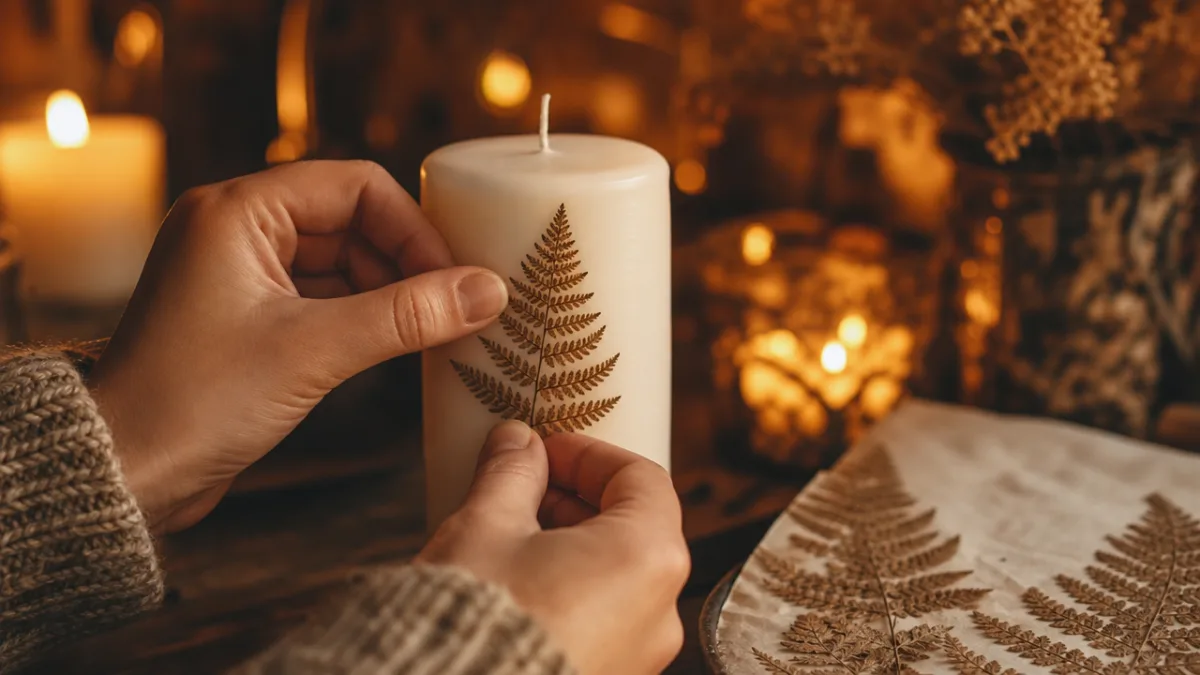
Working one botanical piece at a time, use your brush to apply a thin, even coat of melted wax directly to the area of the candle where you intend to place the specimen. Work quickly, as the wax cools fast against the candle surface. Immediately press your chosen botanical gently but firmly into the wet wax using your fingers or tweezers, smoothing it outward from the center to prevent air bubbles from forming beneath it. Hold it in place for ten to fifteen seconds while the wax re-hardens around the edges of the botanical. Repeat this process for each piece, building your arrangement section by section.
Once all of your botanicals are in place and the adhesive wax layer has fully hardened, you will apply a sealing topcoat over the entire decorated surface of the candle. Using your brush, apply a smooth, thin layer of melted wax over the botanicals and the surrounding candle surface in long, even strokes. Some crafters apply two or three thin sealing layers for extra durability and a more polished, seamless finish. Between coats, allow each layer to harden completely before adding the next. The goal is to embed the botanicals fully within the wax so that they appear almost laminated into the surface of the candle, rather than sitting on top of it.
Design Ideas and Creative Arrangements
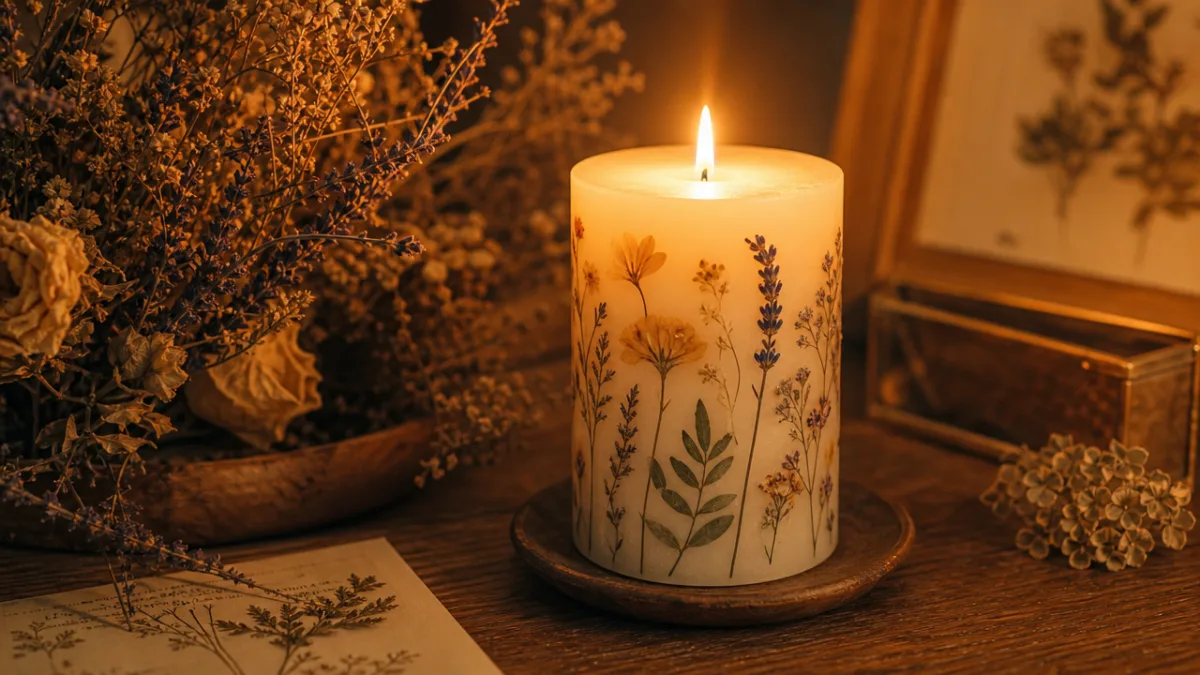
One of the most joyful aspects of making pressed botanical candles is designing your arrangement. There are truly no wrong answers here, and your creativity is the only limit. A few guiding principles can help you create arrangements that feel intentional and visually harmonious. Consider working with a limited color palette — all-green foliage for a clean, modern look, monochromatic dried flowers in shades of cream and blush for a romantic feel, or the vibrant mixed colors of garden wildflowers for something more maximalist and cheerful. Restricting yourself to two or three botanical varieties within a single candle often produces a more sophisticated result than throwing everything together.
Here are some popular design approaches to inspire your own compositions:
- The Botanical Wreath: Arrange small leaves and flower petals in a circular band around the middle of the candle, creating the impression of a miniature wreath encircling the pillar. Fern fronds, small pressed violas, and sprigs of lavender work beautifully together for this style.
- The Cascading Vine: Create an asymmetrical, flowing arrangement that winds from top to bottom of the candle in an organic, trailing pattern, mimicking the look of climbing vines or hanging botanicals.
- The Single Statement Bloom: Press one large, perfectly formed flower — a dahlia, peony, or sunflower — onto the front face of a wide pillar candle for a bold, minimalist statement.
- The Seasonal Collage: Collect botanicals that represent a specific season and scatter them across the candle surface in a loose, collage-like arrangement for a nature journal aesthetic.
- The Monogram Botanical Frame: Use small pressed flowers and leaves to outline a letter or initial pressed into the candle surface, making it an extraordinary personalized gift.
Color plays an enormous role in the visual impact of your finished candle. Many pressed flowers retain their pigment remarkably well — pansies and violas in deep purples and yellows, for instance, stay vibrant for months or even years. Others, like roses and peonies, tend to shift toward muted, dusty shades of blush and burgundy that are equally lovely and lend a vintage quality to the finished piece. Experimenting with different botanical varieties over multiple projects will help you learn which plants press most beautifully and which colors perform best under the warm glow of candlelight.
Safety Considerations and Candle Care
It is important to approach pressed botanical candles with an awareness of fire safety, since the organic material on the candle’s surface is technically flammable. The standard practice among botanical candle makers is to never leave a burning pressed botanical candle completely unattended, and to extinguish the candle before the flame burns down to within two inches of the decorated area. Many people who make or purchase these candles choose to use them primarily as decorative objects rather than functional candles, allowing them to serve as beautiful centerpieces, shelf accents, or nightstand decor without ever being lit. This is a perfectly valid approach that extends the life of the candle indefinitely.
If you do intend to burn your botanical candles, there are some practical steps you can take to do so more safely. Trim the wick to approximately one-quarter inch before each use to minimize the size of the flame and reduce heat output. Always burn candles on a flat, heat-resistant surface away from drafts, curtains, and other flammable materials. Keep candles out of the reach of children and pets. Never move a burning candle or one with liquid wax pooled around the wick. And always use a candle snuffer rather than blowing the flame out, as blowing can scatter hot wax or embers.
To care for your finished pressed botanical candles and keep them looking their best over time, store them away from direct sunlight, which can fade the botanical colors and cause the wax to soften or discolor. Dust them gently with a soft dry cloth or a soft-bristled makeup brush rather than wiping with anything damp. If you notice any of the botanicals beginning to lift at the edges over time, you can carefully re-seal them by applying a small amount of freshly melted wax with a fine brush. Properly cared for, these candles can remain beautiful display pieces for a year or more, making them a genuinely worthwhile investment of your time and creativity.
Gifting, Packaging, and Selling Your Creations
Pressed botanical candles make some of the most thoughtful, personalized gifts imaginable, and their visual appeal translates beautifully to gift packaging. For a simple yet elegant presentation, wrap the finished candle in a sheet of translucent vellum paper tied with a length of natural twine or satin ribbon. Tuck a small sprig of dried lavender or a pressed flower beneath the ribbon for an extra botanical touch. A handwritten tag noting the botanicals used, along with basic burning instructions, adds a personal and informative finishing detail that recipients genuinely appreciate.
For those interested in turning this craft into a small business or selling at local markets and craft fairs, pressed botanical candles occupy a strong market position. They are visually distinctive, photograph extremely well for online listings, and can be produced at a relatively low material cost, allowing for healthy margins. Differentiating your products through unique botanical combinations, specialty seasonal collections, or custom orders for weddings and events can help you establish a recognizable brand identity. Platforms like Etsy, local artisan markets, and Instagram shops are all well-suited to this type of handmade product.
When pricing your candles for sale, factor in the cost of all materials including the base candle, wax, botanicals, packaging, and your time at a fair hourly rate. Do not undervalue the skill and artistry involved — a beautifully crafted pressed botanical candle represents several hours of work across the pressing, arranging, and sealing stages, and should be priced to reflect that. Researching comparable products on platforms like Etsy will give you a useful baseline for market pricing in your region. Starting with a small batch of six to ten candles allows you to refine your process, gather feedback, and build a portfolio of product photos before scaling up your production.








What do you think?
It is nice to know your opinion. Leave a comment.