










Snowflake Suncatcher Craft: The Ultimate Winter Activity to Keep Kids Busy and Inspired
Introduction: Why Suncatcher Crafts Are Perfect for Winter Days
When it’s cold outside and going out to play isn’t really an option, the age-old question kicks in: how do you keep kids entertained without resorting to screens? Winter can drag on for little ones who have energy to burn, and finding something that’s actually fun AND educational feels like striking gold. That’s where snowflake suncatcher crafts come in. They’re simple, they’re beautiful, and when the light hits them just right, they look genuinely magical.
There’s something timeless about suncatchers that kids just respond to. Watching colored light dance across the floor or walls as sunlight filters through their creation is genuinely exciting — and that visual payoff makes this craft feel rewarding in a way a lot of projects don’t quite manage. A snowflake design is especially perfect for winter, bringing a little of that seasonal beauty indoors where it’s warm and cozy.
What makes this craft really worth doing, though, is everything happening under the surface. Kids are building fine motor skills through cutting, placing, and pressing materials. They’re playing with color and pattern — which quietly sneaks in early math and art concepts. And working through steps to finish something from start to finish builds focus and patience in a way that feels natural rather than forced. It’s one of those rare crafts where the fun and the learning are genuinely the same thing.
Materials You Will Need for Snowflake Suncatchers
Here’s one of the best things about this craft: you probably already have most of what you need. The supplies are minimal, cheap, and easy to find at any craft store or dollar store. Whether you’re doing this with one kid at the kitchen table or a whole classroom full of them, it scales up easily without breaking the budget — which is always a win.
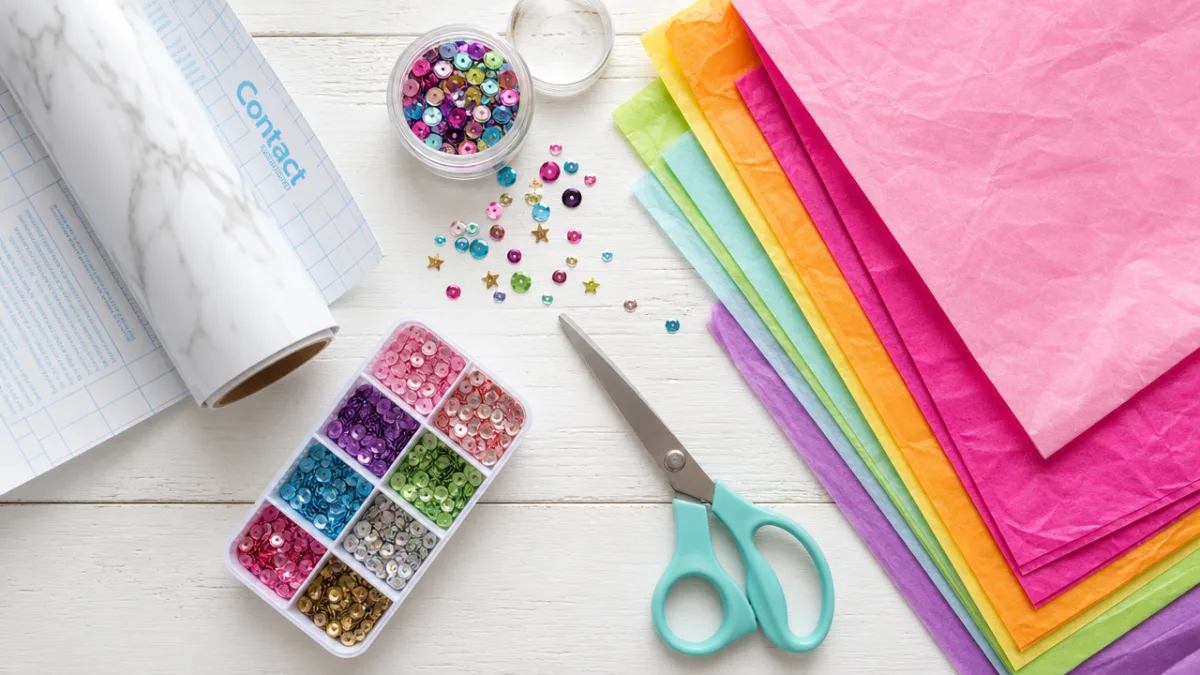
The foundation of the suncatcher is clear contact paper, which acts as the sticky base that holds all your decorative bits in place. You’ll need two sheets per suncatcher so you can sandwich everything in between and seal it up. Contact paper is widely available — hardware stores, dollar stores, Amazon — and one roll goes a surprisingly long way, making it a great thing to keep stocked all winter.
For the actual decorations, you have a lot of options, which is part of what makes this so fun. Tissue paper torn or cut into small pieces is the classic choice because it lets light filter through beautifully, giving you that gorgeous stained-glass effect. But don’t stop there — plastic gems, glitter, sequins, beads, metallic confetti, cellophane, even tiny dried flowers all work wonderfully. The more variety, the more dazzling the finished piece.
Complete Materials Checklist
- Clear contact paper (two sheets per suncatcher)
- Tissue paper in blue, white, silver, and purple tones for a winter palette
- Scissors, including child-safe scissors for little ones
- A snowflake template or stencil printed from the internet
- Glitter, sequins, or small plastic gems for extra sparkle
- A hole punch and ribbon or string for hanging
- A marker for tracing the snowflake shape
- A flat, clean surface covered with a protective sheet or tablecloth
Step-by-Step Instructions for Making Snowflake Suncatchers
Once your supplies are laid out, getting started is pretty intuitive. First, print or draw a snowflake template on regular paper. Snowflakes come in all shapes and sizes — from bold, simple six-pointed stars to elaborate designs with delicate branching arms. For younger kids, simpler and chunkier is better since it’s easier to cut and fill in. Older kids and teens can go as intricate as they like and really challenge themselves.
With your template ready, cut a piece of contact paper slightly larger than your snowflake, peel off the backing, and lay it sticky-side up on your work surface. Taping the corners lightly helps keep it from sliding around. Slide your snowflake template underneath as a guide, then start arranging tissue paper, glitter, sequins, and whatever else you’re using on top of the sticky surface, following the outline you can see below.
Once you’re happy with how it looks and the snowflake shape is filled in, peel the backing off your second sheet of contact paper and lay it sticky-side down over the top, pressing gently to seal everything inside. Smooth out any bubbles working from the center outward, then cut around your snowflake shape. Punch a hole at the top, thread some ribbon or twine through, and you’re done. Ready to hang.
Tips for Working With Different Age Groups
- Toddlers (ages 2–3): Pre-cut the contact paper into a simple snowflake shape and let them press tissue paper pieces onto the sticky surface with minimal guidance. Focus on the sensory experience rather than precision.
- Preschoolers (ages 4–5): Allow them to tear tissue paper into small pieces themselves and help them understand the concept of filling in the snowflake shape. Practice counting pieces as they go for added learning.
- Early elementary (ages 6–8): Give them full ownership of the project from template selection to cutting and sealing. Encourage them to think about color patterns and symmetry to create a more intentional design.
- Older kids (ages 9 and up): Challenge them to create multi-layered effects, experiment with mixed media, or even make a series of suncatchers in graduated sizes to create a window display.
Creative Variations to Make Each Suncatcher Unique
The basic snowflake suncatcher is already lovely, but there’s so much room to make it your own. Giving kids the freedom to put their own spin on the design makes the finished piece more meaningful and keeps them more engaged throughout the process. Creative ownership is a powerful thing, and this craft has plenty of space for experimenting.
One fun variation is the melted crayon technique. Shave crayon wax over tissue paper, then press it briefly with a warm iron between two sheets of parchment paper, and you get beautifully marbled sheets swirled with rich color. Cut those up for your suncatcher and you’ve added a whole extra layer of artistry to the project. Kids also love the fact that they’re essentially making their own custom craft material — there’s something really satisfying about that at any age.
You can also swap contact paper for wax paper. Arrange tissue pieces on one sheet, lay another on top, and fuse them together with a warm iron. The result is softer and more translucent than contact paper, giving the suncatcher a gentle, watercolor-like quality when light shines through. Add watercolor paint directly to the tissue paper for extra color blending, which older kids especially tend to love exploring.
Themed Variations for Extra Fun
- Frozen-inspired suncatcher: Use exclusively blue, silver, and white tissue paper with iridescent glitter to evoke the icy world of a beloved animated film.
- Rainbow snowflake: Fill each arm of the snowflake with a different color of the rainbow, creating a cheerful and vibrant winter-meets-spring hybrid design.
- Monochromatic elegance: Use varying shades of a single color, such as all blues from navy to pale sky blue, for a sophisticated and cohesive look that even adults will admire.
- Nature-inspired: Incorporate tiny pressed leaves, thin slices of dried citrus, or small sprigs of dried lavender between the contact paper layers for a rustic, botanical aesthetic.
- Personalized snowflake: Cut tiny letters from tissue paper to spell out a child’s name or a winter word like “JOY” and incorporate them into the design for a keepsake piece.
Displaying and Gifting Your Snowflake Suncatchers
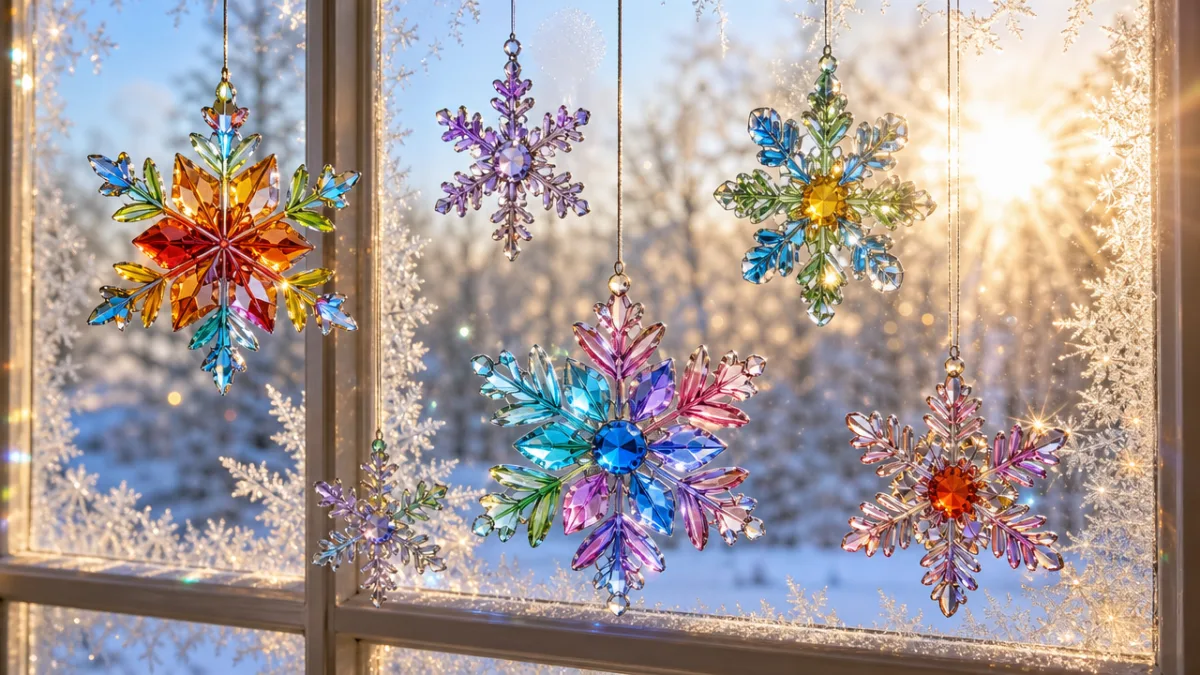
Finding the right spot to show off the finished suncatchers is honestly half the fun. Windows are the obvious choice — and the best one — because direct sunlight streaming through the translucent materials creates those shimmering pools of color on your floors and walls. A window that gets good morning or afternoon sun gives you the most dramatic effect, almost like an ever-changing light show that shifts throughout the day as the sun moves.
For something really stunning, try making several suncatchers in different sizes and hanging them at different heights across the same window using clear fishing line, so they look like they’re floating. Mix them with paper snowflakes, tissue paper stars, or cellophane icicles for a layered winter wonderland window that instantly becomes the focal point of the room. It’s the kind of thing that makes people stop and say “wait, did the kids make that?”
These also make genuinely wonderful handmade gifts. Kids feel real pride in giving something they made themselves, and recipients almost always love the thoughtfulness behind it. Slip each suncatcher into a cellophane bag tied with ribbon, or sandwich it between two pieces of cardboard for protection if you’re mailing it. Add a little handwritten tag with the child’s name and the year, and you’ve got a keepsake that grandparents, teachers, and family friends will actually hold onto.
Display Ideas at a Glance
- Hang from a wooden dowel or branch to create a mobile for a child’s bedroom window
- String several together on twine for a garland effect across a mantle or bookshelf
- Attach to suction cup hooks directly on a window for easy removal and repositioning
- Frame smaller suncatchers in simple picture frames for permanent wall art
- Use as gift tags tied directly to wrapped presents with festive ribbon
The Educational Benefits of Winter Craft Activities
It’s easy to think of crafts as just a fun way to pass the time, but the learning that happens during a project like this is genuinely substantial. Kids are developing skills across multiple areas at once — fine motor coordination, creative thinking, problem-solving, and even early scientific reasoning. Ask a child why they think light passes through the tissue paper but not the sequins, and you’ve just naturally opened the door to a conversation about transparency, opacity, and how light works.
Snowflake crafts in particular are a great jumping-off point for talking about symmetry, geometry, and how snow crystals actually form. Real snowflakes have a six-fold symmetry that comes from the molecular structure of ice, and mentioning that while kids are making their own versions sparks genuine curiosity about the natural world. For older kids or homeschool families, you can pair this with a mini lesson on light refraction, or explore the incredible work of Wilson “Snowflake” Bentley, who spent his life photographing individual snow crystals and proved they really are all different.
And beyond the academic angle, don’t underestimate what crafting together does for kids socially and emotionally. Sitting around a table working on something naturally gets people talking, cooperating, and connecting. Kids practice sharing materials, encouraging each other, and handling the occasional frustration when something doesn’t go as planned — all genuinely important life skills, practiced in a low-stakes, enjoyable setting. In a world that defaults to screens, a hands-on craft that requires presence, patience, and creativity is well worth the time.
Learning Areas Addressed by Suncatcher Crafts
- Fine Motor Development: Tearing, cutting, and placing small pieces of material strengthens the small muscles in hands and fingers that are essential for writing and other detailed tasks.
- Mathematics: Concepts of symmetry, pattern, fractions, and basic geometry are naturally embedded in the process of designing a snowflake shape.
- Science: Exploration of light, transparency, and color mixing introduces foundational concepts in physics and optics in a concrete, observable way.
- Art and Aesthetics: Color theory, composition, and the development of personal artistic style are all practiced and deepened through open-ended craft exploration.
- Social-Emotional Learning: Patience, perseverance, creative risk-taking, and pride in one’s own work are all nurtured throughout the crafting process from start to finish.
Making Suncatcher Crafts a Winter Tradition
The activities that stick with kids — the ones they actually remember — tend to be the ones that happen year after year. Making snowflake suncatchers an annual winter tradition is such a simple way to build those kinds of memories. Pick an afternoon each December or January, gather the supplies, put on some cozy music, and make a real occasion of it. Kids thrive on ritual, and knowing that this special afternoon is coming is something they’ll look forward to long before it arrives.
One of the sweetest parts of doing this every year is watching how each child’s suncatchers change over time. The enthusiastically chaotic creation of a four-year-old gives way to the more carefully planned design of an eight-year-old, and eventually to the genuinely impressive work of a teenager who might have otherwise moved on from crafts entirely. Keep a photo of each year’s suncatcher and display them together — it becomes a lovely visual record of growth, creativity, and time passing in the best possible way.
You can also take the tradition beyond your own home and turn it into a community or classroom event. Set up a long table with shared supplies, put out plenty of decorative options, and let each child’s creativity go wherever it wants. When everyone holds their finished suncatcher up to the window at the end, the collective burst of color and light is genuinely spectacular — a shared moment of delight that kids will bring up years later with a smile.








What do you think?
It is nice to know your opinion. Leave a comment.