










Easy DIY Egg Carton Flowers That Look Expensive
There is something deeply satisfying about transforming something destined for the recycling bin into a piece of art that stops guests in their tracks. Egg carton flowers have become one of the most beloved upcycling crafts in the DIY community, and for very good reason. With a little paint, a few basic supplies, and an afternoon of creative work, you can produce floral arrangements that genuinely rival the look of expensive silk or paper flowers found in boutique home décor stores.
What makes this craft so appealing is its accessibility. Egg cartons are freely available in virtually every household, and the additional materials required are minimal and inexpensive. Whether you are a seasoned crafter or someone picking up a pair of scissors for the first time in years, this project meets you exactly where you are. The techniques are forgiving, the results are consistently beautiful, and the entire process is genuinely enjoyable from start to finish.
This comprehensive guide will walk you through everything you need to know to create stunning egg carton flowers, from gathering your supplies to displaying your finished creations in ways that look polished and intentional. By the time you finish reading, you will have all the knowledge and confidence required to fill your home with handmade blooms that cost almost nothing but look absolutely priceless.
Gathering Your Materials and Setting Up Your Workspace
Before you cut a single cup from an egg carton, it pays to spend a few minutes assembling everything you need within easy reach. The core materials are wonderfully simple: cardboard egg cartons (the paper pulp variety works best and absorbs paint beautifully), a pair of sharp scissors or small craft snips, acrylic paint in whatever colors speak to you, a few small paintbrushes, craft glue or a hot glue gun, and some floral wire or wooden skewers if you want to create stems for your flowers. Green floral tape and artificial leaves are optional but add a lovely finishing touch.
Your workspace setup matters more than most beginners realize. Cover your table with newspaper or a plastic sheet because acrylic paint, while water-soluble when wet, stains permanently once dry. Keep a small cup of water nearby for rinsing brushes and a paper towel roll within arm’s reach. Good lighting is essential, particularly when you are shaping and cutting the petals, so position yourself near a window or set up a bright desk lamp. A drying rack or a sheet of wax paper where you can lay wet pieces flat will also make the whole process flow much more smoothly.
One of the most enjoyable parts of this project is the color planning stage, and it is worth taking a few extra minutes here. Browse images of real flowers for inspiration — roses, dahlias, zinnias, peonies, and anemones all translate beautifully into egg carton form. Decide whether you want a monochromatic bouquet for a sleek modern look, a mix of complementary colors for something more cottage-garden inspired, or perhaps metallics like gold and copper for an opulent, maximalist display. Laying out your paint colors before you begin helps you see how they will work together and prevents regret later when everything is already dry.
Cutting and Shaping the Egg Carton Cups
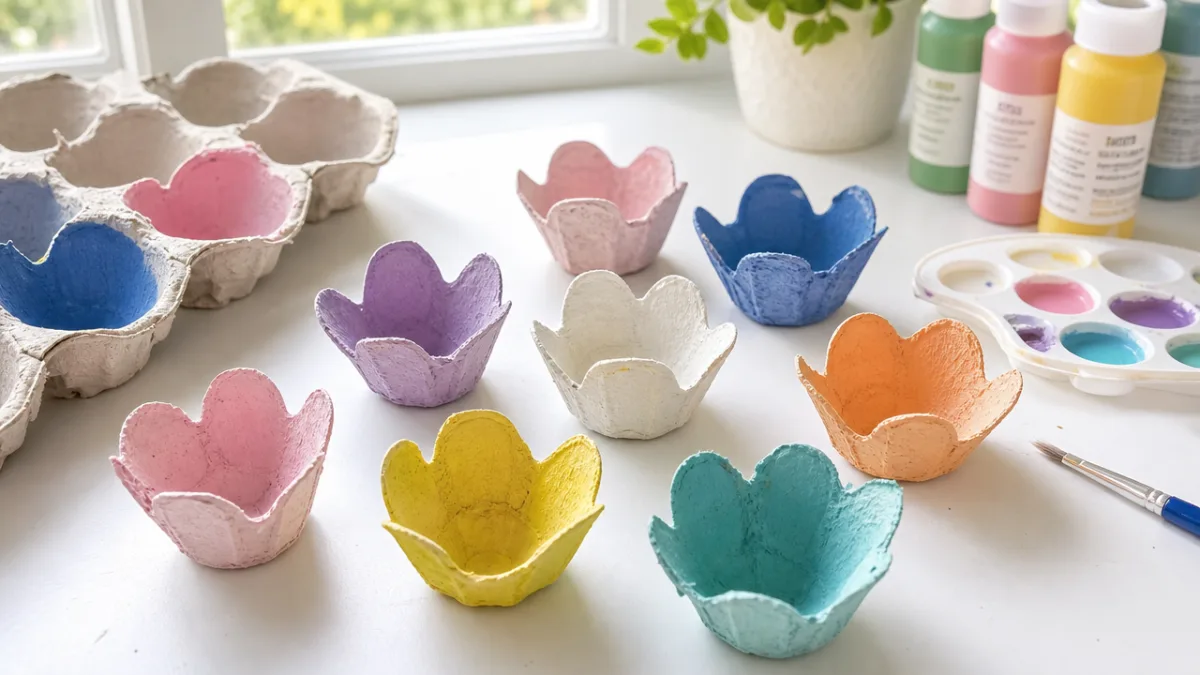
The transformation from humble packaging to delicate flower begins with the cutting stage, and this is where the magic truly starts to reveal itself. Begin by separating the individual cups from the egg carton using your scissors. Cut as cleanly as possible around the base of each cup, removing any jagged edges or connecting cardboard. Each cup will become the base of one flower, so a standard twelve-egg carton gives you twelve flowers — more than enough for a lovely arrangement.
Once your cups are separated, the shaping begins. Use your scissors to cut petal shapes around the rim of each cup, snipping downward toward the base in a series of pointed or rounded cuts. For a rose-like flower, make narrow pointed cuts that curl naturally when bent outward. For a fuller dahlia or zinnia effect, make wider, rounder petal shapes. You can also layer multiple cups of different sizes on top of one another to create flowers with real depth and complexity. There are no strict rules here, and experimentation almost always produces something wonderful and unexpected.
After cutting, use your fingers or the rounded end of a pencil to curl and shape the petals gently. Press each petal backward away from the center of the cup, giving it a natural curve that catches light beautifully. You can also pinch the tips of petals to make them slightly pointed, or score the surface lightly with a fingernail to add subtle texture. If you are layering multiple cups for a fuller flower, nest them inside one another now, offsetting the petals so each layer peeks out from behind the one in front of it, and glue them together at the base before moving on to painting.
For those who want to create flowers with a truly realistic silhouette, consider making additional individual petals from flat sections of the egg carton lid. Cut elongated teardrop shapes from the flat cardboard, score a central vein down the middle with a toothpick, and curl the edges gently. These can be glued around the outside of your cup base to create an outer ring of petals, making the flower appear fuller and more dimensional. This layering technique is the single most effective way to elevate your egg carton flowers from clearly handmade to genuinely impressive.
Painting Techniques That Make All the Difference
Painting is where your egg carton flowers truly come to life, and the techniques you use have an enormous impact on the final result. Begin with a base coat of your chosen color, applied generously over the entire flower including the inside of the cup center. Acrylic paint works perfectly on paper pulp egg cartons, soaking into the texture and creating a surface that is ready for further embellishment. Allow this first coat to dry completely before adding any additional layers, as painting over wet acrylic causes muddying and can weaken the cardboard structure.
Once your base coat is dry, the real artistry begins. Dry brushing is one of the most effective techniques for adding depth and dimension to your flowers. Dip a stiff brush into a slightly lighter or darker shade than your base color, wipe most of the paint off onto a paper towel until barely any remains, then drag it lightly over the raised edges and petal tips. This deposits just a whisper of color on the raised surfaces, mimicking the natural light-catching variation you see on real flower petals. The difference between a flat painted flower and one that has been dry-brushed is remarkable and immediately visible.
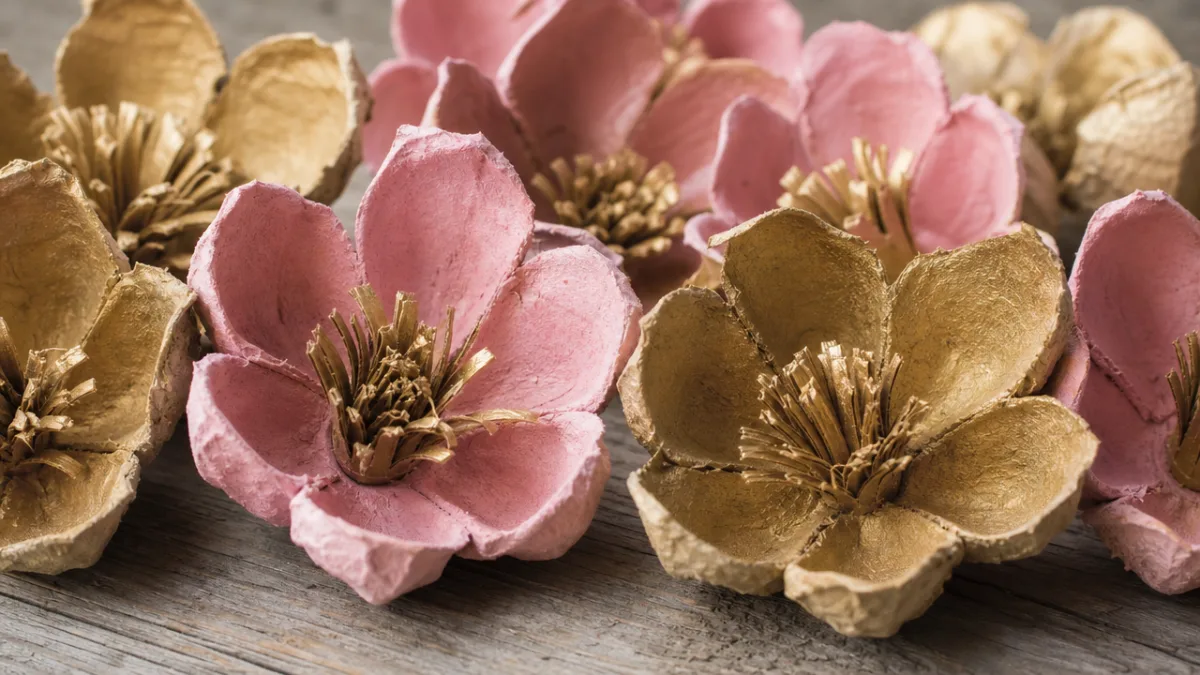
For an even more luxurious finish, try ombre or gradient painting within each petal. Load your brush with a deep, saturated color at the base of each petal and use increasingly diluted or lighter paint as you move toward the tip, blending with a damp brush while the paint is still wet. This technique is particularly beautiful on roses and peonies, where real petals naturally deepen in color toward their centers. Gold or bronze paint applied to petal edges with a fine detail brush creates a gilded effect that looks genuinely expensive and catches the light in a way that draws the eye across a room.
Do not overlook the center of your flower, as this detail has a disproportionate impact on the overall realism of the finished piece. A small yellow button center can be created by rolling a tiny ball of yellow-painted cardboard or by using a large round brad fastener. Stamens can be fashioned from twisted wire, toothpicks dipped in paint, or thin strips of cardboard curled around a pencil. Adding a tiny dot of black or dark brown to the very center, surrounded by yellow, creates the visual depth that makes a viewer look twice and wonder for a moment whether what they are seeing is real.
Creating Stems and Assembling Your Arrangement
A beautiful flower head without a proper stem is a decoration waiting to become an arrangement, and the assembly stage is what transforms individual crafted pieces into something that can be displayed and admired. Floral wire is the most versatile option for stems, available at craft stores in various gauges. Push a length of wire up through the base of your finished flower and bend a small hook at the top to prevent it from pulling back through. Alternatively, wooden skewers work beautifully for flowers that will be arranged in a vase, and their rigid structure holds blooms upright without any tendency to droop or sway.
Wrapping your stems with green floral tape completes the illusion convincingly. Floral tape is self-adhesive when stretched, so it bonds to itself as you wind it in a tight spiral down the length of your wire or skewer. Start just beneath the base of the flower head and wrap continuously downward, stretching the tape slightly as you go and keeping the spiral tight and even. Artificial leaves can be incorporated into the wrapping at any point — simply hold a leaf against the stem at the desired height and continue wrapping over its base to secure it in place. A few well-placed leaves turn a simple stem into something that genuinely resembles a cut flower fresh from a garden.
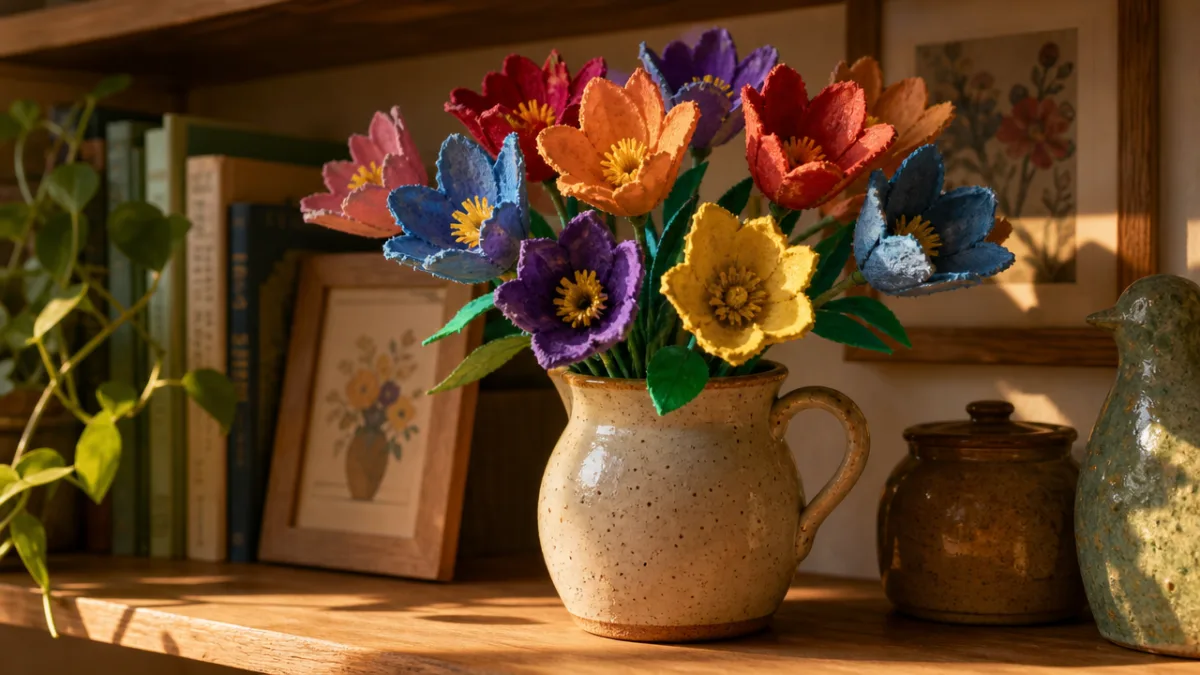
When assembling a full arrangement, consider varying the heights of your stems significantly. Cut or extend wires so that flowers sit at different levels within the bouquet, with some blooms nestled low and close to the vase rim while others stand tall above the group. This variation in height creates visual interest and prevents the arrangement from looking flat or stiff. Tuck in smaller accent flowers — perhaps simple four-petaled blooms made from a single cut cup — among your larger statement flowers to fill gaps and add texture. A few stems of artificial greenery or eucalyptus from a craft store blend seamlessly with your handmade pieces and complete the bouquet beautifully.
Display Ideas That Elevate the Finished Look
The way you choose to display your egg carton flowers has as much impact on the final impression as the craftsmanship of the flowers themselves. A well-chosen vessel transforms a collection of handmade blooms into a considered decorative statement. Ceramic vases in muted tones — cream, sage, terracotta, or charcoal — complement the slightly textural quality of painted cardboard beautifully. Clear glass vessels work particularly well if your stems are neatly wrapped and uniform in color, as they allow the full height of the arrangement to be appreciated. Even a simple mason jar or an antique tin can can become a charming display vessel depending on the aesthetic of your space.
Beyond the traditional vase arrangement, egg carton flowers lend themselves to a variety of creative display formats that add real personality to a room. Consider mounting individual flowers directly onto a wall to create a floral installation — a cluster of blooms in a gradient of pinks and corals arranged in a loose circular shape on a white wall makes a striking piece of art that costs almost nothing to create. Flowers can also be hot-glued onto a wreath form for a front door display that welcomes guests with cheerful handmade charm. A garland of smaller flowers strung on twine makes a lovely addition to a mantelpiece, bookshelf, or the backdrop of a party table.
Seasonal and themed variations add longevity to this craft and ensure that your skills keep developing over time. Here are some particularly effective display concepts to explore:
- Metallic bouquet: Paint all flowers in gold, silver, and copper tones and display in a dark matte vase for a glamorous, maximalist centerpiece that suits autumn and winter décor beautifully.
- Pastel spring wreath: Create small blossoms in soft pink, lavender, mint, and cream and hot-glue them densely onto a foam or straw wreath ring for an Easter or spring door decoration.
- Monochrome statement piece: Make all flowers in a single color family — varying shades of deep red, burgundy, and blush, for example — for a sophisticated, gallery-worthy arrangement.
- Wildflower meadow jar: Combine many small, simply shaped flowers in a range of bright, contrasting colors and arrange them loosely in a tall clear jar for a cheerful, informal look.
- Wedding or event décor: White and ivory egg carton flowers, finished with a pearl-finish spray paint, create surprisingly elegant table centerpieces for budget-conscious events.
Longevity is one of the great practical advantages of these flowers over fresh-cut alternatives. With a light coat of clear sealant spray applied once your painting is fully dry, egg carton flowers become quite durable and resistant to humidity. They do not wilt, shed petals, or require water. They can be stored carefully in a box between uses and will emerge looking exactly as they did when you first made them. Over time, as you refine your techniques and experiment with new shapes and color combinations, you will accumulate a collection of flowers that can be rearranged into different displays for different seasons or occasions, giving you almost infinite creative flexibility from a single investment of time and minimal materials.
Tips, Troubleshooting, and Taking Your Skills Further
Even the most straightforward craft projects have a learning curve, and a few targeted tips can save beginners a great deal of frustration. The most common challenge newcomers encounter is cardboard that becomes too soft and floppy after painting. This happens when too much water is mixed into the paint, saturating the paper pulp fibers. The solution is to use acrylic paint at a reasonably full consistency, adding only enough water to make it flow easily without becoming translucent. If a flower does go floppy during painting, simply set it aside to dry completely in its desired shape — it will firm back up as the paint cures and actually becomes slightly stiffer than before it was painted.
Hot glue is the preferred adhesive for assembly, but it requires some care. Always use a low-temperature glue gun if possible, as high-temperature guns can melt or warp thin cardboard and may cause burns when working with small, delicate pieces. Apply glue quickly and position pieces immediately, as hot glue sets in seconds. If you end up with stringy glue wisps across your flower, wait until they are fully cool and dry, then roll them away gently with your fingertip — they detach cleanly without damaging the painted surface. PVA craft glue works as an alternative and gives a slightly longer working time, but requires patience since it takes much longer to dry fully.
As your confidence grows, you will naturally begin to push the techniques in more ambitious directions. More advanced crafters might explore the following avenues for developing their egg carton flower practice:
- Tissue paper centers: Cut tiny circles of yellow or cream tissue paper, scrunch them into small balls, and glue them into flower centers for a soft, organic texture that closely mimics real stamens.
- Watercolor washes: After sealing your flower with a clear coat, apply diluted watercolor paint in soft washes for a delicate, translucent color effect that no acrylic technique can quite replicate.
- Mixed media combinations: Combine egg carton flowers with fabric flowers, dried botanicals, and commercial artificial foliage to create arrangements with rich textural variety.
- Scented additions: Add a drop of essential oil to the center of each finished flower for an arrangement that not only looks beautiful but carries a subtle, pleasant fragrance.
- Gift wrapping applications: Hot-glue a single finished flower onto a plain wrapped gift for a decorative topper that costs next to nothing but looks utterly charming and considered.
Sharing this craft with others multiplies its joy considerably. Egg carton flower-making is an ideal activity for a crafting afternoon with friends, a school art project, or a family weekend activity that engages children as young as five or six with proper supervision. The simplest flower shapes — a single cup with rounded petal cuts and a wash of bright paint — are achievable by young children, while adults in the same session can work on more complex layered blooms. The shared experience of working toward something beautiful together, from such humble starting materials, creates its own kind of warmth that is entirely separate from the flowers themselves.
Ultimately, what egg carton flowers represent goes beyond the craft itself. They are a reminder that creativity is not a resource reserved for those with large budgets or specialist training. Beauty can be found in the recycle bin, in an afternoon of patient cutting and painting, in the small satisfying act of turning something ordinary into something remarkable. Every egg carton flower you make carries that truth within it, and that is perhaps the most valuable thing a simple DIY project can offer — the quiet, genuine confidence that comes from making something lovely with your own two hands.








What do you think?
It is nice to know your opinion. Leave a comment.