










What Is a Tuna Can Swing Out Storage Tower?
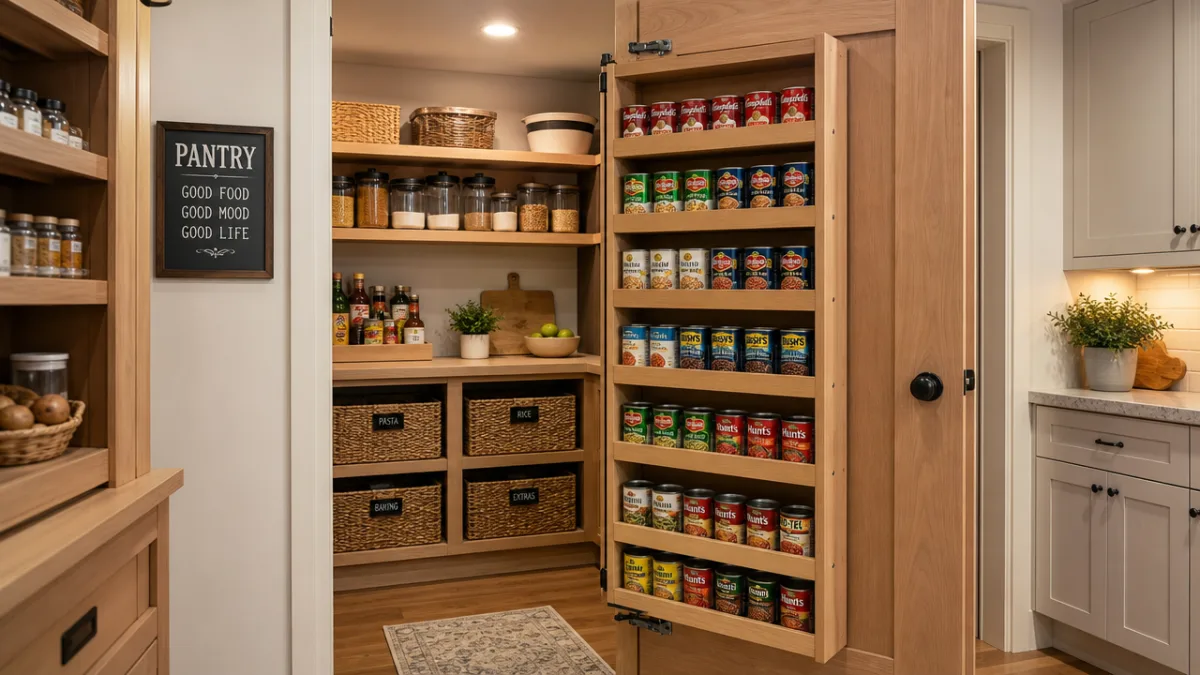
A tuna can swing out storage tower is one of the most clever and satisfying DIY pantry solutions you will ever encounter in the world of home organization. At its core, the project involves building a narrow, vertical cabinet or frame that mounts flush against a wall or inside a cabinet opening, fitted with multiple horizontal shelves or cradles designed to hold standard-size tuna cans stacked on their sides. A pivoting or swing-out mechanism allows the entire unit to rotate outward from the wall, revealing a hidden column of canned goods that would otherwise go completely unnoticed. The genius of this design lies in how it converts dead, wasted wall space into a surprisingly generous food storage zone without visually cluttering your kitchen at all.
The swing-out mechanism is what truly elevates this project beyond a simple shelf. Most builders use a heavy-duty pivot hinge or a piano hinge mounted at the top and bottom of the frame, allowing the tower to arc outward smoothly when pulled. Because tuna cans are relatively lightweight individually, even a tower holding twenty to thirty cans remains manageable to swing open with one hand. When closed, the unit sits perfectly flat against the wall or inside a cabinet gap, making it essentially invisible to anyone who does not know it is there. This hidden quality gives the project an almost magical feeling the first time you demonstrate it to a guest or family member.
The concept is rooted in a broader category of woodworking and kitchen organization known as pull-out or swing-out pantry systems, which have been popular in custom cabinetry for decades. What makes the tuna can version particularly appealing to the DIY community is its accessibility. You do not need advanced woodworking skills, expensive machinery, or a large workshop to build one. The materials are inexpensive, the cuts are mostly straight, and the assembly is logical and forgiving. Whether you are a seasoned builder or someone who has only just started experimenting with hand tools, this project sits comfortably within reach, and the payoff in both utility and satisfaction is enormous.
The Origins of the Swing-Out Pantry Concept
Swing-out and pull-out pantry designs have long been a staple of high-end kitchen cabinetry, often seen in custom homes where every inch of space is engineered for maximum utility. Professional kitchen designers have used tall pull-out spice racks, rotating lazy Susans, and hidden door pantries for generations, recognizing that vertical wall space is among the most underutilized real estate in any kitchen. The tuna can tower is a natural extension of this philosophy, adapted for the DIY crowd who wants the same functionality without the custom cabinetry price tag. Online communities, particularly Pinterest and YouTube, helped popularize the specific tuna-can-sized variation in the 2010s, turning it into a beloved weekend project shared across millions of home organization boards.
What made the project go viral in home improvement circles was its combination of visual drama and practical common sense. A video or photo of a flat wall panel swinging open to reveal rows of neatly organized cans triggers a deeply satisfying response in viewers, touching on the universal appeal of hidden compartments and clever use of space. The project also resonated with families who bulk-buy canned goods and struggle to store them neatly, as well as homesteaders and preppers who want to maintain a well-organized food stockpile without dedicating an entire room to it. The tuna can swing-out tower sits at a perfect intersection of aesthetics, practicality, and DIY pride.
Why This Storage Solution Deserves a Place in Your Kitchen
Space is the single greatest challenge in most modern kitchens, and the tuna can swing-out tower addresses it in a way that few other projects can match. The average kitchen has several narrow gaps and dead zones that are structurally necessary but functionally useless under normal circumstances. The space beside a refrigerator, the gap between a cabinet and a doorframe, or the slim wall section beside a pantry door are all prime candidates for a swing-out tower installation. By targeting these forgotten zones, you effectively add storage capacity without removing any existing counter space, cabinet space, or floor space. It is a pure gain in functionality with virtually zero sacrifice anywhere else.
Beyond the spatial advantages, this type of storage promotes significantly better pantry management. When cans are stacked in a deep cabinet or jumbled in a drawer, older cans sink to the back and are forgotten while newer purchases get used first, creating waste and unnecessary spending. The swing-out tower makes every single can immediately visible and accessible at a glance, which encourages proper first-in, first-out rotation. You can see at a moment’s notice how many cans of tuna you have, what varieties are running low, and what needs to be added to your grocery list. This organizational clarity has a cascading positive effect on your meal planning, your grocery budget, and your household food waste.
There is also a deeply satisfying aesthetic dimension to this project that should not be underestimated. A well-built swing-out tower, painted or stained to match your cabinetry and fitted with a simple handle or pull, looks like a perfectly intentional and professional design element rather than a DIY afterthought. When closed, it contributes to the clean, uncluttered appearance that most people want in their kitchens. When open, it presents a beautifully organized display of uniform cans that feels orderly and even somewhat beautiful. For anyone who derives genuine pleasure from an organized home, this project delivers both the functional benefit and the visual reward in equal measure.
Comparing the Tower to Traditional Can Storage Methods
Traditional can storage typically involves stacking cans in a cabinet, placing them in a basket or bin, or arranging them on a pantry shelf. All of these methods share a common weakness: depth. When you push cans to the back of a shelf to make room for more in front, the rear cans become effectively invisible and unreachable without some effort. Can organizer inserts that create a sloped, rolling system help somewhat, but they consume significant shelf real estate and still require you to open a door and peer into a cabinet. The swing-out tower eliminates the depth problem entirely by presenting every can in a single-layer, face-forward arrangement that can be taken in at a single glance.
Countertop can dispensers are another popular alternative, but they occupy valuable surface space that most home cooks already feel they do not have enough of. Freestanding wire rack organizers solve the visibility problem but often look cluttered and accumulate dust. The swing-out tower beats both alternatives by keeping everything concealed, dust-free, and completely out of the way until the moment you need it. The comparison ultimately highlights what makes the swing-out tower genuinely superior rather than merely different: it solves multiple problems simultaneously rather than trading one problem for another.
Materials and Tools You Will Need
One of the most appealing aspects of this project is how modest the material requirements are. The primary structural material is typically half-inch or three-quarter-inch plywood or MDF, both of which are inexpensive, easy to cut, and readily available at any home improvement store. For a tower designed to hold standard 5-ounce or 12-ounce tuna cans, you will need enough sheet material to cut two long side panels, a back panel, a top and bottom cap, and however many horizontal shelf strips you want to include. Most builders find that a single half-sheet of plywood is more than sufficient, and the total lumber cost for the project often comes in under fifteen to twenty dollars.
For hardware, the most important component is the hinge system. A piano hinge, also called a continuous hinge, is the most popular choice because it distributes the weight of the loaded tower evenly along its full length, preventing warping or stress on a single pivot point. Heavy-duty European-style cabinet hinges are another option for builders who prefer a cleaner look, as they can be concealed within the frame. You will also need wood screws appropriate for your chosen material thickness, wood glue for reinforcing joints, sandpaper in multiple grits for finishing, and a small handle or pull to make opening the tower easy. If you plan to paint the finished tower, a can of primer and your chosen paint color round out the supply list.
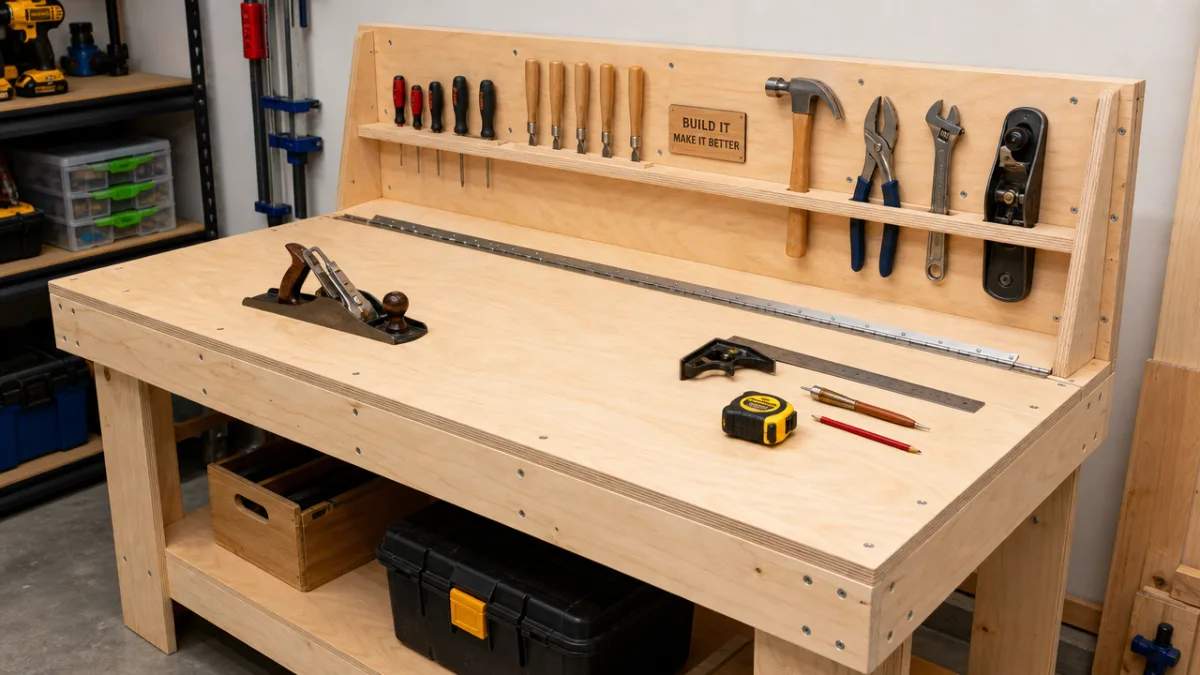
In terms of tools, this project is genuinely beginner-friendly. The essential tools include a tape measure, a pencil for marking cuts, a circular saw or miter saw for making straight cuts in the plywood, a drill with appropriate bits for pilot holes and screws, and a level for ensuring the tower hangs perfectly straight. A sander or sanding block will be needed for finishing the edges and surfaces before painting. Optional but helpful tools include a pocket hole jig for cleaner joinery, a square for checking right angles, and a clamp or two to hold pieces in alignment while glue dries. If you do not own a saw, many hardware stores will make cuts for you at low or no cost, making this project accessible even without a full tool collection.
- Half-inch or three-quarter-inch plywood or MDF for the main frame and shelves, typically one half-sheet is sufficient for a standard-sized tower
- Piano hinge or heavy-duty cabinet hinges to create the swing-out mechanism, rated to handle the loaded weight of the full tower
- Wood screws and wood glue for assembly and joint reinforcement throughout the entire structure
- Sandpaper in 80, 120, and 220 grits for smoothing cut edges and preparing surfaces for paint or stain
- Primer and paint or wood stain to finish the tower and help it blend seamlessly with existing cabinetry
- Small handle or pull for easy opening and to give the unit a finished, professional appearance
- Tape measure, pencil, level, square, and drill as the essential measuring and fastening tools for accurate assembly
Step-by-Step Construction Guide
Begin by carefully measuring the space where you intend to install your swing-out tower. Measure the height of the gap from floor to ceiling or from one cabinet surface to another, then subtract a small clearance of roughly an eighth of an inch at the top and bottom to allow the tower to swing freely without scraping. Measure the width of the available space and decide how deep you want the tower to be, keeping in mind that a standard tuna can is approximately three inches in diameter, so a depth of three and a half to four inches is usually sufficient to cradle the cans securely while keeping the tower slim and unobtrusive. Write all measurements down clearly before making any cuts.
Once your measurements are confirmed, transfer them to your plywood sheet and make your cuts. You will need two identical side panels at the full height of your tower, one back panel of the same height and your chosen width, a top cap and bottom cap at the same width, and as many horizontal shelf strips as you want across the height of the tower. A common spacing for tuna can shelves is approximately three and a half inches between each shelf, which accommodates cans comfortably. After cutting, sand all edges thoroughly with 80-grit sandpaper to remove splinters and sharp edges, then follow up with 120-grit for a smoother finish before assembly begins.
Assemble the frame by attaching the top and bottom caps to the side panels first, using wood glue and screws driven through pilot holes to prevent splitting. Then attach the back panel to close the frame and add rigidity to the entire structure. Once the main box is assembled and the glue has cured, attach your horizontal shelf strips at your measured intervals. These strips should protrude slightly from the front of the box to act as a lip that prevents cans from rolling out when the tower is swung open. A protrusion of roughly three-quarters of an inch is usually sufficient. Sand the fully assembled tower again with 120-grit and then 220-grit before priming and painting.
Mounting the tower is the final and most critical step. Attach your piano hinge to one side of the tower frame, then hold the tower in position in your chosen gap and transfer the hinge mounting holes to the wall or cabinet frame beside it. Drill pilot holes and drive screws into wall studs or solid cabinet material for a secure mount. Do not mount the hinge to drywall alone, as the weight of a loaded tower can pull the screws free over time. Once mounted, test the swing action and adjust the hinge if necessary until the tower opens and closes smoothly. Attach your handle to the front face, load your cans, and enjoy the deeply satisfying result of your work.
- Measure the installation space carefully, noting height, width, and depth, and subtract clearance for smooth swinging movement on all sides
- Transfer measurements to plywood and make all necessary cuts for side panels, back panel, top and bottom caps, and horizontal shelf strips
- Sand all cut pieces thoroughly with progressively finer sandpaper grits before beginning any assembly work
- Assemble the main box frame using wood glue and screws through pilot holes, starting with the top and bottom caps attached to the side panels
- Attach the back panel to close and rigidify the frame, then install horizontal shelf strips at measured intervals with a front-facing lip to retain cans
- Sand the completed assembly, apply primer, and finish with paint or stain matched to your existing kitchen cabinetry color and finish
- Mount the piano hinge to the tower and then to the wall or cabinet frame, ensuring all screws hit solid wood or studs for a secure and lasting installation
- Test the swing action, make any necessary hinge adjustments, attach the handle, load your cans, and confirm that everything operates smoothly
Customization Ideas and Advanced Variations
Once you have mastered the basic tuna can swing-out tower, a world of creative customization opens up that can make your project even more useful and visually impressive. One of the most popular modifications is scaling the shelf spacing to accommodate different can sizes, turning the tower into a versatile pantry unit rather than one dedicated solely to tuna. By alternating shelf heights throughout the tower, you can create zones for small cans like tomato paste, mid-size cans like chickpeas or diced tomatoes, and even larger cans of soup or broth. This multi-size approach maximizes the tower’s utility and makes it an even more valuable component of your pantry system.
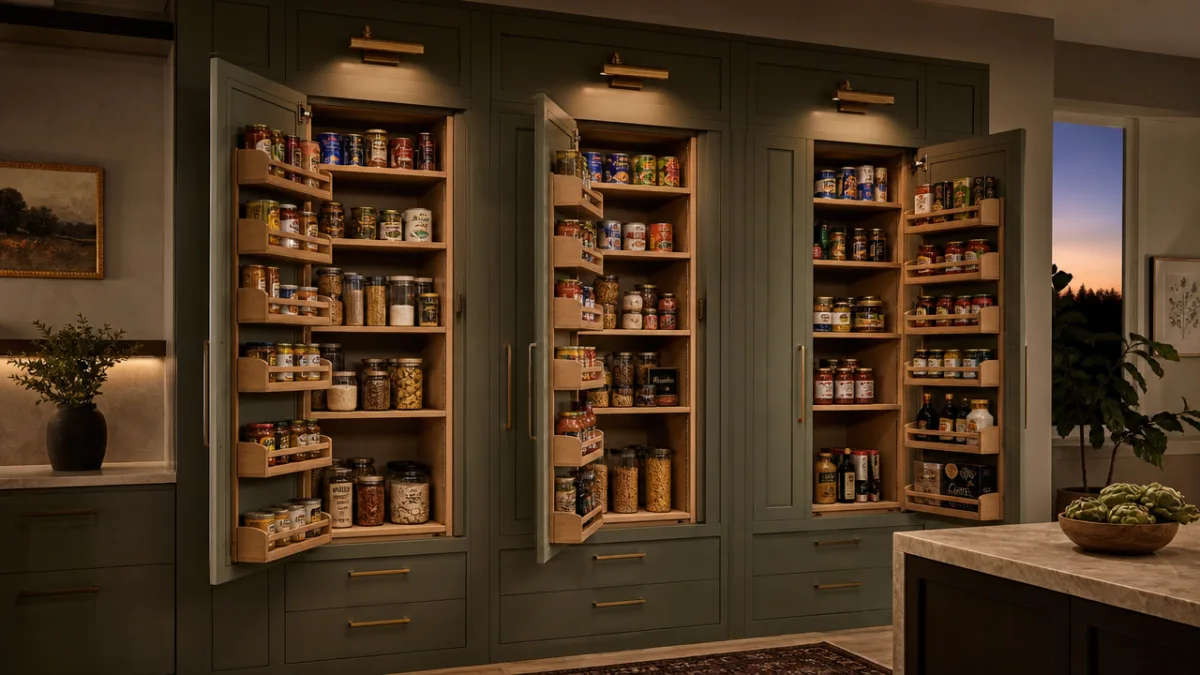
Another popular variation involves building multiple towers and linking them together as a unified panel installation, effectively creating a hidden pantry wall behind what appears to be a flat surface. Each individual tower swings out independently on its own hinge, and when all are closed they present a seamless, flush surface that might be painted or wallpapered to blend entirely with the surrounding wall. This more ambitious variation requires careful planning and precise execution, but the result is a genuinely spectacular organizational feature that transforms an ordinary wall into a hidden food storage system capable of holding hundreds of cans. For homesteaders, large families, or anyone who bulk-buys groceries, this multi-tower installation is a true game-changer.
For builders who want to push the aesthetic dimension further, adding trim and decorative elements to the front face of the tower can make it look like a piece of custom furniture rather than a utility project. Applied molding around the perimeter, a beadboard panel insert on the front face, or a chalkboard paint surface where you can write labels or grocery reminders all add character and intentionality to the finished piece. Some builders even incorporate a magnetic closure mechanism so the tower clicks shut neatly and does not drift open on its own, which is especially valuable if your kitchen floor is not perfectly level. Small touches like these elevate the project from a clever trick to a genuinely beautiful home feature.
The concept also translates beautifully to spaces outside the kitchen, revealing the broader potential of the swing-out tower principle. In a laundry room, a tower fitted with slightly deeper shelves can hold detergent pods, dryer sheets, stain remover bottles, and other supplies in the narrow gap beside a washer or dryer. In a bathroom, a slim tower built to fit beside a vanity can hold toiletries, medicines, and first aid supplies in a hygienic, concealed arrangement. A home office version might hold office supplies, notebooks, or charging cables in the gap beside a desk or bookcase. The underlying principle of converting dead wall space into swing-out storage is adaptable to nearly any room in the home, making this one of the most transferable DIY skills you can develop.
Finishing and Painting Tips for a Professional Result
The quality of your finish work will determine whether your swing-out tower looks like a polished, intentional design feature or an obvious DIY add-on. The single most important finishing step is proper preparation of the wood surface before any paint is applied. Fill any screw holes with wood filler, let it cure fully, and sand flush. Pay particular attention to the edges of plywood or MDF, which tend to absorb primer and paint unevenly due to their porous end grain. Applying two coats of a shellac-based primer or a specific edge-sealing product before your topcoat will result in a dramatically smoother and more professional final appearance.
When it comes to topcoat paint, a semi-gloss or satin finish is generally the best choice for kitchen environments because it resists moisture and is easy to wipe clean, while not being so shiny that it draws attention to any minor surface imperfections. Apply at least two thin coats of topcoat rather than one thick one, lightly sanding with 220-grit between coats for the smoothest possible result. If you are matching existing cabinetry, take a cabinet door to your paint store and have them color-match it precisely. The effort invested in thorough finishing pays dividends for years, as a well-finished tower will look as good a decade from now as it does on the day you first hang it.
Tips for Maximizing Long-Term Organization and Usability
Building your swing-out tower is only the beginning of the organizational journey. To get the most lasting benefit from it, you should establish a consistent system for how you load and rotate cans from the very first day. The most effective approach for canned goods is a strict first-in, first-out rotation, which means new cans always go in at the top and you always reach for cans from the bottom. This ensures that no can sits forgotten at the back of a shelf for months or years past its best-by date. Some builders design their towers with this in mind from the start, creating gravity-fed slots where cans roll to the front as the lowest can is removed, though this more complex design requires careful engineering of the shelf angles.
Labeling the shelves or the front face of the tower is another practical step that adds significant utility over time. A simple label maker can produce clean, readable labels indicating what type of can belongs on each shelf zone, which helps every member of the household understand where items go when they are putting groceries away. This prevents the gradual entropy that causes most organizational systems to break down over time: when everyone knows where things go, everything actually goes there. Labels also help when the tower is fully loaded, allowing you to identify which section to open rather than having to swing the whole tower out just to find one can.
Performing a brief monthly audit of your swing-out tower keeps the system functioning at its best and helps you stay on top of your pantry inventory without significant effort. Once a month, swing the tower fully open and take thirty seconds to scan every shelf. Check for any cans that are close to their best-by dates and move them to the front for priority use. Note any varieties that are running low and add them to your shopping list. Wipe down the shelves with a damp cloth if any spills or condensation marks have accumulated. This small, regular investment of time prevents the gradual disorganization that inevitably overtakes even the most beautifully built storage systems when they are not maintained with some intentionality and care.
Finally, consider the swing-out tower as the beginning of a broader kitchen organization project rather than a standalone solution. The habits of intentional storage, regular rotation, and clear labeling that you develop while using the tower can be applied to every other area of your kitchen and pantry. The project has a way of inspiring people to look at the rest of their kitchen with fresh eyes, suddenly noticing other dead spaces and inefficiencies that could be addressed with similar creativity. Many home organizers report that building their first swing-out tower was the catalyst for a complete kitchen reorganization that saved them money, reduced food waste, and made daily cooking a more enjoyable and stress-free experience. It is a small project with an outsized impact on how you relate to your kitchen space every single day.








What do you think?
It is nice to know your opinion. Leave a comment.