










The Crochet Waffle Stitch: A Complete Guide to Mastering This Textured Technique
What Is the Crochet Waffle Stitch?
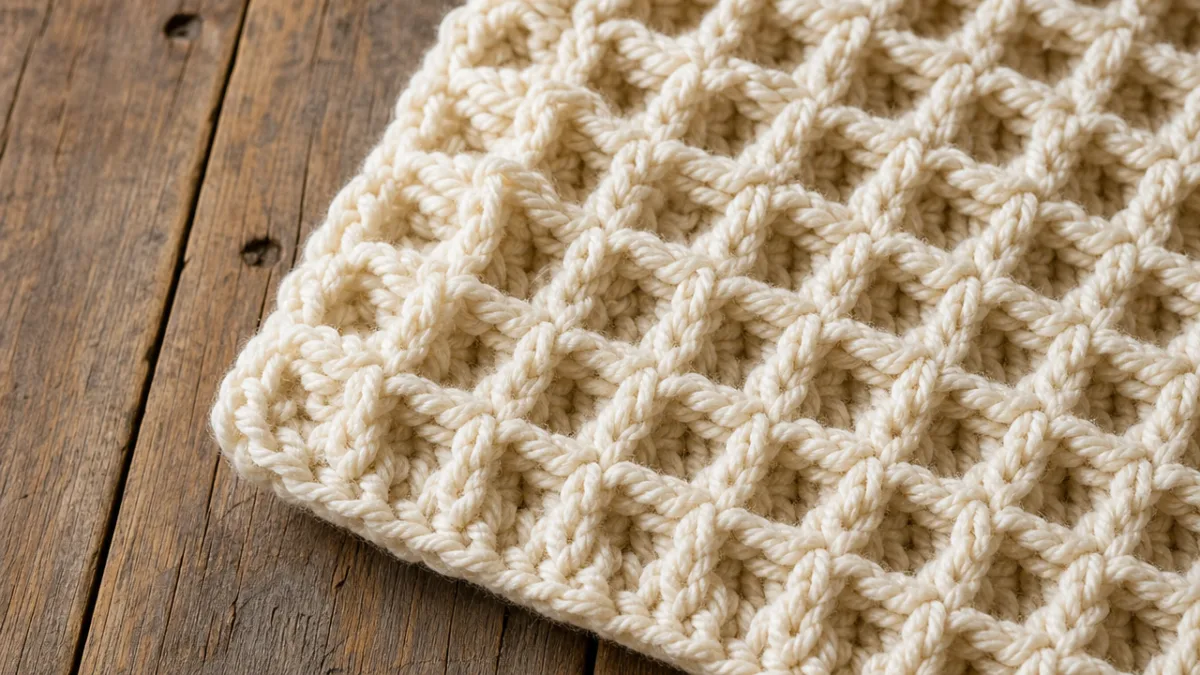
The crochet waffle stitch is one of the most beloved and visually striking stitch patterns in the world of crochet. Named for its unmistakable resemblance to a freshly made waffle, this technique creates a deeply textured, grid-like surface that stands out beautifully on blankets, dishcloths, scarves, and a wide variety of other projects. Whether you are a beginner looking to expand your skill set or an experienced crocheter wanting to revisit a classic, the waffle stitch offers something genuinely rewarding for every level of maker.
At its core, the waffle stitch combines front post double crochets with standard double crochets arranged in a repeating pattern across rows. This combination of stitches worked around the post of previous stitches creates the characteristic raised ridges that form the waffle grid. The result is a fabric that has incredible depth and dimension, making it feel substantial and luxurious in the hand. It is the kind of stitch that immediately impresses onlookers, yet once you understand the mechanics, it is surprisingly approachable to execute.
One of the reasons the waffle stitch has remained so popular over the years is its remarkable versatility. It works beautifully in cotton yarn for kitchen items like dishcloths and pot holders, in chunky wool for thick cozy blankets, and in lightweight acrylic blends for baby items and garments. The texture reads clearly in solid colors, allowing the stitchwork to take center stage, but it also looks stunning in subtle variegated or tonal yarns that add visual interest without competing with the pattern. Few stitches offer this level of adaptability while still delivering such consistent, impressive results.
The History and Appeal of Textured Crochet
Textured crochet stitches have been a fundamental part of fiber arts history for centuries. From the intricate raised patterns of Irish crochet lace to the bold relief designs of Tunisian entrelac, crochet makers have long sought ways to transform a simple strand of yarn into something with depth, substance, and tactile richness. The waffle stitch fits squarely into this tradition, offering a modern take on texture that feels both timeless and contemporary at the same time. Its grid structure gives it a geometric quality that appeals to today’s design sensibilities.
The appeal of textured stitches like the waffle stitch goes beyond mere aesthetics. There is something deeply satisfying about working a stitch that builds upon itself in a visible, tangible way. As you complete each row and watch the waffle grid emerge from your hook, there is an immediate sense of accomplishment and progress that keeps crafters engaged and motivated. This tactile feedback loop is one of the reasons many crocheters find the waffle stitch almost addictive once they begin a project with it. The stitch seems to pull you forward, encouraging just one more row.
Historically, textured crochet was also valued for its practical qualities. A densely textured fabric is typically thicker and more insulating than a flat single crochet or basic double crochet fabric. Waffle-stitch blankets and dishcloths are not just beautiful — they are genuinely more functional for their intended purposes. The raised surface of a waffle stitch dishcloth, for example, provides extra scrubbing ability, making it far more effective at cleaning than a flat-woven alternative. This happy marriage of form and function has helped the waffle stitch earn and maintain its devoted following in crafting communities worldwide.
Materials and Tools You Will Need
Before you begin your waffle stitch journey, gathering the right materials will make the entire process smoother and more enjoyable. The most important decision you will make is your choice of yarn. For beginners learning the stitch, a smooth, medium-weight worsted yarn in a solid color is highly recommended. The smooth texture allows your hook to glide easily around the post stitches, and the solid color ensures you can clearly see each stitch as you work, making it much easier to count and identify where each new stitch should be placed.
Your crochet hook size should correspond to the yarn weight you select. For a standard worsted weight yarn, a 5mm or 5.5mm hook is typically ideal. However, it is worth noting that the waffle stitch tends to produce a denser fabric than many other stitches worked with the same yarn and hook combination. Some crocheters prefer to go up one hook size from the yarn label’s recommendation to achieve a fabric with a slightly more relaxed drape, particularly when making wearable items like scarves or cowls where stiffness would be undesirable.
Beyond yarn and hook, a few additional tools will serve you well throughout your project. Stitch markers are invaluable for keeping track of your beginning chains and ensuring your row counts stay accurate, particularly when working on larger projects like blankets where losing track can mean significant unraveling. A yarn needle for weaving in ends is essential for a polished finish. Scissors, a tape measure, and a notepad for tracking your row progress round out a basic waffle stitch toolkit. Having everything organized before you begin sets you up for a calm, focused crafting experience.
Here is a quick checklist of what you will want to have on hand:
- Smooth worsted weight yarn in your chosen color or colorway
- Appropriately sized crochet hook (typically 5mm to 5.5mm for worsted weight)
- Stitch markers in at least two different colors
- Yarn needle for finishing and weaving in ends
- Sharp scissors
- Tape measure or ruler
- Notepad or row counter app for tracking progress
Step-by-Step Instructions for the Waffle Stitch
The foundation of the waffle stitch begins with a starting chain. For a standard practice swatch, chain a multiple of three stitches plus two. For example, chain 23 for a swatch that is approximately 7 to 8 inches wide in worsted weight yarn. This specific multiple is critical to the pattern working correctly, so take care to count your chains carefully before beginning. Many experienced crocheters recommend placing a stitch marker in the very first chain to make it easier to identify when you need to count back at the end of a row.
Row one establishes your base of double crochet stitches. Beginning in the fourth chain from your hook, work one double crochet in each chain across, then chain two and turn. This row is straightforward and identical to working a standard double crochet row. It creates the foundation upon which all subsequent post stitches will be anchored. Take your time with this row to ensure your tension is consistent throughout, as an even foundation makes everything that follows significantly easier to manage and results in a more professional finished look.
Row two is where the waffle pattern begins to take shape. After your turning chain, work your first double crochet into the first stitch. Then, working across the row, you will alternate between front post double crochets (FPdc) and regular double crochets in a two-by-two pattern. Specifically, you work two FPdc stitches followed by one regular DC, repeating this sequence across. The front post double crochet is worked by inserting your hook from front to back around the post of the corresponding stitch in the row below, rather than through the top loops as you would for a standard stitch.
Row three continues building the grid by working back post double crochets (BPdc) in the positions that received FPdc stitches in the previous row. This alternation between front and back post stitches on alternate rows is what creates the characteristic raised grid of the waffle pattern. As you work more rows, the three-dimensional texture becomes increasingly pronounced and the waffle grid visually pops from the fabric. Most crocheters find that by row four or five, the pattern becomes intuitive and they can work it without referencing the instructions on every stitch.
Here is a simplified row-by-row summary to keep nearby as you work:
- Foundation chain: Chain a multiple of 3 plus 2 extra chains
- Row 1: DC across, chain 2, turn
- Row 2: DC in first stitch, then repeat (2 FPdc, 1 DC) across, chain 2, turn
- Row 3: DC in first stitch, then repeat (2 BPdc, 1 DC) across, chain 2, turn
- Repeat Rows 2 and 3 until your project reaches the desired length
- Final row: Work a standard DC row to create a clean, even edge
Common Mistakes and How to Avoid Them
Even experienced crocheters encounter a few predictable stumbling blocks when first learning the waffle stitch, and understanding these pitfalls in advance will save you considerable time and frustration. The most common mistake is misidentifying where to place the post stitches as the project grows taller. Because the post stitches visually cluster together as the waffle ridges form, it can become confusing to determine whether a particular position should receive a post stitch or a regular double crochet. The solution is to always look at the stitch directly below the one you are about to work and mirror its stitch type.
A second frequent issue involves tension, particularly with the front and back post stitches. Post stitches naturally pull slightly tighter than regular stitches because you are working around the post rather than through the top loops, which have more give. If your post stitches are pulled too tightly, the finished fabric can pucker, curl at the edges, or feel stiff and uncomfortable. To counter this tendency, consciously loosen your grip slightly when forming post stitches, pull your loops up to a consistent height, and consider sizing up your hook slightly if puckering persists across multiple attempts.
Stitch count drift is another challenge that many crocheters face with the waffle stitch. Because the pattern involves working into the post of stitches rather than their tops, it is easy to accidentally skip a stitch or work into the wrong location, which gradually throws off your stitch count over multiple rows. The best preventive measure is to count your stitches at the end of every single row, at least for the first several rows until the pattern rhythm is firmly established. A miscount caught early requires minimal correction; one discovered many rows later can mean ripping out significant progress.
Many crocheters also struggle with consistent edge stitches. The first and last stitches of every row in the waffle stitch should always be worked as regular double crochets rather than post stitches. This creates clean, stable edges that make seaming and finishing significantly easier and give the completed project a polished, intentional appearance. Marking the first stitch of each row with a removable stitch marker is a simple habit that prevents this specific error entirely. Clean edges transform a technically correct waffle stitch project into one that looks truly professional and carefully crafted.
Creative Project Ideas Using the Waffle Stitch
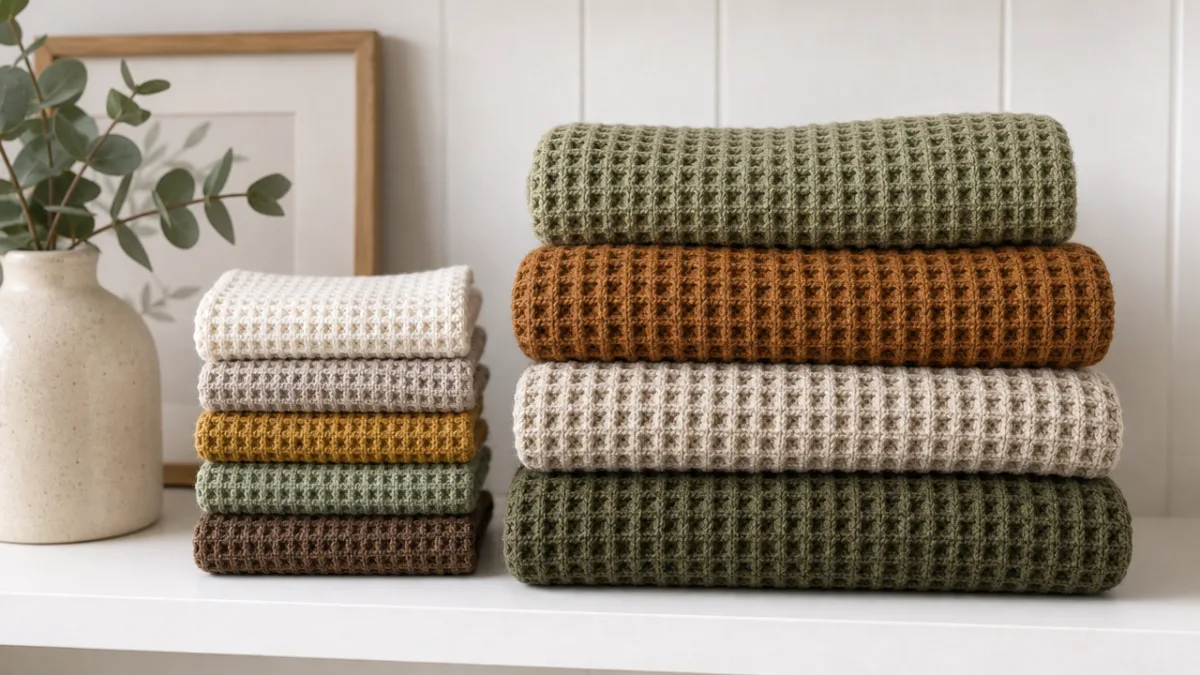
Once you have mastered the mechanics of the waffle stitch, a wide world of creative project possibilities opens before you. The most popular application is undoubtedly the waffle stitch blanket, and for good reason — the stitch scales beautifully to large projects, creating a thick, breathable fabric that is warm without being heavy. A lap blanket worked in a soft neutral like oatmeal, ivory, or sage green makes an elegant and practical addition to any living room. Larger throws in chunky yarn can be completed in a surprisingly short amount of time while delivering maximum visual and tactile impact.
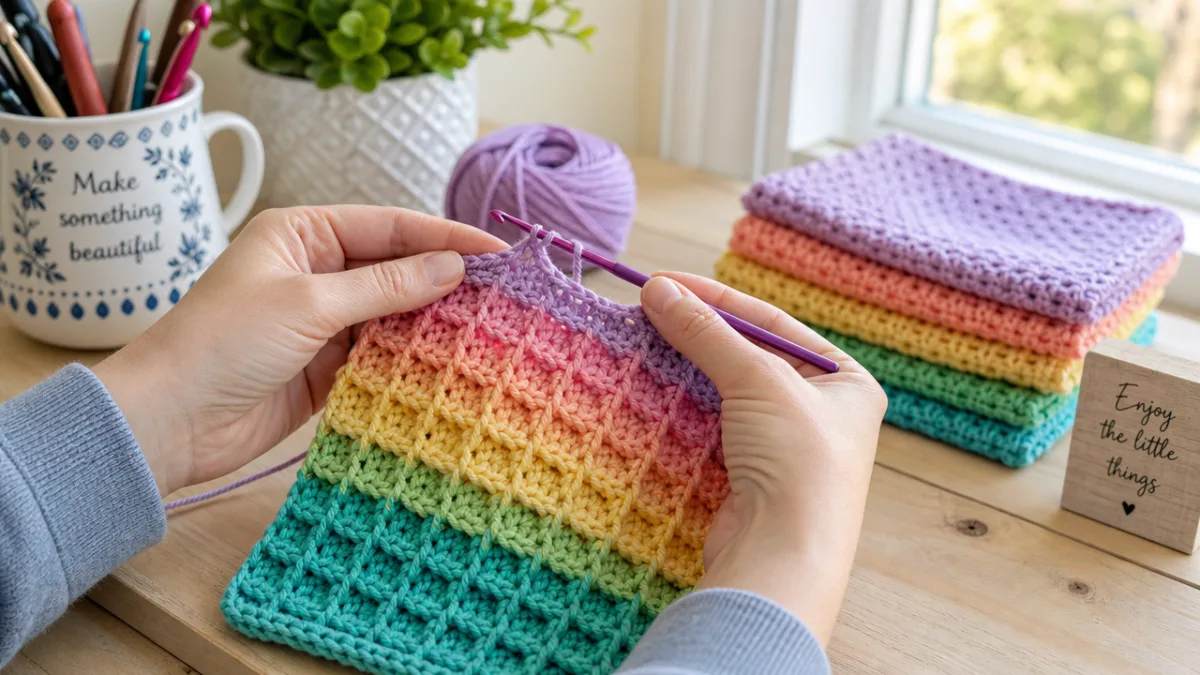
Kitchen items are another category where the waffle stitch truly excels. Dishcloths and washcloths worked in 100% cotton yarn are both beautiful and highly functional. The textured surface adds gentle scrubbing ability while the breathable nature of cotton ensures the cloth dries quickly between uses. A set of waffle stitch dishcloths makes a thoughtful, handmade gift that recipients genuinely appreciate and actually use. Pot holders worked in doubled cotton yarn add the additional benefit of heat protection. Creating a coordinated kitchen set in two or three complementary colors makes for a lovely, cohesive gift bundle.
Wearable projects using the waffle stitch have gained significant popularity in recent years. Scarves and cowls in lightweight merino or bamboo blends show off the stitch’s texture while remaining soft against the skin. Baby blankets in gentle pastel acrylics are perennial favorites for baby showers. More adventurous crafters have successfully applied the waffle stitch to bags, totes, and even sweater panels, where the bold texture adds striking visual interest to the finished garment. The stitch also makes beautiful pillow covers that instantly elevate the look of a sofa or reading nook.
Consider these popular waffle stitch project categories when planning your next make:
- Home textiles: blankets, throws, pillow covers, and table runners
- Kitchen items: dishcloths, washcloths, and pot holders in cotton yarn
- Accessories: scarves, cowls, headbands, and ear warmers
- Baby items: blankets, loveys, and soft toys with textured panels
- Bags and totes: market bags, project bags, and clutches
- Garments: sweater panels, cardigans, and oversized tops for advanced makers
Tips for Customizing and Elevating Your Waffle Stitch Projects
The standard waffle stitch is beautiful on its own, but there are many ways to customize and personalize it to make your projects feel uniquely your own. One of the simplest customizations is color. While the waffle stitch looks stunning in a single solid color, working stripes by changing yarn colors every two rows creates a bold, graphic effect that is both modern and eye-catching. The raised ridges of the waffle grid take on an almost three-dimensional quality when worked in high-contrast colors like navy and cream, or terracotta and sage, giving the finished project an artisan feel that stands out beautifully.
Adjusting the scale of your waffle grid is another powerful customization tool. The standard pattern uses a two-by-two post stitch arrangement, but you can experiment with three-by-three groupings for a more pronounced, chunky texture, or a one-by-one arrangement for a finer, more subtle effect. Pairing different grid scales in alternating sections of a blanket can create an interesting visual rhythm. Similarly, combining waffle stitch panels with sections of simpler stitches like moss stitch or half double crochet can create beautiful striped textural effects that add complexity and interest to large projects without significantly increasing the technical difficulty.
Finishing details make an enormous difference in the perceived quality of any waffle stitch project. A simple single crochet border worked around the entire perimeter of a blanket or dishcloth creates a clean, polished frame that unifies the piece beautifully. For a more decorative finish, a shell stitch border or a picot edge adds an elegant, feminine touch. Blocking your finished projects, particularly those made in natural fibers like cotton, wool, or bamboo, can dramatically improve their appearance by evening out the stitches, relaxing the fabric, and allowing the waffle texture to fully open up and settle into its final, glorious form.
Experimenting with yarn fiber content opens up further possibilities for personalization. Cotton creates a crisp, structured waffle texture ideal for kitchen and bathroom items. Wool and wool blends produce a fabric with natural elasticity and warmth that is perfect for blankets and cold-weather accessories. Bamboo and Tencel yarns create a silky, draped fabric with subtle sheen that gives the waffle stitch an unexpectedly luxurious feel. Bulky or super-bulky yarns worked on large hooks turn the waffle stitch into a statement-making statement texture ideal for large-scale home décor projects. There is truly no limit to how far your creativity can take this one foundational stitch.








What do you think?
It is nice to know your opinion. Leave a comment.