










Art Craft Caddy Organizer Sewing Pattern: The Ultimate Guide to Making Your Creative Space Work for You
Why Every Crafter Needs a Handmade Caddy Organizer
If you have ever sat down to work on a creative project only to spend the first twenty minutes hunting for scissors, measuring tape, or the right shade of thread, you already understand the frustration that drives crafters to seek better storage solutions. A handmade art craft caddy organizer is not just a storage tool — it is a declaration that your creative time is valuable and deserves to be protected. Sewing your own caddy means you get exactly the configuration of pockets, compartments, and loops that your specific set of tools requires, rather than settling for a generic plastic bin from the craft store.
The beauty of following a dedicated sewing pattern for a craft caddy lies in the precision and intentionality built into the design. Unlike improvised storage solutions, a purpose-made caddy pattern accounts for the weight of tools, the accessibility of frequently used items, and the structural integrity needed to hold everything securely whether the caddy is sitting flat on a table or hanging from a hook. Patterns developed specifically for craft caddies have often been tested and refined by experienced sewists who understand the ergonomics of a well-organized workspace.
Beyond pure utility, a handmade caddy carries the added satisfaction of being a functional piece of your creative identity. You can choose fabrics that inspire you, colors that energize your workspace, and trims that reflect your personal aesthetic. Every time you reach into that caddy for a tool, you are reminded that organization itself can be a creative act. This kind of intentional craftsmanship creates a positive feedback loop: a beautiful, functional workspace makes you want to create more, and creating more gives you the skills to make even better organizational tools.
Understanding the Anatomy of a Craft Caddy Sewing Pattern
A well-designed craft caddy sewing pattern is composed of several distinct structural components that work together to create a durable, versatile organizer. At its core, most caddy patterns feature a sturdy base panel, a series of exterior and interior pocket configurations, reinforced dividers, and some form of carrying or hanging mechanism. Understanding how these components interact before you begin cutting fabric will save you significant time and help you make informed customization decisions along the way. Patterns typically label each piece with a letter or number and provide a cutting guide that specifies how many times each piece should be cut and from which type of fabric.
The base of a craft caddy is arguably its most important structural element. This piece bears the full weight of all your tools and must be reinforced accordingly. Most quality patterns call for an interfacing layer — often a firm, fusible variety — to be applied to the base fabric before assembly begins. Some patterns also recommend a layer of thick batting or even a piece of thin plastic canvas sandwiched inside the base to prevent sagging over time. Choosing the right interfacing weight for your base is critical; too light and your caddy will slouch, too heavy and it may be difficult to sew through multiple layers.
Pocket architecture is where a craft caddy pattern really reveals its sophistication. Different tools have vastly different storage needs: a rotary cutter requires a tall, narrow pocket with perhaps a snap closure for safety, while a collection of paintbrushes benefits from individual slots that keep bristles from being crushed. Marker sets need wide, shallow pockets, and scissors demand a deep pocket with enough room to grip the handles comfortably. A thoughtfully designed pattern will offer a variety of pocket depths, widths, and closure types, often arranged in a logical workflow sequence so that your most-used tools are always at your fingertips.
Choosing the Right Fabrics and Materials for Your Caddy
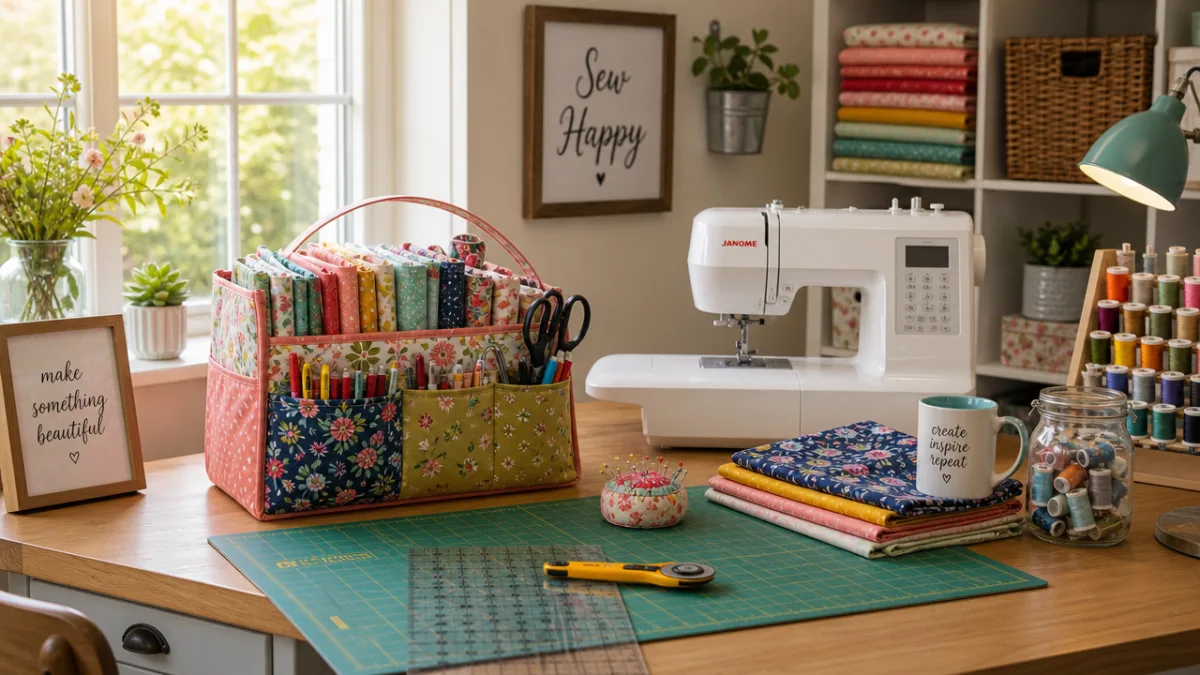
Fabric selection for a craft caddy is a decision that balances aesthetics with engineering. Because this organizer will endure constant use — being picked up, set down, rummaged through, and occasionally knocked over — you need materials that can withstand repeated stress without fraying, stretching, or fading. Medium-weight cotton canvas and quilting cotton are perennial favorites for caddy exteriors because they are widely available in thousands of prints, hold their shape well, and are easy to sew through even when layered with interfacing. Duck cloth and denim offer even greater durability and lend the finished caddy a satisfying, professional weight.
For the lining and interior pockets, the calculus shifts slightly toward comfort and visibility. A light-colored lining makes it easier to spot small items like seam rippers or needle threaders at the bottom of a pocket. Contrast binding along pocket edges not only reinforces those high-wear areas but also creates visual organization cues at a glance. Many sewists choose a coordinating print for the lining that is distinct enough from the exterior to create a pleasing reveal when the caddy is opened or unrolled, adding that extra layer of handmade charm that separates a truly considered make from a utilitarian object.
The supporting materials — interfacings, stabilizers, and hardware — deserve as much attention as the fabric itself. For interfacing, a woven fusible type like Pellon SF101 provides excellent body without adding significant bulk, while a sew-in variety like Décor Bond works well for areas that will be subjected to heavy pulling. For handles or straps, a length of sturdy webbing rated for the expected load is far more reliable than a fabric strap alone. Hardware choices such as D-rings, swivel hooks, and magnetic snaps should be metal rather than plastic wherever possible, as plastic components are often the first to fail under regular use.
- Canvas or duck cloth — ideal for the exterior body where durability and structure are priorities; comes in solid colors and simple patterns that coordinate easily.
- Quilting cotton — perfect for pocket panels and linings where a wide variety of decorative prints are desired without adding excessive bulk.
- Fusible foam stabilizer — creates a lightly padded, professional finish that helps the caddy hold its three-dimensional shape even when not fully loaded with tools.
- Cotton webbing or canvas straps — provides a secure, comfortable carrying handle that distributes the weight of a fully loaded caddy across a wider surface area.
- Metal snaps, D-rings, and rivets — small investments that dramatically extend the functional life of the finished organizer and add a polished, artisan quality to the overall look.
Color coordination across all these materials may seem like a purely decorative concern, but it actually serves a practical function in the finished product. When the binding, lining, and accent fabrics are carefully chosen to work together, the visual system they create helps your brain quickly locate what it needs. A sewist who assigns a particular color to all her embroidery tool pockets and a contrasting color to her paper crafting section has built an intuitive indexing system directly into the design of her caddy. This kind of intentional color coding is far more effective and far more enjoyable to live with than a generic labeled system.
Step-by-Step Overview of the Sewing Process
Before cutting a single piece of fabric, seasoned sewists universally recommend reading through the entire pattern at least once, ideally twice. This full read-through allows you to visualize the complete construction sequence, identify any steps that might require additional preparation, and gather all the materials and tools you will need before you begin. Nothing disrupts creative flow like discovering mid-project that you need a specialty presser foot or a particular size of rivet setter that you do not own. A preliminary read also helps you understand how seemingly separate pieces connect, which is especially valuable in caddy construction where early decisions about pocket placement affect every subsequent step.
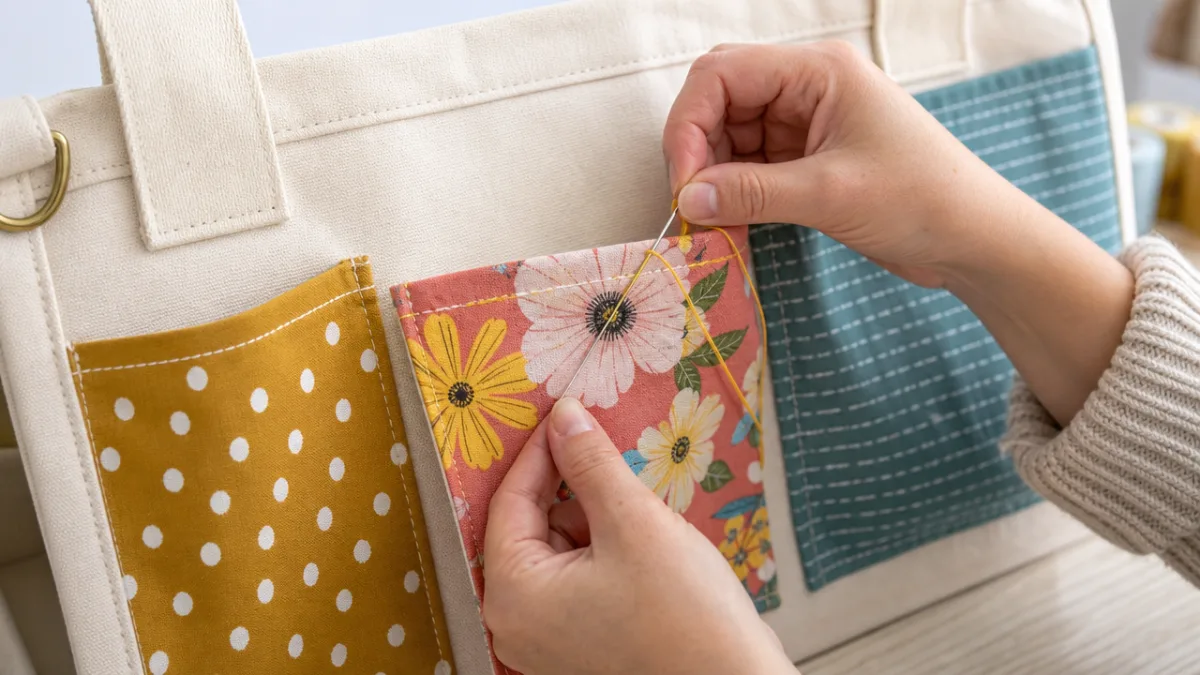
The construction of a craft caddy typically follows a sequence that moves from the smallest, most intricate components to the largest structural elements. Individual pockets are constructed and finished first, then positioned and basted to the main panels, then the panels are assembled into the three-dimensional body of the caddy. This inside-out approach ensures that all seam allowances are neatly enclosed and that every visible surface presents a clean, finished appearance. When attaching pockets, pinning generously and sewing slowly around curved edges or tight corners pays dividends in the professional quality of the finished piece.
Topstitching is a technique that deserves special attention in caddy construction because it performs double duty: it simultaneously reinforces seams that will bear considerable stress and creates the crisp, defined lines that give a handmade organizer its structured, intentional appearance. Using a slightly longer stitch length than you would for standard seaming — typically 3.0 to 3.5mm — produces topstitching that is both visible and beautiful. A walking foot attachment, if your machine supports one, will feed multiple fabric layers evenly and prevent the shifting that can cause frustrating puckering along pocket edges and binding lines.
- Pre-wash and press all fabrics to prevent future shrinkage and ensure that your measurements remain accurate throughout construction.
- Apply all interfacing and stabilizers to their respective fabric pieces before cutting to final size, as interfacing can occasionally cause slight dimensional changes.
- Construct all individual pocket units completely — including any pleating, divider stitching, or closures — before attaching them to the main panels.
- Attach pockets to panels in the sequence specified by the pattern, taking care to stay within seam allowance markings so that pocket openings remain unobstructed.
- Assemble the main body by joining the front, back, base, and any side panels in the order the pattern prescribes, typically leaving one seam open for turning.
- Turn, press, and topstitch the assembled caddy, taking time to push out all corners fully with a blunt tool before pressing flat for a crisp, professional result.
- Install all hardware — handles, snaps, D-rings, and any closure mechanisms — following the pattern’s placement guides and using the appropriate installation tools.
Customizing Your Caddy Pattern for Different Creative Disciplines
One of the most compelling arguments for sewing your own craft caddy rather than purchasing a ready-made organizer is the near-limitless customization potential that a good base pattern provides. A painter’s caddy looks fundamentally different from an embroiderer’s caddy, which differs again from a card-maker’s or a jewelry artist’s caddy, and yet all of them can spring from the same basic pattern with targeted modifications. The key is to map out your specific toolkit before making any alterations: lay all your tools on a flat surface, group them by frequency of use, and measure the ones that will need dedicated pockets so that you are designing around real dimensions rather than approximations.
For sewists and quilters, the caddy design might prioritize a tall central section for storing folded rulers and cutting mats alongside multiple narrow vertical pockets sized for individual seam rippers, quick-unpick tools, and marking pens. A dedicated loop system stitched across one panel can hold rotary cutters by their ring handles, keeping them accessible but safely oriented. Quilters who travel to guilds or classes will benefit from the addition of a wide, flat exterior pocket sized to hold a standard cutting mat or a folded lap desk, turning the caddy into a comprehensive mobile workspace.
Artists working primarily with wet media — watercolorists, ink artists, and mixed-media practitioners — should focus their customizations on pocket depth and material selection. Deep pockets lined with water-resistant fabric or treated with a fabric spray protector will handle the inevitable drips and spills that characterize a wet media practice. Brush holders in a wet-media caddy benefit from ventilation at the bottom — a simple row of grommets allows air circulation that helps bristles dry more quickly and prevents the mildew that can damage natural-hair brushes when they are stored damp. Elastic loops rather than rigid pockets keep brushes of varying handle diameters snugly secured without requiring precise sizing.
Paper crafters and cardmakers tend to work with a wide variety of small, flat tools — bone folders, craft knives, embossing styluses, and multiple varieties of adhesive — and their caddy design should prioritize horizontal organization over vertical. A wider, shallower caddy profile with a generous number of medium-depth pockets arranged across a broad front panel allows paper crafters to see all their tools simultaneously rather than having to dig through a tall, narrow organizer. Adding a series of small binder clips or clothespins along one edge of the caddy provides an instantly accessible staging area for project elements in progress — a feature that any scrapbooker who has lost a perfectly cut piece of patterned paper will deeply appreciate.
Tips for Achieving a Professional Finish and Long-Lasting Durability
The difference between a craft caddy that looks handmade in the best possible sense and one that looks merely homemade often comes down to a handful of finishing techniques that require more patience than skill. Pressing at every stage of construction is perhaps the single most impactful habit you can develop as a sewist working on structured projects. A well-pressed seam lies flatter, feeds more evenly under the presser foot, and produces topstitching that looks as precise as anything you would find on a commercially manufactured product. Investing in a quality iron with reliable steam output and a clapper or seam roller for stubborn seam allowances will transform the quality of everything you sew.
Corner and curve handling is another area where careful technique yields outsized results. At inward corners, a few clips made perpendicularly to the seam line — careful not to cut through the stitching itself — allow the seam allowance to spread and lie flat when turned right side out. At outward corners, trimming the seam allowance diagonally across the corner point before turning eliminates the bulk that would otherwise create a rounded, blunt corner rather than a sharp, defined one. Taking the extra ninety seconds to clip and trim every corner and curve in a caddy project can mean the difference between a finished piece that looks precise and polished and one that looks soft and slightly unresolved.
Reinforcing high-stress attachment points is a practical durability measure that thoughtful caddy patterns build into their instructions but that sewists sometimes skip in their eagerness to reach the finish line. Any point where a handle, strap, D-ring tab, or heavy pocket is attached to the main body of the caddy will bear repeated concentrated loads over the life of the organizer. Box-stitching — sewing a rectangle with an X through its center at these attachment points — dramatically increases the load-bearing capacity of the connection by distributing stress across a larger area of fabric. This technique takes only a few seconds per attachment point but can add years to the functional life of the finished caddy.
Proper care and maintenance instructions are worth including on a small tag sewn inside the caddy, particularly if you plan to give it as a gift. Most caddy fabrics can be spot-cleaned with a damp cloth and mild soap, and many can be gently machine washed on a delicate cycle if the hardware is removable or protected. Storing the caddy stuffed with a few rolled hand towels when not in use helps it maintain its three-dimensional shape rather than collapsing flat and developing permanent creases. A caddy that is cared for properly will remain as functional and beautiful five years from now as it is on the day it is completed, making it a genuinely lasting contribution to a well-organized creative practice.
- Always press seams open or to one side immediately after sewing, before they have time to set in a puckered position.
- Use a denim or leather needle when sewing through four or more layers of fabric and interfacing to prevent skipped stitches and needle deflection.
- Reduce upper thread tension slightly when topstitching to prevent the bobbin thread from being pulled to the visible surface.
- Mark all hardware placement points with a chalk pencil or water-soluble marker before punching holes or cutting slots to ensure symmetrical, professional positioning.
- Test any decorative or functional hardware on a scrap sandwich of your actual fabrics and interfacings before installing it on the finished caddy to catch any sizing or installation issues before they matter.
Gifting and Selling Your Handmade Craft Caddy Creations
A beautifully executed craft caddy organizer made from a quality sewing pattern is one of those rare handmade gifts that strikes the ideal balance between personal thoughtfulness and genuine practical utility. Unlike decorative items that a recipient may feel obligated to display but secretly finds useless, a well-made caddy meets a real organizational need that virtually every creative person experiences. The key to making a gifted caddy feel truly personal rather than generic is to customize it specifically for the recipient’s creative discipline and aesthetic preferences. A caddy made in fabrics that reflect the recipient’s color sensibility, configured with pockets that perfectly fit the tools they actually use, communicates a level of attention and care that no purchased gift can replicate.
For those interested in selling their handmade caddies, whether at craft fairs, through online platforms, or by custom commission, a few business considerations are worth thinking through before listing your first item. Material costs for a quality caddy — including fabric, interfacing, hardware, and incidental supplies — can add up quickly, and pricing below your actual cost-plus-time is a common and consequential mistake that new craft sellers make. A realistic pricing formula should account for all material costs, a reasonable hourly rate for your labor, the platform or booth fees associated with selling, and a margin that allows your small business to grow and absorb occasional material price increases or unsold inventory.
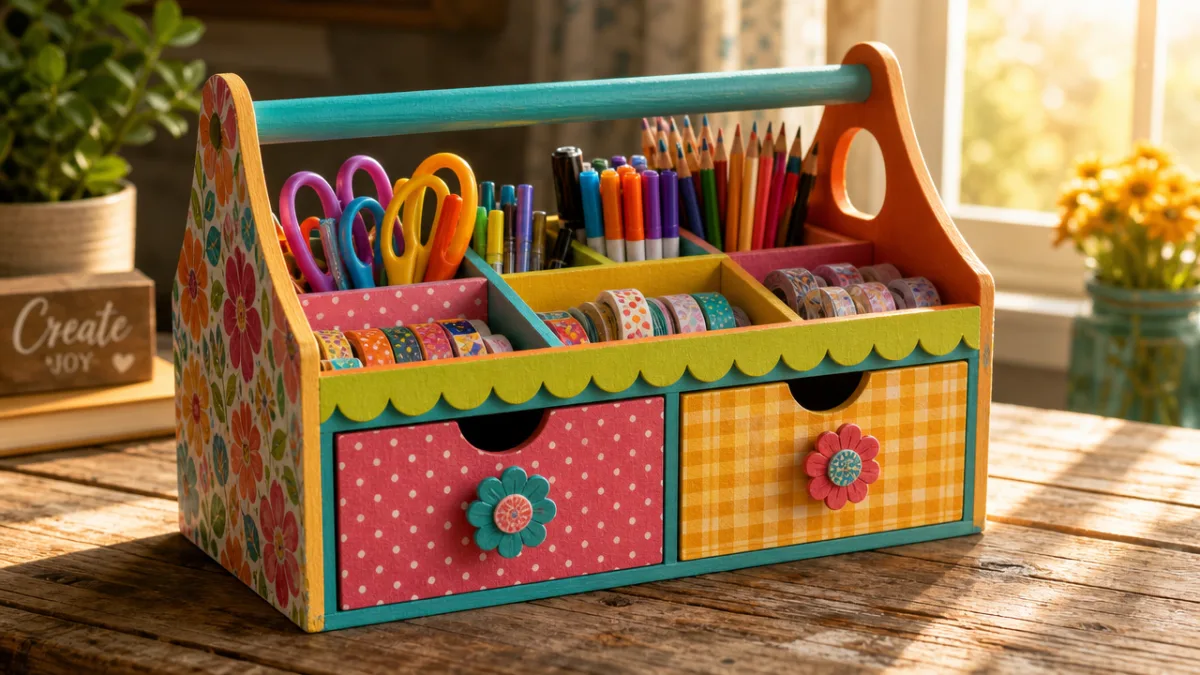
Photography is perhaps the most consequential investment a craft seller can make in the success of their listings. A caddy that is beautifully made but photographed poorly in dim lighting against a cluttered background will consistently underperform in sales compared to a comparable or even slightly less refined caddy that is photographed in excellent natural light against a clean, contextually appropriate background. Styling your caddy photography to show the organizer in action — filled with attractive tools, perhaps set against a creative workspace backdrop — helps potential buyers visualize how it would function in their own lives, which is the most persuasive thing any product photograph can accomplish.
Building a recognizable brand around your craft caddy creations, even as a small-scale seller, creates compounding value over time. Consistent fabric pairings, a signature style of hardware selection, and a distinctive approach to pocket layout all contribute to a maker’s aesthetic identity that buyers begin to recognize and specifically seek out. Pairing each caddy with a small care instruction card and a brief note about the materials used adds a professional, considered quality to the unboxing experience that encourages repeat customers and word-of-mouth recommendations — the most effective and least expensive form of marketing available to any small creative business. The humble craft caddy, born from a sewing pattern and your own hands, has more potential than it might initially appear.








What do you think?
It is nice to know your opinion. Leave a comment.