










10 DIY Trellis Ideas for Beautiful Climbing Plants
Why Every Garden Needs a Trellis
A trellis is one of the most versatile and rewarding additions you can make to any outdoor space, whether you have a sprawling backyard or a modest balcony garden. These elegant structures provide essential vertical support for climbing plants, allowing them to reach toward sunlight while keeping your garden organized and visually striking. Beyond mere functionality, a well-placed trellis transforms an ordinary fence line or bare wall into a living tapestry of color and texture that changes with every season.
The beauty of building your own trellis lies in the freedom to customize every detail — the size, shape, material, and style — to perfectly complement your existing landscape and personal aesthetic. Store-bought trellises often come in limited designs and sizes, whereas a DIY approach lets you craft something that fits your space precisely and expresses your creativity. Whether you lean toward rustic charm, modern minimalism, or whimsical garden art, there is a trellis design that will speak to your vision and enhance your outdoor sanctuary.
Climbing plants like roses, clematis, wisteria, jasmine, and cucumber vines are among nature’s most dramatic performers, but they need the right stage to truly shine. Without proper support, these plants can become tangled, diseased, and underproductive. A sturdy trellis not only guides their growth upward but also improves air circulation around the foliage, reduces the risk of fungal disease, and makes harvesting edible climbers far simpler. Investing a weekend in building a trellis is truly one of the highest-return projects a gardener can take on.
Classic Wooden Lattice Trellis
The classic wooden lattice trellis is the archetype that most gardeners picture when they think of plant support, and for very good reason. Its crisscross pattern of thin wooden strips creates dozens of attachment points for tendrils and stems, making it ideal for vigorous climbers like climbing roses and passionflower. Cedar and redwood are the top material choices because of their natural resistance to rot, insects, and moisture — meaning a well-built lattice trellis can easily last a decade or more with minimal maintenance beyond an annual coat of sealant or paint.
Building a lattice trellis is one of the most beginner-friendly woodworking projects imaginable. You will need a sheet of pre-made lattice panel from your local home improvement store, a basic frame built from 2×4 lumber, wood screws, and either fence post anchors or a mounting bracket depending on whether you want it freestanding or wall-mounted. The frame adds structural integrity and gives the panel clean, finished edges that elevate the overall look from utilitarian to genuinely decorative. Once assembled, you can paint it in classic white for a cottage garden feel, stain it a warm honey color, or leave it natural for a rustic aesthetic.
Spacing your lattice trellis slightly away from the wall or fence behind it is a detail that pays enormous dividends over time. Leaving a gap of at least two to three inches allows air to circulate freely behind the plants, dramatically reducing the humidity that encourages powdery mildew and other fungal problems. It also gives you easy access to maintain the wall surface behind the trellis if needed, and makes training young stems through the grid considerably easier. This small adjustment in installation technique is the single most impactful thing you can do to protect both your plants and the surface behind them.
Rustic Branch and Twig Trellis
For gardeners who love an organic, naturalistic aesthetic, a trellis built from foraged branches and twigs is an absolutely enchanting option that costs almost nothing and blends seamlessly into a woodland or cottage garden setting. This style of trellis celebrates imperfection — the gentle curves of a birch branch, the interesting fork of a willow stem — and turns those natural irregularities into artistic features. Hazel, willow, and birch are all excellent choices for this type of project because they are both flexible when green and surprisingly durable once dried, and all three are commonly available as garden prunings or inexpensive bundles from craft suppliers.
The construction process is wonderfully intuitive and meditative, requiring no power tools whatsoever. You begin by selecting two or three straight, sturdy branches for your vertical uprights and pushing them firmly into the ground or securing them to a fence. Then you weave or lash smaller, more flexible twigs horizontally across these uprights using natural jute twine, garden wire, or even strips of flexible bark. The weaving itself creates a surprisingly strong structure, and as the twigs dry and settle into position the whole piece becomes more rigid and stable. No two branch trellises look exactly alike, which gives your garden a handcrafted identity that no mass-produced product can replicate.
This type of trellis is particularly well-suited to annual climbing plants like sweet peas, nasturtiums, and scarlet runner beans, which you will want to replace each season anyway. Since the trellis itself is made from entirely biodegradable materials, you can simply pull the whole structure out at the end of the growing season, compost it alongside your spent plant material, and build a fresh new one the following spring. This zero-waste approach aligns beautifully with sustainable gardening principles and actually gives you the enjoyable excuse to go foraging for interesting branches every year, turning the building process itself into a seasonal ritual.
Modern Metal Pipe Trellis
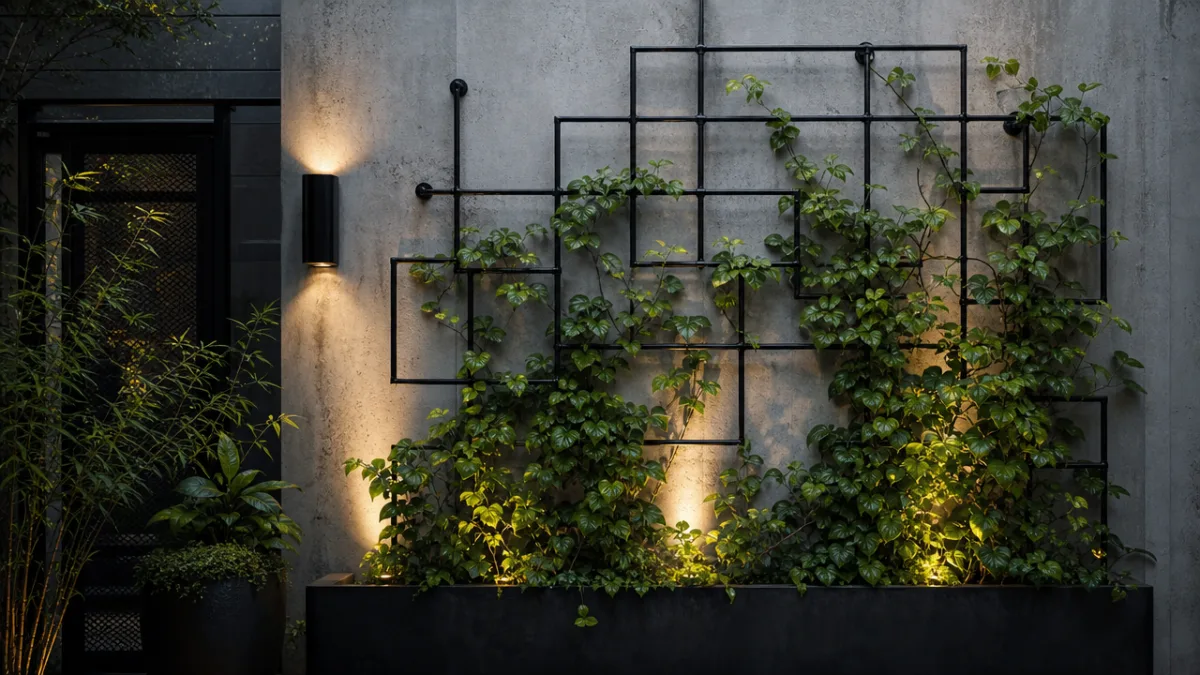
For gardens with a contemporary or industrial design sensibility, a trellis constructed from black steel or copper pipes delivers a strikingly modern aesthetic that looks polished and intentional rather than merely functional. The clean lines and dark or metallic tones of pipe trellises contrast beautifully against lush green foliage and bright blooms, creating a visual tension that sophisticated garden designers deliberately seek out. This style works especially well against rendered or brick walls in urban gardens, on rooftop terraces, and in minimalist outdoor living spaces where every element needs to look considered and curated.
The materials are inexpensive and widely available at plumbing supply stores and home improvement centers. Half-inch or three-quarter-inch steel conduit or copper pipe can be cut to any length with a basic pipe cutter, and simple elbow and T-joint connectors allow you to build virtually any geometric configuration you can imagine — a classic grid, a series of vertical lines, a fan shape, or even an arched tunnel for a dramatic entrance feature. Wall flanges secure the pipe directly to a brick or wooden surface with standard screws, and because the whole structure is metal, it will bear the weight of even the heaviest climbers without flexing or warping over time.
Copper pipe trellises deserve special mention for their extraordinary visual evolution over time. When first installed, copper gleams warmly in the sunlight with a rich orange-gold tone. Over months and years of exposure to rain and air, it develops a stunning verdigris patina that transitions through deep bronze and chocolatey brown before ultimately settling into the iconic blue-green color associated with aged copper statuary and architecture. This living finish means that a copper trellis actually becomes more beautiful with age rather than deteriorating, and the weathered tones complement virtually every plant color from deep burgundy roses to bright yellow black-eyed Susans.
Repurposed and Upcycled Trellis Ideas
Some of the most creative and visually memorable trellis solutions come not from a lumber yard or hardware store but from thrift shops, salvage yards, and your own garage. Repurposing everyday objects as plant supports is a philosophy that sits at the intersection of sustainability and garden artistry, and the results can be genuinely extraordinary. Old wooden ladders leaned against a wall and planted with climbing roses or jasmine become instantly iconic garden features. Vintage iron bed headboards staked into the soil support annual climbers in a way that makes every visitor stop and smile. Even old bicycle wheels, window frames, and wooden pallets can be reimagined as charming and functional plant supports with minimal effort.
Wooden pallets are perhaps the single most accessible upcycled trellis material available today, as they are routinely given away free outside garden centers, hardware stores, and warehouses. Standing a pallet vertically and securing it to fence posts or wall brackets creates an instant trellis with a pleasingly rustic industrial character. The gaps between the slats are perfect for weaving climbing stems, and the solid horizontal boards provide natural ledges where small pots or mason jars can be balanced for an additional planting dimension. A lick of weatherproof paint in a deep charcoal, sage green, or terracotta transforms a raw pallet into something that looks intentionally designed.
When sourcing materials for upcycled trellises, there are a few practical considerations worth keeping in mind to ensure both safety and longevity. Avoid pallets or wood bearing the MB stamp, which indicates treatment with methyl bromide, a fumigant that is toxic to plants and humans. Look instead for HT-stamped pallets, indicating heat treatment, which is entirely safe. For metal items like bed frames and gates, a coat of rust-inhibiting primer followed by outdoor paint will dramatically extend their lifespan in a garden environment. And when positioning any repurposed trellis, ensure the structure is securely anchored — mature climbing plants can become remarkably heavy, and a toppling trellis can cause significant damage to both plants and garden visitors alike.
Fan-Shaped and Decorative Trellis Designs
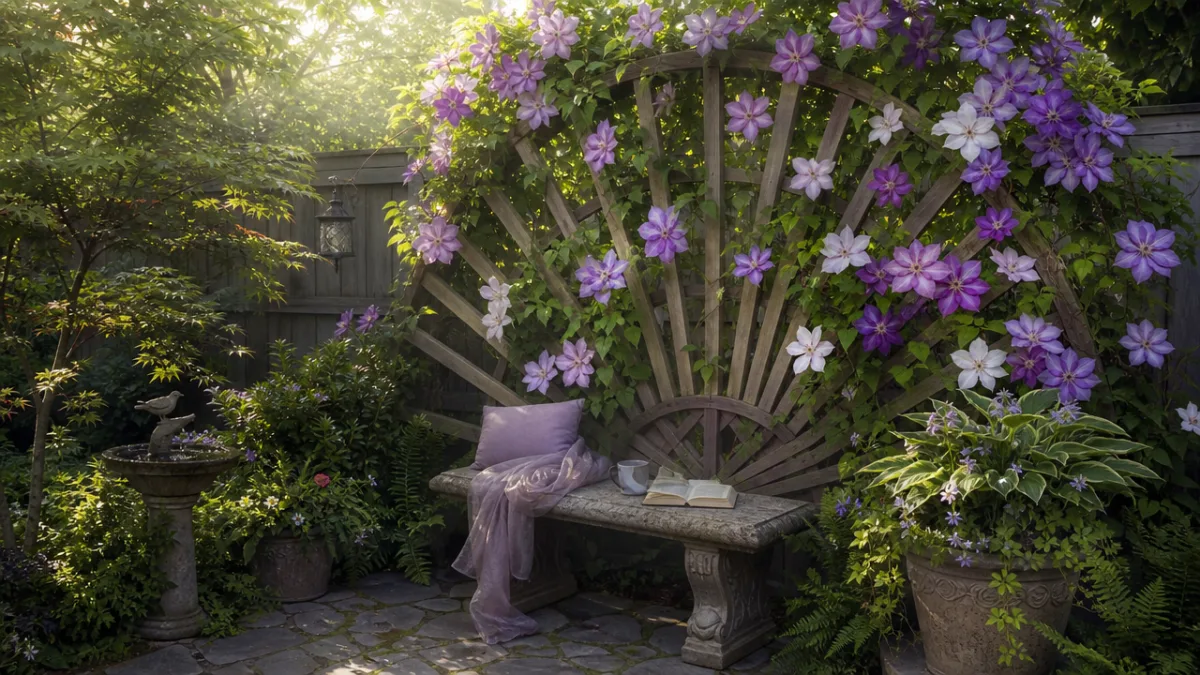
Beyond the standard rectangular grid, fan-shaped and decorative trellis designs offer a way to introduce genuine sculptural beauty into the garden even before a single plant has started to climb. The fan trellis, with its radiating lines spreading upward from a narrow base, is a particularly elegant choice for training climbing roses, espaliered fruit trees, and spreading clematis varieties. The shape naturally guides plant growth outward and upward in a graceful arc that mimics the organic patterns found in nature, and when a climbing rose is in full bloom across a large fan trellis, the effect is nothing short of breathtaking.
Building a fan trellis is more involved than a simple grid but still well within the capabilities of a confident weekend DIYer. The key is to start with a strong central stake or vertical support from which all the radiating arms will extend. Using thin wooden dowels or bamboo canes secured with galvanized wire at both the base and various points along their length, you can create a fan of any width and height. Pre-drilling small holes in a curved top batten through which the dowels pass at regular intervals is the neatest and most professional technique for achieving an even, symmetrical spread at the crown of the fan. A coat of exterior wood paint or stain unifies the whole structure beautifully.
For those who want their trellis to be a genuine focal point rather than merely a background structure, decorative designs that incorporate geometric patterns, diamond motifs, or even silhouettes of birds and branches can elevate the garden to an almost gallery-like level of visual sophistication. These designs are achievable either by cutting shapes from sheet wood using a jigsaw or by carefully arranging and securing pre-cut wooden pieces into the desired pattern. Japanese-inspired trellis designs, which favor asymmetry and the interplay of horizontal and vertical lines at varying spacings, are particularly fashionable in contemporary garden design circles and pair magnificently with ornamental grasses, bamboo, and structural architectural plants.
When selecting which type of trellis to build, it helps to consider a few guiding questions that will ensure the finished structure serves your garden beautifully for many years to come. Think about which plants you intend to grow — heavy woody climbers like wisteria demand a much more robust structure than lightweight annual sweet peas. Consider the architectural character of your home and existing garden features, since a trellis that harmonizes with these elements will always look more intentional than one chosen at random. And don’t neglect practicality: think about how you will access the structure for pruning and training, and how the trellis will look in winter when it may be entirely bare. A trellis with genuine visual interest of its own will grace your garden through every season, not just the months when plants are actively growing and flowering.
Tips for Installing and Maintaining Your DIY Trellis
Even the most beautifully designed trellis will underperform or fail prematurely if it is not properly installed and maintained, so it is worth spending as much time thinking about these practical matters as you do about aesthetics and materials. The most critical installation consideration is anchoring — your trellis must be secured in a way that can withstand the combined force of a mature plant in full leaf being struck by strong winds. Ground-mounted freestanding trellises should have their posts buried to a depth of at least one third of their total height, ideally set in concrete or gravel for drainage. Wall-mounted trellises should be fixed with heavy-duty masonry anchors if attaching to brick or stone, or long screws with wall plugs into timber framing if mounting on a wooden surface.
Ongoing maintenance is far simpler than most gardeners expect, particularly if you choose rot-resistant materials from the outset. Wooden trellises benefit from an annual inspection at the end of winter, before plants begin their new season of vigorous growth. Look for any loose joints, cracked timber, or signs of rot and address them promptly, as small repairs are infinitely easier to make before a climbing plant has woven itself through every corner of the structure. A fresh coat of exterior wood preservative, paint, or stain every two to three years will dramatically extend the lifespan of any wooden trellis, and applying it in late winter while plants are dormant and less entangled in the structure makes the job considerably more manageable.
Training your climbing plants correctly from their very first season is perhaps the single most important factor in achieving that lush, even coverage that makes a trellis truly spectacular. Resist the temptation to simply plant a climber at the base of your new trellis and leave it to its own devices — young plants need gentle, consistent guidance to develop the even, well-distributed framework that underpins years of beautiful growth. Tie new stems loosely to the trellis using soft garden twine or silicone plant ties, spreading them out horizontally as much as possible in the early years. Horizontal stems produce far more flowering side shoots than vertical ones, so this simple training technique will reward you with dramatically more blooms for the same amount of plant material.
Here is a quick reference summary of the most important considerations when planning and building any DIY trellis project:
- Material durability: Choose cedar, redwood, galvanized metal, or copper for maximum longevity in outdoor conditions. Untreated pine will deteriorate quickly in contact with soil and moisture.
- Structural strength: Match the robustness of your trellis to the mature size and weight of your intended plants. Wisteria and climbing roses can be enormously heavy and will destroy an undersized structure over time.
- Wall clearance: Always mount wall trellises at least two to three inches away from the surface behind them to ensure airflow and protect both plant and wall from moisture damage.
- Anchoring depth: Freestanding posts should be buried to one-third of their above-ground height for stability, with concrete or packed gravel at the base for drainage.
- Seasonal maintenance: Schedule an annual inspection and treatment of wooden components in late winter while plants are dormant and the structure is most accessible.
- Plant training: Guide stems horizontally in early years to encourage maximum flowering and even coverage across the full width of the trellis.
A DIY trellis project is one of those rare gardening endeavors where the investment of time and materials pays dividends that grow quite literally with each passing year. The structure you build this weekend will support a living, breathing, ever-changing work of natural art that becomes more magnificent with every season. Whether you choose the timeless elegance of a painted wooden lattice, the earthy charm of a woven branch structure, the urban sophistication of a metal pipe grid, or the whimsical delight of a repurposed ladder or bed frame, you are creating something that will shape the character of your garden for years to come. Start planning, gather your materials, and let your climbing plants take flight.








What do you think?
It is nice to know your opinion. Leave a comment.