










How to Collect & Save Columbine Flower Seeds: A Complete Guide
Understanding Columbine Plants and Why Seed Saving Matters
Columbine flowers — botanically known as Aquilegia — are some of the most magical perennials you can grow. Those distinctive spurred petals, the nodding blooms in every shade from deep violet and crimson to soft yellow and white — they give a cottage garden that slightly enchanted, fairy-tale feel that’s hard to put your finger on but impossible to miss. Before you start collecting seeds though, it really helps to understand how the plant lives and grows.
Seed saving is one of the oldest gardening traditions around, and honestly one of the most satisfying. When you save seeds from your own columbines, you’re creating a self-sustaining loop that costs nothing and keeps giving back season after season. Over time, you end up with a seed stock that’s genuinely adapted to your specific garden — your soil, your climate, your conditions. Plants grown from saved seed often turn out to be tougher and more vigorous than anything you’d buy from a catalog, because they’ve been quietly selecting for fitness in your exact spot for generations.
There’s also something worth knowing about columbine genetics before you dive in. These plants are notorious cross-pollinators — bees move pollen freely between different varieties, so if you’re growing multiple colors or species side by side, the seeds you collect will very likely produce offspring with all kinds of mixed and unexpected traits. Honestly, that’s part of the fun. You often stumble on gorgeous new color combinations you never would have chosen yourself. That said, if you want seeds that consistently reproduce a specific parent plant, you’ll need to either isolate varieties from each other or do some selective hand-pollinating.
Identifying the Right Time to Harvest Columbine Seeds
Timing really does make or break a columbine seed harvest. Collect too early and you’ll end up with immature, soft seeds that simply won’t germinate. Wait too long and the pods burst open on their own, scattering thousands of tiny black seeds across the bed before you ever had a chance. Learning to read the visual cues of a ripening pod is one of those skills that feels tricky the first season and then becomes completely intuitive.
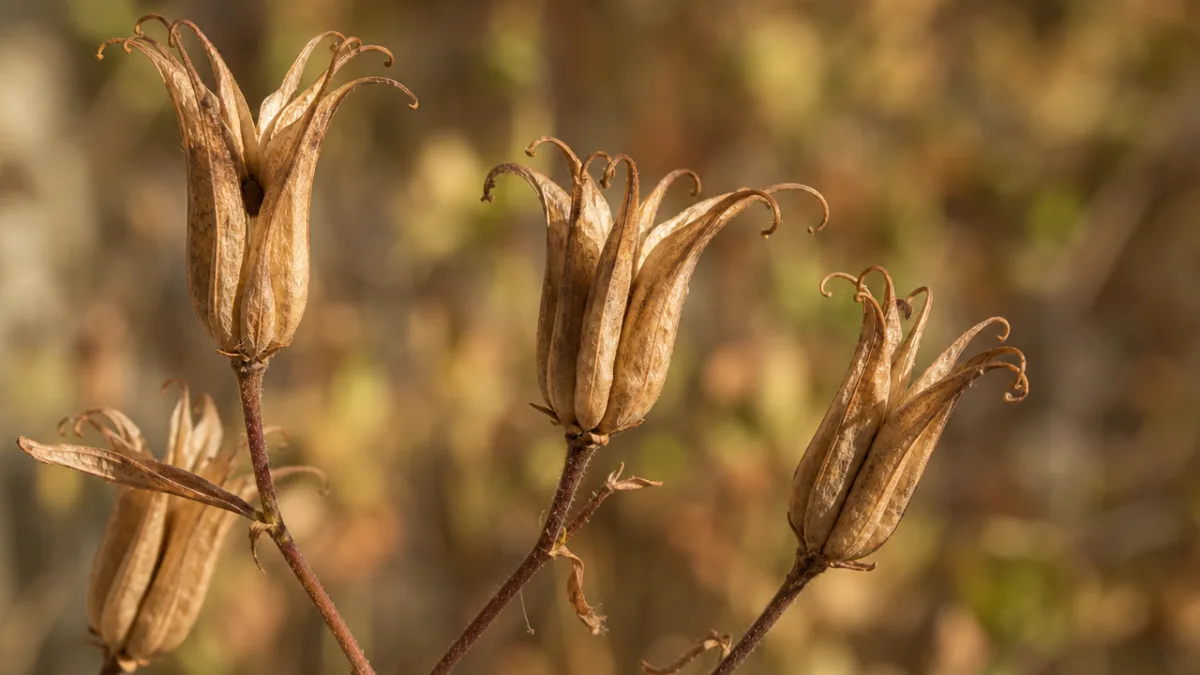
After the flowers finish blooming, they leave behind upright, elongated seed pods called follicles. Each flower head typically produces a cluster of five, arranged in a kind of star pattern at the tip of the stem. As the weeks go by, those green pods slowly dry out and change color. The sweet spot for harvesting is when they’ve shifted from green to a papery tan or light brown and feel noticeably dry when you touch them. By that point, the seeds inside have fully matured — they’ll be glossy, hard, and jet black, which is your best sign that they’re viable.
A handy test is to gently squeeze a pod between your fingers. If it feels firm and you can hear the seeds rattle a little inside, you’re good to go. You can also carefully peel back a tiny bit of the pod wall to check what’s inside. Mature columbine seeds are shiny, jet black, and roughly sesame-seed-sized. If they’re still pale, tan, or soft, just close it back up and check again in a week. A little patience here saves a lot of disappointment come spring when nothing sprouts.
Tools and Supplies You Will Need for Seed Collection
One of the best things about saving columbine seeds is how low-tech the whole process is. You probably already have most of what you need sitting in a kitchen drawer or on a shelf in the garage. Getting everything together before you head outside takes just a few minutes, and it saves you from the very real frustration of losing seeds while you scramble around looking for a container.
The most important thing is something to collect into. Small paper envelopes are ideal because paper breathes, letting any remaining moisture escape from the seeds while they’re stored. Brown paper lunch bags work great when you’re harvesting from several plants in one go. Steer clear of plastic bags and sealed plastic containers at this stage — trapped moisture is a fast track to mold before your seeds have a chance to cure properly. You can move them to glass jars later, once they’re fully dried.
Beyond containers, you’ll want a small pair of scissors or pruning snips for cutting stems cleanly, a fine-mesh sieve or kitchen strainer to separate seeds from debris, a magnifying glass for checking seed quality, and a permanent marker for labeling envelopes right away with the variety, color, and harvest date. Some gardeners swear by bringing a large paper bag or bucket to the garden and holding cut stems upside-down over it so loose seeds fall to the bottom during the walk back to the potting bench. It’s a simple trick that saves more seeds than you’d expect.
Step-by-Step Seed Collection Process
Start your harvest in the morning, after any dew has had time to evaporate. Wet pods are harder to work with and raise the risk of mold later on. Walk through your garden and look at each columbine plant on its own terms — pods on the same plant don’t all ripen at once, so you might find the upper ones are ready while the lower ones need a few more days. It’s completely fine to harvest in several passes over a week or two, only picking the pods that are actually ready.
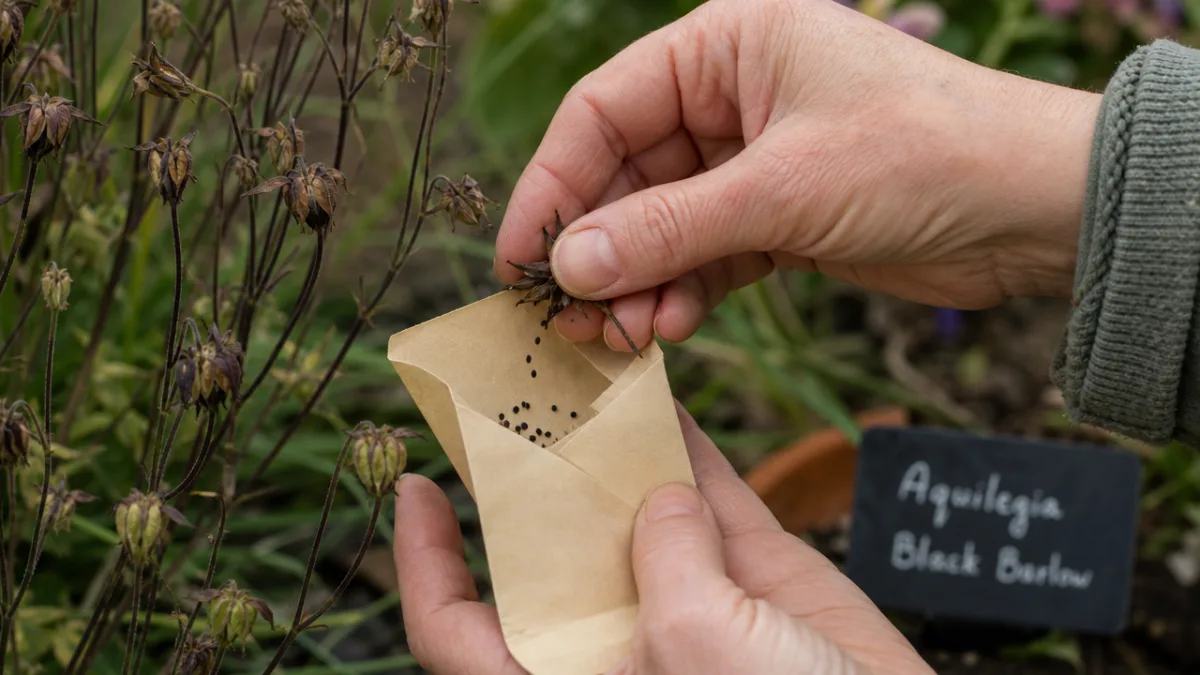
When you find a cluster that’s good to go, cut the stem a few inches below it and immediately flip the stem upside down over your open bag or envelope. Gravity does a lot of the work for you. Pods that have already started to crack open at the tips will release seeds easily with a gentle shake or a light squeeze. For pods that are dry but still sealed, pinch them between your thumb and forefinger and roll gently over the container to break them open.
Work your way through the plant section by section. Once you’ve collected all the ripe pods, you can finish the job more carefully at your potting bench. Stand the cut stems upright or inverted inside a large paper bag and let them keep drying for a few more days — any remaining seeds will drop naturally to the bottom. Then sift everything through a fine-mesh strainer to separate seeds from bits of pod, stem, and dust. What’s left is ready to clean and store.
- Cut only fully dried, tan or brown pods — never green ones
- Work in dry conditions, morning being ideal after dew has evaporated
- Invert cut stems immediately over your collection container
- Label every envelope the moment seeds go in — memory cannot be trusted
- Sift collected material to remove chaff before storage
- Allow seeds a final curing period before sealing in long-term containers
Cleaning, Drying, and Curing Your Collected Seeds
Once you’ve collected and sifted your seeds, they’re not quite ready for long-term storage yet. Even seeds that looked perfectly dry on the plant often carry residual internal moisture, and if you seal them up too soon, that moisture can trigger fungal growth and tank your germination rates. Curing is just the process of letting that last bit of moisture escape under controlled conditions so your seeds are in the best possible shape for storage.
Spread your sifted seeds in a single thin layer on a sheet of paper or a fine mesh screen. Set it somewhere warm, dry, and well-ventilated indoors — away from direct sunlight, which can actually degrade viability. A kitchen counter, a windowsill that gets light but not direct rays, or a seed-drying rack all work well. Let them sit there for at least one to two weeks, giving them a gentle stir every day or two so every surface gets exposed to the air and drying happens evenly.
To check if they’re ready, try to bend a single seed between your fingernails. A properly dried columbine seed will snap crisply — it won’t bend or squish. Seeds that still hold too much moisture will just deform. It’s a simple, no-tools-needed test and surprisingly reliable. Once your seeds pass it, move straight to packaging. Leaving them out in open air after that point can actually start pulling humidity back in from the room, which would undo all that careful drying.
Long-Term Storage for Maximum Germination Success
Stored correctly, columbine seeds can stay viable for three to five years — sometimes even longer under ideal conditions. The two things that will kill them fastest are heat and humidity. Both speed up the metabolic processes inside a dormant seed, burning through the energy reserves the embryo needs to germinate. Keep those two things under control and you’re most of the way there.
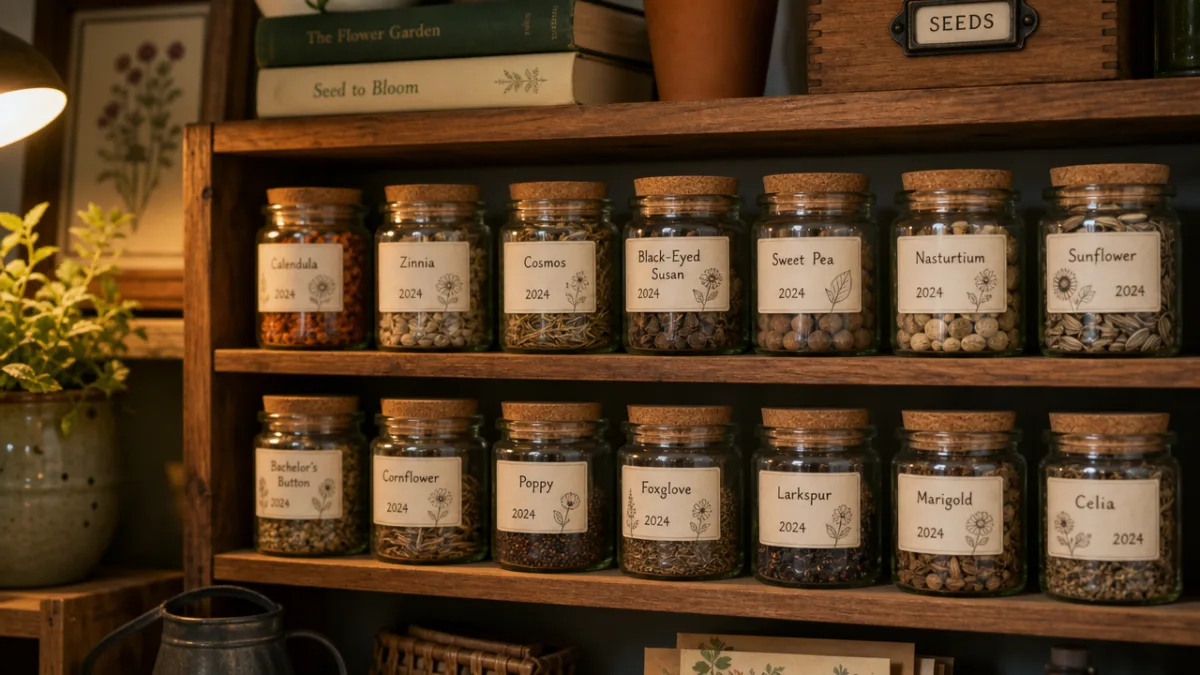
The best home storage setup is a small glass jar with an airtight lid — a mason jar works perfectly. Put your dried seeds in a labeled paper envelope, tuck that envelope into the jar, and drop in a small silica gel desiccant packet before sealing. Those little packets absorb any remaining moisture inside the jar and keep the environment consistently dry. Store the sealed jar in the refrigerator where temperatures are stable and cool. One caution: don’t freeze columbine seeds unless you’re absolutely certain they’re bone dry, because any remaining moisture combined with freezing temperatures can form ice crystals that damage the embryo.
And don’t overlook organization — it matters just as much as the storage conditions themselves. Keep a simple seed inventory, whether that’s a handwritten list or a basic spreadsheet, noting each variety or color, the harvest date, where the parent plant was in your garden, and anything notable about it. Check your inventory each fall and again in late winter before planting season. This one habit prevents the very common scenario of discovering a pile of unlabeled envelopes with no idea what’s in them or how old they are, and it helps you figure out which seeds to prioritize planting versus which ones have been sitting long enough that you should test-germinate a small batch first.
- Place fully cured seeds into labeled paper envelopes
- Tuck the envelope into an airtight glass jar with a desiccant packet
- Seal the jar and store in the refrigerator at a stable, cool temperature
- Record the collection details in a seed inventory log
- Review and test older seeds annually to assess continuing viability
Planting Saved Columbine Seeds and What to Expect
Here’s the thing that catches a lot of first-time seed savers off guard: columbine seeds need a period of cold before they’ll germinate reliably. In nature this happens automatically — seeds fall to the ground in late summer and spend the winter there before sprouting in spring. When you’re starting seeds indoors, you have to replicate that cold exposure yourself. Skip it and you’ll get very poor germination, which leads a lot of gardeners to wrongly assume their saved seeds were bad.
The easiest way to handle stratification is to sow your seeds into moistened seed-starting mix in small pots or trays, loosely seal the containers in a plastic bag, and put them in the refrigerator for four to six weeks. After that chilling period, bring the trays out to a warm, bright spot and you’ll typically see germination within two to four weeks. Alternatively, you can direct-sow seeds outside in fall and let the actual winter do the work for you. This approach often produces the strongest seedlings, since the seeds go through a stratification cycle that’s naturally dialed in to your local climate.
Once seedlings come up, thin them so they’re not crowding each other, and transplant to their final spots once they’ve grown their second set of true leaves. Columbines like partial shade to full sun and do best in well-drained soil that’s reasonably fertile but not too rich. Water young transplants regularly through their first season while they get established, and resist the urge to over-fertilize — columbines don’t need heavy feeding, and too much nitrogen will push leafy growth at the expense of flowers. By their second year, your plants will be blooming freely, and you’ll be right back at the beginning of the cycle: watching pods form, waiting for them to dry, and starting the whole rewarding process all over again.








What do you think?
It is nice to know your opinion. Leave a comment.