










DIY Personalized Bookmarks with Cricut: The Ultimate Guide for Beginners and Gift Givers
Why Personalized Bookmarks Make the Perfect Handmade Gift
There is something uniquely thoughtful about giving a book lover a handmade gift that speaks directly to their passion. A personalized bookmark sits at the intersection of practicality and sentimentality — it gets used every single day, tucked between pages that matter, and it carries a little piece of the person who made it. Unlike generic store-bought options, a DIY bookmark tells a story before the reader even opens the cover.
When you create a bookmark with a Cricut machine, you elevate the craft to an entirely new level. The precision cutting capability of the Cricut means you can add intricate designs, custom names, meaningful quotes, or decorative shapes that would be nearly impossible to achieve by hand. The result looks professional and polished, yet carries all the warmth of something made with care and intention. Recipients often treasure these bookmarks for years, long after other gifts have been forgotten.
Whether you are making a gift for a friend’s birthday, a holiday exchange, a teacher appreciation gesture, or simply as a treat for yourself, personalized bookmarks are one of the most versatile and rewarding Cricut projects you can undertake. They are quick enough to complete in an afternoon, inexpensive enough to make in bulk, and impressive enough to leave a lasting impression on anyone lucky enough to receive one.
Who This Project Is Perfect For
This project is genuinely beginner-friendly, requiring no prior Cricut experience to achieve beautiful results. If you have recently purchased your first Cricut machine and are looking for a low-stakes way to learn the software and practice your cuts, bookmarks are an ideal starting point. The materials are inexpensive, the design space is straightforward to navigate for this kind of project, and the margin for error is very forgiving compared to more complex crafts.
Experienced crafters will also find this project rewarding because of how endlessly customizable it is. You can experiment with layering different materials, combining vinyl with watercolor cardstock, adding foil effects, or creating a cohesive set with matching designs. The simple format of a bookmark becomes a canvas for artistic expression, and seasoned crafters often find that limitations in size and shape spark some of their most creative work.
Teachers, librarians, small business owners, and event planners will find particular value in this tutorial as well. Personalized bookmarks make wonderful party favors at literary-themed events, meaningful back-to-school gifts for students, or branded merchandise for book clubs and independent bookstores. Once you understand the basic process, scaling up production is surprisingly manageable with a Cricut machine handling all the precision work.
Materials and Tools You Will Need
Essential Cricut Supplies
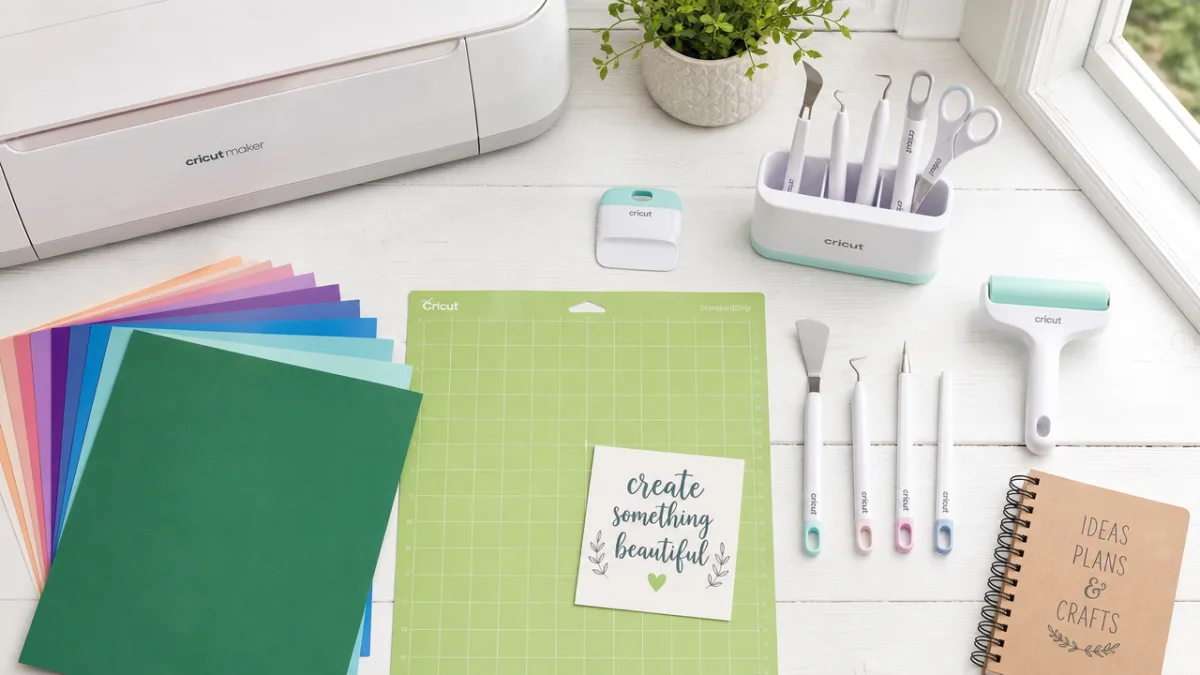
Before you begin, gathering your materials is the most important step in ensuring a smooth crafting experience. Having everything within reach before you power on your machine prevents interruptions during the creative process and helps you stay focused on the craft itself. The good news is that for this particular project, you do not need a large collection of specialty supplies — most of what you need is either already in your craft room or readily available at any major craft retailer.
Your Cricut machine is, of course, the centerpiece of this project. The Cricut Explore series and the Cricut Maker series both work beautifully for bookmark-making. The Explore Air 2 is a popular choice for beginners because it offers excellent precision at an accessible price point, while the Maker provides additional versatility for cutting thicker materials if you want to experiment with leather or wood veneer bookmarks down the line. Whichever model you own, it will handle this project with ease.
Beyond the machine itself, you will need the Cricut Design Space software, which is available as a free download for both desktop and mobile devices. A cutting mat appropriate for your chosen material — typically a light grip mat for cardstock and a standard grip mat for vinyl — is also essential. Make sure your mat is clean and sticky enough to hold your material flat during cutting, as any slippage can affect the quality of your finished piece.
Here is a complete list of materials for a basic personalized cardstock and vinyl bookmark:
- Cricut machine (any current model)
- Cricut Design Space (free software, computer or tablet)
- Cardstock in your chosen colors (at least 65 lb weight recommended)
- Adhesive vinyl in complementary colors or patterns
- Cricut cutting mat (light grip for cardstock)
- Weeding tool for removing excess vinyl
- Scraper or brayer tool for smoothing vinyl
- Transfer tape
- Hole punch or Cricut scoring stylus
- Ribbon or twine for tassel decoration
- Laminator or laminating pouches (optional but recommended)
Setting Up Your Design in Cricut Design Space
Opening Cricut Design Space for the first time can feel a little overwhelming, but for a bookmark project, you will only need to use a handful of its features. The interface is organized around a canvas where you build your design, a panel on the left with tools for adding shapes and text, and a layers panel that lets you manage different elements of your composition. Take a few minutes to click around and familiarize yourself with where things are before you start designing — it will save you time and frustration later.
To begin your bookmark design, start by creating a new project and inserting a rectangle shape. Standard bookmark dimensions are approximately 2 inches wide by 7 inches tall, though you can adjust this based on your preference. In the edit panel, type in these measurements precisely to set the size of your base shape. This rectangle will represent the cardstock backing of your bookmark and will guide all the other design elements you place on top of it.
Next, add your personalization elements. If you are making a gift for a specific person, type their name using the text tool and choose a font that reflects their personality. Cricut Design Space offers hundreds of built-in fonts, and you can also upload fonts from free sites like DaFont or Google Fonts. Script fonts give a romantic, literary feel, while bold sans-serif fonts feel modern and clean. Experiment with sizing and placement until the name feels well-balanced within the bookmark’s proportions.
Adding Decorative Elements and Quotes
A name alone makes a lovely bookmark, but adding a meaningful quote or a decorative motif takes the design from simple to spectacular. Cricut Design Space includes a library of images — many free and some available for purchase — that include book-related icons like open books, quill pens, stacked tomes, reading glasses, and literary flourishes. Browse these to find something that complements your overall aesthetic and positions well alongside the text you have already placed.
Quotes are another wonderful addition and work particularly well when paired with a clean, legible font. Consider classics like “A reader lives a thousand lives,” attributed to George R.R. Martin, or the simple elegance of “Not all those who wander are lost” from Tolkien. If you are making the bookmark for someone specific, choosing a quote from their favorite book or author adds an extra layer of personalization that transforms a lovely gift into a deeply meaningful one.
Once your design is complete, use the Attach and Group functions in Design Space to lock all your elements together before sending the design to your machine. This step is crucial — without attaching text and images to one another, the software may rearrange them on the cutting mat to optimize material use, which would throw off the alignment of your carefully planned layout. Double-check that everything is grouped correctly before proceeding to the cut screen.
Choosing the Right Cut Settings
Selecting the correct material settings on your Cricut machine is one of the most important technical steps in this process. When cutting cardstock, choose the cardstock setting in Design Space and test a small piece before cutting your final design. Different brands and weights of cardstock behave slightly differently, and a test cut takes only seconds but can save you from wasting a larger piece of material. The goal is a clean cut that goes through the cardstock without tearing but does not cut so deeply that it scores the mat beneath.
For the vinyl layer that will carry your personalized text or design, switch your mat and select the appropriate vinyl setting. Adhesive vinyl, also called permanent or removable vinyl, requires a lighter touch than cardstock, and most Cricut machines handle it beautifully on the default vinyl setting. Iron-on vinyl, sometimes called HTV, requires different settings and a heat press or iron and is better suited to fabric projects than paper ones, so stick with adhesive vinyl for your bookmarks unless you are specifically adding a fabric element.
Always remember to mirror your design when cutting iron-on vinyl, as it must be applied face-down. For adhesive vinyl, no mirroring is needed. These are common beginner mistakes that are easy to avoid once you know about them, and keeping a small checklist near your machine during your first few projects can be genuinely helpful as you build these habits into your workflow.
Cutting, Weeding, and Assembling Your Bookmark
Once your design is sent to the machine and your mat is loaded, let the Cricut do what it does best — cut with breathtaking precision. Watch the first pass to make sure the material is feeding smoothly and the blade is engaging correctly, then step back and let the machine complete its work. Most bookmark designs cut in under two minutes, making this an incredibly satisfying project with near-instant gratification. The whir of the machine and the sight of your design emerging is one of crafting’s great pleasures.
After cutting is complete, unload the mat and carefully remove your pieces. For cardstock, peel the mat away from the paper rather than pulling the paper away from the mat — this subtle difference prevents the cardstock from curling or warping, which is especially important with lighter weight papers. Set your cut cardstock pieces aside and prepare to work on the vinyl elements. Lay the vinyl sheet face up on a clean, flat surface for weeding.
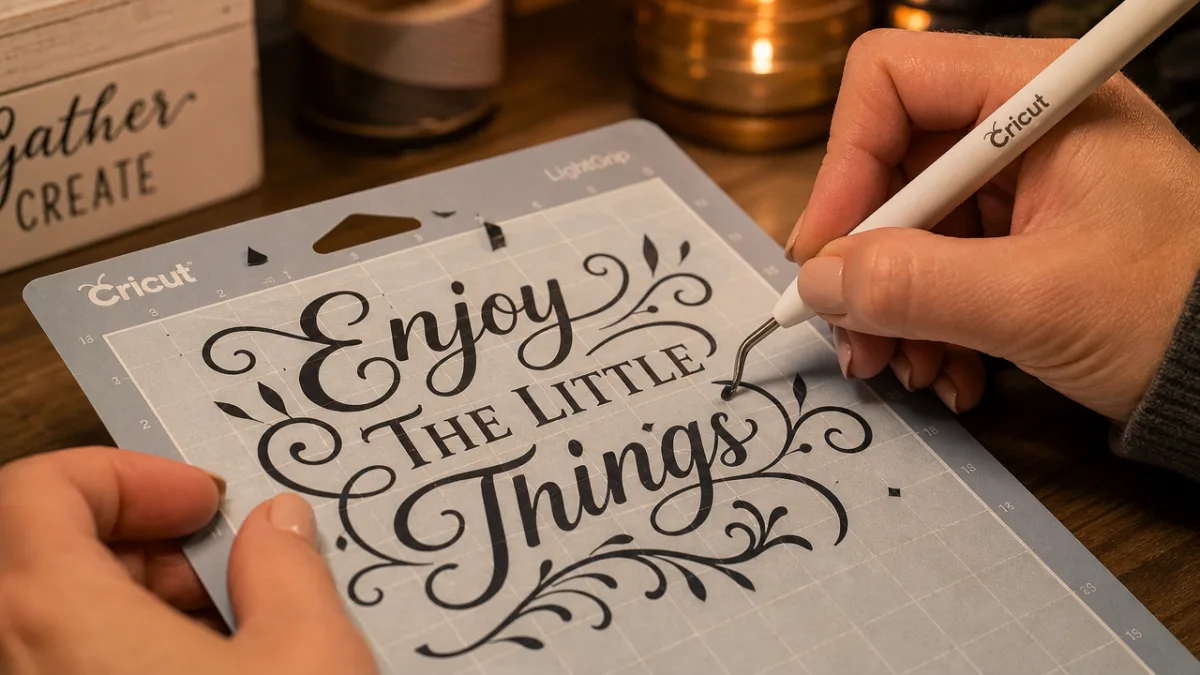
Weeding refers to the process of removing the excess vinyl that surrounds your cut design, leaving only the letters, shapes, or images you want to transfer to your bookmark. Use your weeding tool — a pointed hook-like instrument that is ideal for lifting small pieces — to pick away the unwanted vinyl carefully. Work under good lighting and take your time with intricate letters or delicate design elements. This step requires patience, but it is also one of the most meditative and satisfying parts of the process, revealing your finished design like uncovering something hidden.
Applying Vinyl and Finishing Touches
With your vinyl weeded, cut a piece of transfer tape slightly larger than your design and press it firmly over the vinyl, rubbing it down with your scraper tool to ensure good adhesion. Carefully peel the transfer tape away from its backing, bringing the vinyl design with it. Position this over your cardstock bookmark, aligning it carefully before pressing down. Once positioned, burnish the transfer tape thoroughly with your scraper, then slowly peel the tape away at a low angle, leaving the vinyl adhered cleanly to the cardstock surface beneath.
To significantly extend the life of your bookmark and give it a professional, polished finish, run it through a laminator using a standard laminating pouch. Lamination protects the vinyl from peeling, shields the cardstock from moisture and fingerprints, and gives the bookmark a satisfying rigidity that feels luxurious in the hand. If you do not own a laminator, you can achieve a similar effect with clear contact paper, though the finish will not be quite as smooth. After laminating, trim the edges with a paper trimmer for clean, professional lines.
The final flourish is adding a tassel through a hole punched at the top of the bookmark. Use a standard hole punch or a Cropadile tool for thicker laminated bookmarks, then loop a length of colorful ribbon, embroidery floss, or twine through the hole and knot it into a tassel. Choose ribbon colors that complement the bookmark’s design palette for a cohesive, intentional look. This small detail elevates the finished piece tremendously and adds a tactile element that book lovers will adore as they flip through pages.
Creative Variations and Gift Presentation Ideas
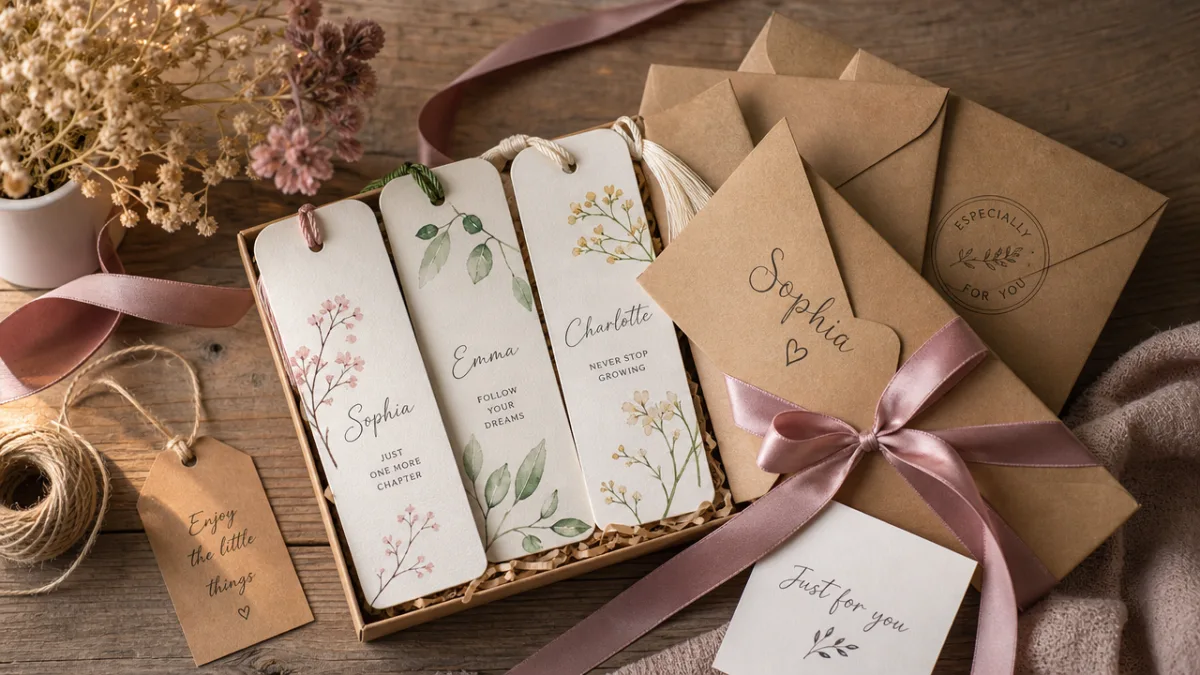
Once you have mastered the basic personalized bookmark, a world of creative variations opens up before you. Consider making a themed set of bookmarks featuring different quotes from a reader’s favorite series, packaged together as a coordinated gift. You might also experiment with different base materials — genuine leather scraps cut by a Cricut Maker create incredibly luxurious bookmarks that will last decades, while clear acetate bookmarks with vinyl lettering have a striking, modern elegance. The fundamental process remains the same, but the results can look dramatically different.
Seasonal and holiday-themed bookmarks are particularly popular and make wonderful additions to Christmas stockings, Easter baskets, or Valentine’s Day gifts. Design a winter bookmark with snowflake cutouts and metallic silver vinyl, or a floral spring bookmark with botanical illustration elements and pastel cardstock. Because the materials cost so little per bookmark, making multiple variations for different holidays throughout the year is an entirely affordable creative habit that keeps your Cricut skills sharp and gives you a constant supply of thoughtful gifts ready to go.
For truly special occasions like weddings, baby showers, or milestone birthdays, consider creating matching sets of bookmarks as party favors. Batch production with a Cricut is efficient and consistent — design one bookmark, duplicate it across a mat layout, and cut dozens in a single session. Wrap each finished bookmark in a clear cellophane sleeve tied with a satin ribbon, and tuck a small handwritten tag inside with a note about the occasion. Guests will remember the thoughtfulness long after the party ends, and you will have created a keepsake that connects the memory of the event to every future reading session.
Packaging and Presenting Your Handmade Bookmarks
Presentation matters enormously when giving handmade gifts, and a beautifully packaged bookmark communicates the care and effort you have invested in the creation. Simple packaging choices can make a dramatic difference in how the gift is received. Consider tucking the bookmark inside the cover of a new book you have chosen for the recipient — this two-part gift is particularly effective because it gives the bookmark an immediate, tangible purpose and shows that you have thought carefully about what the person would enjoy reading.
Alternatively, display your bookmark in a simple kraft paper envelope with a hand-stamped design on the front, or slide it into a clear plastic bookmark sleeve available from craft supply stores for just a few cents each. For a more elevated presentation, mount the bookmark on a folded piece of cardstock that serves as a backing card, punch a hole through both, and tie them together with twine — this format looks professional enough to sell at a craft fair or gift shop and is the kind of thoughtful detail that distinguishes a truly special handmade gift from a hurriedly assembled one.
If you are giving bookmarks to multiple people or selling them online, consider creating a cohesive brand identity for your bookmarks with a consistent color palette, font family, and design aesthetic across a collection. Photography also plays an enormous role in how handmade goods are perceived, so invest a little time in staging attractive flat-lay photos on a clean background with natural light. These images work beautifully for sharing on Pinterest, Instagram, or an Etsy shop, and they also serve as a personal portfolio of your growing Cricut skills — a record of creative progress that you can look back on with genuine pride.
Tips for Beginners and Troubleshooting Common Issues
Every Cricut beginner encounters a few stumbling blocks along the way, and knowing what to expect makes the learning process far less frustrating. One of the most common issues new users face is incomplete cuts — the machine goes through the motions but the material is not fully cut through. This usually indicates that the blade needs to be replaced, the mat is not holding the material flat enough, or the cut settings need to be adjusted to a slightly deeper pressure. Try a test cut first, and if the result is not clean, increase the pressure by one step before cutting your final piece.
Vinyl bubbling or lifting after application is another frequent beginner frustration. This typically happens when the cardstock surface has a texture that prevents the vinyl adhesive from bonding properly, or when the transfer process introduced air bubbles that were not fully burnished out. Using a smooth, matte or satin finish cardstock rather than heavily textured paper gives the vinyl a much better bonding surface. Applying even, firm pressure with your scraper tool during transfer — working from the center outward — minimizes bubble formation significantly.
Fonts that look beautiful on screen sometimes become difficult to cut cleanly when they are very small or have extremely thin strokes. If you are cutting a script font at a small size and finding that the delicate portions are tearing rather than cutting cleanly, try increasing the size slightly or switching to a slightly bolder font variant. Alternatively, make sure your blade is fresh, as a dull blade affects thin cuts far more noticeably than thicker ones. As a rule of thumb, replace your Cricut blade after every eight to ten hours of cutting time for consistently clean results.
Keeping Your Cricut in Top Condition
Caring for your Cricut machine properly ensures that it continues delivering precise, reliable cuts for years. After each crafting session, remove your cutting mat and clean it gently with a baby wipe or lint roller to remove paper fibers, glitter, and adhesive residue. Store your mats flat or hanging vertically with their protective film covers in place — never roll them or stack them under heavy objects, as this causes warping that will affect cut quality. Clean mats grip materials better and last significantly longer than neglected ones.
Your Cricut blade should also receive regular attention. When cuts start to feel ragged or incomplete despite correct settings, it is time for a replacement. Fine-point blades are relatively inexpensive and readily available, so keeping one or two spares on hand means you never have to stop a project mid-session waiting for a new blade to arrive. Store spare blades in their protective caps in a cool, dry place, and clearly mark the cutting end of used blades before disposal to prevent accidental injuries.
Design Space updates automatically and generally improves with each version, but if you notice performance issues or features behaving unexpectedly, clearing the app cache or reinstalling the software usually resolves the problem quickly. The Cricut community online is also an extraordinarily generous and knowledgeable resource — YouTube tutorials, Reddit communities, and dedicated Facebook groups are filled with experienced crafters who have encountered virtually every problem you might face and are happy to share solutions. Lean on that community as you learn, contribute your own tips as your skills grow, and enjoy the process of becoming a confident, creative Cricut user one beautiful bookmark at a time.








What do you think?
It is nice to know your opinion. Leave a comment.