










Painted Paper Plate Pumpkins: The Ultimate Halloween Craft Guide for Kids
Why Paper Plate Pumpkins Are the Perfect Halloween Craft
When Halloween season rolls around, parents and teachers everywhere begin searching for creative, affordable, and age-appropriate activities that can bring a little seasonal magic into the lives of children. Painted paper plate pumpkins check every single box on that list, offering a wonderfully accessible craft that requires minimal supplies, zero advanced skill, and delivers maximum fun. Whether you are organizing a classroom Halloween party, planning a rainy afternoon activity at home, or running a community event for kids, this craft is one that never fails to delight participants of all ages and abilities.
The beauty of paper plate pumpkins lies in their simplicity. A standard paper plate already has the rounded shape that makes an ideal pumpkin canvas, eliminating the need for complicated cutting or tracing. Children can dive straight into the creative part — painting, decorating, and personalizing their pumpkins — without the frustration that often accompanies more complex craft projects. This low barrier to entry makes the activity especially wonderful for younger children aged two and up, while still offering enough creative flexibility to keep older kids genuinely engaged and challenged.
Beyond the obvious fun factor, crafting painted paper plate pumpkins delivers real developmental benefits for growing children. The act of painting strengthens fine motor skills, encourages hand-eye coordination, and builds concentration. Choosing colors, designing faces, and making decorative decisions fosters creative thinking and self-expression. When children complete their pumpkins and proudly display them, the resulting sense of accomplishment boosts confidence and self-esteem in meaningful ways. This is not merely a time filler — it is a genuinely enriching activity disguised as Halloween fun.
Materials You Will Need
Gathering your supplies before sitting down with little ones is always a smart strategy, and the good news is that the materials list for painted paper plate pumpkins is refreshingly short and inexpensive. Most of the items you need are probably already sitting in a kitchen drawer or craft cupboard, making this an activity that can be spontaneously organized without a special shopping trip. Even if you do need to pick up a few things, the total cost per child is typically well under one dollar, making it an ideal choice for large groups and classrooms working with limited budgets.
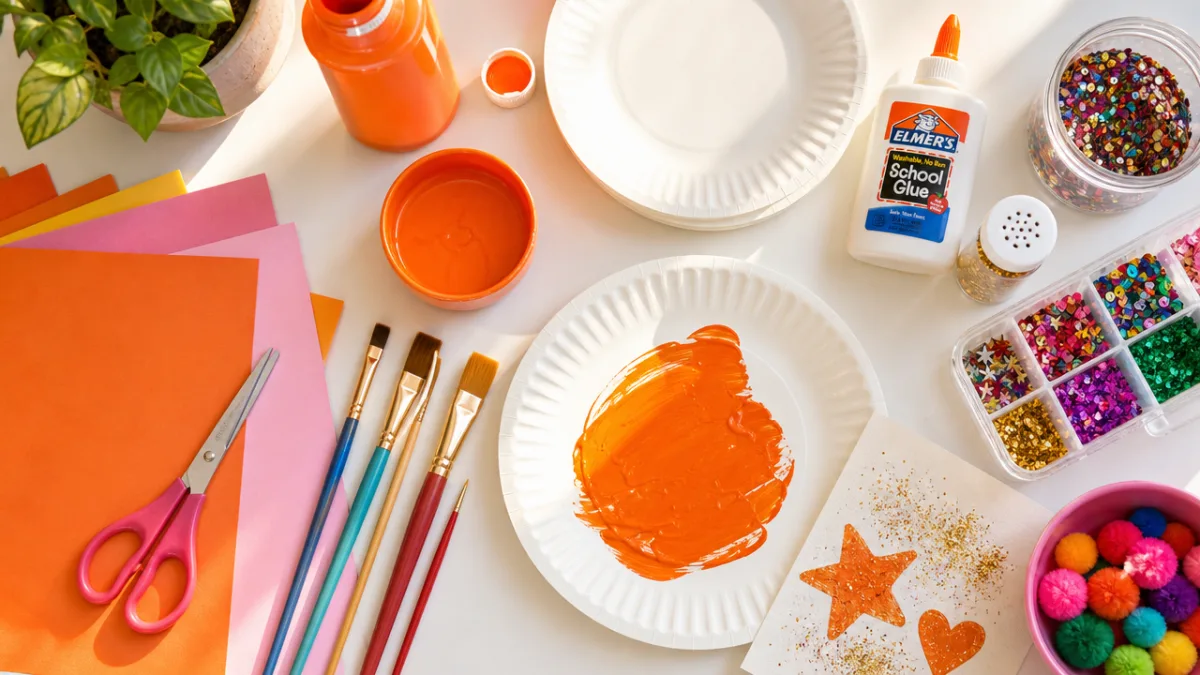
The core materials you will need include standard white paper plates (the plain, uncoated variety works best because paint adheres to it more easily), orange tempera or acrylic paint, green paint for the stem, black paint or a black marker for the face, and paintbrushes in a variety of sizes. Tempera paint is the preferred choice for younger children because it washes off skin and clothing with relative ease, which is an important practical consideration when working with enthusiastic little painters who tend to get as much color on themselves as on their projects.
Optional but highly recommended embellishments include glitter glue for a sparkly finishing touch, foam stickers in Halloween shapes, yarn or chenille stems for curling vines, and googly eyes for a fun three-dimensional face effect. Having paper towels, a water cup for rinsing brushes, and a plastic tablecloth or newspaper to protect your work surface will make cleanup significantly easier. A smock or old shirt for each child is also worth having on hand. Once everything is assembled and the workspace is protected, you are fully ready to begin the creative adventure.
Step-by-Step Instructions for Creating Your Paper Plate Pumpkin
The process of making a painted paper plate pumpkin is wonderfully straightforward, and walking children through it step by step ensures that even the youngest crafters can participate successfully. Begin by setting up individual workstations with a paper plate, a brush, and a dollop of orange paint on a separate palette or small paper plate used for mixing. Encourage children to cover the entire surface of their plate with orange paint, working in broad strokes and being sure to reach all the way to the edges. This base coat is the foundation of the whole project and should be applied generously.
Once the orange base coat is applied, allow it to dry completely before moving on to the next steps. Depending on how thickly the paint was applied and the humidity in the room, drying time can range from fifteen minutes to half an hour. While waiting, this is a perfect moment to talk with children about pumpkins — where they grow, how they are harvested, why we carve them at Halloween, and what makes a jack-o-lantern face scary, silly, or sweet. This kind of conversation enriches the craft experience and builds language skills naturally and enjoyably.
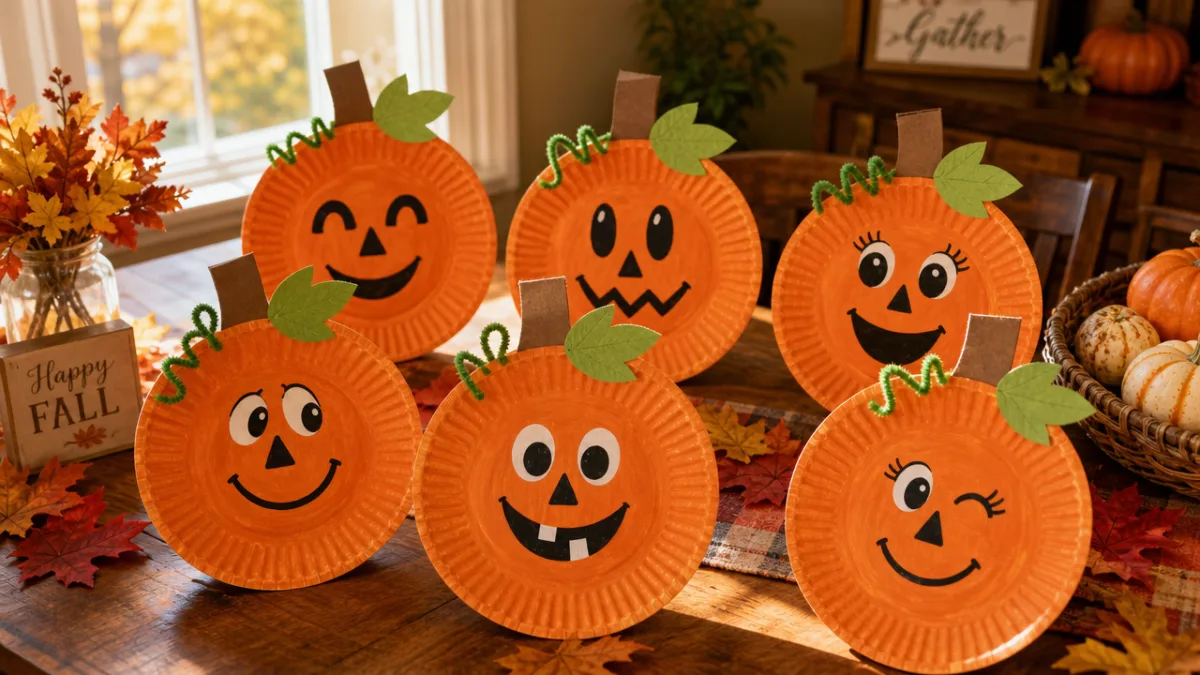
After the base coat is dry, it is time for the most exciting step: adding the pumpkin’s face and details. Children can use a thin brush and black paint to draw triangular eyes, a jagged or grinning mouth, and a small triangular nose, mimicking the look of a classic carved jack-o-lantern. A green stem painted at the top of the plate completes the pumpkin silhouette beautifully. For children who feel nervous about painting freehand features, a black marker works equally well and gives a little more control. Remind young artists that there is no single right way to design a pumpkin face — wild, wonky, and wonderfully imperfect faces are all part of the charm.
Adding Texture and Dimension
For children who want to take their paper plate pumpkins to the next level, adding texture and dimension transforms a flat craft into something truly impressive. One popular technique involves using a darker orange or brown paint to draw curved vertical lines from the top of the plate to the bottom, following the natural round contour of the plate to create the segmented look of a real pumpkin. These lines give the finished piece a more realistic and polished appearance that older children especially tend to love, and the technique is easy enough for most kids aged five and up to master with a little practice.
Glitter glue is another fantastic way to add dimension and visual excitement to a paper plate pumpkin. Tracing the outline of the face features with orange or gold glitter glue, adding sparkly accents along the stem, or using green glitter glue to create curling vines and leaves all make the finished pumpkin shimmer and catch the light in a way that children find absolutely magical. The slight puffiness of dried glitter glue also adds a subtle tactile texture that makes the craft more interesting to hold and display. Allow glitter glue to dry fully before handling or stacking the finished pumpkins.
For a truly three-dimensional effect, consider having children attach a real or craft foam stem to the top of their plate using hot glue (handled by an adult only) or strong craft adhesive. A small accordion-folded strip of green paper makes an excellent curling vine when attached beside the stem. Googly eyes in place of painted ones add instant personality and humor to any pumpkin face. Tissue paper in green or brown can be scrunched and glued to create leaf accents. Each of these additions requires minimal extra materials but produces a noticeably richer final result that children are even more proud to take home and display.
Creative Variations to Try This Halloween Season
One of the most wonderful things about the painted paper plate pumpkin craft is how endlessly adaptable it is. Once children have mastered the basic orange jack-o-lantern, a world of creative variations opens up that can keep the activity fresh and exciting across multiple crafting sessions. Encouraging kids to experiment with different color palettes, face designs, and decorative elements not only extends the creative life of the project but also teaches them that art has no single correct answer and that personal style is always worth celebrating and exploring.
Glow-in-the-dark pumpkins are a particularly thrilling variation for Halloween. Simply substitute regular orange paint with glow-in-the-dark paint or mix a small amount of phosphorescent powder into standard paint to create a version that lights up eerily in a darkened room. Children are absolutely captivated by the effect when they take their finished pumpkin into a bathroom, turn off the lights, and watch it glow. This variation pairs beautifully with a brief discussion of how glow-in-the-dark materials work, turning the craft into a mini science lesson as well as an art project.
Other exciting variations worth trying include the following approaches that keep creativity flowing throughout the season:
- Galaxy pumpkins: Use purple, blue, and black paint to create a cosmic swirled background, then add white dots for stars and silver glitter for stardust, transforming the classic pumpkin into an out-of-this-world decoration.
- Emoji pumpkins: Instead of a traditional jack-o-lantern face, children paint the plate bright yellow and add emoji expressions — laughing faces, heart eyes, surprised expressions — making the craft feel contemporary and personally relatable.
- Watercolor pumpkins: Using diluted watercolor paints instead of tempera creates a soft, dreamy wash of color that produces a beautifully artistic and more sophisticated-looking finished piece.
- Mosaic pumpkins: Tearing small pieces of orange, yellow, and red tissue paper and layering them across the plate using a diluted glue mixture creates a stunning mosaic effect reminiscent of stained glass art.
- Polka dot pumpkins: Using the eraser end of a pencil or a cotton swab dipped in contrasting paint colors, children can cover their orange base with cheerful dots in yellow, white, or black for a playful, modern look.
Tips for Running This Craft in a Classroom or Group Setting
Organizing any craft activity for a large group of children requires thoughtful preparation, and painted paper plate pumpkins are no exception. The good news is that with a little advance planning, this particular craft runs remarkably smoothly even with large groups of twenty or thirty children. The key is to set up individual workstations before children arrive, with all materials already portioned out and surfaces protected. Having designated drying areas clearly marked out in advance prevents the chaos of wet plates being moved around before they are ready and significantly reduces the risk of smeared artwork and disappointed little artists.
When working with a classroom or group, it helps to introduce the project with a brief demonstration that walks through each step clearly and slowly. Showing children exactly what the finished product can look like — while emphasizing that their own versions will be unique and equally wonderful — sets realistic expectations while sparking enthusiasm. It is also worth explicitly giving children permission to make their pumpkins look different from yours or from each other’s, as young children sometimes worry unnecessarily about getting things wrong. A quick pep talk about creative freedom at the beginning of the session sets a positive, pressure-free tone that benefits everyone.
Managing paint distribution efficiently is one of the most important logistical considerations in a group setting. Rather than having children help themselves from large bottles, which almost always results in enormous quantities of paint being used unnecessarily, pre-dispense small amounts of each color onto individual palettes or squares of wax paper before the session begins. This approach reduces waste, minimizes mess, and keeps the activity moving at a good pace. Designating a helper or classroom volunteer to circulate and add more paint as needed, rather than having children leave their seats to fetch it, further streamlines the process and keeps the energy in the room productively focused.
Adapting the Craft for Different Age Groups
The painted paper plate pumpkin craft is genuinely suitable for a wide range of ages, but small adaptations make it optimally appropriate for each developmental stage. For toddlers aged two to three, the primary goal should simply be exploratory painting — letting them swirl and spread orange paint across the plate freely without worrying about producing a recognizable pumpkin at all. At this age, the sensory experience of paint on brush on paper is the whole point, and the resulting abstract orange smear is absolutely charming in its own right. An adult can add a simple face with a marker afterward if desired.
Children aged four to six can participate in every step of the basic pumpkin project with minimal adult assistance, though they may appreciate help with thinner detail work like painting a stem or drawing fine facial features. Encouraging children in this age group to choose their own face expression — scary, happy, surprised, or silly — gives them meaningful creative ownership over the project and often produces wonderfully expressive and imaginative results. Simple embellishments like foam stickers and googly eyes are ideal for this age group because they are easy to apply independently and immediately rewarding to place.
Older children aged seven and above are ready for the more complex variations described earlier in this article, as well as additional challenges like creating an entire paper plate Halloween scene with multiple elements, mixing custom paint colors to achieve the perfect shade of pumpkin orange, or experimenting with shading and highlighting techniques to make their pumpkin look more three-dimensional. These children also benefit from a brief introduction to art concepts like warm and cool colors, complementary color relationships, and how artists use line to suggest texture and form, enriching the activity with genuine artistic education that extends well beyond the Halloween season.
Displaying and Celebrating Finished Pumpkins
The moment a child finishes a craft project and holds it up for the world to see is a moment worth honoring thoughtfully and enthusiastically. After all the effort, concentration, and creativity that went into creating a painted paper plate pumpkin, the finished artwork deserves a display worthy of its maker. At home, paper plate pumpkins can be hung on walls, arranged along windowsills, propped on mantlepieces, or strung together with twine to create a festive Halloween banner that the whole family can enjoy throughout the month of October. The lightweight nature of paper plates makes hanging them from windows or doorways with a simple loop of tape or ribbon remarkably easy.
In classroom settings, displaying every child’s pumpkin prominently in the room creates a collective installation that celebrates the creativity of the whole group. Arranging finished pumpkins at varying heights along a bulletin board, labeling each one with the child’s name, and perhaps adding a border of paper leaves in autumn colors transforms the display into something genuinely gallery-worthy. Taking a group photograph in front of the display gives children a memorable keepsake and provides teachers with a lovely image to share with parents through classroom newsletters or communication apps.
Beyond simple display, finished paper plate pumpkins can become the jumping-off point for additional learning activities that extend the creative experience in meaningful directions. Children can write or dictate a short story about their pumpkin’s personality, name, and adventures. They can practice mathematical concepts by counting the features on their pumpkins or comparing the sizes of different shapes used in their designs. Older children might write descriptive paragraphs about their pumpkins using sensory language, adjectives, and vivid imagery. In these ways, a simple craft project becomes a rich, multidimensional learning experience that touches reading, writing, math, and the visual arts — and all it took was a paper plate and a little orange paint.








What do you think?
It is nice to know your opinion. Leave a comment.