










Simple Beaded Pipe Cleaner Pumpkins: A Complete Guide to This Charming Fall Craft
Introduction: The Magic of Beaded Pipe Cleaner Pumpkins
Every fall, once that first real chill settles into the air, I start itching to make my home feel cozy and seasonal. If you’re the same way, beaded pipe cleaner pumpkins might just become your new favorite go-to craft. They’re simple enough to do with a kindergartner on a rainy Saturday, but honestly satisfying enough that adults end up making a dozen of them without even noticing the time passing. Pop a few on your windowsill or use them as a Thanksgiving centerpiece — they just work.
What I love most about this project is how low-maintenance it is. No special tools, no drying time, no complicated techniques to master. You’re basically just threading beads onto wire and shaping it — and yet somehow a little pumpkin appears right before your eyes. There’s something almost meditative about it, honestly.
This guide covers everything from your supply list to how to display what you make. Whether you’re a longtime crafter or just looking for something fun to do with your kids on a slow autumn afternoon, I think you’ll find these little pumpkins are way more rewarding than they have any right to be. Let’s get into it.
Supplies You Will Need for This Project
Here’s the good news: you probably already have some of this stuff sitting in a drawer somewhere. Everything else is easy to find at a dollar store or craft shop, and none of it will break the bank. Getting organized before you start makes things a lot smoother — especially if you’re crafting with kids who will absolutely knock over an unsorted pile of beads the moment you look away.
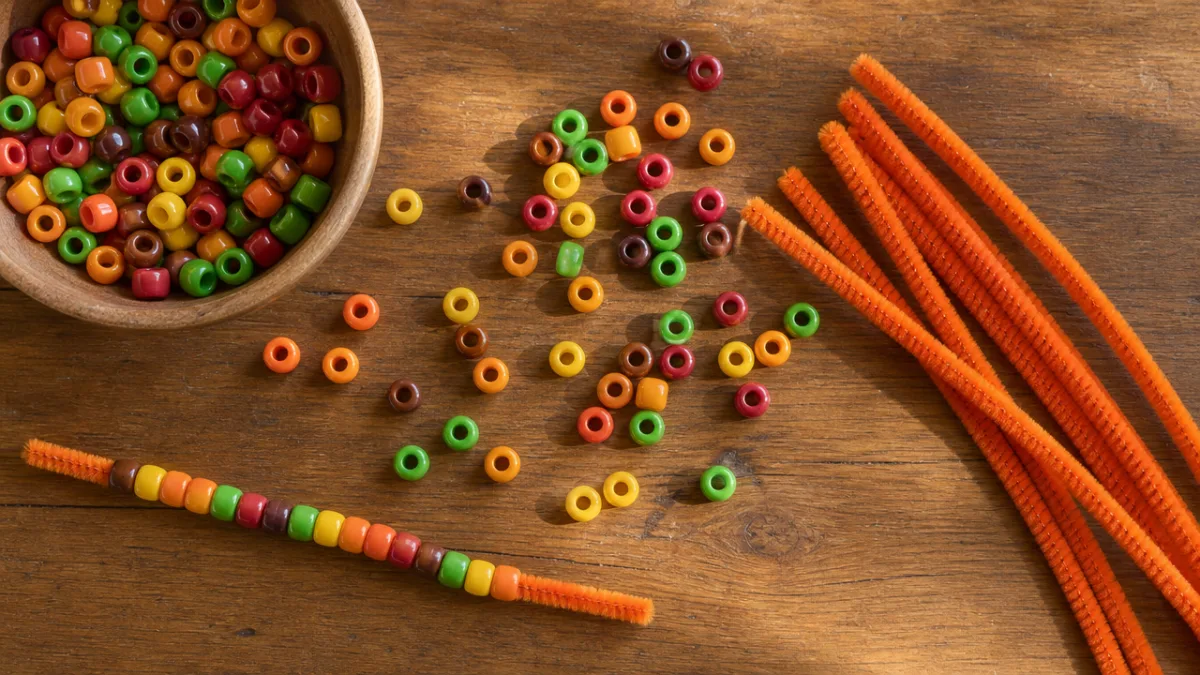
The main ingredient here is pony beads. These are those small, round plastic beads with the big holes — they slide onto pipe cleaners like a dream. For a classic pumpkin look, grab some in deep orange, warm yellow, burgundy, and brown. Lots of craft stores sell them in fall-themed mixed packs, which saves you the trouble of picking individual colors.
Beyond the beads, you’ll need a couple of different pipe cleaner colors. Orange or rust for the pumpkin body, and green for the stem and those cute little curling vine details that really make the finished piece pop. Scissors and a pair of needle-nose pliers are nice to have on hand, but don’t stress if you don’t own pliers — you can get by without them. A small bowl or tray to corral your beads is genuinely helpful and will spare you from chasing them across the floor.
- Pony beads in orange, yellow, brown, and burgundy shades
- Orange or rust-colored pipe cleaners for the pumpkin body
- Green pipe cleaners for stems and vines
- Scissors for trimming excess wire
- Needle-nose pliers (optional but helpful for tightening)
- Small bowls or trays for bead organization
- A flat, clean work surface
Step-by-Step Instructions for Making Your Pumpkin
The process is pretty straightforward once you see it in action, and after your first pumpkin you’ll wonder why it ever seemed tricky at all. The basic idea is simple: thread beads onto pipe cleaners, twist them together, fan them out into that classic pumpkin shape. Once you’ve got the hang of it, you can knock one out in about ten to fifteen minutes — which means an entire patch of them is very doable in a single afternoon.
Start by cutting three or four orange pipe cleaners to about twelve inches each. Thread your pony beads onto each one, leaving roughly an inch of bare wire on both ends so you have something to work with when it comes time to secure everything. Mix up your bead colors — some orange, some yellow, a little brown here and there — for a natural, varied look. Or keep them all one color if you want something cleaner and more graphic. As you thread, push the beads toward the middle so they stay snug with no gaps.
Once all your pipe cleaners are beaded up, gather them into a bundle and twist the ends together tightly — both the top and bottom. That twisted center is what holds your pumpkin together. Now fan the individual beaded sections outward in an even circle, kind of like the ribs of a real pumpkin. Gently curve each one outward with your fingers to build up that plump, rounded shape. Take your time here — the more attention you give to shaping, the better your pumpkin will look.
- Cut three to four orange pipe cleaners to approximately twelve inches each
- Thread pony beads onto each pipe cleaner, leaving one inch bare on each end
- Gather all beaded pipe cleaners and twist the ends together at the center top and bottom
- Fan the beaded segments outward evenly to form the round pumpkin shape
- Curl a short green pipe cleaner into a stem and twist it into the top center
- Add a second green pipe cleaner wound around a pencil to create a curling vine accent
- Adjust and shape until you are satisfied with the overall look
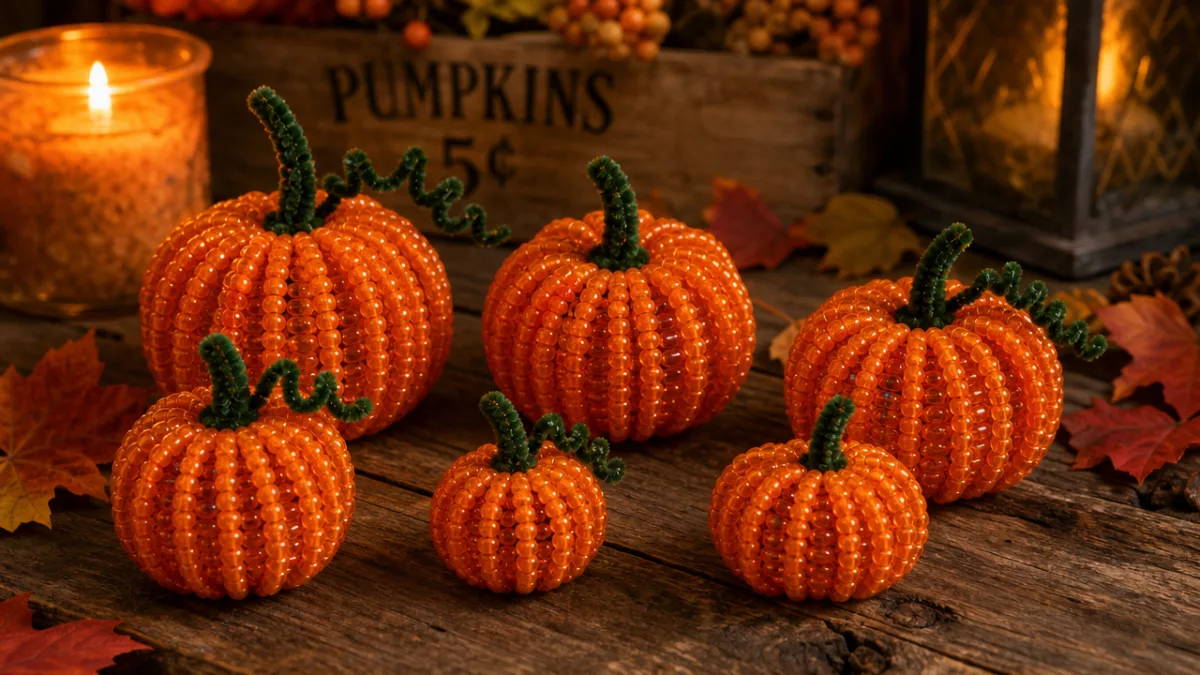
For the finishing touches, fold or coil a small piece of green pipe cleaner into a stem shape and twist it right into the top center. Then — and this is my favorite part — wrap a longer green pipe cleaner tightly around a pencil, slide it off, and you’ve got a perfect little spiral tendril. Attach that near the stem to mimic a real pumpkin vine. It’s such a small detail, but it’s the thing that takes your pumpkin from “cute” to “wait, did you make that?”
Creative Variations and Customization Ideas
Once you’ve made your first classic orange pumpkin, it’s really hard not to start experimenting. The color possibilities alone can keep you busy for a while. Swap in deep purple and black beads for something spooky and Halloween-ready, or try soft cream and pale gold if you’re going for that elegant, neutral farmhouse look that works so well for Thanksgiving. The shape stays the same — everything else is up to you.
Size is another fun variable to play with. A pumpkin made from just two short pipe cleaner segments comes out as the most adorable little miniature gourd — perfect for scattering down a table runner or nestling into a bowl with some real autumn leaves. Go the other direction with five or six longer pipe cleaners and you get something bold enough to stand on its own on a mantel. Making a whole assortment of sizes is honestly the most satisfying version of this project, because it looks just like a real pumpkin patch.
Jack-o’-lanterns are easier to pull off than you’d think. Wire a few small black pony beads into triangle shapes for eyes and a nose, add a zigzag of black wire for the grin, and you’ve got yourself a spooky little face. You can also wire in some green beaded leaves near the stem, or mix a few gold or copper metallic beads into the body for a subtle shimmer that looks especially lovely by candlelight on a dark October evening.
- Purple and black beads for Halloween pumpkins
- Cream and gold beads for elegant Thanksgiving decor
- Miniature versions using shorter pipe cleaner segments
- Jack-o’-lantern faces using black pony beads wired into expressions
- Metallic or iridescent beads mixed in for sparkle
- Leaf accents made from green beads attached near the stem
- Glow-in-the-dark beads for an extra spooky Halloween version
Making This a Group or Family Craft Activity
This is genuinely one of the best group crafts I can think of, because almost anyone can do it. Kids as young as four or five can jump right in — threading beads is great for fine motor skills, and following the steps gives them a real sense of accomplishment. There’s something pretty special about watching a little kid hold up a pumpkin they made themselves and realize they actually did that.
In a classroom setting, this project is a natural fit for fall. Pre-cut the pipe cleaners and pre-sort the beads into small trays ahead of time, and the whole activity fits comfortably into a class period. Kids can take their pumpkins home, or you can use them to decorate the classroom windows — either way, parents are always genuinely charmed by them. And since the materials are so affordable, it’s a realistic option even for larger groups, which matters a lot in school settings.
For a family craft night, set everything up like a little station, put on some good fall music, and just let people make pumpkins at their own pace. Even older kids and teenagers who roll their eyes at first tend to get pulled in once they start shaping their pumpkin and tweaking the colors. There’s something quietly calming about threading beads — it’s the kind of low-key, hands-on thing that gets people talking and laughing in a way that staring at separate screens never quite does.
Displaying and Preserving Your Beaded Pumpkins
Once you’ve got a little collection going, the fun of figuring out where to put them begins. These pumpkins are surprisingly versatile — they fit just as naturally on a kitchen windowsill as they do on a formal dining table. One of my favorite simple arrangements is three pumpkins in different sizes on a small wooden tray, with a few real acorns or dried leaves tucked around them. It looks intentional and put-together, even though it comes together in about thirty seconds.
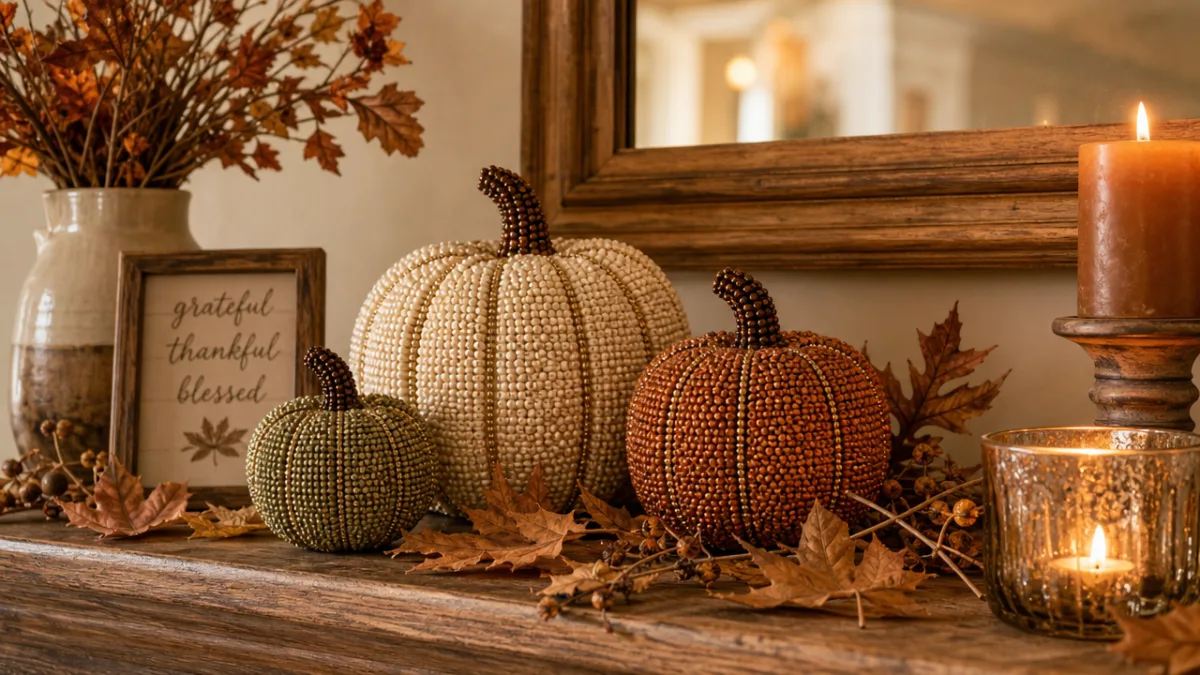
They play really nicely with other fall decor, too. Scatter a few among pillar candles and small gourds for a layered Thanksgiving centerpiece, or tuck some into a store-bought fall wreath to give it a handmade, personal feel. On a mantel, a row of beaded pumpkins in graduating sizes makes a lovely focal point — the kind of thing guests always notice and ask about.
The practical news is that these little guys are surprisingly durable. No rotting, no denting, no deteriorating over time the way natural gourds do. When the season’s over, just wrap them loosely in tissue paper, tuck them into a box, and put them away. They’ll come out the following fall looking exactly as good as they did when you made them. Over the years, a collection of these can turn into something genuinely sentimental — little handmade heirlooms that come out every autumn along with everything else you love about the season.
Why Handmade Crafts Matter in a Digital Age
It’s worth pausing for a second to think about why sitting down to thread beads onto a pipe cleaner actually feels so good. We live in a world where you can order a box of fall decorations and have them on your doorstep tomorrow, and yet something about making your own just hits differently. When you make something with your hands, you’re doing something fundamentally human — creating something tangible and personal out of simple materials and a little focused attention. It slows you down in a way that feels genuinely restorative.
When you do this with kids, there’s an extra layer of meaning to it. They’re learning patience, the satisfaction of following a process all the way through, and — maybe most importantly — that their own hands are capable of making something real and beautiful. When a kid proudly sets a pumpkin they made on the family table, they’re getting a quiet lesson about creative confidence that sticks around long after the decorations come down.
There’s also something a little rebellious about filling your home with handmade things in an age of mass production. Every one of your beaded pumpkins is slightly different from every other one — shaped by your choices, your color preferences, the particular way you bent the wire. No factory can replicate that. And when someone notices your fall decor and finds out you made it yourself, the conversation that follows is always warm and curious and connecting. That’s the thing about crafts like these — they’re not just decorations. They’re invitations to share something, teach something, and maybe inspire someone else to pick up a pipe cleaner and see what they can make.








What do you think?
It is nice to know your opinion. Leave a comment.