










How to Add a Wooden Bridge to Your Pond: A Complete Guide
Why a Wooden Bridge Transforms Your Pond and Garden
Adding a wooden bridge to a backyard pond is one of the most rewarding landscaping projects a homeowner can undertake. Beyond its obvious functional purpose of allowing you to cross from one side of the water to another, a wooden bridge introduces a focal point that draws the eye, creates a sense of depth, and instantly elevates the overall aesthetic of your outdoor space. Whether your garden style leans toward Japanese zen, rustic cottage, or modern naturalistic design, there is a wooden bridge style that will complement and enhance your vision beautifully.
From a practical standpoint, a bridge gives you better access to the far side of your pond for maintenance, feeding fish, and enjoying the full perimeter of your water feature. Without a bridge, getting to the other side often means navigating muddy banks or walking a long way around the edge, which can damage surrounding plantings and compact the soil in sensitive areas. A well-placed bridge solves this problem elegantly while adding architectural interest that no simple stepping stone path can match in drama or visual impact.
Psychologically, bridges have long held symbolic meaning in garden design — they represent transition, connection, and the idea of moving from one space into another. In Japanese garden philosophy, a moon bridge arching gracefully over still water is intended to slow the visitor, encouraging reflection and mindfulness. Even in a more casual Western backyard setting, the presence of a bridge naturally invites people to pause, lean over the railing, and watch the fish below. This quality of encouraging stillness and appreciation is genuinely difficult to achieve through other means, making the bridge one of the most emotionally resonant garden structures you can add.
Choosing the Right Style for Your Pond
The style of bridge you choose should feel like a natural extension of your garden’s existing character. A rustic split-log bridge with rough-hewn timber and minimal railing suits a naturalistic wildlife pond surrounded by native plants and meadow grasses. A painted white lattice-sided bridge with gentle curves speaks to a romantic English cottage aesthetic and pairs beautifully with water lilies, roses climbing nearby trellises, and soft flowering marginals around the pond edge. Take time to walk through your garden and really observe what is already there before committing to a style.
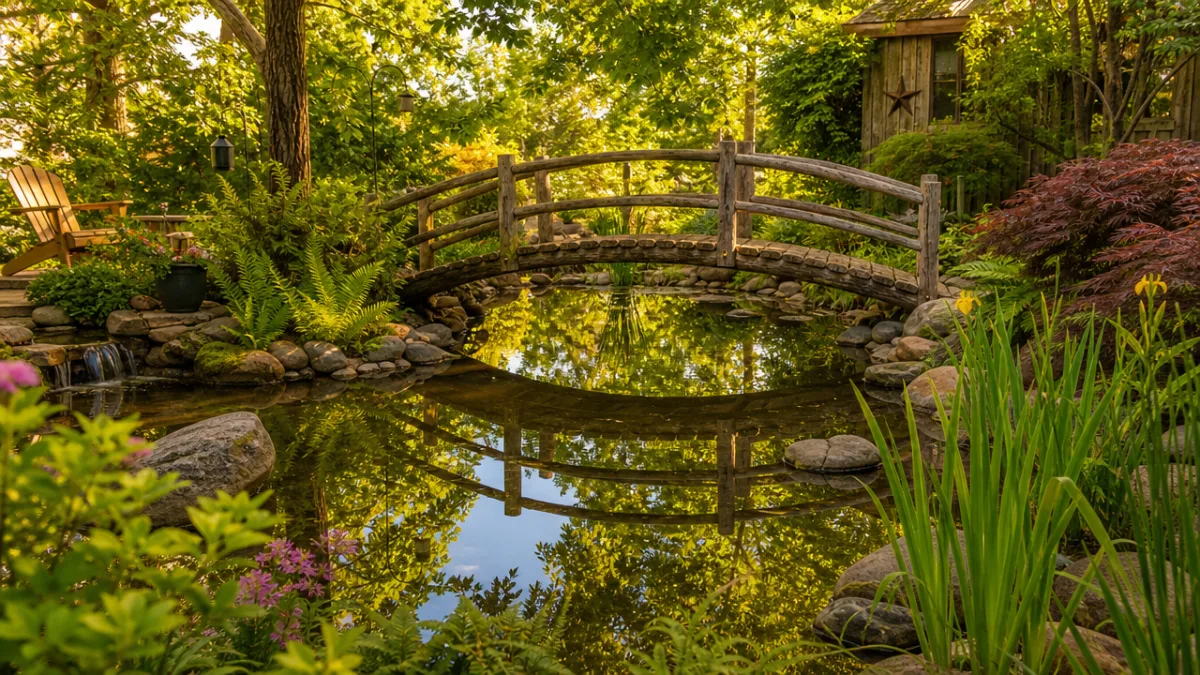
Arched bridges versus flat bridges are the most fundamental stylistic choice you will make. Flat bridges are simpler to build, easier to walk across, and tend to look more understated and modern. Arched bridges, particularly those with a pronounced moon-bridge curve, are more dramatic and classical but require more engineering skill to construct safely, especially if the arch is steep enough to require steps on either side. For most backyard ponds, a gentle arch of no more than 10 to 15 degrees provides just enough visual interest without creating a tripping hazard or accessibility challenge for older family members.
Color and finish are also important style considerations that many people overlook until it is too late to change course easily. Natural untreated cedar or redwood left to weather to a silver-grey looks stunning in naturalistic settings and requires minimal maintenance. Dark stained or black-painted bridges create a striking contrast against green water plants and are particularly dramatic in modern or Japanese-inspired gardens. Painted white or cream bridges have a timeless, romantic quality but will require the most ongoing maintenance to keep them looking fresh. Think carefully about how much upkeep you are genuinely willing to commit to before making your color choice.
Planning, Measuring, and Designing Your Bridge
Careful planning before you purchase a single piece of timber will save you significant time, money, and frustration during the build. The first step is to accurately measure the span you need to cross. Measure the width of your pond at the exact point where the bridge will sit, adding at least two feet on each side so that the bridge ends rest comfortably on solid ground rather than on the unstable, saturated soil right at the water’s edge. Bridges that are too short and rest on wet bank soil will sink, shift, and rot far more quickly than properly positioned ones.
Beyond span length, you need to consider the width of your bridge deck. A minimum deck width of three feet allows a single person to cross comfortably, but four feet is much more pleasant and allows two people to walk side by side or to stand together looking over the railing at the fish below. If you plan to use a wheelbarrow or garden cart to cross the bridge for maintenance purposes, bump the width up to at least five feet to give yourself enough clearance on either side of the wheel. Sketch your measurements out on paper and calculate your materials list before heading to the lumber yard.
Load capacity is a technical consideration that many enthusiastic DIY builders underestimate. A bridge that looks lovely but flexes alarmingly when you walk across it is both unpleasant and potentially dangerous. As a general rule of thumb, design your bridge to support a minimum of 250 pounds per square foot of deck area. This means choosing appropriately sized joists and beams for your span length and ensuring your supports or footings are solid and stable. If in doubt, consult a structural engineer or at minimum use a free online bridge load calculator to check your design before you commit to cutting expensive timber.
Permits and Safety Considerations
Depending on where you live, adding a bridge to a backyard pond may require a building permit, particularly if the structure is above a certain size or spans a water feature that has been classified as a regulated waterway. It is always worth checking with your local council or building authority before you begin construction. The consequences of building without a required permit can range from a fine to being required to demolish the structure entirely, which is an expensive and heartbreaking outcome after all your hard work.
Safety railings are not just a regulatory requirement in many jurisdictions — they are simply good practice, especially if children or elderly individuals will be using the bridge. A railing height of at least 36 inches is generally considered the minimum for residential applications, with 42 inches being preferable for higher-traffic or more public-facing settings. The spacing between railing balusters should be no more than four inches to prevent small children from slipping through or getting their heads trapped. Use the same pressure-treated or naturally rot-resistant lumber for your railings as you do for the rest of the structure.
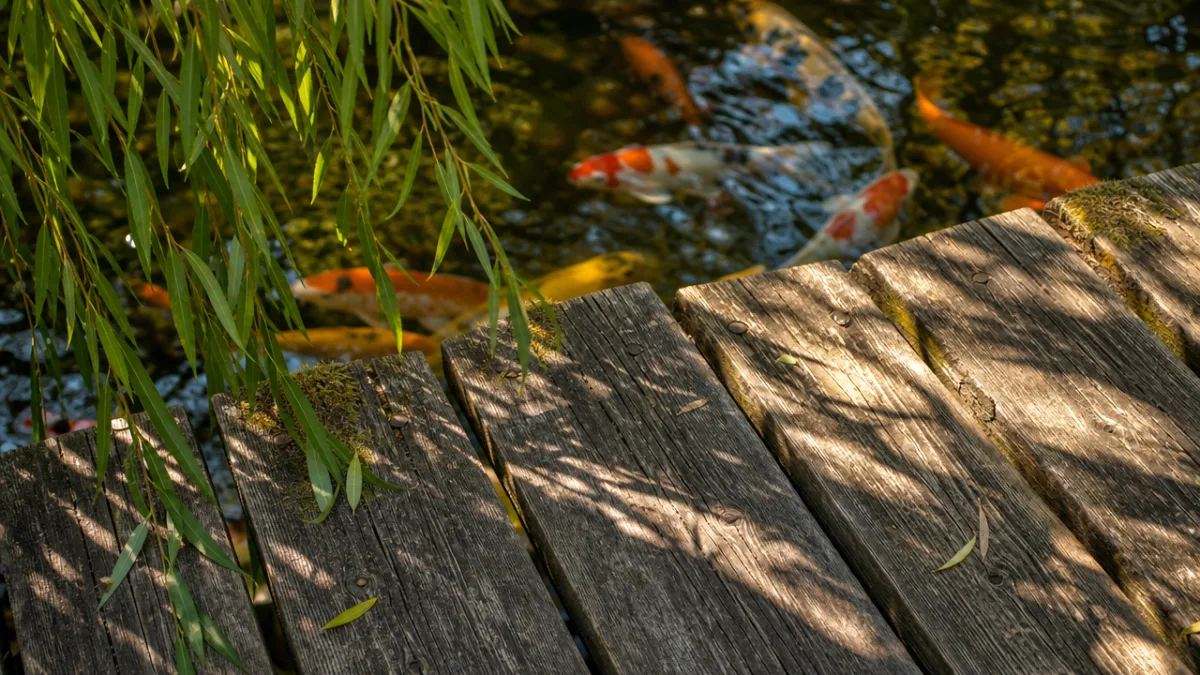
Non-slip surfacing on the deck boards is one of the most critical safety features you can include, and it is also one of the most frequently overlooked by first-time bridge builders. Wooden bridge decks can become incredibly slippery when wet, and in a garden setting they are almost always exposed to moisture, algae growth, and fallen leaves. You can address this by leaving deliberate gaps between deck boards to allow water to drain and airflow to dry the surface, by using decking with a textured or grooved surface, by applying non-slip strips, or by attaching thin strips of chicken wire to the surface for traction. Check the surface regularly throughout the year and treat it with anti-slip solution as needed.
Selecting the Best Timber for Longevity
The choice of timber is arguably the single most important decision you will make for the long-term success of your pond bridge, because wood that is in constant proximity to water is under significant stress from moisture, temperature fluctuations, and biological organisms like algae, moss, and wood-boring insects. Not all timber species respond equally well to these conditions, and choosing the wrong wood can mean your beautiful new bridge begins to deteriorate within just a few seasons, requiring expensive repairs or complete replacement far sooner than you expected.
Cedar and redwood are two of the most popular natural choices for garden bridges in North America because both species contain naturally occurring oils that resist moisture penetration, fungal decay, and insect damage without the need for chemical treatment. Western red cedar in particular is widely available, relatively affordable compared to other rot-resistant species, dimensionally stable as it dries, and easy to work with hand and power tools. It also has a beautiful warm reddish-brown color that weathers gracefully to a soft silvery-grey if left unfinished. Both cedar and redwood are considered sustainable when sourced from certified responsibly managed forests.
Pressure-treated lumber is the most economical option for structural components like support beams, joists, and footings that will be in close contact with soil or water. Modern pressure-treated lumber uses copper-based preservatives that are far less toxic than the old arsenic-based treatments that were phased out in the early 2000s, making it safer for use near garden ponds containing fish and other aquatic life. However, it is still best practice to use pressure-treated lumber only for structural elements hidden beneath the bridge deck, and to use cedar or redwood for the visible walking surface and railings that may come into direct contact with skin or food plants growing nearby.
Tropical Hardwoods and Composite Alternatives
Tropical hardwoods such as ipe (Brazilian walnut), teak, and cumaru are exceptionally durable and beautiful but come with a significantly higher price tag and serious sustainability concerns. Ipe in particular is extraordinarily dense and hard — so much so that it is difficult to cut and requires pre-drilling for every fastener — but it will last decades even in harsh outdoor conditions with minimal maintenance. If you choose tropical hardwoods, look for Forest Stewardship Council (FSC) certification to ensure the timber has been sourced from responsibly managed forests rather than contributing to illegal deforestation.
Composite decking materials made from a combination of recycled wood fiber and plastic are worth serious consideration for bridge deck boards, even if they feel less romantic than solid timber. High-quality composites are virtually impervious to moisture, will not rot, warp, or splinter, require almost no maintenance beyond occasional washing, and are available in a wide range of colors and wood-grain textures that can look convincingly natural. They do tend to be more expensive upfront than timber, but when you factor in the elimination of staining, sealing, and eventual replacement costs, composite decking often works out to be the more economical choice over the life of the bridge.
Whichever material you choose, always protect cut ends with wood preservative before installation, as the end grain of any timber is the most vulnerable point for moisture entry and subsequent decay. Apply a generous coat of end-grain sealer or penetrating wood preservative to every cut surface during construction, and reapply to any areas that get trimmed or drilled on-site. This simple step can dramatically extend the life of your structure and is especially important for deck boards where water regularly pools and seeps down into the end grain over time.
Step-by-Step Construction Guide
Once your design is finalized and your materials are on hand, construction can begin in earnest. The process for a straightforward flat pond bridge follows a logical sequence that most competent DIY builders can complete over a weekend with the right tools and a helpful assistant. Working systematically through each phase — footings, support beams, joists, decking, and railings — and not rushing ahead to the next stage before the previous one is solid and level will make the difference between a bridge that looks and feels professional and one that disappoints.
Begin by establishing your footings on both banks of the pond. The type of footing you use will depend on the soil conditions and the size of your bridge. For small to medium bridges crossing backyard ponds, concrete deck blocks or poured concrete footings set below the frost line are the most common approaches. Position the footings so that the outer face of each support beam will land at least 18 to 24 inches back from the water’s edge on solid, undisturbed soil. Use a long spirit level and string lines to ensure both footings on each bank are at exactly the same height before you proceed — any unevenness here will compound through every subsequent stage of construction.
With footings set and cured, lay your main support beams across the span, resting them on the footings and securing them with appropriate hardware. For a typical 8 to 12 foot span, doubled-up 2×8 or 2×10 pressure-treated lumber works well for the main beams. Add cross-joists perpendicular to the beams at 12 to 16 inch intervals across the width of the bridge to form the structural framework for your deck. Use galvanized or stainless steel joist hangers and screws throughout — standard zinc-plated fasteners will corrode and fail in the moist environment near a pond, compromising the structural integrity of your bridge far too early.
Laying the Deck and Installing Railings
Lay your deck boards perpendicular to the joists, starting from one side and working across. Leave a consistent gap of approximately one quarter inch between boards to allow water to drain freely and air to circulate under the deck surface. Secure each board with two stainless steel screws at every joist crossing — do not rely on nails, which will eventually work loose as the wood expands and contracts seasonally. Pre-drill pilot holes near the edges of boards to prevent splitting, particularly if you are working with hardwood species that are prone to cracking under direct fastener pressure.
Railing posts should be notched to fit over the outer beam or bolted through the side of the deck frame rather than simply toe-nailed to the surface, which would be structurally inadequate. Space posts no more than six feet apart along each side of the bridge, and more closely if your design includes decorative balusters between them. Once posts are secure, install the top rail and any mid rails, then add balusters at the correct spacing. Take time to get the railing installation right — it is the most visible element of the finished bridge and will define its overall character and quality of appearance more than any other single component.
Sand all surfaces smooth, paying particular attention to the top edges of deck boards and handrails where skin contact is most likely. Apply your chosen finish — whether that is a penetrating oil, a semi-transparent stain, or a solid color paint — according to the manufacturer’s instructions, ensuring full coverage on all exposed surfaces. Allow the finish to cure completely before inviting anyone to walk on the bridge or before allowing heavy rainfall to wash over the fresh coating. A well-applied finish in the first season will protect the timber and make subsequent maintenance applications bond more effectively and last longer.
Landscaping Around Your New Bridge for Maximum Impact
The bridge itself is only the beginning — the planting and landscaping you install around it will determine whether it looks like a thoughtful, intentional garden feature or an isolated structure that was simply dropped into the landscape without context. The goal of surrounding plantings is to soften the bridge’s edges, anchor it visually to both banks, and create a sense that the bridge belongs in the garden rather than having been added as an afterthought. This requires thinking carefully about height, texture, color, and seasonal interest in the plants you select for the immediately adjacent areas.
On the banks where the bridge meets the ground, use low-growing, spreading plants that will gradually colonize the transition zone between structure and soil without growing so exuberantly that they obscure the bridge or make access difficult. Creeping jenny, blue star creeper, thyme, and similar groundcovers work beautifully at the base of bridge supports and along the bank edges. Behind them, layer in medium-height marginal plants like iris, rushes, and ornamental grasses that provide vertical interest and movement in the breeze. Taller shrubs or small ornamental trees set further back on the banks complete the layered planting composition and frame views of the bridge from across the garden.
Planting in and at the very edge of the pond itself is equally important for integrating the bridge into the broader water garden picture. Water lilies, lotus, and other floating-leaf plants that spread across the pond surface create a sense of lushness and biodiversity that makes the bridge feel like it is hovering over a rich, living ecosystem rather than a bare pool of water. Marginal plants like pickerelweed, arrowhead, and blue flag iris planted at the pond’s edge directly beneath and around the bridge soften its supports and create continuity between the structure and the water. Allow plants to naturalize and spread gradually rather than trying to control every inch too rigidly — some gentle informality is what makes a planted pond and bridge look truly beautiful.

Lighting and Seasonal Maintenance Tips
Thoughtfully installed lighting can transform your pond bridge from a daytime feature into a magical nighttime focal point that extends your enjoyment of the garden well beyond sunset. Solar-powered LED post cap lights fitted to the tops of railing posts are the simplest option, requiring no wiring and running automatically from dusk to dawn. Low-voltage underwater pond lights aimed upward at the underside of the bridge create a dramatic theatrical effect, and string lights woven through the railings add a festive, romantic quality perfect for entertaining. Whatever lighting you choose, use fixtures rated for outdoor and wet-location use to ensure safety and durability.
Maintenance is an ongoing commitment that most bridge owners underestimate when first installing their structure. Develop a seasonal routine that keeps your bridge in top condition year after year. In spring, inspect all structural connections for looseness, check for any signs of rot or insect damage, replace any deck boards that have warped or cracked, and apply a fresh coat of finish if the existing one is looking tired. In autumn, clear fallen leaves from the deck surface promptly as they retain moisture and accelerate wood decay, and clean algae or moss from the surface before it becomes slippery enough to pose a safety hazard.
Once a year, do a thorough inspection beneath the bridge as well as on top, checking the footings for settlement, the support beams for any signs of moisture damage, and the fasteners for corrosion. Tighten any loose bolts, replace corroded screws with fresh stainless steel ones, and treat any newly exposed end grain with wood preservative. This annual inspection and maintenance session, which typically takes only a couple of hours, will reliably extend the life of your bridge by many years and ensure that it remains a safe, beautiful, and cherished feature of your garden for decades to come. A little consistent care is all that separates a bridge that deteriorates disappointingly quickly from one that becomes a beloved multigenerational garden landmark.








What do you think?
It is nice to know your opinion. Leave a comment.