










Easy DIY Egg Carton Flowers That Look Expensive
Why Egg Carton Flowers Are the Craft Trend You Need to Try
If you have ever walked through a craft store and marveled at delicate paper or fabric flowers while quietly balking at the price tag, egg carton flowers might just become your new obsession. These remarkable little blooms are made entirely from the cardboard cartons that most of us toss in the recycling bin without a second thought. With a little paint, some patience, and a few basic craft supplies, you can create floral arrangements that genuinely fool guests into thinking you spent a small fortune at a boutique flower shop.
The appeal of this craft goes far beyond budget savings. Egg carton flowers are durable, lightweight, and completely customizable to match any color scheme or decor style in your home. Unlike real flowers, they never wilt, never need water, and never drop petals on your tablecloth. They are perfectly suited for centerpieces, wreaths, wall art, hair accessories, and gift toppers — essentially anywhere you would use a decorative bloom but want something that will last indefinitely without any maintenance whatsoever.
Sustainability is another enormous draw. Every year, billions of egg cartons end up in landfills, and transforming even a handful of them into beautiful home decor is a small but meaningful act of creative recycling. This craft is also wonderfully inclusive — it requires no special artistic talent, no expensive equipment, and no prior experience with crafting. Whether you are a seasoned DIY enthusiast or someone picking up a glue gun for the very first time, egg carton flowers are approachable, forgiving, and deeply satisfying to make from start to finish.
The History of Upcycled Paper Crafts
Upcycled paper crafts have a long and storied tradition across many cultures. In Mexico, papier-mâché flowers have decorated festivals and homes for centuries, while in Japan, the art of origami has elevated folded paper into a respected artistic tradition. The modern movement toward crafting with household waste material like egg cartons fits naturally into this global heritage of finding beauty in the humble and the overlooked. Egg carton crafting specifically gained traction in the early 2000s and has exploded in popularity with the rise of Pinterest and crafting communities online.
What makes egg carton flowers particularly special in this tradition is the way the material itself seems almost designed for the purpose. The individual cup sections of an egg carton already possess a natural, curved, petal-like shape that requires very little manipulation to look convincingly floral. Crafters have capitalized on this happy accident, developing dozens of techniques for cutting, curling, layering, and painting the cups to mimic roses, dahlias, peonies, sunflowers, and many other varieties with impressive accuracy.
Materials and Tools You Will Need
One of the greatest joys of this project is how little you actually need to get started. The primary material is, of course, cardboard egg cartons — the kind made from pressed paper pulp rather than foam or plastic, as the paper variety absorbs paint beautifully and is much easier to cut and shape. You will want to collect several cartons before you begin, since a single arrangement might use anywhere from three to fifteen cartons depending on the size and complexity of your design.
Beyond the cartons themselves, the tools and supplies list is refreshingly short and inexpensive. Most of what you need is likely already sitting in a junk drawer or craft basket somewhere in your home. Here is a helpful list of everything you will want to have on hand before you sit down to create:
- Cardboard egg cartons (paper pulp variety, not foam)
- Sharp scissors or a craft knife with a cutting mat
- Acrylic craft paint in your chosen colors
- Small and medium paintbrushes
- A hot glue gun and plenty of glue sticks
- Green floral wire or wooden skewers for stems
- Green floral tape to wrap stems
- A pencil or pen for marking cut lines
- A bowl of water and paper towels for cleanup
- Optional: glitter, pearl-finish paint, Mod Podge, or acrylic sealer for finishing
Selecting your paint colors is actually one of the most exciting parts of preparation. Acrylic craft paints from brands like Apple Barrel or Folk Art cost just a dollar or two per bottle and come in hundreds of shades. For a luxurious, expensive-looking result, consider leaning into soft, sophisticated palettes: dusty rose and sage green, creamy ivory and antique gold, deep burgundy and forest green, or bright coral with touches of yellow. Mixing two shades together while the paint is still wet on the carton can create a beautiful, naturalistic gradient that makes the petals look remarkably realistic and dimensional.
Step-by-Step Instructions for Making Egg Carton Roses
The classic egg carton rose is the crown jewel of this craft family, and once you master it, every other flower style will feel effortless by comparison. Begin by cutting apart your egg carton so that you have individual cup sections. For one rose, you will need approximately five to seven cups of varying sizes — if you use the bottom of a standard twelve-cup carton, you can carefully trim some cups slightly smaller than others to create the layered, graduated look of an opening rose bloom.
With your scissors, cut petal shapes into the rim of each cup. Make four or five cuts evenly spaced around the top edge of each cup, going about halfway down the side, and then round each resulting petal shape with your scissors. At this point you can also gently press your thumb into the base of each cut section to create a subtle curve in the petal — this small step makes an enormous difference in how lifelike the finished flower appears. Do not worry about achieving perfection; slight variations in petal shape actually make the flower look more natural and organic.
Once all your cups are cut and shaped, paint them using your chosen colors. Apply a base coat and let it dry completely before adding any detail or second colors. For roses, a rich, deep base color like dusty rose, red, or coral looks stunning, and you can dry-brush a slightly lighter or slightly darker shade over the tips of the petals once the base is dry to add depth and dimension. When your paint is fully dry, begin gluing the cups together by nesting them from smallest to largest, securing each layer with a small dot of hot glue at the center. The smallest cup goes at the very center to form the tight inner bud of the rose, and the largest cup forms the outermost layer of open petals.
Making Dahlias, Sunflowers, and Wildflowers
Once you have the rose technique under your belt, branching out to other flower types is simply a matter of changing how you cut the cup rims and how you layer your pieces. For dahlias — which have a spectacular, intricate appearance that makes them look particularly expensive and elaborate — cut much thinner, more pointed petals around the rim of each cup, making eight to twelve cuts rather than four or five. Layer many more cups together than you would for a rose, building up a dense, globe-like bloom that mimics the real dahlia’s impressive fullness and complexity.
Sunflowers offer a wonderful opportunity to use two different colors in the same bloom. Cut the bottom panel from one cup and paint it dark brown or deep gold to serve as the center seed disk of the sunflower. For the petals, cut long, narrow pointed shapes from the flat panels between cups on the carton, or cut petal strips from the side walls. Paint these a bright, cheerful yellow and glue them in a ring around the back of your brown center piece. The result is a charming sunflower that translates beautifully into summer wreaths and table arrangements.
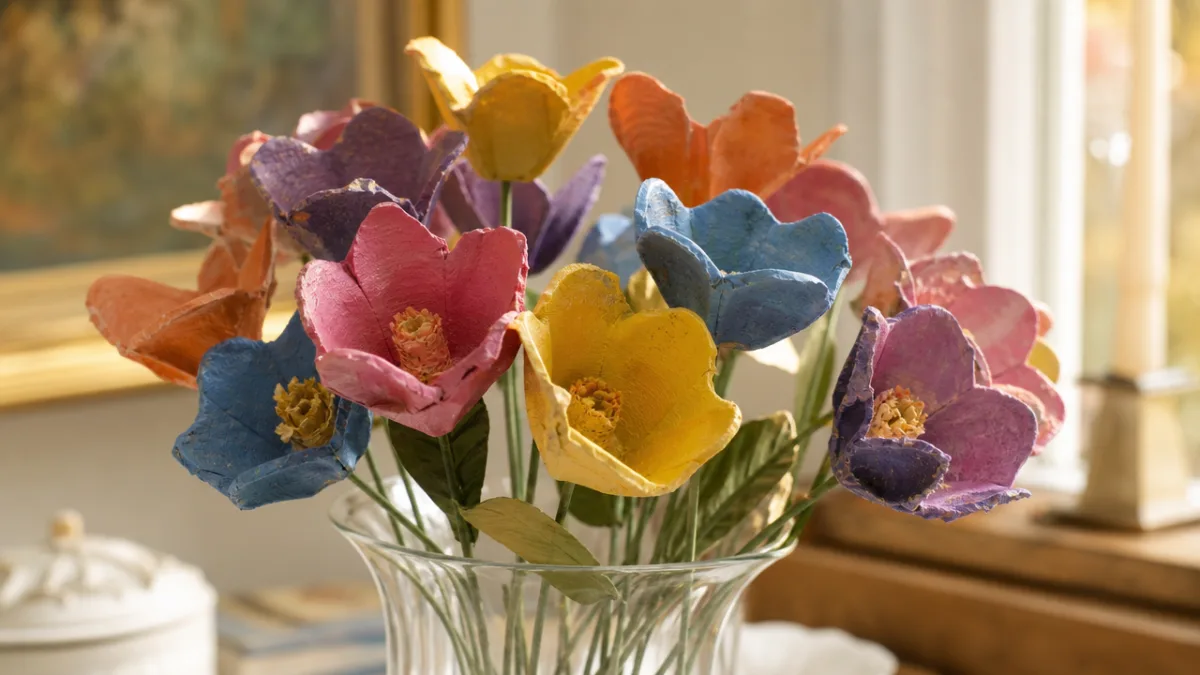
For a more whimsical, garden-fresh look, try making simple five-petal wildflowers using just a single egg carton cup per flower. Cut five even petals around the rim, paint each one a different pastel shade or a solid cheerful color, and add a small button or bead in the center with a dot of hot glue. These simple blooms work wonderfully when clustered together in large quantities — a mason jar stuffed with thirty or forty of them looks like a lush, abundant bouquet that required far more skill and expense than it actually did.
Painting Techniques That Make Flowers Look High-End
The single factor that most distinguishes a stunning, expensive-looking egg carton flower from a craft project that reads as obviously homemade is the quality and technique of the painting. Many beginner crafters make the mistake of applying one flat, even coat of a single color and calling it done. While there is certainly nothing wrong with this approach for casual or children’s projects, a few additional painting techniques can elevate your flowers to an entirely different level of sophistication and realism with very little extra effort or skill required.
Dry brushing is perhaps the most impactful and beginner-friendly technique you can adopt. Load a small, stiff-bristled brush with a lighter color — say, a soft pink if your base is a deeper rose — and then wipe most of the paint off on a paper towel until the brush is almost completely dry. Drag this nearly-dry brush lightly across the tips and raised edges of your petals. The result is a subtle highlight that mimics the way light catches the edges of real petals and instantly adds a professional, dimensional quality to your blooms. You can also reverse this and dry-brush a darker shade into the center and base of petals to suggest shadow.
Watercolor washing is another beautiful technique that works particularly well on egg carton material because the paper pulp is quite absorbent. Thin your acrylic paint significantly with water — the consistency of a light watercolor wash — and brush it quickly across the petals over your dried base coat. This creates a soft, translucent layer of color variation that is deeply convincing as a natural petal coloration. Finish any flower with a light coat of Mod Podge or acrylic sealer to give the petals a gentle sheen, protect them from dust and humidity, and lend them that final touch of polish that really does make them look like they came from a high-end artisan shop.
Adding Details Like Stamens and Leaves
Leaves and stamens are the finishing details that take your egg carton flowers from pretty to truly breathtaking. For leaves, cut leaf shapes from the flat sections of the egg carton — the lid works especially well for this because it provides a larger, flatter surface area. Cut your leaves with a pointed tip and slightly wavy edges for a natural look, then score a line down the center with your scissors or a craft knife to suggest a midrib vein. Paint them in various shades of green, mixing yellow-green and blue-green tones for variety, and glue them behind your blooms or along your stems.
Stamens can be made from a variety of household items. Yellow-tipped flower stamens are available inexpensively in bulk from craft stores, but you can also DIY them using small beads threaded onto thin wire, short lengths of yellow-painted toothpick, or even tightly rolled bits of paper painted yellow or gold. A cluster of stamens in the center of a flower adds an incredible amount of realism and visual interest. For poppies especially, a dark center with yellow stamens surrounding it creates a jaw-dropping result that bears a genuinely convincing resemblance to the real thing.
Creative Ways to Display and Use Your Flowers
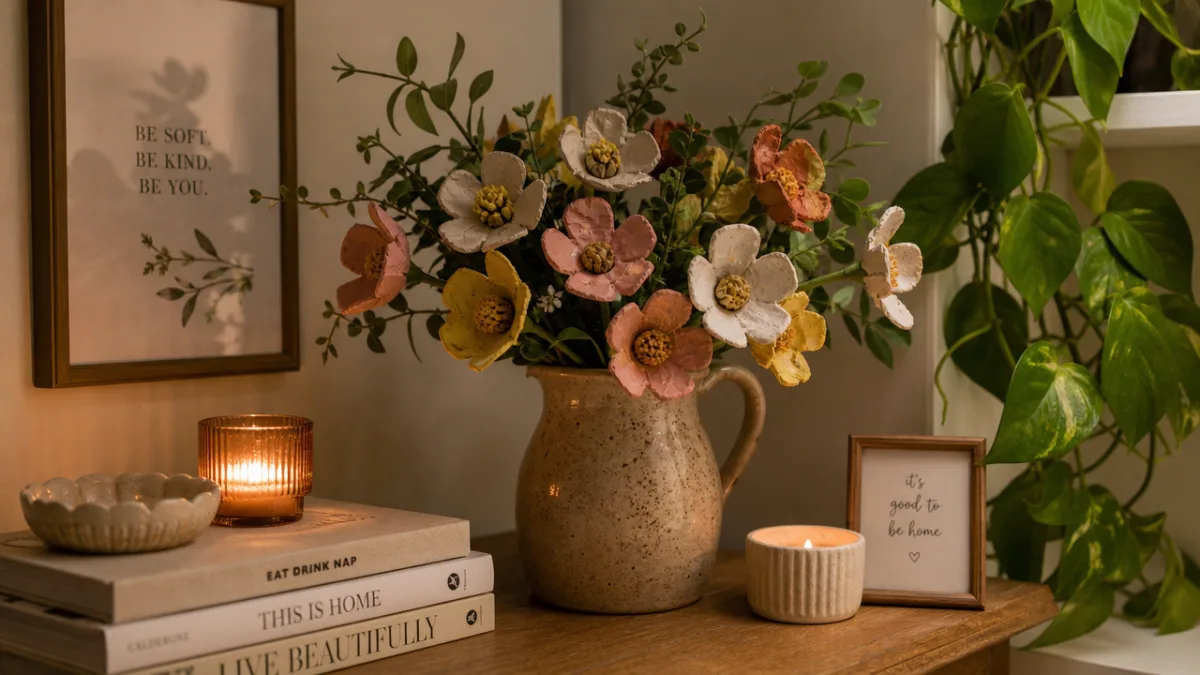
Once you have assembled a collection of gorgeous egg carton blooms, the fun truly begins — deciding how to display and use them throughout your home. The most straightforward approach is the classic vase arrangement: wire your flowers onto floral stems, wrap the stems in green floral tape, and arrange them in a vase just as you would with real or silk flowers. Because egg carton flowers are so lightweight, they stay in place beautifully and can be rearranged endlessly without any flowers drooping or stems bending out of shape.
Wreaths are another spectacular application. A grapevine or foam wreath base from the craft store provides an ideal foundation, and you can cover it almost entirely in egg carton blooms supplemented with leaves, berries, ribbon, and other decorative elements. A full, lush wreath made primarily from painted egg carton flowers looks absolutely gorgeous on a front door, above a fireplace, or as a centerpiece laid flat on a dining table with a pillar candle in the center. These wreaths make phenomenal gifts as well, since the recipient receives something beautiful and handmade that will last for years without any care.
Beyond home decor, egg carton flowers have a charming role to play in gift wrapping, event decoration, and wearable accessories. Glue a single large bloom to a plain hair clip or headband for a garden-party accessory that draws compliments all day long. Use smaller flowers as gift toppers in place of bows — they look far more thoughtful and special than anything you would find in a store, and the recipient often saves them long after the gift is opened. For weddings, baby showers, or birthday parties, crafting dozens of egg carton flowers in coordinated colors and scattering them across tables, hanging them from string lights, or spelling out words on a backdrop wall creates a stunning, budget-conscious installation that photographs beautifully.
Seasonal and Holiday Variations
One of the most delightful aspects of egg carton flowers is how naturally they lend themselves to seasonal adaptation. For spring, stick to soft pastels — lavender, pale yellow, blush pink, and mint green — and arrange them in a moss-lined basket or a terracotta pot for an Easter centerpiece that looks like it stepped out of a lifestyle magazine. For summer, go bold and bright with sunflower yellows, hot pinks, and tropical oranges clustered together in a colorful, abundant arrangement that brings energy and warmth to any outdoor entertaining space.
Autumn calls for a richer, deeper palette: burnt orange, deep red, golden yellow, and chocolate brown. Egg carton flowers in these tones look spectacular combined with dried seed pods, pine cones, cinnamon sticks, and fall leaves in a Thanksgiving centerpiece that can stay on your table for months without any maintenance. For winter and the holiday season, try painting your flowers white or silver and dusting them with iridescent glitter while the paint is still slightly tacky — the resulting blooms look like ice crystals or snow-kissed roses and make exquisite additions to Christmas wreaths, garlands, and gift wrapping.
Tips for Beginners and Common Mistakes to Avoid
Every crafter, no matter how experienced, encounters a few hiccups the first time they try a new technique, and egg carton flowers are no exception. The good news is that the most common beginner mistakes are entirely avoidable once you know what to watch out for. The first and most widespread issue is using foam egg cartons instead of paper pulp ones. Foam cartons do not absorb paint, cannot be easily scored or shaped, and tend to crack rather than bend gracefully. Always check the bottom of your carton before you begin — paper pulp cartons typically have a rough, matte texture and a slightly gray or brown color, while foam cartons look and feel like the foam of a disposable coffee cup.
Another common mistake is rushing the drying process between paint coats. Acrylic paint dries remarkably quickly on most surfaces, but egg carton material absorbs moisture and can take a bit longer to dry fully, especially if you have applied a thick coat. Attempting to add a second color or begin the assembly process before the base coat is fully dry leads to muddy colors, smearing, and petals that stick together during shaping. Give each coat a full ten to fifteen minutes of drying time, or use a hair dryer on a low setting to speed the process without risking warping the cardboard.
Finally, be cautious with your hot glue gun, especially if you are making these flowers with children present. Hot glue works far better than craft glue or regular white glue for this project, but it is genuinely hot and can cause burns if it contacts skin. Work on a silicone mat or a piece of parchment paper to protect your work surface, keep a bowl of cold water nearby in case of accidental contact, and if crafting with younger children, consider using a low-temperature glue gun designed specifically for child-safe crafting. With these simple precautions in mind, egg carton flower making is a joyful, relaxing, and immensely rewarding craft that you will return to again and again for every season, every occasion, and every corner of your beautifully decorated home.








What do you think?
It is nice to know your opinion. Leave a comment.