










DIY Garden Arbour: A Complete Guide to Building Your Own Beautiful Garden Structure
Introduction to Garden Arbours and Why You Should Build One
A garden arbour is one of the most enchanting and functional structures you can add to your outdoor space. Whether you envision a romantic vine-covered archway leading into a secret garden, a shaded seating retreat tucked into a corner of your yard, or a dramatic focal point that transforms an otherwise flat landscape, an arbour delivers on every front. Building one yourself not only saves considerable money compared to purchasing a pre-made structure or hiring a contractor, but it also gives you the deeply satisfying experience of creating something lasting and beautiful with your own hands.
The terms “arbour” and “arbor” are simply regional spelling variations — British English favours the former, while American English uses the latter — but both refer to the same beloved garden feature: a framework of latticework or open beams designed to support climbing plants and provide a sense of enclosure and definition within a garden. Historically, arbours have graced the gardens of grand estates and modest cottages alike, beloved for the way they blend architecture with living greenery, creating spaces that evolve and deepen in beauty with each passing season as plants mature and intertwine.
The great news for DIY enthusiasts is that building a garden arbour is a genuinely achievable weekend project, even for those with only moderate woodworking experience. With the right materials, a solid plan, and a methodical approach, you can erect a structure that will stand proudly in your garden for decades. This guide walks you through every stage of the process — from design and material selection through to finishing touches and planting choices — so you can approach the project with confidence and clarity, knowing exactly what lies ahead at each step of the journey.
Planning and Designing Your Garden Arbour
Before you pick up a single tool, the most valuable time you can spend is in the planning stage. Begin by walking your garden and identifying the ideal location for your arbour. Consider the purpose it will serve: is it meant to frame a pathway and create a sense of arrival, to screen an unsightly fence or utility area, or to create a destination — a place to sit, relax, and enjoy the garden from within? The purpose will largely determine the size and style of the structure. A pathway arbour tends to be narrower and taller, while a seating arbour needs to be wider to accommodate a bench or two chairs comfortably beneath it.
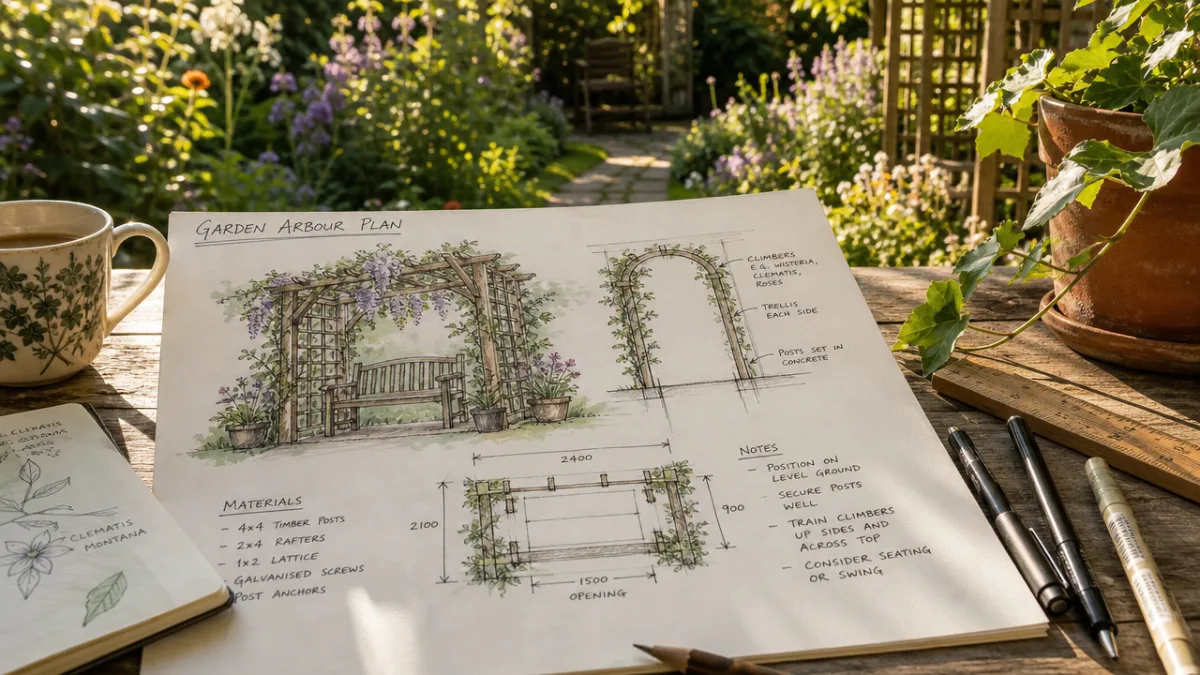
Sketch out your design on paper before committing to dimensions. A typical garden arbour stands between 2.1 and 2.4 metres tall at the apex, allowing comfortable headroom for adults passing underneath, and measures roughly 1.2 to 1.8 metres wide. The depth can range from a simple single arch of perhaps 60 centimetres through to a more substantial structure of 1.2 metres or more, which gives climbing plants more coverage to grow across and provides a greater sense of immersive enclosure. Think about the visual proportions carefully — an arbour that is too narrow will look pinched and uninviting, while one that is too broad can overwhelm a smaller garden.
It is also wise at this stage to check whether your planned structure requires any planning permissions or local building permits. In most residential settings, garden arbours fall well within permitted development guidelines, but rules vary by region and property type, so a quick check with your local authority can save potential headaches later. Additionally, consider the orientation of your arbour relative to the sun. A south-facing opening will flood the interior with afternoon light, which is wonderful for a seating area, while a north-facing orientation provides welcome shade on hot summer days. These subtle decisions made at the planning stage significantly shape how enjoyable the finished structure will be throughout the year.
Materials, Tools, and Timber Selection
Choosing the right timber is arguably the single most important decision in the entire building process, as it determines both the longevity of your structure and the amount of maintenance it will require over the years. Pressure-treated softwood — typically pine or spruce that has been impregnated with preservative under pressure — is the most popular and cost-effective choice for DIY garden structures. It resists rot, insect attack, and moisture far better than untreated timber, and it is widely available from timber merchants and large DIY stores. Look for timber rated for ground contact use on the posts, which will be in direct contact with soil or set into concrete.
For a more premium finish, hardwoods such as oak or western red cedar are outstanding choices. Oak is incredibly strong and develops a beautiful silvery patina as it weathers, while cedar is naturally aromatic, lightweight, and exceptionally resistant to decay without any chemical treatment. Both hardwoods are significantly more expensive than pressure-treated softwood, but they reward the investment with extraordinary durability and a natural beauty that is difficult to replicate with other materials. If budget allows and the arbour is a feature you intend to be a permanent fixture in your garden for twenty years or more, hardwood is well worth considering.
In terms of specific timber dimensions, a typical freestanding garden arbour will require the following structural components:
- Four corner posts: 100mm x 100mm (4×4 inch) section, cut to your desired height plus at least 600mm extra for ground fixing
- Top beam rafters and cross rails: 75mm x 50mm (3×2 inch) section
- Decorative lattice panels or trellis for the sides: pre-made panels save considerable time
- Roof cross slats or purlins: 75mm x 25mm (3×1 inch) section, spaced evenly for plant support
- Galvanised or stainless steel screws, bolts, and post anchors: never use bare steel outdoors, as it will rust rapidly
The tools required are similarly straightforward, and most seasoned DIYers will already own the majority of them. You will need a circular saw or mitre saw for accurate timber cuts, a drill-driver with appropriate bits, a spirit level, a tape measure, a pencil, a post hole digger or auger for setting the uprights, and a mixing bucket if you plan to use concrete to secure the posts. Safety equipment — including eye protection, hearing defenders, and work gloves — should be considered essential rather than optional whenever power tools and heavy timber are involved.
Step-by-Step Construction Process
With your materials gathered and your design finalised, construction can begin in earnest. Start by marking out the exact position of your four corner posts using stakes and string lines, ensuring the layout is perfectly square by measuring diagonally from corner to corner — if both diagonal measurements are identical, your layout is square. This step sounds almost too simple to warrant attention, but a structure built on an out-of-square base will cause compounding problems throughout the build, with joints that never quite align and panels that never sit flush. Take the time to get it exactly right before digging a single hole.
Dig your post holes to a depth of at least 600mm — deeper in softer or wetter soils where frost heave is a concern, as a depth of 750mm to 900mm provides greater stability in challenging ground conditions. Set the posts in the holes and pour in a fast-setting concrete mix, checking each post for plumb in both directions with your spirit level before the concrete sets. Use temporary bracing — lengths of scrap timber nailed diagonally to stakes in the ground — to hold the posts perfectly upright while the concrete cures. Allow the concrete to cure for at least 24 hours before removing the bracing and continuing with the build.
Once the posts are set and solid, the construction progresses quickly and satisfyingly. Cut your top beams to length and fix them horizontally across the tops of the posts, drilling pilot holes to prevent the timber from splitting and using long structural screws or carriage bolts for strength. The roof slats or purlins then run perpendicular across these beams, fixed at regular intervals of around 200 to 300 millimetres apart. Attach your trellis or lattice panels to the sides of the arbour, and add any decorative cut detailing to the beam ends — a simple rounded or ogee profile cut into the overhanging ends of the beams transforms the look of the structure from purely functional to genuinely elegant with very little extra effort.

If your design includes an arched top rather than flat horizontal beams, the process requires a little more skill but is still very much within reach of a determined DIY builder. Arches can be created by cutting curved profiles from wide timber boards — typically 200mm to 250mm wide — using a jigsaw to follow a carefully marked curve. Two pieces are usually laminated together with staggered joints to create a stronger, thicker arch member. Alternatively, pre-made wooden arch kits are available from garden centres that can be adapted and incorporated into your own design, saving the more complex woodworking while still giving you a handmade structure you can be proud of.
Finishing, Treating, and Weatherproofing Your Arbour
The finishing process is what separates a structure that deteriorates within a few seasons from one that remains sound and attractive for a decade or more. Even pressure-treated timber benefits enormously from the application of a quality exterior wood finish, which provides an additional barrier against UV degradation, moisture ingress, and surface cracking. Before applying any finish, sand all visible surfaces lightly with medium-grit sandpaper to remove any rough grain raised during construction, then wipe clean with a dry cloth to remove all dust and debris. This preparation step ensures the finish adheres evenly and penetrates effectively.
Your choice of finish depends largely on the aesthetic you want to achieve. Clear or lightly tinted exterior wood oils allow the natural grain and colour of the timber to show through beautifully while providing excellent moisture protection — ideal for hardwoods like oak or cedar where the natural beauty of the timber is a key part of the appeal. Opaque exterior paints or stains offer a wider range of colour options and typically provide stronger UV protection, making them a practical choice for softwood structures where you want to introduce a specific colour that ties the arbour into your wider garden scheme. Classic choices include sage green, slate grey, off-white, and warm charcoal.
Apply your chosen finish according to the manufacturer’s instructions, typically working with the grain and ensuring full coverage on all faces, including end grain which is particularly vulnerable to moisture absorption. Plan to reapply the finish every two to three years as part of routine maintenance, combined with an annual inspection of the structural elements to check for any signs of movement, loose fixings, or early timber decay. Catching and addressing small issues early — tightening a loose bolt, applying fresh preservative to a post base — prevents them from developing into structural problems that require major intervention or even rebuilding sections of the arbour.
Choosing Climbing Plants and Styling Your Completed Arbour
An arbour without plants is like a stage without performers — functional but missing its full potential. The choice of climbing plants is where you can truly personalise your structure and let it evolve into something that feels uniquely yours. For sheer romance and fragrance, few choices rival climbing roses, which will drape the structure in blooms from late spring through summer and autumn. Heritage varieties such as ‘Constance Spry’, ‘Generous Gardener’, or ‘Zephirine Drouhin’ are particularly suited to arbours, combining generous flowering with flexible, manageable stems that can be trained easily along the structure’s framework.
If you prefer a faster-growing plant that provides dense coverage more quickly, Clematis species are outstanding performers on garden structures. The large-flowered hybrids offer spectacular blooms in shades from pure white through lavender, purple, and deep magenta, while species clematis such as Clematis montana will cover an entire arbour in a single season and produce a breathtaking cloud of small flowers in spring. Wisteria is another perennial favourite for arbours, though it demands a very sturdy structure as it becomes a genuinely heavy, woody plant over time — if you choose wisteria, ensure your posts and fixings are robustly dimensioned and well anchored.
Beyond the climbing plants themselves, consider how you will style the space beneath and around the arbour. A simple wooden bench painted to complement the arbour structure invites you to sit and enjoy the garden from within the structure, watching light filter through the canopy of leaves above. Underplant the base of the posts with low-growing perennials or annual flowers to soften the transition between structure and ground. String lights wound gently through the overhead slats extend the arbour’s usability into evening hours, creating a magical lantern-like effect as dusk falls. These finishing details collectively transform a well-built garden structure into a truly special outdoor destination.
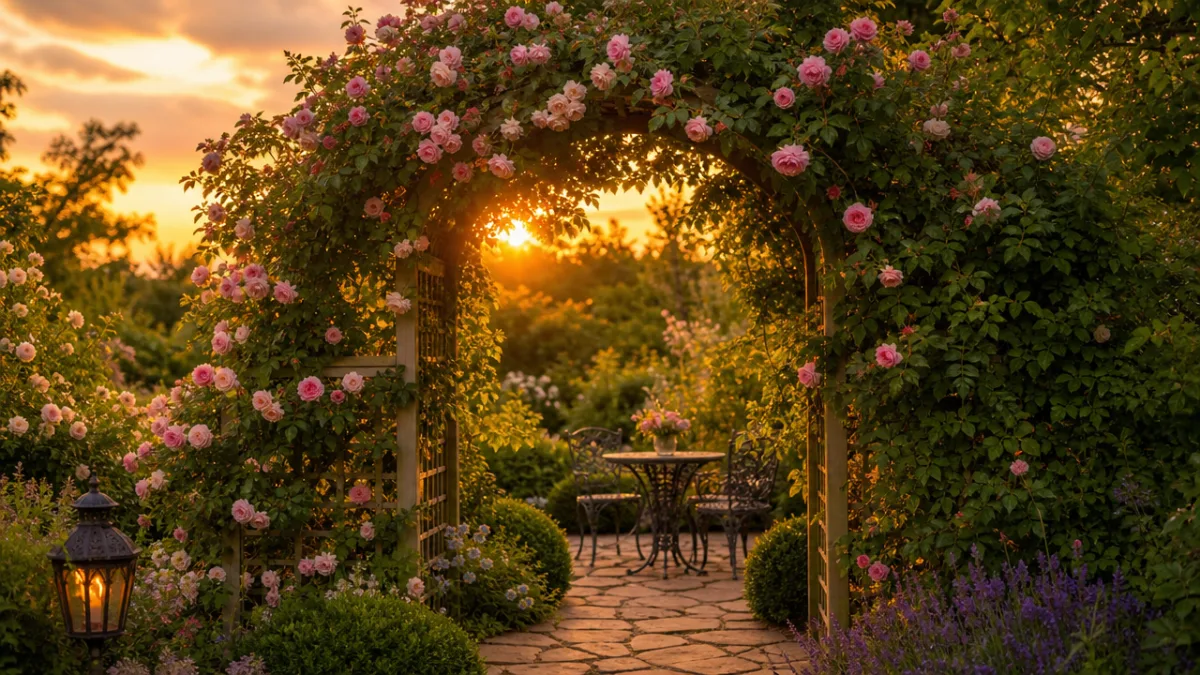
Finally, remember that your garden arbour is a living project that will genuinely improve with age. As climbing plants mature and thicken, as the timber weathers and takes on the character of its outdoor environment, and as you refine the planting and styling in the seasons following construction, the structure will become an increasingly integrated and beloved part of your garden. Many garden arbours built as weekend DIY projects have gone on to become the defining centrepiece of the gardens they inhabit — the place guests gather, the backdrop for memorable photographs, and the spot where the gardener themselves finds the greatest peace and pleasure throughout the changing seasons of the year.








What do you think?
It is nice to know your opinion. Leave a comment.