










How to Plant Tulip Bulbs: A Complete Guide to a Stunning Spring Garden
Understanding Tulip Bulbs: What You Need to Know Before You Plant
Tulips are one of those flowers that just never get old. Those bold, cup-shaped blooms show up right when you’re most desperate for color after a long, grey winter — and honestly, there’s nothing quite like them. But if you want that gorgeous explosion of reds, yellows, purples, and pinks in spring, the work starts in the fall, when you’re choosing and planting your bulbs. Before you dig a single hole, it helps to understand a little about what you’re actually working with.
A tulip bulb is really a tiny, self-contained miracle. Inside that papery brown shell, everything the plant needs is already packed in — nutrients, moisture reserves, even the embryonic flower itself. When you hold one in your hand, you’re essentially holding a flower in suspended animation, just waiting for the right signal to wake up. That signal is vernalization: a period of cold temperatures followed by warming soil. It’s why tulips do so well in climates with real winters, and why they can struggle in warmer regions without a little help.
When you’re shopping for bulbs, don’t skimp on quality — it really does make a difference. Look for bulbs that are firm, plump, and feel heavy for their size. Pass on anything spongy, lightweight, or showing signs of mold or soft spots, since those bulbs have lost too much moisture and are unlikely to do much for you. In general, bigger bulbs mean bigger blooms, so it’s worth spending a bit more on top-size bulbs, which are usually graded at 12 centimeters or more in circumference. A reputable garden center or mail-order bulb supplier is your best bet for getting quality stock.
Choosing the Right Time and Location for Planting
If there’s one thing that can make or break your tulip planting, it’s timing. You want to get your bulbs in the ground during mid-to-late autumn — after the first hard frost has chilled the soil but before it freezes solid. For most gardeners in temperate climates, that window falls somewhere between October and December. Plant too early while the soil is still warm and you risk premature sprouting, which leaves tender shoots vulnerable to winter damage. Wait too long and the roots won’t have time to establish before the ground freezes up.
Choosing the right spot matters just as much as choosing the right time. Tulips need sun — at least six hours of direct sunlight a day during their growing season. South-facing and west-facing beds tend to work really well. One thing to keep in mind: deciduous trees that are still bare in early spring cast a lot less shade than they will later in the season, so a spot that looks shady in summer might actually be perfect for tulips in April and May. The key is making sure they get good light when they’re actively growing.
And then there’s drainage, which is non-negotiable. Tulip bulbs sitting in waterlogged soil will rot — it’s almost guaranteed. Avoid any low spots where water tends to pool after rain, and don’t plant right next to downspouts or irrigation heads. If you’re dealing with heavy clay soil, consider building up your beds by several inches and amending them before planting. Even a modest raised bed of 8 to 12 inches can dramatically improve drainage and turn a previously frustrating spot into a productive one.
Preparing Your Soil for Optimal Tulip Growth
Good soil prep is one of those things that’s easy to skip but really pays off. Tulips prefer loose, well-draining soil with a pH that’s roughly neutral to slightly alkaline — somewhere in the 6.0 to 7.0 range. If you’re not sure where your soil stands, an inexpensive pH test kit from the garden center can give you a quick answer. If your soil skews too acidic, a light application of garden lime should bring things back into the right range.
Start by loosening the soil to a depth of 12 to 15 inches with a garden fork or spade. Tulip roots grow deep, and compacted soil will get in the way of that. While you’re at it, pull out any rocks, old roots, or debris that could create problems. This is also a great moment to work in some organic matter — compost, aged manure, or leaf mold will improve both the structure and fertility of your soil, giving your bulbs a much better foundation to grow from.
A little fertilizer at planting time goes a long way. Mixing a slow-release bulb fertilizer or some bone meal into the bottom of each planting hole gives the roots a good source of phosphorus right where they need it most. Stay away from high-nitrogen fertilizers at this stage — nitrogen pushes leafy growth, which isn’t what you want right now. Many experienced gardeners also add a small handful of coarse sand or grit under each bulb to help water drain away from the base, which is where rot tends to start.
Step-by-Step Planting Technique
Once your site is prepped, it’s time for the fun part — actually getting the bulbs in the ground. A good rule of thumb for planting depth is three times the diameter of the bulb, which works out to about 6 to 8 inches for most standard tulips, measured from the base of the bulb to the soil surface. Planting at the right depth matters more than people often realize. It keeps bulbs stable and insulated from freeze-thaw cycles near the surface, and deeper planting tends to encourage bulbs to come back year after year rather than petering out after one season.
Always place your bulbs pointed-end up, flat basal plate facing down. Tulips can actually correct themselves if planted sideways or upside-down, but giving them the right orientation from the start just makes things easier. For spacing, 4 to 6 inches apart gives a natural, relaxed look, while 3 to 4 inches creates that dense, dramatic mass planting effect that really stops people in their tracks. If you’re planting a large area, it’s much more efficient to dig out the whole section at once, lay all your bulbs, and then backfill, rather than digging individual holes one by one.
Here’s a quick summary of the full planting process:
- Dig individual holes or a wide trench to a depth of 6 to 8 inches.
- Mix a small amount of bone meal or bulb fertilizer into the base of each hole.
- Add a thin layer of coarse sand or grit if drainage is a concern.
- Place each bulb with the pointed end facing upward.
- Space bulbs 4 to 6 inches apart, or closer for dense planting.
- Backfill with the amended soil, pressing gently to eliminate air pockets.
- Water thoroughly after planting to help settle the soil and initiate root growth.
- Apply a layer of mulch 2 to 3 inches deep over the planted area to moderate soil temperature.
Once the bulbs are in, give the area a thorough watering to settle the soil around them and kick off the rooting process. Tulips need that autumn moisture to get their root systems going before the ground freezes — but after that initial watering, rainfall in most climates will take care of things through the winter. Finish up with a layer of mulch (straw, shredded leaves, or wood chips all work well) to help regulate soil temperature, hold moisture in, and keep weeds down during those critical first weeks.
Caring for Your Tulips Through Winter and Into Spring
Here’s the good news about winter care: once your bulbs are in the ground, there isn’t much to do. In climates with reliably cold winters, you can pretty much leave them alone and let nature do its thing. The bulbs will quietly develop roots through late autumn, go dormant during the coldest stretch, and then start pushing up shoots as the soil warms in early spring. It’s a slow, satisfying process, and honestly, the anticipation of watching for those first green tips is one of the best parts of growing tulips.
If you live somewhere with unpredictable winters or frequent freeze-thaw cycles, adding extra mulch after the ground freezes solid is a smart move. The goal isn’t to stop the soil from freezing — tulips actually need that cold — but to prevent the ground from repeatedly freezing and thawing, which can heave bulbs right out of the soil and mess with their developing roots. A thick layer of straw or shredded bark applied after the ground freezes acts like an insulating blanket, keeping temperatures steadier and the bulbs safely dormant until spring arrives for real.
One thing you do need to stay on top of during winter is pest protection. Squirrels, chipmunks, voles, and mice absolutely love tulip bulbs. A few strategies that actually help: planting some daffodil bulbs nearby (animals tend to avoid them because they’re toxic), laying chicken wire or hardware cloth just below the soil surface as a physical barrier, or sprinkling cayenne pepper, blood meal, or a commercial animal repellent over the bed after planting. None of these is completely foolproof, but combining a couple of them usually does the trick.
Aftercare: Helping Tulips Thrive and Return Year After Year
When spring finally comes and your tulips are blooming, the care you give them during and after their flowering period will largely determine whether they come back strong next year. A lot of gardeners just treat tulips as annuals and replant fresh bulbs each fall, which is totally valid — but with the right aftercare, you can absolutely get them to come back for multiple seasons. The golden rule is this: let the foliage die back on its own. Those leaves are still photosynthesizing after the flowers fade, sending energy back down into the bulb to fuel next year’s blooms.
It can be tempting to tidy up the dying leaves once the flowers are gone, but cutting them back too soon will starve the bulb and seriously reduce your chances of repeat flowering. The trick to making this easier to live with is to plant annuals or perennials nearby that will fill in and camouflage the fading tulip foliage as the season moves along. By the time your salvias, geraniums, or hostas have done their thing, the tulip leaves will have finished their job and can be gently pulled away.
Here are the aftercare practices that really make a difference for long-term bulb health:
- Deadhead spent blooms promptly to prevent seed formation, which drains energy from the bulb.
- Continue watering moderately during the post-bloom foliage period if rainfall is sparse.
- Apply a light top-dressing of balanced fertilizer as shoots emerge in early spring.
- Allow all foliage to yellow and wither completely before removing it.
- In warm climates, consider lifting bulbs after foliage dies, storing them in a cool dry place, and chilling them in the refrigerator before replanting in fall.
- Divide crowded clumps every three to four years to prevent competition between bulbs.
Warm-climate gardeners — anyone in USDA Hardiness Zone 8 or above — face a particular challenge because mild winters don’t provide the cold period tulips need. The most common workaround is to treat them as annuals, either buying pre-chilled bulbs each fall or chilling your own bulbs in the refrigerator for six to ten weeks before planting. One important tip: keep the bulbs away from ripening fruit in the fridge. Apples and other fruits release ethylene gas, which can damage the flower developing inside the bulb. It sounds fussy, but it’s a small thing that makes a real difference — and it means even gardeners in mild climates can enjoy beautiful tulips every spring.
Design Ideas and Variety Selection for Maximum Visual Impact
One of the genuinely fun parts of planning a tulip planting is just how much variety you have to work with. From the classic Darwin Hybrids with their huge, richly colored blooms to the extravagantly ruffled petals of Parrot tulips, there’s really something for every taste and garden style. And if you plan your variety selection thoughtfully, you can keep your garden looking spectacular for six weeks or more in spring rather than having everything peak at once and then go quiet.
The key to a long season is mixing early, mid-season, and late-blooming varieties. Single Early and Double Early types tend to bloom in March and April, giving way to mid-season Darwin Hybrids and Triumph tulips through April and May, then finishing with the late-blooming Parrot, Lily-flowered, and Rembrandt types in May and into early June. Choose varieties from each of those groups and you can realistically have continuous color for close to two months — that’s an incredible return on a relatively simple investment of time and planning.
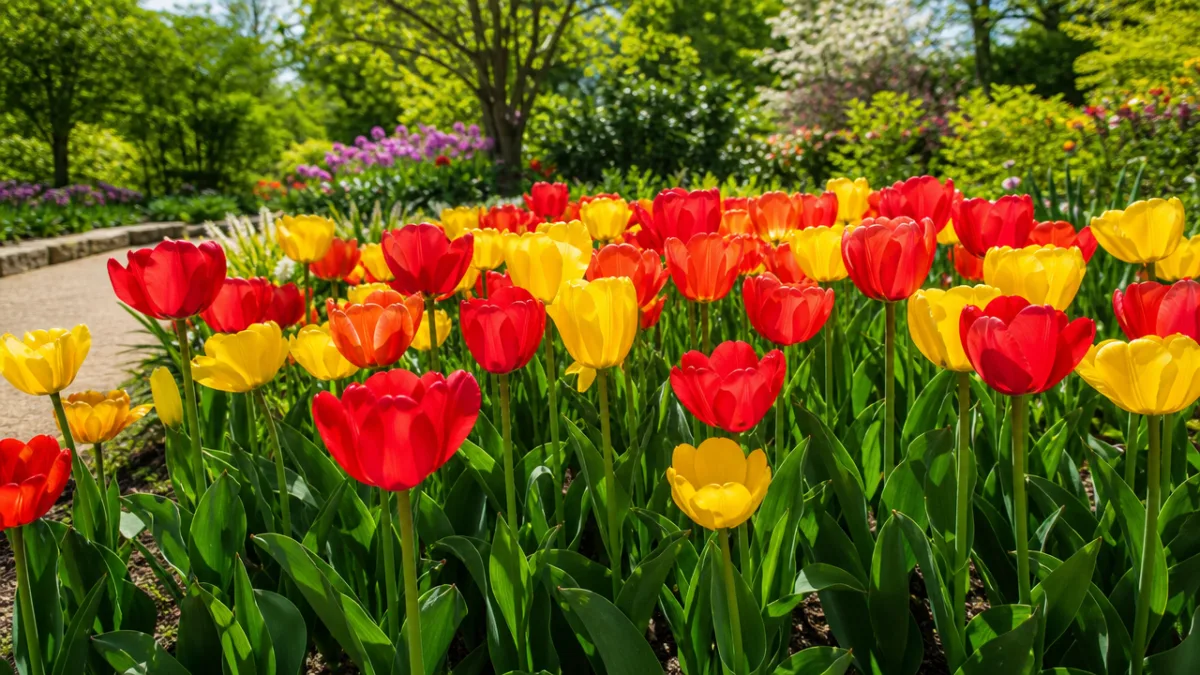
Color combinations and companion planting are where you can really take things up a notch. Purple and white tulips paired with blue muscari creates a cool, sophisticated look that’s hard to beat. Warm-toned red, orange, and yellow tulips alongside golden daffodils feel like a proper spring celebration. Forget-me-nots make a gorgeous soft blue carpet beneath taller tulip stems, and the combination is a classic for good reason. If you’re going for something more naturalistic, smaller species tulips tucked into rock gardens or among ornamental grasses have a delicate, effortless charm that works beautifully. Whatever direction you want to take your garden, there’s a tulip that fits the vision.








What do you think?
It is nice to know your opinion. Leave a comment.