










Creating the Ultimate Cozy Craft Studio with Cricut Mug Printing
The Magic of a Dedicated Craft Space
There is something deeply satisfying about having a space in your home that is entirely devoted to creativity. A dedicated craft studio is more than just a room with supplies — it is a sanctuary where imagination takes physical form, where ideas that exist only in your mind can become tangible, beautiful objects. Whether you carve out a spare bedroom, convert a corner of a basement, or claim a cozy nook beneath the stairs, giving your creative pursuits a permanent home changes everything about how you approach your craft.
When your materials are organized, your tools are within reach, and your workspace is designed around your particular creative process, you spend less time searching and setting up and more time actually making things. The mental shift that happens when you step into a well-designed craft studio is remarkable. Your brain begins to associate that physical space with a creative mindset, so inspiration flows more readily and focus comes more naturally. Many dedicated crafters report that simply sitting down at their studio desk is enough to trigger a productive, imaginative session.
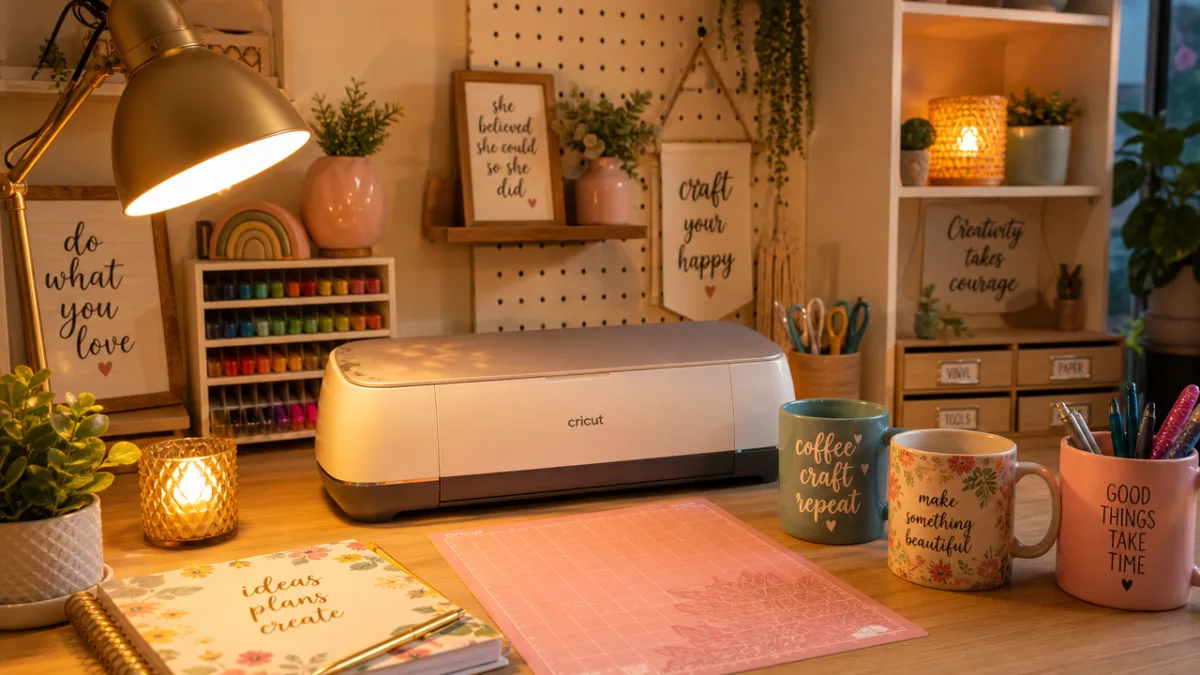
The concept of a cozy craft studio has exploded in popularity in recent years, particularly among crafters who use cutting machines and heat transfer tools like the Cricut. The aesthetic — warm lighting, organized shelving, cheerful colors, and the gentle hum of a machine at work — has become aspirational for hobbyists and small business owners alike. This article will guide you through building, designing, and fully equipping that dream space, with a special focus on one of the most beloved craft applications: mug printing with a Cricut machine.
Understanding Cricut Mug Printing from the Ground Up
Cricut mug printing refers to the process of applying a custom design to a ceramic mug using an Infusible Ink transfer sheet or pen and a Cricut Mug Press. The science behind it is elegant: when heat and pressure are applied together, the specially formulated ink sublimates — meaning it transforms from a solid directly into a gas — and bonds permanently with the polymer coating on compatible mugs. The result is a vibrant, dishwasher-safe design that becomes part of the mug itself rather than sitting on top of the surface like a decal or sticker would.
The Cricut Mug Press is a dedicated heat press tool designed specifically for the cylindrical shape of a mug. Unlike a flat heat press used for T-shirts or tote bags, the Mug Press wraps around the mug evenly and applies consistent heat across the entire surface. This is crucial for sublimation printing, because uneven heat results in uneven color transfer — some areas may appear faded or patchy while others come out vibrant. The Mug Press takes the guesswork out of timing and temperature, automatically regulating both to produce professional results every single time.
To get started with Cricut mug printing, you will need a few core supplies beyond the machine itself. Understanding what each element does helps you shop smartly and avoid common beginner mistakes. Here is what goes into a successful mug print:
- Cricut Mug Press: The dedicated heat press tool that bonds Infusible Ink to compatible mugs using regulated heat and pressure.
- Infusible Ink Transfer Sheets or Pens: The specially formulated ink media that sublimate under heat to create permanent designs.
- Cricut Blank Mugs: Polymer-coated ceramic mugs specifically engineered to accept Infusible Ink transfer — regular mugs will not work.
- Cricut Design Space: The free software where you design, size, and send your artwork to your Cricut cutting machine.
- Heat-Resistant Tape: Holds the transfer sheet in place on the mug during the pressing cycle.
- Butcher Paper: Protects the Mug Press and prevents ink from bleeding where you do not want it.
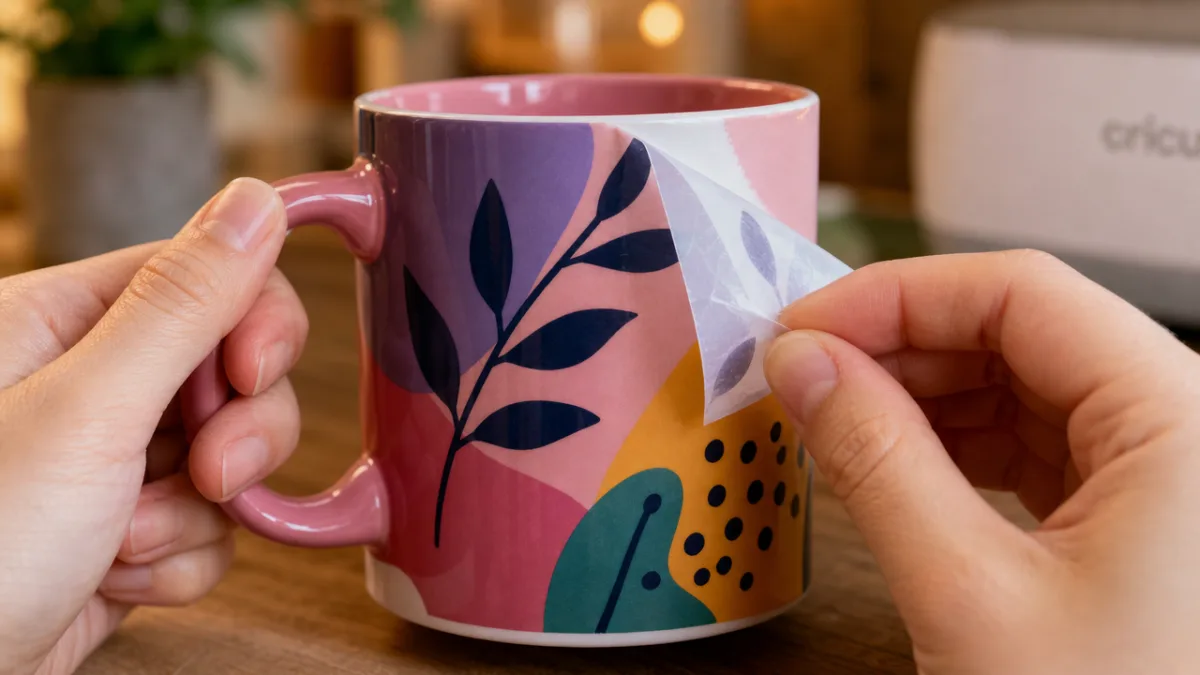
Once you have your supplies assembled, the workflow is intuitive and deeply satisfying. You create or import your design in Design Space, mirror it, cut it from an Infusible Ink sheet with your Cricut cutting machine, trim away the excess material, wrap it around a clean mug, secure it with heat-resistant tape, slide it into the preheated Mug Press, close the lid, and wait. In roughly five to six minutes, the press beeps, you remove the mug, peel away the transfer sheet while it is still warm, and reveal your finished creation. The first time that sheet comes away to reveal a brilliantly colored, permanent design is a moment crafters never forget.
Designing Your Cozy Craft Studio Layout
The foundation of any functional craft studio is a thoughtful layout that accounts for how you actually work. Before you move a single piece of furniture or install a single shelf, spend time observing your creative process and identifying your friction points. Where do you set things down temporarily? What do you reach for most often? How much clear workspace do you genuinely need when a project is in progress? Answering these questions honestly will prevent you from building a beautiful studio that does not actually support your workflow.
For Cricut-based crafters, the layout needs to accommodate a few specific elements. The Cricut cutting machine itself requires a flat, stable surface and enough clearance in front of it for the cutting mat to feed in and out — typically about two feet of open space on the front edge of whatever surface the machine sits on. The Cricut Mug Press needs to be near an electrical outlet and should sit on a heat-resistant surface, as the exterior of the press gets warm during use. You will also want a dedicated area for weeding — the process of removing the excess material from your cut designs — which requires good lighting and a clear work surface.
Storage is where most craft studios either shine or collapse. A common mistake is underestimating how much storage you will need, especially as your collection of Infusible Ink sheets, blank mugs, vinyl rolls, and accessories grows over time. Consider vertical storage solutions — wall-mounted shelving, pegboards hung above your worktop, and tall cabinet units — to make the most of your available square footage without sacrificing floor space. A well-organized studio feels spacious even when it is full of supplies, simply because everything has a designated home and is easy to find at a glance.
Lighting deserves special attention in a craft studio, particularly one used for intricate work like weeding fine Cricut cuts or color-matching Infusible Ink designs. Natural daylight is ideal and should be maximized wherever possible through windows and light-colored walls. Supplement with adjustable task lighting at your main work surface — a daylight-spectrum LED lamp that mimics natural sunlight is an excellent investment, as it renders colors accurately and reduces eye strain during long crafting sessions. Ambient lighting throughout the rest of the space can be warmer and cozier, creating that inviting atmosphere that makes you want to spend time in the room.
Aesthetic Choices That Make a Studio Truly Cozy
Functionality is non-negotiable, but the cozy factor is what transforms a working studio into a space you genuinely love. The term “cozy” in interior design refers to a combination of warmth, texture, personalization, and a sense of enclosure that makes a space feel intimate rather than clinical. For craft studios, this means resisting the urge to make everything purely utilitarian and instead layering in elements that reflect your personality and make the room feel lived-in and welcoming.
Color plays a powerful role in establishing a cozy atmosphere. Warm neutrals like cream, soft taupe, and warm white create a calm, airy backdrop that makes colorful craft supplies pop visually without feeling chaotic. If you prefer more color on the walls, consider dusty or muted shades — sage green, dusty rose, warm terracotta — that feel soothing rather than stimulating. Many crafters choose to keep walls neutral and let the rainbow of their supply collection provide the color, which has the added benefit of making reorganizing supplies feel like redecorating the studio without any paint required.
Textiles soften a studio considerably and add that tactile warmth that defines coziness. A cushioned seat at your main work chair, a small area rug underfoot, a throw draped over a reading chair in the corner — these elements signal that this is a space for spending time, not just a workspace to dash in and out of. Plants, whether real or high-quality artificial versions, bring in organic shapes and the psychological benefits associated with greenery. Framed prints of your own finished projects make the walls personal and serve as ongoing inspiration for future creations.
Organization accessories can themselves be aesthetic elements. Rather than hiding everything behind closed cabinet doors, consider displaying your most beautiful supplies. A row of glass jars filled with Cricut pens organized by color, a wooden rack holding rolls of patterned vinyl, a set of matching storage boxes labeled with hand-lettered tags — these details communicate that this space is cared for and loved. When your organization system is visually appealing, you are more likely to maintain it consistently, which keeps the studio functional as well as beautiful.

Running a Small Mug Printing Business from Your Studio
One of the most exciting possibilities that opens up once you have a functional Cricut craft studio is the opportunity to generate income from your hobby. Custom mug printing has proven to be one of the most accessible and profitable small product categories for home-based Cricut sellers. Mugs are universally appealing, they photograph beautifully for online listings, they ship relatively easily, and the profit margins on custom Infusible Ink mugs can be quite healthy once you have refined your process and established a reliable supplier relationship for blank mugs.
Platforms like Etsy, Shopify, and even Instagram have enabled countless crafters to build genuine small businesses from their home studios. The key to standing out in a crowded market is a combination of design quality, niche focus, and excellent product photography. Rather than trying to appeal to everyone, the most successful mug printing sellers identify a specific audience — teachers, nurses, dog moms, bookworms, plant lovers, a particular fandom — and create a cohesive collection of designs that speak directly to that community. Repeat customers and word-of-mouth referrals follow naturally when your products feel personally relevant to buyers.
Pricing is an area where many new sellers undercharge, not accounting for all of the real costs involved in producing each mug. A transparent pricing calculation should include the cost of the blank mug, the Infusible Ink transfer sheet material used, a proportional share of equipment wear and electrical costs, packaging materials, and — critically — your own time. Many sellers also factor in a small percentage for platform fees if selling on a marketplace. When all of these are accounted for honestly, a custom Infusible Ink mug typically retails between fifteen and thirty-five dollars depending on design complexity, market positioning, and the seller’s brand reputation.
Your craft studio setup directly affects your capacity to produce orders efficiently. A studio that is optimized for batch production — where you can cut multiple transfer sheets at once, have a clear staging area for mugs awaiting pressing, and a finished goods area where completed mugs cool and are checked for quality — allows you to fulfill more orders in less time without feeling chaotic or overwhelmed. Many home-based mug printing sellers develop a production day ritual: music playing, supplies laid out, a cup of coffee nearby, and a satisfying rhythm of cut, wrap, press, reveal, repeat.
Tips, Troubleshooting, and Leveling Up Your Mug Printing Skills
Even with a well-equipped studio and a solid understanding of the process, mug printing involves a learning curve, and most crafters encounter a few frustrating results before they consistently produce prints they are proud of. Understanding the most common issues and their causes arms you with the knowledge to diagnose problems quickly and correct them rather than wasting materials through repeated failed attempts. The good news is that most mug printing problems have straightforward solutions once you know what to look for.
Faded or patchy color transfer is the most common complaint among new Cricut Mug Press users. This almost always comes down to one of three causes: the mug is not a Cricut-compatible blank with the correct polymer coating, the transfer sheet was not wrapped tightly enough against the mug’s surface before pressing, or the design was not mirrored before cutting. Always verify that your blank mugs are designated as Infusible Ink compatible, use generous lengths of heat-resistant tape to hold the sheet firmly against the mug with no air gaps, and double-check the mirror setting in Design Space before every single cut. These three habits alone will eliminate the vast majority of failed presses.
As your skills develop, you can begin experimenting with more advanced design techniques that elevate your mug printing results. Layering Infusible Ink colors — by cutting separate pieces from different colored sheets and positioning them to overlap slightly on the mug — creates gradient effects and multi-color designs that look complex but are achievable with careful planning. Using Infusible Ink pens to hand-draw or hand-letter designs directly onto the transfer sheet adds a personal, artisan quality that is difficult to replicate with cut designs alone. Combining both techniques in a single design opens up remarkable creative possibilities.
Here are some practical tips that experienced Cricut mug printers consistently recommend to newcomers:
- Always preheat your Mug Press fully before loading your mug. Rushing this step results in uneven heat distribution and inconsistent ink transfer across the design.
- Clean your blank mugs with isopropyl alcohol before applying the transfer sheet to remove any fingerprints, oils, or dust that could interfere with ink bonding.
- Peel the transfer sheet while it is still warm — not hot, but warm — for the cleanest reveal. Waiting until it cools can cause the sheet to re-adhere slightly and result in minor smudging.
- Store unused Infusible Ink sheets flat in a cool, dark location away from direct sunlight, which can cause the ink to pre-activate and degrade before you use it.
- Keep a project log noting which designs, materials, and press settings you used for each mug, so you can recreate successful results and identify patterns in any failures.
- Photograph your finished mugs in natural light before packaging them — both for your shop listings and your own record of what you have created.
The joy of Cricut mug printing, like so many crafts, deepens significantly with practice and experimentation. Each project teaches you something new about how the materials behave, what design elements translate most beautifully to the curved mug surface, and how to push the boundaries of what the process can produce. Building a cozy, dedicated craft studio gives you the environment to pursue that learning joyfully — a space where experimenting feels exciting rather than stressful, where your supplies are ready when inspiration strikes, and where the simple act of walking through the door signals to your creative mind that it is time to make something wonderful.








What do you think?
It is nice to know your opinion. Leave a comment.