










“`html
Why Small Sewing Rooms Demand Smarter Thinking
A lot of people assume that a real sewing room needs to be big — we’re talking wall-to-wall shelving, multiple cutting tables, enough floor space to lay out an entire quilt. But honestly? That’s not most people’s reality. Most sewists are working with a spare bedroom that barely fits a twin bed, a converted closet, some awkward alcove under the stairs, or just a corner of the home office that moonlights as a sewing space after dinner. That’s not a failure — it’s a design problem. And design problems, once you look at them the right way, are actually kind of fun to solve.
The sewists who actually thrive in small spaces share one thing: they refuse to let square footage set the ceiling on what they can do. Instead of stewing over what they don’t have, they get curious about how they actually work. What do you reach for constantly? Where does your process get bogged down? Are you always hunting for your scissors? Is the ironing board perpetually in the wrong place? Does your fabric stash look like a small disaster — enough that you’d rather not start something new than dig through it? Pinpointing those friction points is where a genuinely useful sewing room starts.
This article walks through fifteen setup ideas pulled from real sewing rooms in real small spaces — apartments, cottages, spare corners, cleverly converted nooks — all built around one principle: every single inch should earn its place. Whether you’re setting up your first dedicated sewing area or rescuing a space that’s gradually descended into chaos, you’ll find concrete ideas here to work from and, hopefully, a little inspiration to see your limitations as a starting point rather than a dead end.
Vertical Space: Your Most Underused Real Estate
When floor space is tight, your walls are your best friend — but most sewists think horizontally by instinct. Where can I fit another table? Can I squeeze in another shelf at waist height? Meanwhile, the upper half of the room just sits there, empty and ignored. In a standard room with eight-foot ceilings, there’s often four to five feet of wall space above the typical shelf line that’s doing absolutely nothing. That’s prime real estate for long-term storage: seasonal fabric bolts, bins of batting, interfacing rolls, project bags for things you’re not actively working on right now.
Pegboards have made a real comeback in craft room design, and it’s easy to see why. A single four-by-eight sheet mounted flush to a wall can hold a surprising amount — scissors in multiple sizes, rotary cutters, seam rippers, marking tools, measuring tapes, thread spools sorted by color, little bins of buttons and snaps and elastic — all visible at a glance, nothing buried in a drawer. That visibility isn’t just pretty; it actually saves time. When you can see everything, you stop hunting. And when everything has a designated spot on the board, you notice immediately when something’s gone missing.
Floating shelves at varying heights let you fit storage to what you’re actually storing. Narrow shelves spaced about eight inches apart are perfect for folded fabric cuts and pattern envelopes. Deeper shelves higher up can hold labeled bins for notions. Go all the way to the ceiling and keep a small step stool nearby — that alone can double or even triple your storage capacity without taking up a single extra square foot of floor. If there’s one principle that runs through every successful small sewing room, it’s this: think vertical first.
The Multipurpose Cutting Table That Changes Everything
The cutting table is usually the biggest space hog in any sewing room, and it’s also the thing small-space sewists most often get wrong. A fixed-height table that only does one job is a luxury compact rooms just can’t support. The setups that actually work tend to use height-adjustable tables, fold-down wall-mounted surfaces, or existing furniture repurposed at the right ergonomic height. And speaking of ergonomics — the most important measurement is one a lot of people overlook: your cutting surface should sit right at or just below your bent elbow when you’re standing. For most adults, that’s somewhere between 35 and 38 inches, which is notably higher than a standard dining table.
A fold-down cutting surface mounted to the wall is honestly one of the smartest small-space solutions out there. Folded up, it barely registers in the room. Folded down, supported by legs or a Murphy-style bracket, it gives you a full cutting surface that works just as well as a dedicated table. Some versions come with a grid printed right on the surface so you don’t need a separate cutting mat. Others have built-in storage on the wall-mounted section, meaning when you fold everything back up, your tools are already hanging right there, organized and ready for next time.
If a wall-mounted surface isn’t an option, a fold-flat table on locking casters is a great alternative. You can wheel it out of a closet or from behind a door, unfold it, use it, and put it away in under two minutes. That ease of use matters more than it might seem — because if getting your cutting table set up is a hassle, you’ll start cutting on the floor or the sofa instead. Both of those are rough on your back and not great for accuracy. The best cutting table is the one you’ll actually use every time, without thinking twice about it.
Thread and Notions Organization Systems That Actually Work
Thread organization is something sewists have strong feelings about, and honestly, fair enough — a messy thread situation is one of the quickest paths to frustration in the sewing room. You can’t find the color you need, spools roll off the table and tangle together in a drawer, you keep buying duplicates because you can’t see what you already have. The fix isn’t just buying more containers; it’s choosing a system that makes your whole collection visible, accessible, and easy to navigate at a glance.
Wall-mounted thread racks are the gold standard here. A rack with spools on horizontal dowels, hung right on the wall, puts every color in plain sight and lets you grab exactly what you need without disturbing anything else. You can buy one commercially or build a simple version from wooden dowels and a basic frame — neither option is expensive. Organizing by color family rather than brand or thread weight makes scanning much faster and more intuitive. Keep your most-used neutrals (white, cream, black, navy, grey) in the easiest-to-reach spot and spread the spectrum out from there.
For everything beyond thread, the key is organizing by how often you use things, not by category. The stuff you reach for during every single sewing session — your main scissors, seam ripper, pins, marking tool — should be within arm’s reach of your machine, no standing up, no opening anything required. Secondary notions you use regularly but not constantly, like specialty presser feet, zipper attachments, and specific needles, can live in clearly labeled containers one step away. Occasional-use items like specialty buttons, boning, or specific interfacings can go in labeled bins on higher shelves or in a closet. This three-tier approach quietly eliminates most of the low-level frustration that eats away at sewing time.
- Use a wall-mounted thread rack organized by color family for instant visual access to your entire collection without opening a single drawer or container.
- Store your most-used notions — scissors, seam ripper, pins, marking tools — directly at your machine position so they are always within reach during an active sewing session.
- Label every bin, basket, and container clearly and consistently, even when the contents seem obvious to you now; your future self will thank you during a busy project.
- Dedicate one clearly designated area to works-in-progress so that active projects do not gradually colonize every available surface in the room.
- Audit your notions collection at least once a year to discard dried-out marking pens, dull needles, broken zippers, and any other supplies that have become unusable.
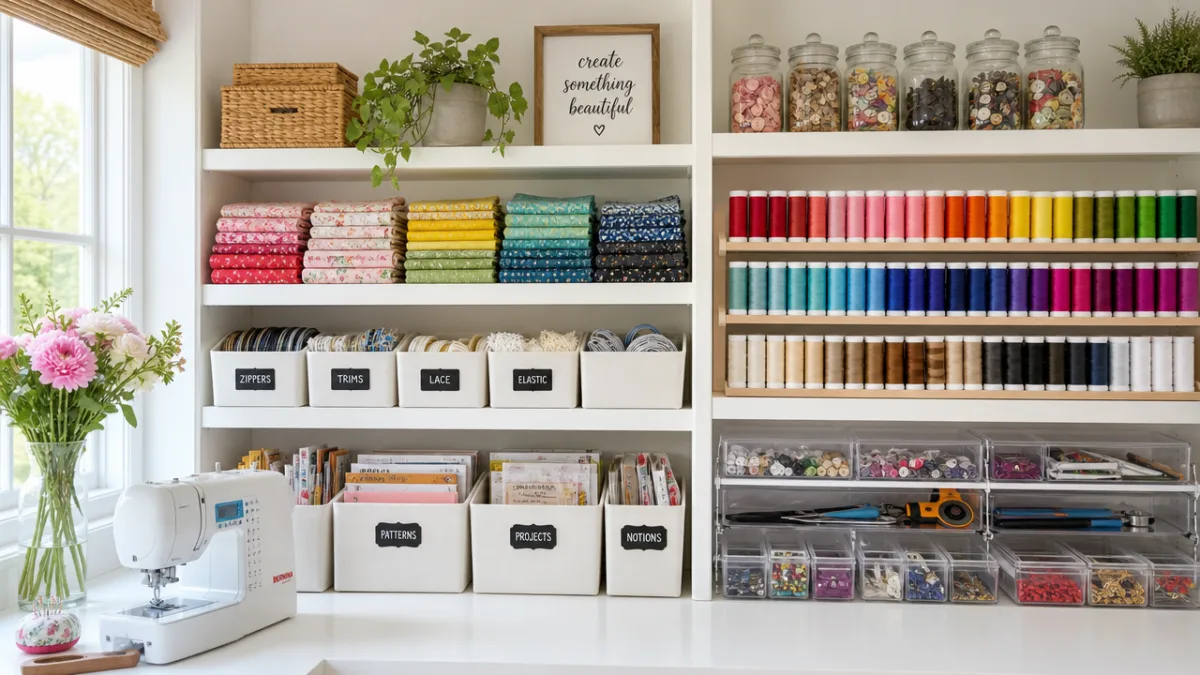
Fabric Storage Strategies for the Space-Conscious Sewist
Fabric is the most beloved and most space-consuming thing in any sewist’s life, and the stash has a well-documented way of expanding far beyond its original territory — slowly annexing shelves, closet floors, the space under the bed, and eventually the guest room bed itself. In a small sewing room, that has to be managed actively. Not because you need to rein in your collecting instincts, but because a fabric pile that’s out of control makes a small room feel suffocating and makes finding any specific piece genuinely hard when inspiration actually strikes.
The storage systems that work best in small spaces combine consistent folding with clear visibility. When every piece of fabric is folded to the same width and stored vertically in a bin — the way a bookstore displays paperbacks — you can see the color and print of every single piece without unfolding anything. This filing-style approach, which a lot of people know from the KonMari method, is especially great for fat quarter collections and smaller cuts. For larger pieces and full yardage, rolling onto comic book backing boards or foam pool noodles prevents fold lines and lets you identify each piece just by peeking at the top edge.
Color-coding takes fabric storage from purely functional to genuinely inspiring. Arranging by color family rather than fiber content or planned project turns your stash into something that looks and feels like a curated palette — and working from a visually organized palette is just more motivating. Clear bins on open shelving let you see everything without opening a thing. If your fabric has to live behind closed doors, photograph your stash and keep the photos in a simple digital album so you can see what you own without pulling everything out every time.
For very tight spaces, a strict one-in-one-out rule for fabric is worth thinking about seriously. This isn’t about limiting what you make — it’s about keeping a stash that’s actually useful rather than overwhelming. A smaller collection of fabrics you genuinely love and have real plans for is more valuable, practically and emotionally, than a massive pile where individual pieces get buried and forgotten for years. Some sewists find that a tighter, more intentional stash actually leads to more consistent sewing, because every piece feels chosen rather than just accumulated.
Lighting, Ergonomics, and the Human Side of a Great Sewing Space
Even the most beautifully organized sewing room will let you down if the lighting is bad or the setup is uncomfortable to work in. Lighting isn’t a finishing touch you get to once everything else is figured out — it’s foundational. It affects the quality of your work, the health of your eyes, and whether you actually want to spend time in the room. Most home lighting is nowhere near adequate for detailed handwork, threading needles, accurate color matching, or cutting on grain. A room that feels perfectly bright for reading or watching TV can have you squinting and straining within half an hour of detailed sewing.
A good sewing room lighting setup works on at least three levels. Ambient overhead lighting handles general room illumination — bright enough to move around comfortably and see the space clearly. Task lighting at your machine, ideally a daylight-spectrum LED that clips on or mounts to an adjustable arm, gives you focused, shadow-free light exactly where your hands and the needle are working. And a third light source at your cutting area means you can see grain lines, pattern markings, and cutting lines clearly without casting shadows across your work. That three-layer approach transforms the experience of working in even the tiniest sewing room.
Ergonomics deserves just as much attention as organization and aesthetics. The height of your machine table, the type and height of your chair, where your foot pedal sits, the angle of your work surface — all of it affects how your body feels during long sessions and over the long haul. A chair with adjustable height and real lumbar support is genuinely worth the investment if you’re planning to spend serious time in this space. Your arms should rest at a comfortable angle with elbows close to ninety degrees. If you do a lot of hand sewing or embroidery, consider a separate area set up specifically for that work at a slightly different height.
- Install at least one daylight-spectrum task light directly at your machine position to reduce eye strain during detailed work like threading needles and sewing seams.
- Choose a chair with adjustable seat height, back support, and ideally adjustable armrests so you can position yourself correctly relative to your specific machine height.
- Position your foot pedal so your foot rests flat on the floor or on a low platform, not dangling or angled awkwardly, to prevent leg fatigue during longer sessions.
- Take regular breaks during extended sewing sessions to stretch your neck, shoulders, and hands — even five minutes of movement every hour makes a significant difference over time.
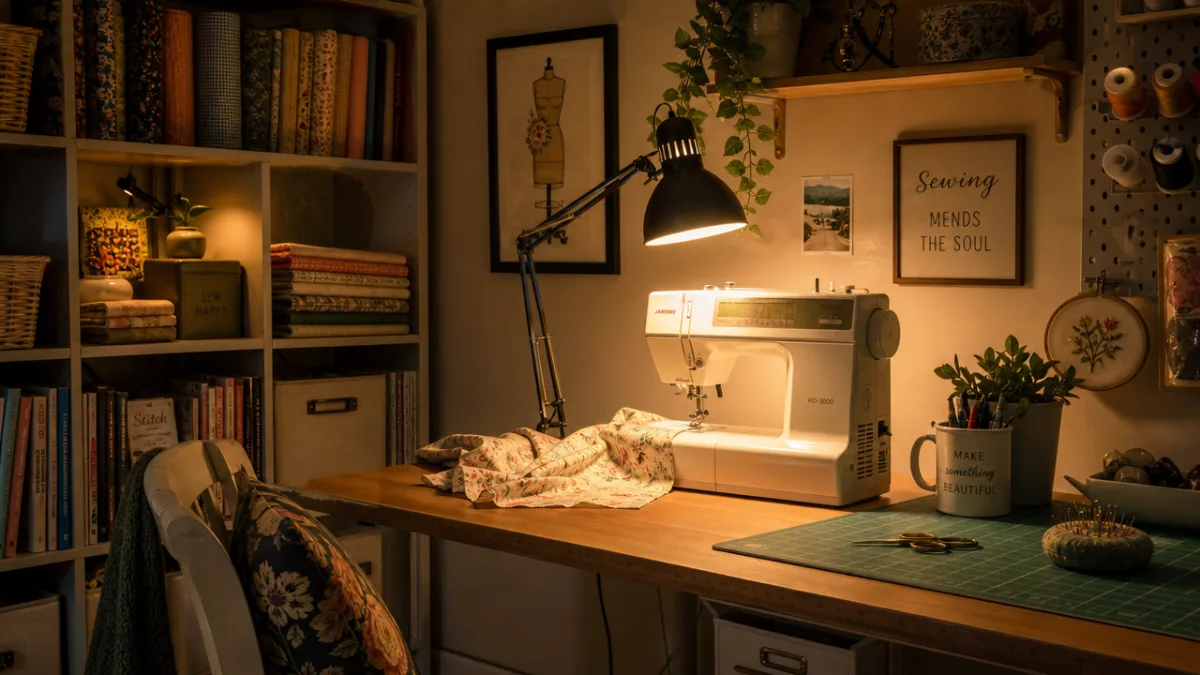
The emotional atmosphere of your sewing room matters just as much as how well it’s organized — maybe more so in a small space, where every visual element is right there in front of you. A room that feels calm, personal, and inspiring pulls you in. A room that feels cluttered or purely utilitarian, even a tidy one, can quietly drain the creative energy you need to actually make things. So let yourself add a few meaningful touches: a print you love on the wall, a small plant that can handle artificial light, a handful of your favorite finished projects displayed somewhere you’ll see them as a reminder of what this space makes possible. In a small sewing room, every inch matters — and that includes the inches that make it feel like yours.
“`








What do you think?
It is nice to know your opinion. Leave a comment.