










Flower Care: Taking Care of Your Flowers
Understanding What Your Flowers Need to Thrive
Flowers, whether fresh-cut arrangements or potted plants, are living organisms with specific needs that must be met consistently to keep them looking their best. Understanding the fundamental requirements of your flowers — light, water, nutrients, and the right temperature — is the foundation of any successful flower care routine. Without this baseline knowledge, even the most beautiful blooms will fade prematurely, leaving you wondering what went wrong when the answer often lies in something simple and entirely preventable.
Every species of flower has evolved in a particular environment, which means its care requirements are deeply tied to its natural habitat. A tropical orchid, for instance, craves humidity and filtered light, while a hardy sunflower wants full sun and moderate watering. Before you invest time and money into any flower, it pays to research its native growing conditions. This single step can dramatically improve your success rate and help you avoid the frustration of watching beautiful plants struggle unnecessarily in the wrong conditions.
Beyond species-specific requirements, there are universal truths about flower care that apply broadly. All flowers benefit from clean water, good drainage, appropriate light levels, and some degree of nutritional support. They also respond to the care and attention you give them — consistent observation allows you to spot problems early, whether that means yellowing leaves, drooping stems, or the first signs of pests. Developing a daily habit of checking in on your flowers is one of the most powerful things you can do for their long-term health and vitality.
Watering Techniques That Make a Real Difference
Watering seems deceptively simple, but it is one of the most commonly misunderstood aspects of flower care. Overwatering is, in fact, one of the leading causes of flower death, especially for potted plants. When roots sit in waterlogged soil, they become oxygen-deprived and susceptible to root rot, a fungal condition that can destroy a plant within days. The key is to water thoroughly but allow the soil to approach dryness before watering again — the exact frequency depends on your climate, the season, the pot size, and the flower variety.
For fresh-cut flowers in a vase, water management takes on a different dimension. The water in your vase is not just hydration — it is the lifeline that keeps stems firm and petals vibrant. Change the water every two days at minimum, and always use clean water that is free of bacterial buildup. Adding a small packet of floral preservative to the water provides a blend of sugar for energy, an acidifier to improve water uptake, and a biocide to slow bacterial growth. These simple additions can extend the life of cut flowers by several days or even more than a week.
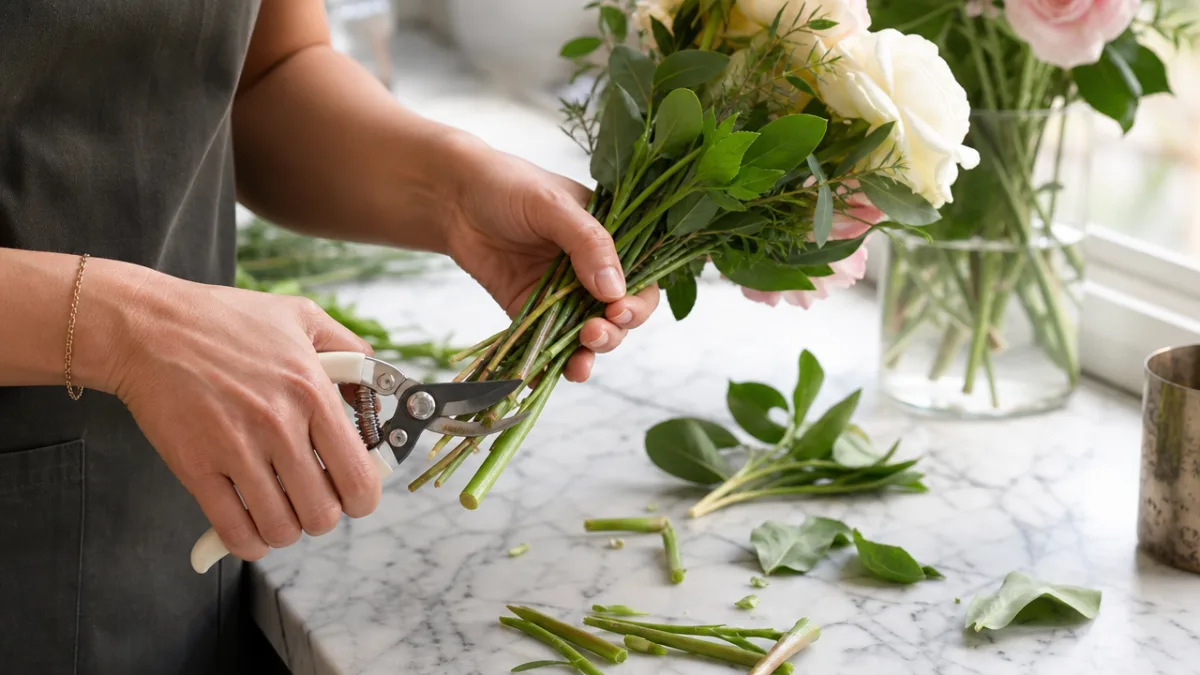
The technique of watering also matters more than most people realize. For potted flowers, water at the base of the plant rather than overhead to avoid wetting the foliage, which can encourage fungal diseases. Water slowly and deeply so the moisture reaches the root zone rather than running off the surface. For cut flowers, re-cut the stems at a 45-degree angle every couple of days before returning them to fresh water. This diagonal cut increases the surface area available for water absorption and removes any clogged tissue that may be impeding the flow of water up the stem.
- Water potted flowers in the morning so any surface moisture evaporates during the day, reducing the risk of mold and fungal disease.
- Use room-temperature water rather than cold water, which can shock tropical varieties and slow water uptake in cut stems.
- Check soil moisture by pressing your finger about an inch into the soil — water only when it feels dry at that depth.
- For cut flowers, remove any leaves that would sit below the waterline in the vase, as submerged foliage rots quickly and contaminates the water.
Light and Temperature: Creating the Right Environment
Light is the engine that powers photosynthesis, the process by which plants convert sunlight into the energy they need to grow, bloom, and sustain themselves. For flowering plants, getting the light balance right is critical. Too little light and plants become leggy, producing weak stems and sparse blooms as they stretch desperately toward any available source of illumination. Too much direct sunlight, on the other hand, can scorch leaves, bleach petals, and dehydrate plants faster than they can absorb water from the soil. Understanding the light levels in your space is the first step toward placing your flowers correctly.
Most flowering plants fall into one of three light categories: full sun, partial shade, or full shade. Full sun plants typically need at least six hours of direct sunlight per day and do best in south or west-facing windows indoors, or in open garden beds outdoors. Partial shade plants prefer bright but indirect light — the kind you might find near a window that receives morning sun but is shaded in the afternoon. Full shade flowers, though less common in ornamental horticulture, thrive in low-light environments and are ideal for north-facing rooms or shaded garden corners. Matching your flower to the light you can offer it is a foundational care decision.
Temperature is equally significant and often overlooked by casual flower enthusiasts. Most common flowering plants do best in temperatures between 60 and 75 degrees Fahrenheit, though this varies widely by species. What matters almost as much as the average temperature is the consistency — wild swings between hot days and cold nights can stress plants and cause buds to drop before they open. Keep your potted flowers away from heating vents, air conditioning units, and drafty windows. For cut flowers, cooler temperatures slow their metabolism and extend their lifespan significantly, which is why florists store arrangements in refrigerated coolers.
Feeding and Fertilizing for Bloom-Boosting Nutrition
Just as humans need a balanced diet to function at their best, flowers require a steady supply of nutrients to produce lush foliage and vibrant blooms. The three primary macronutrients plants need are nitrogen, phosphorus, and potassium, often listed on fertilizer packaging as N-P-K. Nitrogen supports leafy green growth, phosphorus encourages root development and flowering, and potassium contributes to overall plant health and disease resistance. A balanced fertilizer with roughly equal proportions of these three nutrients works well for most flowering plants during their active growing season.
For potted flowering plants, nutrients in the soil deplete over time through regular watering. Unlike garden beds that benefit from the natural cycling of organic matter, potted plants are entirely dependent on you to replenish their nutritional supply. During the spring and summer growing season, fertilize most flowering plants every two to four weeks using a diluted liquid fertilizer. In fall and winter, when many plants enter a period of dormancy or slow growth, reduce feeding significantly or stop altogether. Over-fertilizing is a real risk — too much nitrogen, in particular, can promote lush foliage at the expense of flowers.
Organic fertilizers deserve special mention as a gentle, sustainable option for flower care. Compost, worm castings, fish emulsion, and seaweed extracts all provide a slow-releasing supply of nutrients that feed the soil as well as the plant. Unlike synthetic fertilizers, which deliver nutrients in a concentrated, immediately available form, organic options reduce the risk of chemical burn and support a healthy microbial ecosystem in the soil. For gardeners who want to take a more natural approach, incorporating organic matter into potting mixes at planting time and topping up with liquid organic feed throughout the season is an excellent strategy.
- Spring: Begin fertilizing with a balanced N-P-K formula as new growth emerges and days lengthen. This kickstarts the growing season and encourages strong, healthy development from the ground up.
- Summer: Switch to a phosphorus-rich bloom-booster formula to support abundant flowering throughout the peak blooming season and maximize bud production.
- Fall: Taper off feeding gradually as temperatures cool and plant growth slows. A final application of a low-nitrogen fertilizer can help strengthen roots before dormancy.
- Winter: Suspend regular fertilizing for most varieties. Allow plants to rest, and resume feeding only when you notice new growth beginning to emerge in late winter or early spring.
Pruning, Deadheading, and Grooming Your Flowers
Pruning and deadheading are among the most rewarding tasks in flower care because they produce immediate, visible results. Deadheading — the practice of removing spent blooms — redirects the plant’s energy away from seed production and back toward generating new flowers. When a plant is allowed to go to seed, it essentially considers its reproductive mission complete and reduces its blooming effort. By consistently removing faded flowers before seeds can form, you encourage the plant to keep producing new buds in an ongoing cycle of bloom that can last significantly longer than if the plant were left unattended.
Pruning goes a step beyond deadheading to include the removal of damaged, diseased, or overcrowded stems and foliage. For potted plants and garden perennials, an annual hard prune — cutting the plant back to a fraction of its size — can reinvigorate old, woody growth and promote a fresh flush of healthy new shoots. For most flowering shrubs and perennials, the best time to prune is immediately after they finish their main blooming period, which gives them ample time to recover and set buds for the following season. Avoid heavy pruning in late fall when plants are preparing for dormancy, as new growth stimulated by pruning may be killed by frost.
Grooming also encompasses the regular removal of yellowing leaves, cleaning of dusty foliage, and the staking of tall or top-heavy stems. Yellow leaves can be a sign of normal aging, but they can also indicate overwatering, nutrient deficiency, or disease — removing them keeps the plant looking tidy and also removes potential habitats for pests. Dusting the leaves of indoor flowering plants with a damp cloth improves their ability to photosynthesize by increasing the light reaching their surface. Staking provides structural support to tall flowers like dahlias, delphiniums, and gladioli, preventing their stems from snapping under the weight of their blooms or in strong winds.
Identifying and Managing Common Flower Pests and Diseases
Even the most attentive flower gardener will eventually encounter pests or disease, because these challenges are an inevitable part of working with living plants. The most important thing you can do is learn to identify problems early, before a minor infestation or a small patch of disease becomes a plant-threatening crisis. Regular inspection of your flowers — checking both the tops and undersides of leaves, as well as the stems and soil surface — helps you catch issues at their most manageable stage. Early intervention almost always results in a better outcome than waiting until symptoms become severe and widespread.
Among the most common pests affecting flowering plants are aphids, spider mites, mealybugs, scale insects, and fungus gnats. Aphids cluster in large numbers on new growth, sucking sap and leaving behind a sticky substance called honeydew that can promote sooty mold. Spider mites thrive in hot, dry conditions and create fine webbing on the undersides of leaves. Mealybugs appear as white, cottony masses in leaf joints and on stems. Many of these pests can be managed effectively with insecticidal soap spray, neem oil, or simply a strong blast of water from a hose to dislodge them from the plant. For indoor plants, introducing beneficial insects is less practical, so chemical or natural spray treatments are more commonly used.
Fungal diseases such as powdery mildew, botrytis (gray mold), and black spot are also frequent challenges for flower growers. Powdery mildew appears as a white, dusty coating on leaves and thrives in conditions of poor air circulation and fluctuating humidity. Botrytis causes soft, brown, decaying patches on petals and foliage and is particularly problematic in cool, damp conditions. Black spot, common on roses, creates dark circular spots on leaves that eventually yellow and drop. Prevention through good cultural practices — ensuring adequate spacing between plants, watering at the base rather than overhead, and removing plant debris — is far more effective than treatment after the fact. When disease does appear, removing affected parts promptly and applying an appropriate fungicide can prevent it from spreading to healthy tissue.
- Inspect new plants carefully before introducing them to your home or garden, as they may harbor hidden pests that can quickly spread to other plants in your collection.
- Quarantine newly purchased plants for at least one to two weeks, keeping them separate from your existing plants while you monitor for any signs of infestation or disease.
- Maintain good air circulation around your plants by avoiding overcrowding, which reduces the humidity and stagnant conditions that many fungal pathogens prefer.
- Keep a simple spray bottle of diluted neem oil solution on hand as a first-response treatment for both common pests and many fungal issues — it is safe, effective, and widely available.
Extending the Life of Cut Flowers and Bouquets
Cut flowers bring an immediate sense of beauty and life into any interior space, but their display life can be frustratingly short without the right care strategies in place. The moment a stem is cut from its parent plant, the clock begins ticking, and everything you do from that point forward either slows or accelerates the process of decline. The good news is that with a handful of consistent practices, you can easily double or even triple the display life of most cut flower arrangements, keeping them fresh and vibrant for a week or more rather than just a few days.
Preparation is the most important phase of cut flower care and happens before you even put the flowers in a vase. If you are cutting flowers from your own garden, do so in the early morning or evening when temperatures are cooler and the stems are fully hydrated. Use sharp, clean scissors or pruning shears — a dull blade crushes the vascular tissue of the stem, impeding water uptake from the very start. Immediately after cutting, place the stems in a bucket of water so they do not lose hydration while you finish harvesting. Remove all foliage that would fall below the waterline in your vase, as decaying plant material dramatically accelerates bacterial growth.
The environment in which you display your cut flowers plays a significant role in how long they last. Keep arrangements away from direct sunlight, which accelerates aging and dehydration, and away from fruit bowls — ripening fruit emits ethylene gas, a natural plant hormone that hastens the senescence of cut flowers. Place your vase in a cool spot, and consider moving it to a cooler room overnight to slow the flowers’ metabolism further. With regular water changes, fresh stem cuts every two to three days, and a cool, shaded location, most cut flower arrangements will reward you with color and fragrance well beyond what most people expect from their blooms.








What do you think?
It is nice to know your opinion. Leave a comment.