










Bananagoose Crochet Pattern: Your Complete Guide to Making an Amigurumi Banana Goose Plushie
Introduction to the Bananagoose: Where Whimsy Meets Yarn
If you have ever scrolled through the world of amigurumi and felt the sudden, irresistible urge to combine two completely unrelated things into one impossibly adorable creation, then the Bananagoose is exactly the project you have been waiting for. This charming little plushie fuses the cheerful yellow curve of a ripe banana with the waddling, dignified energy of a goose, and the result is a crochet pattern that has captured the hearts of crafters all over the internet. It sits somewhere between absurdist art and cozy handcraft, and that is precisely what makes it so delightful to make and to give as a gift.
Amigurumi, the Japanese art of crocheting or knitting small stuffed animals and creatures, has expanded far beyond its traditional roots of simple bears and bunnies. Modern amigurumi artists push the boundaries of what a plushie can be, drawing inspiration from food, memes, internet culture, and unexpected animal hybrids. The Bananagoose fits squarely into this playful tradition, embodying the kind of creative joy that reminds us why we pick up a hook and yarn in the first place. It is not just a craft project — it is a tiny, squishy statement about imagination.
Whether you are an experienced amigurumi maker looking for your next quirky challenge, or a crafter who has just discovered the meditative pleasure of working in the round, the Bananagoose pattern offers something for everyone. Its construction blends foundational amigurumi techniques with just enough character-specific shaping to keep the project interesting from start to finish. By the end of this guide, you will understand everything you need to know about materials, technique, assembly, and finishing to bring your very own Bananagoose confidently and joyfully to life.
Understanding the Design: Anatomy of a Banana Goose
Before you cast on your magic ring and begin your first round, it helps enormously to understand what you are actually making. The Bananagoose is built on a conceptually simple but visually clever premise: a goose whose body takes the curved, elongated shape of a banana. The yellow coloring, the gentle arc of the torso, and even the tapered tip that mimics a banana stem all work together to create a silhouette that reads as both bird and fruit simultaneously. This dual identity is what gives the finished plushie its singular charm and makes it instantly recognizable on any shelf or craft table.
The construction of the Bananagoose typically involves several distinct components that are made separately and then assembled. The main body is the largest and most structurally important piece, worked in continuous rounds to form that signature banana curve. The head is a rounder, more traditionally goose-like shape, often featuring an expressive flat bill worked in orange or pale yellow yarn. The wings are usually small, flat panels that attach to the sides of the body, and tiny webbed feet anchor the whole creature at its base, giving it the ability to stand upright with a satisfying, self-assured wobble.
What makes the design particularly clever is how the color palette does the storytelling for you. The dominant banana yellow immediately signals the fruit element of the hybrid, while the orange beak and feet, the white or cream accents, and the carefully placed safety eyes all signal goose. Some pattern variations introduce a small tuft on top of the head, a blush of pink on the cheeks, or even a tiny bowtie or hat, allowing crafters to personalize their Bananagoose and give it a distinct personality. Understanding these design elements before you begin helps you make informed choices about yarn colors and any customizations you might want to incorporate.
Materials and Tools You Will Need
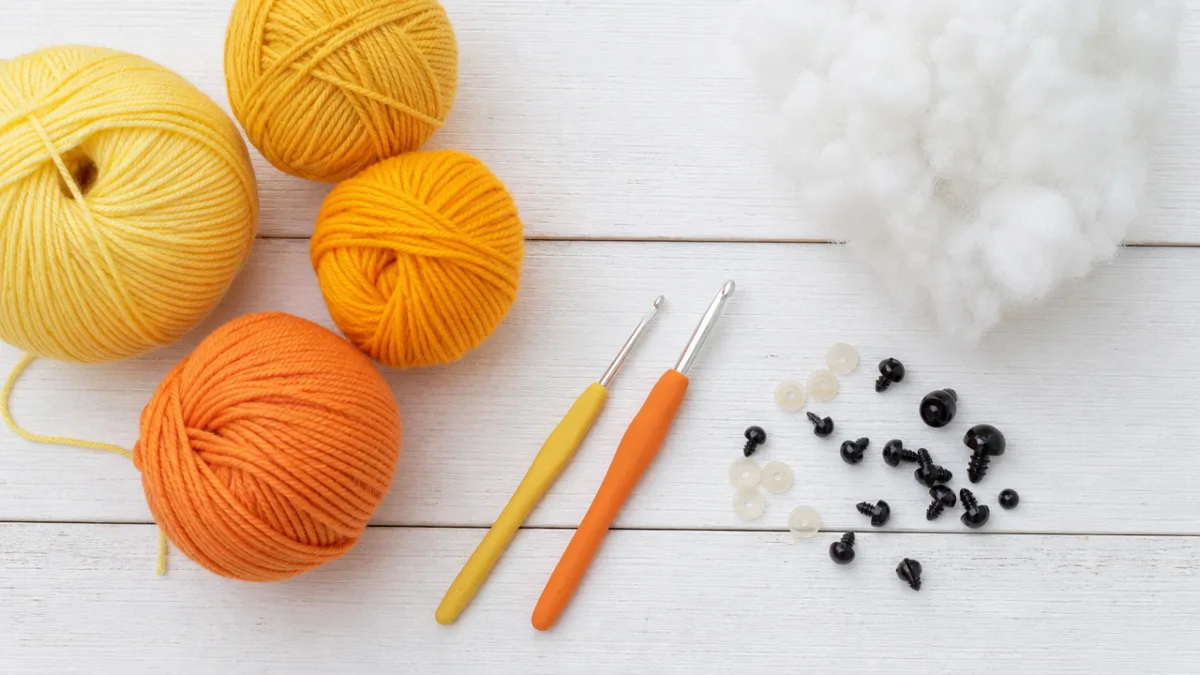
Gathering your materials before you begin any crochet project is a habit that saves time, frustration, and mid-project trips to the craft store. For the Bananagoose, the material list is reassuringly manageable, which is one of the reasons this pattern is so approachable even for crafters who are relatively new to amigurumi. The most important thing you will buy is your yarn, and for this project, yarn choice has a significant impact on both the look and feel of the finished plushie.
Most Bananagoose patterns call for a DK weight or worsted weight yarn in the following colors, though the exact shades are always a matter of personal preference and creative interpretation:
- Banana Yellow: The primary color for the main body and most of the head. Look for a warm, saturated yellow rather than a pale or greenish tone to get that perfectly ripe banana effect.
- Orange: Used for the bill and the webbed feet. A medium, true orange works best, though some crafters prefer a slightly peachy tone for a softer look.
- White or Cream: Often used for the chest area or belly of the goose, adding dimension and realism to the bird half of the design.
- Black: A small amount is used for pupils if you are embroidering eyes rather than using safety eyes, or for any detailing around the face.
Beyond yarn, you will need a crochet hook sized appropriately for your chosen yarn weight — typically a 2.5mm to 4mm hook for amigurumi work, as a tighter gauge prevents the stuffing from showing through. You will also need polyester fiberfill stuffing, a yarn needle for seaming and weaving in ends, stitch markers to track your rounds, and a pair of 6mm to 9mm safety eyes. Scissors, straight pins for positioning pieces before sewing, and optionally a bit of blush powder or chalk for adding rosy cheeks complete your toolkit. Having everything laid out before you begin makes the process feel organized and enjoyable rather than scattered.
Step-by-Step Construction Guide
The Bananagoose is assembled from multiple separately crocheted components, so a smart approach is to work through each piece in order before joining anything together. This method lets you check your gauge and adjust as needed before committing to the full construction, and it also means you end up with a satisfying pile of tiny goose parts to admire before the final assembly begins. Start with the main body, as it is the largest and most time-consuming piece and will set the tone for the scale of all the other components.
The body begins with a magic ring and is worked in continuous spiral rounds, increasing steadily to achieve the widest part of the banana curve before decreasing back down toward the tapered tip. The curve itself is usually achieved through strategic increases and decreases on one side of the body only, or by slightly angling your increases as you work. As the body grows, stuff it firmly and evenly before the opening becomes too small to work through comfortably. Firm stuffing is essential in amigurumi — a loosely stuffed piece loses its shape over time and allows the seams to look uneven and stretched.
Once the body is complete, work the head in the round, starting with a magic ring and increasing to form a smooth sphere. The bill is typically worked as a flat oval or wedge shape and sewn directly onto the front of the head at a slight downward angle to capture that classic goose expression. Attach the safety eyes before closing the head entirely, positioning them on either side to give the Bananagoose its characteristic wide, slightly bewildered gaze. The wings are small flat ovals and the feet are worked as simple webbed shapes using chain stitches and slip stitches to create the distinctive multi-toed silhouette. Assembly order matters: attach the head to the body first, then wings, then feet, checking balance and proportion at each stage.
Tips and Techniques for Amigurumi Success
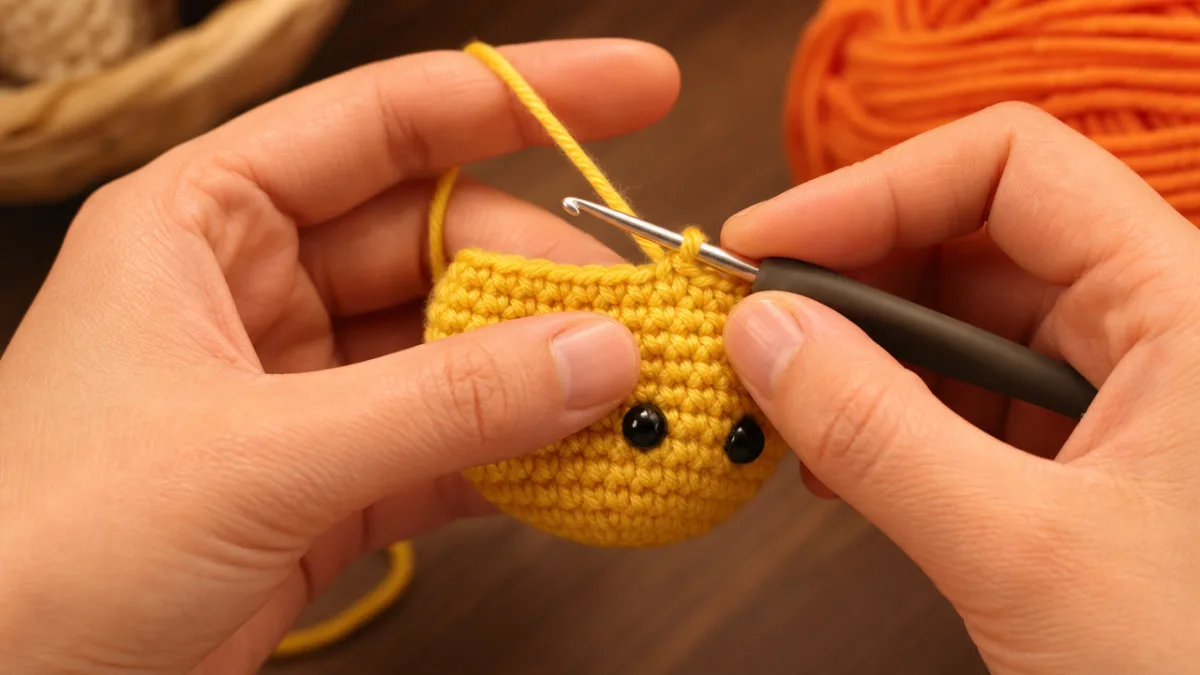
Even experienced crocheters encounter challenges when working on amigurumi for the first time, and the Bananagoose has a few particular nuances worth addressing before you begin. One of the most common stumbling blocks is tension. Amigurumi requires a significantly tighter gauge than most other crochet projects, because every stitch is a potential window through which fiberfill stuffing can peek unattractively. If you find your stitches are looser than you would like, try dropping down one hook size and see whether your fabric becomes denser without feeling stiff or difficult to work.
Working in continuous spiral rounds rather than joined rounds is the standard approach for amigurumi, and it is worth practicing if you are not already comfortable with it. Continuous spirals mean you never slip stitch to join or chain up at the beginning of a round, which results in a seamless fabric with no visible join lines. The trade-off is that it can be tricky to track where one round ends and the next begins, which is why stitch markers are absolutely essential. Place a marker in the first stitch of every round and move it up as you go — this small habit prevents the kind of miscounting that can throw off your shaping at a critical moment.
A few additional tips that experienced amigurumi makers recommend for a polished result include the following:
- Leave long yarn tails when fastening off each piece. These tails become your seaming thread, which means you will not need to introduce a new length of yarn every time you sew a component in place, and your joins will be more secure.
- Use straight pins generously during assembly. Pin every piece in place and step back to assess the overall look before committing a single seam. Small adjustments in positioning make a dramatic difference in the character’s expression and personality.
- Stuff the head and body more firmly than feels intuitive. Amigurumi stuffing compresses over time and with handling, so erring on the side of slightly overstuffed at the beginning results in a plushie that holds its shape beautifully through years of display or play.
- Block finished pieces lightly if needed. A light misting of water and gentle reshaping while damp can smooth out any uneven stitching and help the banana curve of the body sit at the perfect angle.
Color changes, if your chosen pattern includes them for the belly or other accent areas, are managed most cleanly in amigurumi by crocheting over the carried yarn rather than cutting and rejoining at every transition. This technique keeps the inside of your work neat and prevents the annoying problem of too many ends to weave in at the finish. If you are working with a pattern that requires you to switch colors multiple times, keep a separate small ball or butterfly bobbin for each color and carry them up the inside of the work as needed. This level of organizational care in the middle of the project pays dividends at the finishing stage.
Finishing, Gifting, and Caring for Your Bananagoose
The finishing stage of any amigurumi project is where your creation truly comes to life, and the Bananagoose is no exception. Once all components are assembled and your seams are secure, take a few minutes to go over the entire piece and tighten any loose stitches, trim any stray yarn ends that have escaped their weaving, and gently reshape the body and head with your hands. If you chose to add blush to the cheeks, now is the moment — a very light application of cosmetic blush or chalk pastel rubbed on with a fingertip or soft brush gives the face a rosy, lifelike warmth that photographs beautifully and adds enormous personality to the finished plushie.
The Bananagoose makes an exceptional handmade gift for a wide range of occasions and recipients. Its playful hybrid concept appeals to people of all ages, from children who simply love the silly visual to adults who appreciate the craft and creativity involved in its construction. It works wonderfully as a baby shower gift when made with soft, baby-safe materials and secured or embroidered eyes rather than safety eyes. It is equally at home as a quirky desk companion for a coworker, a whimsical birthday present for a friend who loves unusual things, or a market table centerpiece at a craft fair that draws curious browsers and delighted customers alike.
Caring for a finished Bananagoose is straightforward, provided you used machine-washable yarn in its construction — a wise choice for any plushie that will be handled frequently or given to a child. Most acrylic and washable wool amigurumi can be hand-washed in cool water with a small amount of gentle soap, then reshaped and left to air dry flat. Safety eyes are fully waterproof, but if you used glued-on eyes or other embellishments, hand washing is always the safer option. Store your Bananagoose away from direct sunlight to prevent the yellow yarn from fading over time, and give it an occasional gentle squeeze and reshape to keep its stuffing evenly distributed and its banana silhouette looking its best for years to come.
Building a Creative Amigurumi Practice Around Patterns Like Bananagoose
The Bananagoose is more than just a single pattern to tick off your project list — it is a wonderful entry point into a broader creative practice centered on amigurumi design and the joyful, meditative rhythm of working in the round. Once you have completed your first Bananagoose and experienced the particular satisfaction of assembling its pieces and watching a personality emerge from yarn and stuffing, you will likely find yourself thinking about what other unexpected hybrids or characters you might want to bring to life next. This is how many serious amigurumi artists begin: one quirky, beloved project opens a door that leads to an entire creative world.
Consider keeping a dedicated project journal where you record the yarn brands and colors you used for each amigurumi, your hook size, any modifications you made to the original pattern, and how the finished piece compared to your expectations. This kind of documentation might feel unnecessary when you are eager to simply pick up the hook and start making, but it becomes invaluable over time as a reference when you want to recreate a specific look, match a yarn color from a previous project, or troubleshoot a technique that did not work the way you expected. Photographs of your finished pieces alongside your notes create a personal portfolio that tracks your growth as a maker in a tangible and deeply satisfying way.
Sharing your finished Bananagoose on social media or in crafting communities is also a meaningful part of the amigurumi experience. Platforms like Pinterest, Instagram, and dedicated crochet forums are full of makers who will genuinely appreciate and celebrate your finished work, offer encouragement if you encountered difficulties, and share their own variations and modifications that might inspire your next project. The amigurumi community is notably warm, generous, and enthusiastic — exactly the kind of creative environment that sustains a long-term crafting practice. Post your Bananagoose proudly, tag the pattern creator if possible, and enjoy the ripple of delight it sends through whatever corner of the internet you choose to share it in. Your tiny yellow goose-banana deserves its moment in the spotlight.








What do you think?
It is nice to know your opinion. Leave a comment.