










Halloween DIY Night Lamp: Transform Your Home with Spooky Indoor Lighting
When the nights grow longer and October’s chill settles into the air, there is no better way to embrace the spirit of the season than by crafting your own Halloween night lamp. DIY Halloween lighting projects have surged in popularity in recent years, and for good reason — they allow you to create a truly personalized, atmospheric glow that store-bought decorations simply cannot replicate. Whether you are a seasoned crafter or picking up a glue gun for the first time, a homemade Halloween lamp can become the centerpiece of your indoor Halloween décor.
The magic of a Halloween night lamp lies in its ability to transform an ordinary room into something genuinely eerie and enchanting. Imagine walking into a living room or entryway bathed in orange, purple, or ghostly green light, with shadows dancing across the walls and the soft silhouette of a pumpkin or skeleton glowing from within. This kind of atmospheric lighting does something that plastic skeletons and fake cobwebs alone cannot accomplish — it changes the very mood of the space and makes every corner feel alive with Halloween spirit.
Beyond aesthetics, DIY night lamps are wonderfully practical. They provide soft ambient lighting that is perfect for Halloween parties, trick-or-treat evenings, or simply curling up with a spooky movie. They are safe alternatives to real candles, they can be switched on and off with ease, and many designs use LED lights that stay cool to the touch even after hours of use. This guide will walk you through everything you need to know to design, build, and display your own Halloween night lamp indoors.
Choosing Your Halloween Night Lamp Concept and Design
Before you gather a single supply, the most important step is deciding what kind of lamp you want to create. Halloween night lamps come in a staggering variety of styles, from classic jack-o’-lantern lanterns to ghostly mason jar lights, haunted house silhouette boxes, skull-shaped table lamps, and whimsical witch hat fixtures. Your choice should be guided by a few key factors: the overall style of your Halloween décor, the room where the lamp will live, and your current skill level with crafting tools and materials.
If you are decorating a living room or dining table and want something elegant yet eerie, consider a black silhouette lantern — a wooden or cardboard box with cutouts of haunted trees, bats, or flying witches that cast dramatic shadow patterns on the walls when lit from within. If you are decorating a child’s bedroom and want something a little more playful and less frightening, a glowing ghost made from a white frosted bottle or a friendly pumpkin jar lamp might be the perfect fit. For a front hallway or windowsill display visible from outside, a larger, bolder design with bright orange or flickering LED bulbs will have the most visual impact on passersby.
Sketching your design before you begin is a habit that pays dividends. Even a rough pencil sketch on paper helps you visualize proportions, plan where light will escape and where shadows will fall, and identify any structural challenges before you have already cut into your materials. Think about the source of light — will it be a small LED tea light, a string of fairy lights, a battery-operated candle, or a plug-in bulb socket? Each light source has different heat, brightness, and size requirements that will influence the size and material of your lamp housing.
Materials and Tools You Will Need
One of the greatest advantages of DIY Halloween night lamps is that most of the materials are inexpensive, widely available, and often already sitting in your home. The base material for your lamp housing can range from glass mason jars and empty wine bottles to wooden boxes, cardboard tubes, foam pumpkins, paper lanterns, and even repurposed tin cans. Each material has its own aesthetic and practical properties, so choosing the right one for your specific design is worth a moment of consideration.
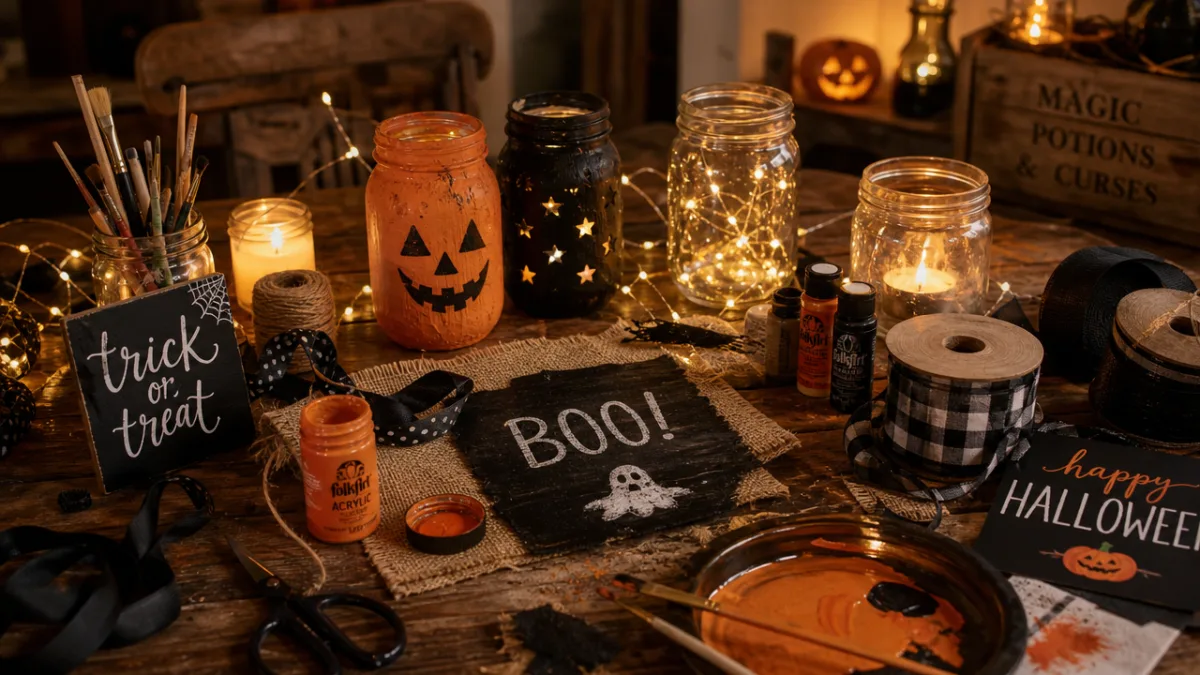
Glass and clear plastic containers are excellent choices when you want the light itself to be the star of the show. You can paint them with translucent glass paint in orange, amber, purple, or green to create a warm glowing effect, or wrap them in tissue paper for a softer, more diffused light. Wooden boxes and frames offer a more rustic, vintage Halloween feel and are easier to cut or carve into intricate shapes. Cardboard is the most beginner-friendly material — it can be scored, folded, and cut with basic scissors or a craft knife, and it accepts paint beautifully.
Here is a general list of supplies you are likely to need for most Halloween lamp projects:
- Your chosen lamp housing material (mason jar, wooden box, cardboard, foam pumpkin, tin can, paper lantern)
- LED tea lights, battery-operated fairy lights, or a low-wattage plug-in bulb socket
- Black, orange, purple, and green craft paint or spray paint
- Translucent glass paint or Mod Podge mixed with food coloring for glass surfaces
- Craft knife or scissors for cutting shapes and silhouettes
- Hot glue gun and glue sticks for assembling elements
- Tissue paper, vellum paper, or cellophane for diffusing light through cutouts
- Fine-grit sandpaper for smoothing wooden surfaces
- Black marker or stencils for drawing your Halloween designs
- Ribbon, twine, or wire for hanging or decorative finishing touches
Safety is also worth discussing here. Always use LED lights rather than incandescent bulbs inside enclosed or partially enclosed lamp housings made from paper, cardboard, or fabric. LED lights produce very little heat, making them safe for materials that would pose a fire risk with traditional bulbs. Battery-operated lights are particularly convenient because they require no wiring and can be positioned anywhere without concern for power outlets. If you are using a plug-in socket for a larger, more permanent lamp, ensure all electrical components are rated for indoor use and that no flammable materials are in direct contact with the bulb.
Step-by-Step Guide to Building Your Halloween Night Lamp
With your design chosen and your materials gathered, it is time to bring your Halloween night lamp to life. The process described here is adaptable to most common lamp designs, so feel free to adjust the steps to suit your specific project. We will use a mason jar silhouette lamp as our primary example because it is one of the most popular, beginner-friendly, and visually striking options available — but the principles apply broadly across different lamp types.
Begin by cleaning your mason jar thoroughly and allowing it to dry completely. Any moisture or residue on the glass can prevent paint or adhesive from bonding properly and may cause your finished lamp to look uneven or peel over time. Once dry, decide on your color. For a classic Halloween look, painting the inside of the jar with a mixture of Mod Podge and orange or amber food coloring creates a beautiful stained-glass effect. Simply pour a small amount of the mixture inside, swirl it to coat the walls, then tip the jar upside down on a paper towel and allow it to drain and dry for several hours.
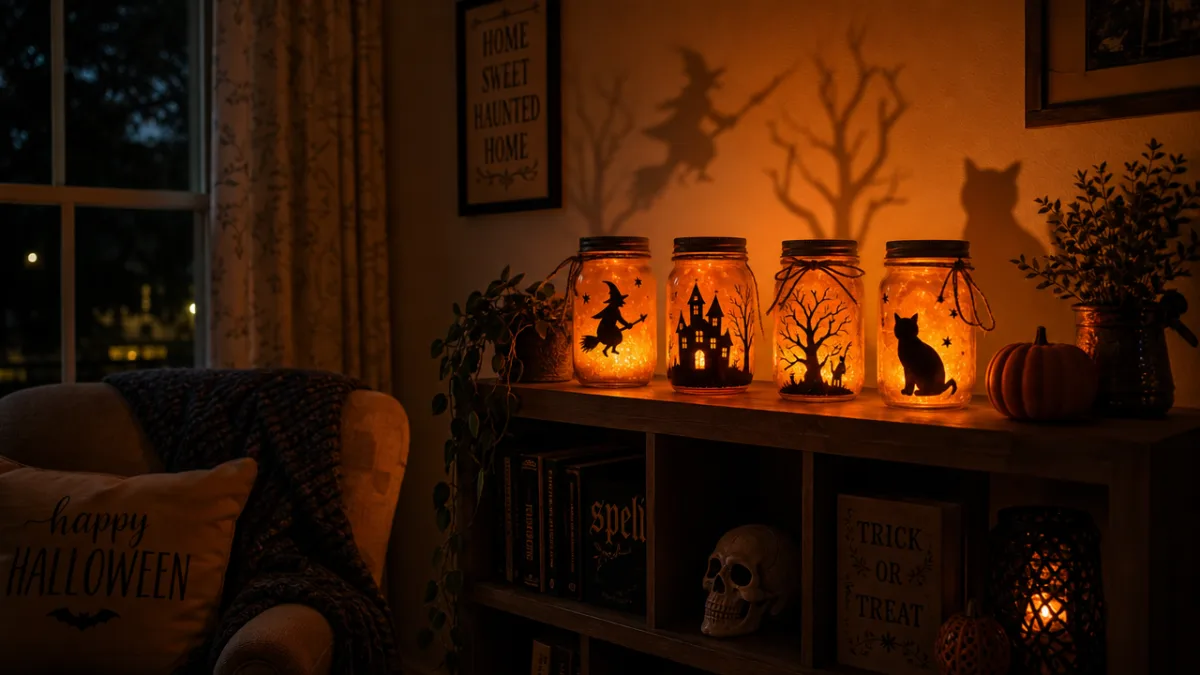
Next, create your silhouette design. Cut your chosen Halloween shapes — a haunted house, a witch on a broomstick, a cat arching its back, a graveyard scene, or a cluster of bats — from black cardstock or black adhesive vinyl. If you are not confident in your freehand cutting skills, print a template from the internet, trace it onto your black paper, and cut along the traced lines. Adhere your silhouette to the outside of the jar using a thin layer of Mod Podge or double-sided tape, pressing carefully to eliminate air bubbles and ensure crisp, clean edges. Finally, drop in a battery-operated LED tea light or a short strand of battery-operated fairy lights, close or partially close the lid, and switch on the light to see your creation come to life.
For those who want to go further, here are some popular variation techniques to elevate your lamp design:
- Layered silhouettes: Use two or three layers of silhouette paper at different depths inside or outside the jar to create a sense of depth and dimension in the shadow play.
- Color-changing LEDs: Use RGB LED tea lights or smart fairy lights that cycle through purple, orange, and green to add dynamic, shifting color to your lamp.
- Crackle finish: Apply crackle medium over your base paint to give wooden or cardboard lamps an aged, weathered look that suits gothic Halloween aesthetics beautifully.
- Decoupage accents: Tear pieces of Halloween-themed tissue paper or napkins and decoupage them onto glass surfaces for a textured, layered effect.
- String embellishments: Wrap twine, black lace ribbon, or faux spiderweb material around the neck or base of your lamp for a finishing touch that adds visual interest.
Creative Themes and Variations for Every Room
One of the most exciting aspects of DIY Halloween night lamps is the sheer range of themes you can explore. Because you are building the lamp yourself, you have complete creative freedom to match it perfectly to the aesthetic you want to achieve in each room of your home. Different rooms call for different moods, and a well-chosen lamp theme can tie an entire Halloween decorating scheme together with remarkable elegance and intention.
For the living room, where Halloween entertaining tends to happen, consider a dramatic gothic or haunted mansion theme. Black-painted wooden lanterns with wrought-iron style cutouts, tall column candle holders wrapped in cheesecloth and dripping with faux wax, or large apothecary jars filled with fairy lights and Halloween trinkets all create a sophisticated, atmospheric look that impresses adult guests without feeling juvenile. Cluster three lamps of varying heights together on a mantelpiece or sideboard for maximum visual impact, and add a few dried branches or faux black roses to complete the tableau.
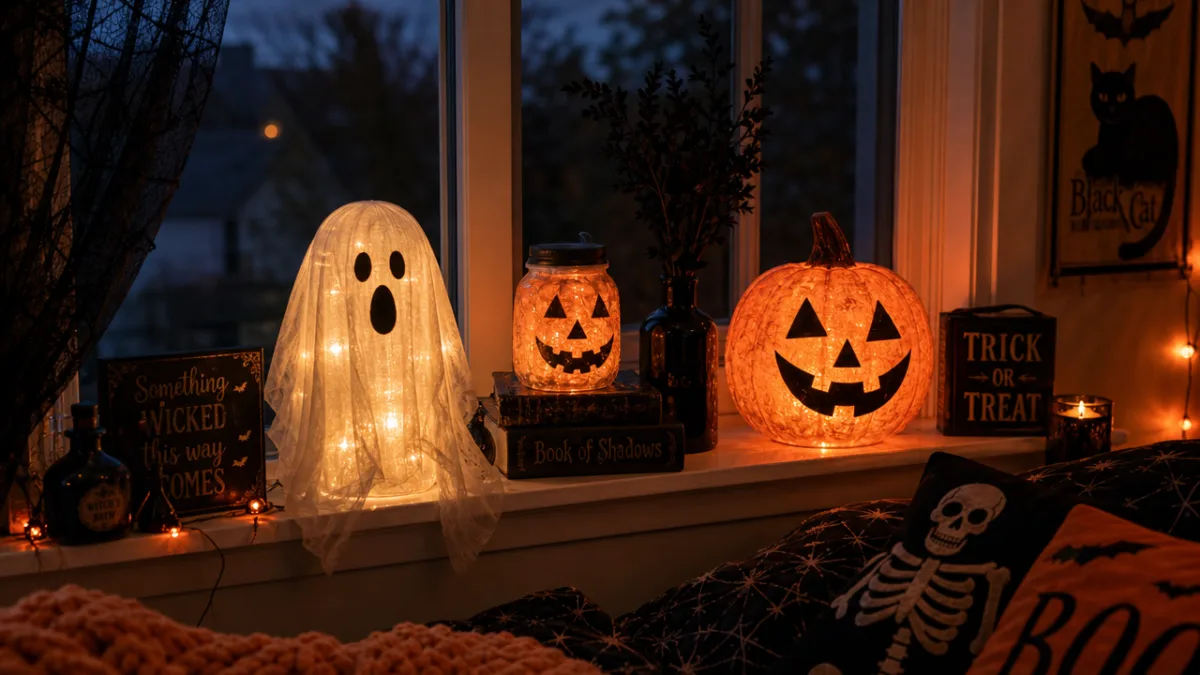
Children’s bedrooms and playrooms call for a friendlier, more whimsical approach. A glowing ghost lamp made from a white frosted bottle with a simple painted face, a smiling pumpkin lantern crafted from an orange paper lantern, or a friendly Frankenstein made from a painted tin can are all charming options that delight children without keeping them up at night with genuine fear. These lamps double beautifully as nightlights, providing just enough soft glow to comfort a child who might be a little nervous on Halloween night itself.
The kitchen and dining area offer a wonderful opportunity for harvest-themed lamp designs that blend Halloween with the broader autumnal aesthetic. Think warm amber and deep burgundy tones, mason jar lamps decorated with pressed autumn leaves, or carved miniature pumpkin lanterns arranged as a centerpiece down the middle of the dining table. These designs feel celebratory and cozy rather than frightening, making them appropriate for households where not everyone is a die-hard Halloween enthusiast but everyone appreciates the warmth of autumn.
Displaying Your Halloween Night Lamp for Maximum Effect
A beautifully crafted lamp deserves a thoughtfully chosen display location. The placement of your Halloween night lamp within a room has an enormous impact on how effective it is at creating atmosphere. Light behaves differently depending on surface colors, nearby objects, ceiling height, and the distance of the lamp from walls and furniture. Taking a few minutes to experiment with placement before committing to a spot will always yield better results than simply setting the lamp down wherever there is space.
Windows are among the most impactful locations for Halloween night lamps because they allow the light to be seen both from inside and outside the home. A lamp placed on a windowsill facing the street creates an inviting, festive signal that your household is celebrating Halloween enthusiastically. The glass of the window acts as a second layer of display, sometimes reflecting the lamp and doubling the visual effect. If you have a bay window or a wide sill, a row of three or five matching lamps in graduating sizes creates a stunning, professional-looking display that can be seen from the street.
Grouping multiple lamps together is almost always more visually effective than placing a single lamp in isolation. Interior designers refer to this principle as “vignetting” — the creation of a curated, intentional cluster of objects that reads as a cohesive composition rather than random individual items. For Halloween, this might mean grouping your night lamp with a small cauldron, a few miniature plastic skulls, a bundle of dried black branches, and a scattering of faux fall leaves on a sideboard, bookshelf, or console table. The lamp provides the light that animates the entire vignette and draws the eye naturally to the whole display.
Reflective surfaces nearby can dramatically amplify the effect of your Halloween night lamp. Placing a lamp near a mirror, a glass cabinet door, a metallic picture frame, or even a bowl of water creates secondary reflections and an extended glow that makes the lamp seem more powerful and pervasive than it actually is. This is particularly useful if you have a small lamp that you want to feel more impactful in a larger room. Similarly, placing your lamp on a white or light-colored surface will reflect more light upward and outward, while a dark surface will absorb it — each effect has its own merits depending on the mood you are trying to create.
Tips for Longevity and Storing Your DIY Halloween Lamp
One of the most worthwhile investments you can make in your DIY Halloween lamp is building it with longevity in mind. A lamp that survives season after season becomes a beloved household tradition — the kind of decoration that gets pulled out of a storage box each October with genuine excitement and nostalgia. A few simple choices during construction and storage can mean the difference between a lamp that lasts one Halloween and one that lasts a decade or more.
Sealing your finished lamp with an appropriate topcoat is one of the most effective things you can do to extend its life. For painted glass surfaces, a clear acrylic spray sealer applied in thin, even coats will protect the paint from chipping, scratching, and moisture damage. For wooden lamps, a brush-on polyurethane or lacquer provides excellent durability. Cardboard lamps benefit from a thorough coating of Mod Podge, which when fully dried creates a hard, water-resistant shell over the entire surface. These sealers add only minutes to your finishing process but can add years to your lamp’s usable life.
When Halloween is over and it is time to put your lamp away until next year, storage method matters enormously. Wrap glass jars and fragile elements individually in bubble wrap or soft cloth before placing them in a storage container. Cardboard or paper lamps should be stored in a cool, dry location away from humidity, which can cause warping and mold. Flat, shallow storage bins are better than deep boxes for most lamp designs because they prevent stacking pressure from crushing delicate elements. Label your storage containers clearly so that next October you can find your beloved Halloween lamps quickly and easily without sorting through every box in the attic.
Battery replacement and LED maintenance are small but important considerations for electronic elements. Before storing your lamp, remove all batteries from battery-operated lights to prevent corrosion inside the battery compartment, which can damage the light mechanism and even seep onto your lamp’s interior. Store spare batteries and fairy light strands in a small labeled bag inside the same storage container as the lamp itself so everything is together when you need it next year. With this level of care, a well-made DIY Halloween night lamp truly can become an heirloom-quality decoration that defines your home’s Halloween atmosphere for many years to come.








What do you think?
It is nice to know your opinion. Leave a comment.