










Ocean Sensory Bottles for Summer Play: A Complete Guide to Making and Using These Magical Calm-Down Tools
What Are Ocean Sensory Bottles and Why Do Children Love Them?
Ocean sensory bottles are sealed, shaker-style containers filled with water, glitter, small ocean-themed objects, and a variety of colorful materials that mimic the look and movement of the sea. When a child shakes or tilts one of these bottles, the contents swirl and drift in a hypnotic, wave-like motion that captures the imagination and soothes the nervous system simultaneously. These simple yet captivating creations have become a staple in early childhood education, occupational therapy, and mindful parenting for very good reason.
The appeal is almost universal across age groups. Toddlers are drawn to the visual stimulation, the swirling colors, and the gentle sound of the water and beads shifting inside. Older children find them useful as a focus tool during moments of emotional dysregulation, using the settling of the glitter as a visual cue to calm their own breathing and thoughts. Even adults have been known to keep a sensory bottle on their desks as a stress-relief object during long work sessions, making them a surprisingly versatile household item.
Summer is the perfect season to embrace the ocean theme. Whether your family lives near a coast or simply loves the aesthetic of the beach, ocean sensory bottles bring a little piece of that calming, sun-drenched atmosphere indoors. They pair beautifully with beach play, bath time, reading corners, and backyard sensory stations. The crafting process itself is also a wonderful summer activity, giving children a hands-on project that results in a toy they will genuinely treasure and return to again and again.
The Science Behind Sensory Play and Emotional Regulation
Sensory play is not simply about keeping children entertained. It serves a deeply important developmental function rooted in how the brain processes and integrates information from the environment. When children engage with materials that stimulate multiple senses at once — sight, sound, touch, and even smell — they are actively building neural connections that support cognitive development, fine motor skills, language acquisition, and emotional intelligence. Occupational therapists and child psychologists have long advocated for sensory-rich play environments as a cornerstone of healthy early childhood development.
Ocean sensory bottles specifically target what therapists call the visual vestibular system — the relationship between what a child sees and how their body orients itself in space. Watching the slow descent of glitter through water activates a calming response in the parasympathetic nervous system, which is the body’s natural rest-and-digest counterpart to the fight-or-flight stress response. This is why these bottles are frequently used in therapeutic settings as a grounding tool for children experiencing anxiety, sensory processing differences, or emotional outbursts. The bottle gives the child something concrete and beautiful to focus on while their nervous system recalibrates.
The mindfulness angle is equally compelling. Many educators now incorporate sensory bottles into breathing exercises and mindfulness practices for young children, instructing them to shake the bottle and then breathe slowly until all the glitter has settled to the bottom. This simple ritual teaches children a tangible, visual method of understanding what it feels like to “calm down,” making abstract emotional concepts concrete and accessible. Research supports the idea that children who regularly engage in mindfulness practices show measurable improvements in attention span, impulse control, and social-emotional skills.
Materials You Will Need to Create Ocean Sensory Bottles
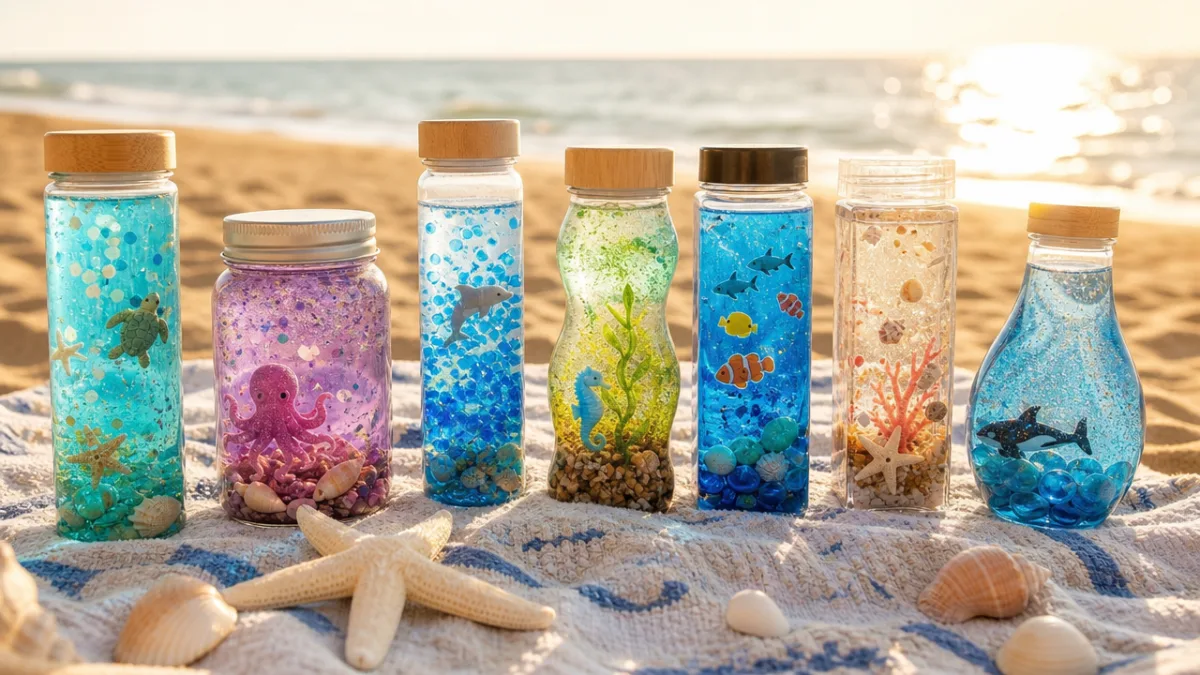
Gathering your materials before you begin is the key to a smooth and enjoyable crafting experience, especially when working with young children who have limited patience for mid-project supply runs. The good news is that ocean sensory bottles are remarkably budget-friendly. Most of the ingredients can be found at dollar stores, craft supply shops, or even in your own recycling bin. The base of the bottle itself is flexible — plastic water bottles, mason jars with secure lids, or purpose-built sensory bottle containers all work beautifully depending on the age of the child and your preference for durability.
The liquid base is one of the most important decisions you will make. Plain water works, but adding a small amount of clear glue (such as Elmer’s school glue) to the water creates a thicker, more viscous medium that slows down the movement of the contents dramatically, producing that mesmerizing, slow-wave effect that children find so captivating. Baby oil layered on top of colored water creates a beautiful two-tone effect where the liquids refuse to mix, adding another dimension of visual interest. For a truly oceanic experience, you can tint your water with blue and green food coloring to mimic the deep sea.
Here is a suggested list of materials to collect before your crafting session:
- Clear plastic bottles or mason jars with tight-fitting lids (one per child is ideal)
- Distilled water or tap water
- Clear school glue or hair gel for viscosity
- Blue and teal food coloring
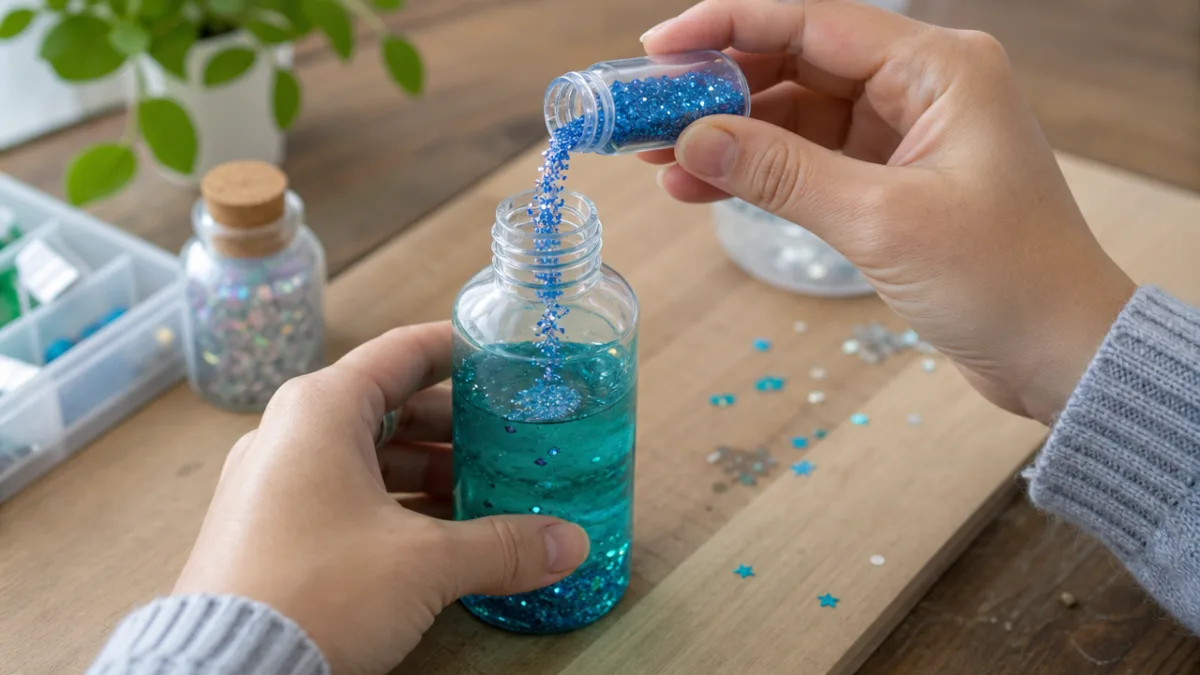
- Fine glitter in silver, blue, gold, and white
- Holographic star and shell-shaped confetti
- Small plastic ocean animals such as fish, turtles, and seahorses
- Craft gems and acrylic pearls in ocean tones
- Small shells, if sanitized and smooth-edged
- Strong waterproof glue or hot glue gun for sealing the lid
- Waterproof tape or decorative washi tape for the exterior
A note on safety: always inspect every item you plan to include in the bottle with fresh eyes, considering whether any piece could become a choking hazard if the bottle were somehow opened. For children under three, skip any items smaller than a marble, and always use hot glue on the lid followed by a layer of waterproof tape as a double security measure. Supervise young children during the crafting phase, particularly when the lid is still open, and make the sealing a ceremonial final step that signals the bottle is now complete and safe for play.
Step-by-Step Instructions for Making Your Ocean Sensory Bottle
The process of making an ocean sensory bottle is delightfully simple once you have your materials assembled, and it is genuinely one of those rare craft projects where the act of creation is almost as enjoyable as the finished product. Begin by cleaning and thoroughly drying your chosen bottle or jar. Any residual moisture or soap film can cause cloudiness in the finished bottle, so take an extra minute to rinse and dry completely before you begin filling. If you are using a bottle with a paper label, remove it entirely for maximum visual clarity — children love being able to see every swirling detail.
Start by adding your liquid base. Pour water into the bottle until it is approximately three-quarters full, leaving room for the glue and any bulkier solid materials you plan to add. Squirt in a generous amount of clear school glue — roughly a quarter cup for a standard 16-ounce bottle — and gently swirl the bottle to begin mixing without creating too many bubbles. Add your food coloring at this stage, starting with just two or three drops and building up to your desired depth of color. Blues and teals are classic, but deep purple and aquamarine together create a stunning twilight ocean effect that many children find particularly enchanting.
Now comes the most exciting part: adding the ocean elements. Drop in your small plastic sea creatures one by one, letting children choose their favorites and narrate a little story about what each animal is doing in their ocean bottle. Add your glitter, craft gems, shell confetti, and any other decorative elements gradually, pausing to gently shake and observe the effect after each addition. It can be tempting to add everything at once, but the incremental approach produces a better-balanced final result and makes the activity last longer, which is especially valuable when crafting with children who need extended engagement.
Once you are happy with the contents, top off the bottle with a little more water if needed — you want minimal air space at the top so the bottle feels full and the contents move freely. Apply a thick bead of hot glue or strong waterproof epoxy around the inside of the lid, then screw it on firmly and hold it in place while the glue sets. Once dry, apply a strip of waterproof tape around the lid seam as a secondary seal. You can decorate the outside of the bottle with washi tape, ocean-themed stickers, or a personalized label that makes the bottle feel truly special and uniquely the child’s own creation.
Creative Variations and Themed Ocean Bottle Ideas
Once you have mastered the basic ocean sensory bottle, a world of creative variation opens up that can keep this activity fresh across multiple crafting sessions and different seasons. The ocean theme itself is wonderfully broad — you can focus on the surface world with bright blues, white foam glitter, and sunlit shimmer, or take a deep-sea approach with dark navy water, bioluminescent glow-in-the-dark elements, and mysterious creatures like anglerfish or giant squid figurines. Each variation tells a different story and can be tied to books, films, or real-world learning about marine biology.
A coral reef bottle is particularly stunning and educational. Use clear water tinted only very lightly with blue, then add colorful coral-shaped confetti, bright tropical fish figurines, orange and pink craft gems, and gold glitter. The result looks like a sunlit reef teeming with life, and it opens up wonderful conversations about coral ecosystems, reef conservation, and ocean biodiversity. Pair this bottle with picture books about the Great Barrier Reef or a nature documentary segment, and you have transformed a simple craft into a rich educational experience that children will remember.
Here are several themed variations to inspire your next ocean bottle crafting session:
- Midnight Ocean Bottle: Dark navy water, silver star glitter, glow-in-the-dark paint drops, and deep-sea creature figurines for a mysterious nighttime ocean effect.
- Tropical Sunset Bottle: Layered pink, orange, and gold glitter in lightly tinted water with palm tree and flamingo charms for a beachy sunset aesthetic.
- Arctic Ocean Bottle: Clear water with white and silver glitter, tiny polar bear and penguin figurines, and white foam beads to mimic sea ice and snowflakes.
- Mermaid Lagoon Bottle: Iridescent glitter in purple and teal, holographic scale-shaped confetti, tiny mermaid charms, and pearl beads for a magical fairytale ocean.
- Calm Waves Bottle: Pale blue water with white foam glitter, minimal solid objects, and extra glue for maximum slow-movement effect — specifically designed for calming and focus.
You might also consider making a sensory bottle specifically designed for outdoor use during summer water play. Use a slightly larger bottle, add waterproof elements only, and create a version that can be submerged in a water table or kiddie pool without any risk. Children love bringing their sensory bottles to bath time, where the warm water temperature subtly changes how the bottle feels in their hands and the steam creates an atmospheric, spa-like sensory environment that is wonderfully calming before bed.
How to Incorporate Ocean Sensory Bottles into Daily Routines and Learning
The true long-term value of an ocean sensory bottle comes not just from making it but from integrating it meaningfully into a child’s everyday life. Many parents and educators find that introducing the bottle during predictable daily transition points — such as before rest time, after school, or during moments of emotional escalation — helps children begin to associate the bottle with a shift into a calmer state. Consistency is important here: the more regularly a child reaches for their bottle during challenging moments, the more conditioned their nervous system becomes to using it as an effective self-regulation tool.
In classroom or homeschool settings, ocean sensory bottles can anchor a dedicated calm-down corner or sensory station. Pair the bottle with ocean-themed books, a small sandbox with seashells, water sounds playing softly in the background, and comfortable seating to create a full sensory environment that supports emotional reset. Teachers have reported that having a defined, inviting calm-down space equipped with sensory tools significantly reduces the duration and frequency of behavioral disruptions, because children have a structured, socially acceptable way to manage their own emotional states without requiring adult intervention every time.
Ocean sensory bottles also work beautifully as a focus tool during academic activities. Allowing a child to hold or gently tilt their bottle during a read-aloud or while listening to instructions gives their hands and visual attention a constructive outlet, which can actually improve listening comprehension for children who benefit from movement and tactile input. This approach is particularly effective for children with ADHD, sensory processing differences, or anxiety, but research suggests that most children show improved attention and retention when they have access to a low-stimulation fidget tool during learning activities.
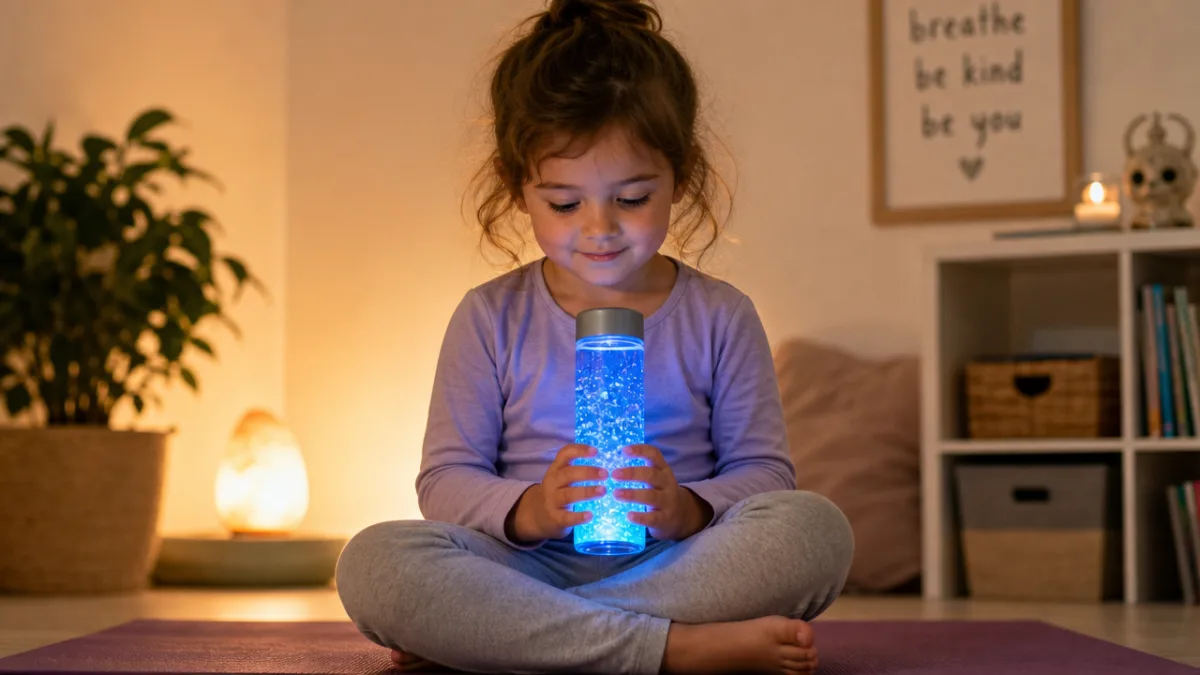
Consider also using the ocean sensory bottle as part of a daily mindfulness or gratitude practice. At the start or end of each day, invite your child to shake their bottle and take three slow breaths while watching the glitter settle. As they breathe, encourage them to name one thing from their day that felt like sparkling glitter — a moment of joy, kindness, or accomplishment — and one thing that felt heavy, like the little shells settling at the bottom. This simple ritual creates a beautiful metaphor for emotional experience and gives children a language and a visual anchor for processing the events of their day in a healthy, reflective way.
Tips for Long-Lasting Bottles and Troubleshooting Common Issues
A well-made ocean sensory bottle can last for months or even years with proper care, making it a truly worthwhile investment of time and materials. The most common issue crafters encounter is cloudiness developing in the water over time, which is usually caused by bacterial growth, the degradation of the glue, or the leaching of dyes from the figurines or confetti inside. To minimize cloudiness from the start, use distilled water rather than tap water, which contains fewer minerals and organic particles that can create turbidity over time. Adding a tiny drop of dish soap or a quarter teaspoon of glycerin can also help maintain clarity by acting as a mild preservative.
Another frequent challenge is the glitter clumping at the bottom or sticking to the sides of the bottle rather than floating freely through the water. This typically means the water-to-glue ratio needs adjustment — either the mixture is too thin and the glitter falls too quickly, or it is too thick and everything moves sluggishly or sticks. The ideal consistency is achieved through experimentation; a good benchmark is that after a vigorous shake, the contents should take between 60 and 90 seconds to fully settle. If things settle too fast, add more glue. If they are barely moving at all, add a small splash of water and reshake gently to incorporate.
Leaking lids are perhaps the most frustrating issue, particularly after a child enthusiastically shakes and drops their bottle repeatedly. To prevent leaks from the start, clean the threads of the bottle opening meticulously before applying your sealant, ensuring no water or residue is present. Apply hot glue generously around the entire interior lip of the lid, not just a few dots, and consider wrapping the sealed lid in a full layer of plumber’s tape before adding your decorative outer tape. If despite your best efforts a bottle begins to seep, simply unscrew the lid — it will likely break free with some effort — top off the liquid, and reseal with fresh glue and tape.
For storage and longevity, keep finished sensory bottles out of direct sunlight when not in use. UV exposure can fade food coloring, degrade glitter coatings, and warp plastic bottles over time. A basket or bin in a cool, shaded spot in your playroom or classroom is ideal. If you notice a bottle developing an unpleasant odor after several weeks, this is a sign that bacterial growth is occurring, and it is unfortunately safer to retire that bottle and make a fresh one. Using a sealed bottle rather than a jar with a less airtight lid, and ensuring no organic materials like real shells or natural sand are included, greatly reduces this risk and extends the life of your creation considerably.








What do you think?
It is nice to know your opinion. Leave a comment.