










DIY Jellyfish Light: Create Your Own Dreamy Underwater Glow
There is something undeniably magical about the soft, pulsing glow of a jellyfish drifting through deep ocean water. That ethereal, translucent beauty has inspired makers and crafters around the world to bring a little piece of the sea into their homes through one of the most enchanting DIY projects circulating creative communities right now: the jellyfish light. Whether you hang it above a bed, tuck it into a cozy reading nook, or display it as a statement piece in a living room, a handmade jellyfish lamp transforms any space into something that feels genuinely otherworldly.
The best part about this project is that it requires no advanced crafting skills, no expensive equipment, and no art degree. With a handful of accessible materials — most of which you may already own or can find at a dollar store — you can build a glowing, tentacled masterpiece in an afternoon. The DIY jellyfish light has taken off on platforms like Pinterest precisely because the end result looks far more sophisticated and intentional than the effort involved. It is one of those rare craft projects where the payoff dramatically exceeds the investment of time and materials.
In this comprehensive guide, we will walk you through every stage of the process: gathering your materials, assembling the bell structure, creating the flowing tentacles, wiring in your light source, and styling the finished piece for maximum visual impact. Whether you are making this for yourself, as a gift, or as part of a themed bedroom makeover, you will find everything you need right here. Let the deep sea inspire your next creative project.
Materials You Will Need
Before diving into the construction process, it is essential to gather all of your supplies in one place. Nothing disrupts a creative flow quite like stopping mid-project to run to the store. The good news is that the core materials for a DIY jellyfish light are widely available and surprisingly affordable. Most crafters spend between five and fifteen dollars total, depending on what they already have at home. The primary structure of the jellyfish bell is typically made from a clear or frosted plastic lantern, a balloon, a paper bowl, or even a transparent umbrella — each option yielding a slightly different aesthetic effect.
For the tentacles, you have a wonderful range of choices that will each lend a different texture and movement to your creation. Iridescent ribbon is a popular favorite because it catches light beautifully and ripples with even the slightest air movement. Tulle fabric, cut into long thin strips, creates a softer, more dreamlike effect. Cellophane strands, fishing line, or even curled strips of translucent wrapping paper all work beautifully. For crafters leaning into a more romantic or maximalist aesthetic, adding pearl strands, small crystal beads, or pastel-dyed fabric strips can elevate the piece into something truly gallery-worthy.
The light source is perhaps the most critical material decision you will make, and thankfully the safest and most versatile option is also the most accessible: battery-powered LED fairy lights. These come in warm white, cool white, and a rainbow of pastel and vivid colors. Pink and purple tones are particularly popular for jellyfish lights because they mimic the bioluminescent glow of real jellyfish. Some crafters opt for color-changing LED strips or even small Edison-style bulb fairy lights for a vintage twist. Avoid candles or any heat-producing bulb inside the structure, as most materials used in this project are not heat-resistant.
- Clear or frosted plastic lantern, large balloon, paper bowl, or transparent umbrella for the bell
- Iridescent ribbon, tulle strips, cellophane, or organza fabric for tentacles
- Battery-powered LED fairy lights in your preferred color
- Hot glue gun and glue sticks
- Fishing line or clear thread for hanging
- Scissors, tape, and any decorative embellishments such as beads or sequins
- Optional: spray paint in iridescent or pearlescent finish for the bell
Building the Jellyfish Bell
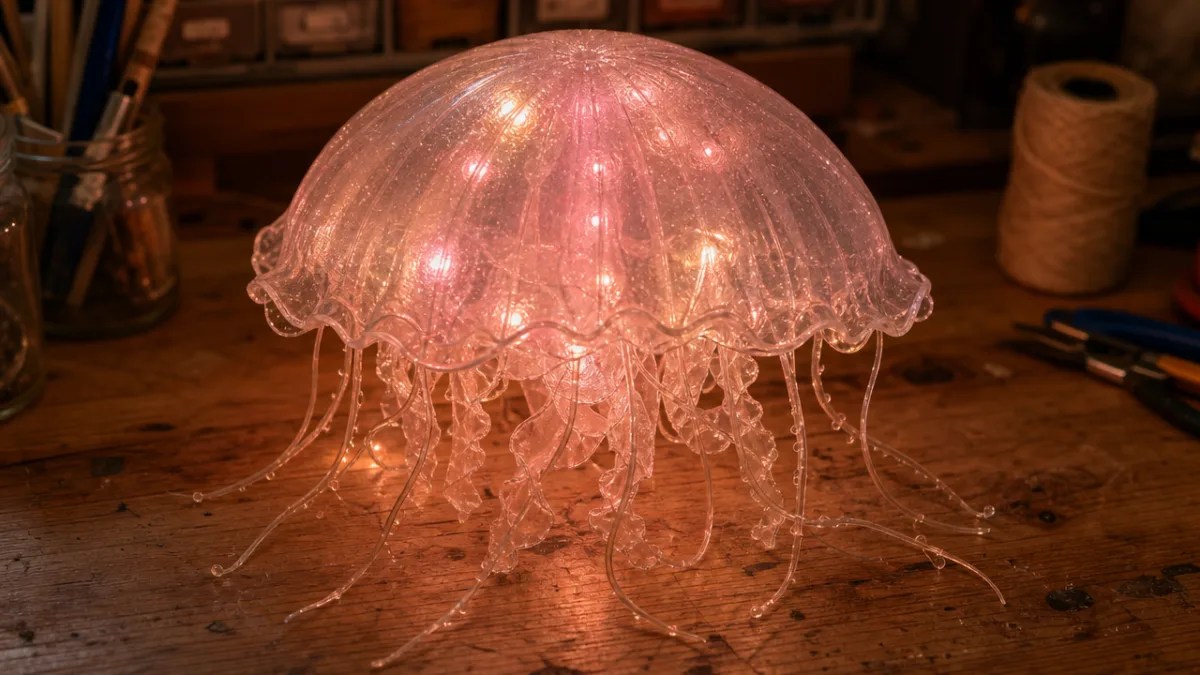
The bell is the rounded, dome-shaped top of the jellyfish and it forms the structural heart of your light. If you are using a clear plastic lantern — the kind commonly found in dollar stores or craft shops — you will want to start by removing any internal hanging mechanism that might interfere with your fairy lights. Wipe down the outside surface with a dry cloth to remove any dust or oils, which can prevent glue or spray paint from adhering properly. If your lantern has a flat bottom, consider flipping it so the opening faces downward; this creates the natural bell shape of a real jellyfish and gives you a convenient opening through which to feed the tentacles and fairy light wires.
For those using a balloon as the base, inflate it to roughly the size of a large grapefruit or small cantaloupe, then tie it off. You will then apply strips of tissue paper, thin fabric, or even plastic wrap dipped in a diluted craft glue solution over the surface, layering until you have a translucent shell. Once fully dry — which typically takes several hours or overnight — you can pop and remove the balloon from inside, leaving a lightweight, hollow dome. This method produces a particularly beautiful bell because light filters through the multiple thin layers in an organically uneven way, mimicking the textural complexity of a real jellyfish.
Once your bell is prepared, consider adding decorative details before attaching anything else. A light misting of iridescent or pearlescent spray paint can give a plastic lantern a truly spectacular shimmer, especially under colored lighting. Crafters who prefer a more handmade aesthetic often use iridescent nail polish applied in swirling patterns with a fine brush, or press holographic stickers and small sequins onto the exterior surface. Whatever decorative approach you choose, allow everything to dry completely before moving on to the tentacle attachment stage. A bell that is fully finished and beautiful on its own will form a far more cohesive finished piece.
Creating and Attaching the Tentacles
The tentacles are where your jellyfish really comes to life, and this is the stage where you have the most creative freedom. Begin by cutting your chosen tentacle material into lengths ranging from about twelve to thirty-six inches. Varying the lengths is key to achieving a naturalistic, flowing appearance — real jellyfish tentacles are never uniform, and your DIY version will look far more dynamic and organic if you embrace this variation. Plan to create anywhere from twenty to fifty individual tentacle strands depending on how full and dramatic you want the final piece to look.
If you are using ribbon, a beautiful finishing touch is to curl some of the strands before attaching them. Simply run a closed pair of scissors firmly along the ribbon’s length — the same technique used to curl gift-wrapping ribbon — and the ribbon will spring into a lovely spiral. This curling technique works particularly well with lighter-weight satin or organza ribbons and adds an incredible sense of movement even when the jellyfish is completely stationary. For tulle strips, cutting with a slight zigzag motion or using pinking shears along the edges will prevent fraying and add a delicate textural detail that catches light in an appealing way.
Attaching the tentacles to the bell requires a bit of patience but is not technically difficult. Using a hot glue gun, apply a small dot of glue just inside the opening of the bell and press the top of a tentacle strand firmly into it, holding for a few seconds until the glue sets. Work your way around the entire circumference of the bell opening in a uniform fashion, then add a second inner ring of tentacles slightly staggered from the first for added fullness. If you want some tentacles to hang from different heights around the bell rather than just from the very edge, you can glue additional strands to the inner sides of the bell at varying heights, creating that characteristic jellyfish layering effect.
- Cut tentacle strands in varying lengths from 12 to 36 inches for a naturalistic appearance.
- Curl ribbon strands with scissors or crinkle tulle strips for added texture and movement.
- Glue the first ring of tentacles around the outer edge of the bell opening.
- Add a second inner ring, slightly offset from the first, for fullness and depth.
- Optionally glue additional strands at varying heights inside the bell cavity for layering.
- Allow all glue to cool and set completely before adding fairy lights or hanging.
Adding the Light Source
The fairy lights are what transform your beautiful jellyfish craft into a genuinely magical glowing object, so this stage deserves careful attention. Begin by deciding how you want to position your light source. For a battery-powered fairy light strand, you will want to tuck the battery pack either just inside the top of the bell — where it will be hidden from view — or just outside the top if you plan to hang the jellyfish from the pack itself. Some crafters use a small adhesive hook or a length of ribbon to create a neat, concealed hanging mechanism that also keeps the battery pack accessible for when batteries need replacing.
Gently stuff the fairy light strand into the interior of the bell, working from the top down and distributing the lights as evenly as possible throughout the space. The goal is to avoid having any bright spots or dark patches and instead create a uniform, diffused glow that illuminates the entire bell. If your fairy lights are on a wire, you can shape the wire slightly to encourage the bulbs to press against the interior walls of the bell, which helps distribute the light more evenly. For balloon-construction bells, the multiple layers of the shell act as natural diffusers, softening the light beautifully without any extra effort.
Once you are happy with the placement of your lights, switch them on and observe the effect in a dimmed room. This is the moment most crafters describe as genuinely thrilling — watching an assembly of ordinary craft materials suddenly transform into something luminous and alive. If certain areas appear brighter than others, gently rearrange the fairy light strands inside the bell until the glow is even. At this stage you can also experiment with color if your lights have multiple settings, finding the hue that best suits your aesthetic vision. Pink and lavender create the most classically jellyfish-like effect, while warm amber gives a more lantern-like, vintage feel.
Hanging and Displaying Your Jellyfish Light
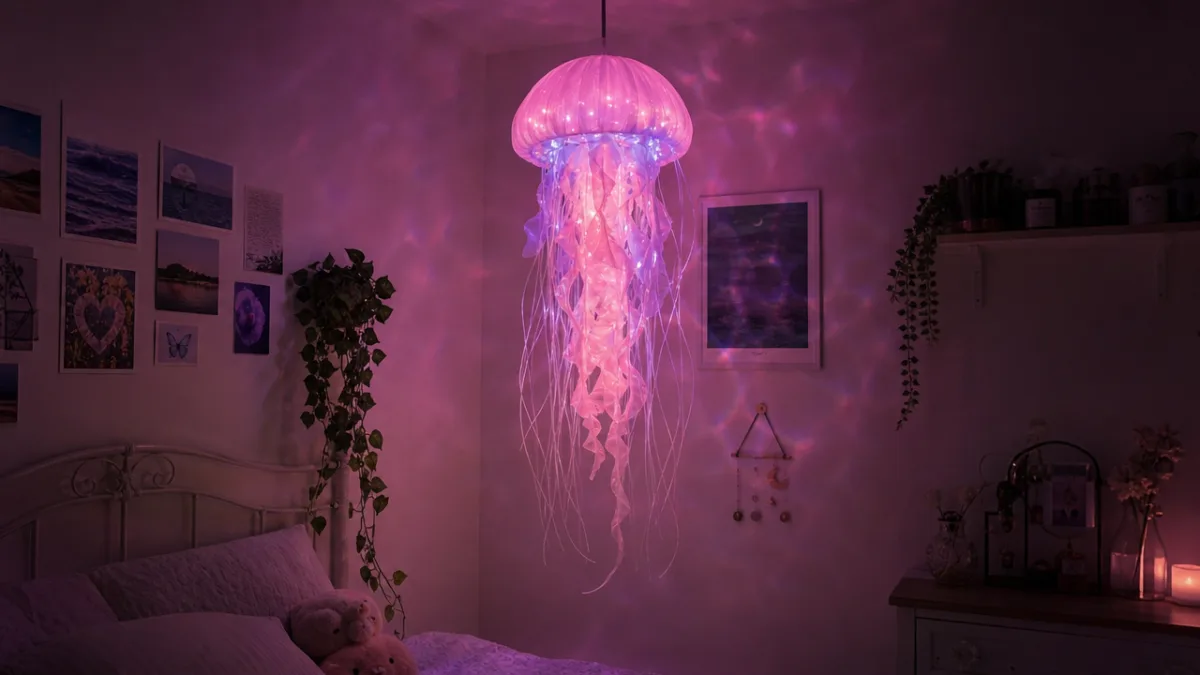
How and where you display your finished jellyfish light will significantly impact the overall effect and impression it makes. These luminous creations look absolutely spectacular when hung at different heights in groups, creating a jellyfish swarm effect that is visually arresting and deeply atmospheric. If you are decorating a bedroom, consider hanging a cluster of three to five jellyfish lights above the bed at staggered heights using fishing line attached to a simple wooden dowel or a driftwood branch. The transparent fishing line will be nearly invisible in low light, making the jellyfish appear to float magically in mid-air.
A single statement jellyfish light also works beautifully as a window ornament. When hung in front of a window during the day, sunlight passes through the translucent bell and illuminates the tentacles, creating a stunning display even without the battery-powered lights switched on. At night, with the lights glowing and possibly a dark curtain behind, the piece becomes a completely different and equally captivating focal point. For children’s rooms in particular, a gently glowing jellyfish makes an extraordinary and whimsical nightlight that is both calming and imaginative.
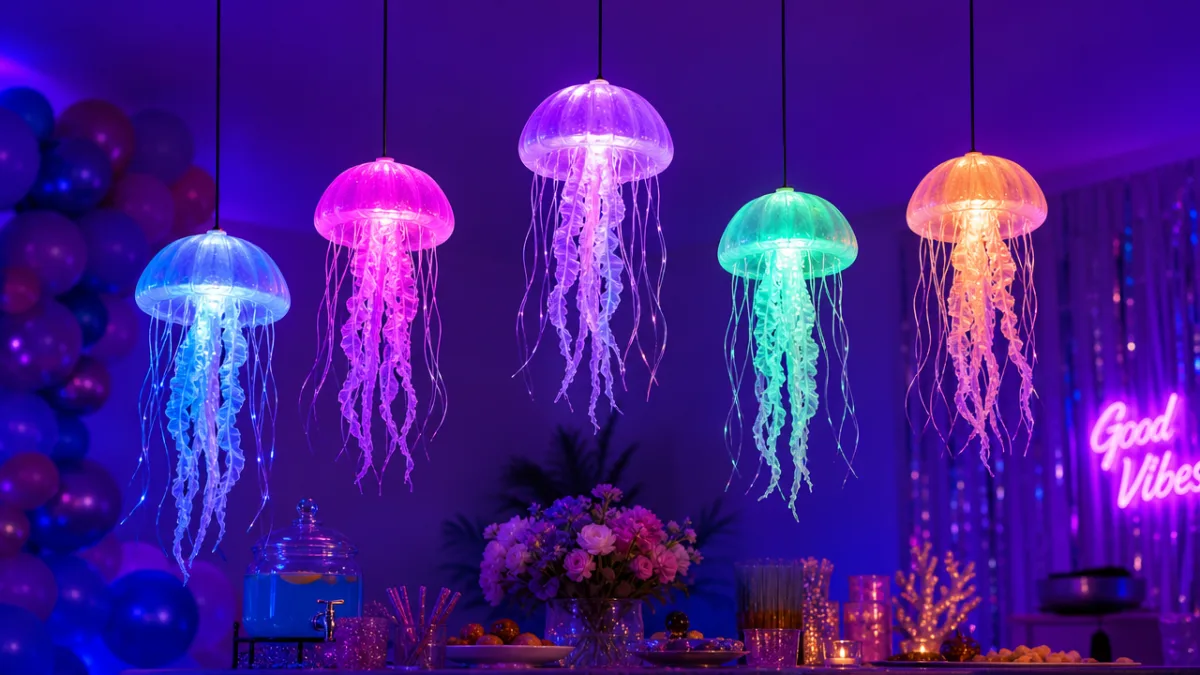
Themed displays offer yet another exciting possibility. A bathroom or powder room with coastal or ocean-inspired decor can be dramatically enhanced by a collection of jellyfish lights hung above the vanity or in a window corner. For party or event decoration, jellyfish lights in coordinating colors can be suspended above a dessert table or dance area, transforming an ordinary room into something that feels like an underwater fantasy. Because they are lightweight and hang from simple fishing line, they are also easy to reposition and reuse for different events or seasons, making them one of the more versatile crafts you can add to your decorative repertoire.
Customization Ideas and Creative Variations
One of the most appealing aspects of the DIY jellyfish light project is its extraordinary adaptability. The basic structure remains the same, but virtually every material choice, color decision, and decorative embellishment can be swapped out to create a completely unique result. For a more elegant, adult aesthetic, consider working exclusively in white, silver, and champagne tones — white organza tentacles, a frosted bell, and warm white fairy lights produce something that looks genuinely like a high-end decorative object rather than a craft project. Add a few strands of small faux pearls or crystal beads among the tentacle strands for a finishing touch of understated luxury.
For crafters who love bold color and maximalist style, the possibilities are truly unlimited. Deep teal and electric blue tentacles with color-changing LED lights create a dramatic bioluminescent effect reminiscent of deep-sea photography. Hot pink and neon purple combinations are wildly popular with younger crafters and for themed birthday parties. For Halloween, black and orange versions with flickering LED lights are strikingly effective. For Christmas or winter holiday decor, silver and icy blue versions with white snowflake embellishments transform the jellyfish silhouette into something completely seasonal and festive without losing its fundamental elegance.
Beyond color and material variations, you can also experiment with scale. A miniature jellyfish, made from a small clear Christmas ornament ball as the bell, can be hung from a garland or used as a tree ornament. A giant jellyfish, constructed from a large paper lantern with extremely long tentacle strands reaching nearly to the floor, creates a room-defining statement installation that would not look out of place in a contemporary art gallery. Mixed-media approaches — incorporating natural elements like dried flowers, feathers, or shells among the tentacles — can ground the piece in nature and add layers of visual complexity that elevate it far beyond a simple craft project.
Tips for a Professional-Looking Finish
The difference between a jellyfish light that looks like a craft project and one that looks like a designer decorative object usually comes down to a handful of small but significant finishing details. The first and perhaps most impactful tip is to be extremely consistent and intentional about your color palette. Choose two or three colors that complement each other and repeat them throughout — in the tentacle materials, the light color, and any embellishments. A scattered, multi-color approach can look chaotic, while a focused palette creates a sense of cohesion and intentionality that reads as sophisticated.
The second major factor is the quality of your tentacle attachment. Visible glue strings — the thin, spider-web-like strands that hot glue guns inevitably produce — are the most common way a craft project reveals its homemade origins. Work slowly and deliberately when gluing, and keep a toothpick or a dry paintbrush nearby to immediately sweep away any glue strings before they cool. Once cool, these strings become significantly harder to remove without disturbing the surrounding work. Taking your time at the attachment stage, gluing only a few tentacles at a time rather than rushing through the whole ring at once, will produce a dramatically cleaner result.
Finally, pay attention to the hanging mechanism, as this is often where DIY pieces show their limitations most clearly. A length of thin fishing line, tied securely through a small hole punched in the very top of the bell, creates the cleanest and most invisible hang point. Use a needle or a small awl to create a neat hole rather than forcing a cord through the material, which can cause tearing or cracking. Reinforce the hole with a small ring of clear tape on the inside surface of the bell before threading the fishing line through. Tie the line to a small adhesive ceiling hook, an existing light fixture, or a tension rod across a window frame, and your jellyfish will hang beautifully, swaying with the slightest movement of air and casting its gentle, dreamy light in every direction.








What do you think?
It is nice to know your opinion. Leave a comment.