










DIY Whitewashed Scalloped Farm Style Bench: A Complete Guide to Building Your Own Rustic Masterpiece
Introduction to the Farmhouse Bench Aesthetic
Few pieces of furniture capture the warmth and character of country living quite like a handcrafted farmhouse bench. The combination of whitewashed wood, scalloped detailing, and sturdy construction creates a piece that feels simultaneously timeless and on-trend. Whether placed at the foot of a bed, tucked beneath a kitchen window, or positioned along an entryway wall, a farm style bench brings an effortless charm that store-bought furniture rarely achieves. Building one yourself adds an extra layer of pride and personalization to the finished piece.
The whitewashing technique has roots going back centuries, originally used as a practical and affordable way to brighten interiors and protect wood surfaces. Today, it has been reimagined as a decorative finish that gives new lumber the look of aged, sun-bleached wood found in old barns and country homes. When applied to a bench with scalloped edges, the result is a piece that looks like it was discovered at a charming antique market rather than assembled in a weekend workshop session.
Scalloped detailing, the curved decorative cutouts typically found along the apron or legs of this style of bench, is what sets this project apart from a standard woodworking build. These gentle, repeating curves reference traditional folk art and European country furniture. Though the scallops require a bit of extra effort with a jigsaw, they are well within reach for a confident beginner. This guide will walk you through every stage of the process, from selecting your lumber to applying that final coat of whitewash, so you can create a stunning piece you will be proud to display in your home.
Tools, Materials, and Planning Your Build
Before you make a single cut, gathering the right tools and materials is essential. For a standard bench measuring approximately 48 inches long, 12 inches wide, and 18 inches tall, you will need common dimensional lumber. A single 1x12x8-foot pine board works beautifully for the seat, while two 1x6x8-foot boards provide enough material for the apron and leg panels. Pine is an ideal choice for this project because it is affordable, widely available, relatively lightweight, and accepts whitewash paint exceptionally well, especially when it has a bit of natural knot grain character.
In terms of tools, you will need a jigsaw for cutting the scalloped profiles, a miter saw or circular saw for straight cuts, a drill with bits and a countersink attachment, sandpaper in 80 and 120 grit, wood glue, and clamps. A random orbital sander will save you considerable time during the finishing stages. For the whitewash finish itself, you will need white latex paint, water, a wide paintbrush, and a clean cloth for wiping. Optional but helpful items include a pencil compass or a round template object like a jar lid for drawing the scallop curves before cutting.
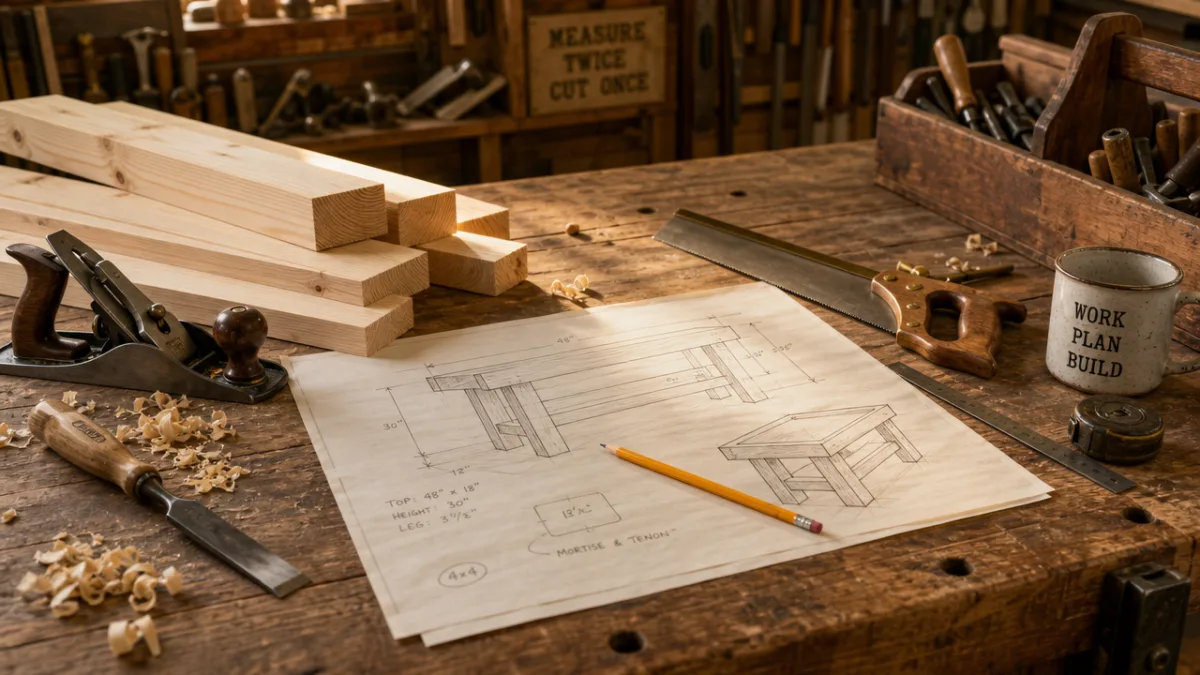
Planning your build means sketching out your design before touching any wood. Decide on the number of scallops you want along the apron — typically five to seven evenly spaced curves look balanced on a 48-inch bench. Consider whether you want the legs to be solid panel style, which provides a more substantial farmhouse look, or more traditional turned or tapered legs. Panel legs with a scalloped cutout at the base are the most common choice for this style and keep the project accessible without requiring a lathe. Taking the time to draw your dimensions to scale on paper will help you avoid costly mistakes and wasted material once you start cutting.
Cutting and Shaping the Scalloped Details
The scalloped apron is the signature element of this bench, and cutting it cleanly is the step that will define the finished piece’s quality. Begin by measuring and marking the apron board — typically a 1×6 cut to 44 inches, leaving a 2-inch overhang on each side once the legs are in place. Divide the board into equal sections along its bottom edge to determine the center point of each scallop. Using a jar lid, a compass, or a printed circle template, trace your curves carefully with a pencil. Taking your time at this stage ensures the scallops will appear symmetrical and professionally executed.
With your curves drawn, secure the apron board firmly to your workbench using clamps before making any cuts. A jigsaw with a fine-tooth blade is the best tool for these curved cuts — it gives you the control to follow your pencil lines smoothly without splintering the wood. Cut slowly and let the blade do the work, pivoting the saw gently around each curve. If you rush this step, you risk ragged edges that are difficult to sand smooth later. After completing all the cuts, use a half-round file or a folded piece of sandpaper to refine the curves until they feel smooth and consistent to the touch.
The leg panels can also benefit from a smaller decorative scallop or arch cut at their base, which lifts the visual weight of the piece and ties the design together. A simple single arch at the bottom center of each leg panel, approximately 2 to 3 inches tall, is enough to echo the apron’s detailing without overcomplicating the build. Sand all cut edges thoroughly before assembly, starting with 80-grit paper to remove any roughness and finishing with 120-grit to achieve a surface smooth enough to accept paint evenly. Dust off all surfaces with a tack cloth or a slightly damp rag before moving on to the assembly stage.
Tips for Perfect Scallop Symmetry
- Use a paper template folded in half to ensure both sides of each curve are perfectly mirrored before tracing onto wood.
- Mark the center of the apron board first, then work outward to space scallops evenly toward each end.
- Drill a small starter hole inside each curve before inserting the jigsaw blade for a cleaner entry point.
- Test-cut a scrap piece of the same lumber before committing to your actual apron board to practice blade control.
- Use a light touch when sanding curved edges — too much pressure can flatten the curve and distort the scallop profile.
Assembling the Bench Frame
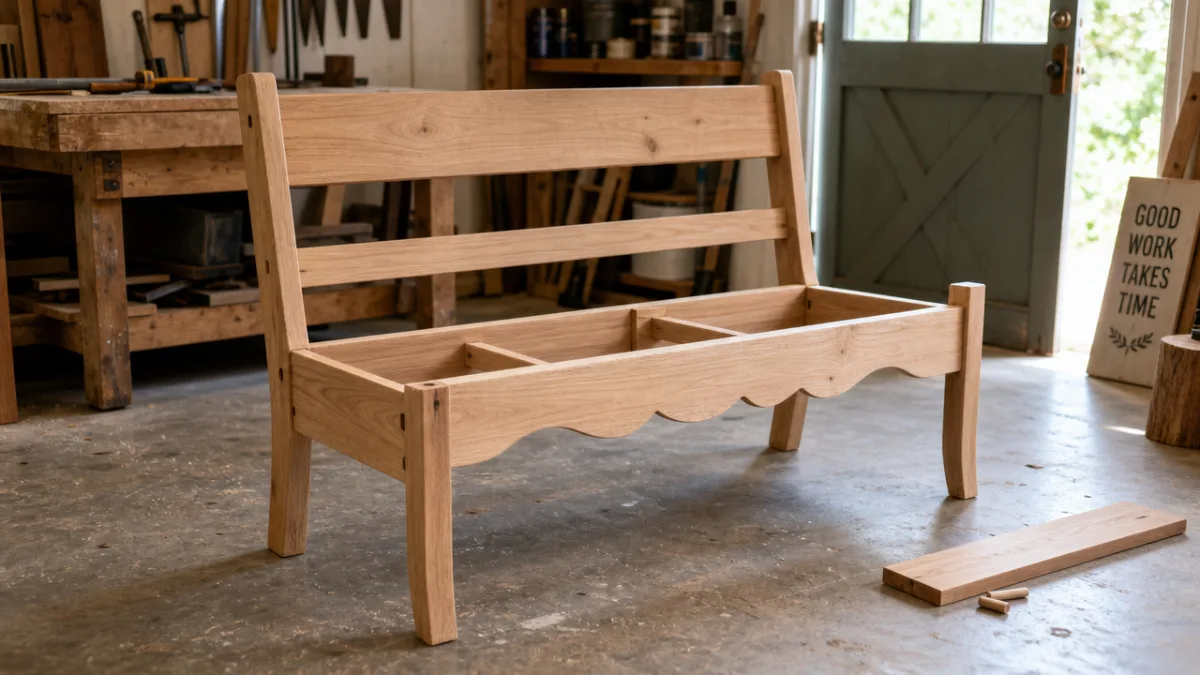
With all your pieces cut and sanded, assembly is a satisfying and relatively straightforward stage. Begin by attaching the apron to the inside faces of the leg panels using wood glue and 1.5-inch pocket screws or standard wood screws driven through countersunk pilot holes. Pocket screws are particularly useful here because they create strong joints without visible fasteners on the outside face of the apron. If you do not have a pocket hole jig, pre-drilling and countersinking your screw holes will allow you to fill them later with wood filler for a clean finish.
Clamp the apron and leg assemblies tightly while the glue cures — ideally for at least an hour, though overnight is best. During this waiting period, check that all corners are square using a carpenter’s square. Even a slight misalignment at this stage can cause the bench to wobble once the seat is attached. Adding a small corner brace inside each joint with a metal L-bracket is an optional reinforcement step that is highly recommended if the bench will be used as seating for adults rather than purely as a decorative accent piece.
Once the base assembly has fully dried, attach the seat board to the top of the leg and apron structure. The seat should overhang the apron by approximately 1 to 1.5 inches on all sides for a traditional farmhouse look. Attach it from below by driving screws up through the inside top edge of the apron into the underside of the seat board — this keeps the seat surface completely free of visible hardware. Sand any remaining rough spots on the assembled bench and wipe it down thoroughly before moving on to the most transformative step of the entire project: applying the whitewash finish.
Assembly Checklist Before Finishing
- Confirm all joints are fully dry and glue has cured before applying any load or stress to the frame.
- Check for any gaps at joints and fill with wood filler, allowing it to dry and sanding smooth before painting.
- Inspect all screws to ensure they are fully countersunk and not proud of the surface.
- Do a final sand of the entire assembled bench with 120-grit sandpaper to unify the surface texture.
- Wipe down with a tack cloth to remove all dust before applying any paint or finish.
Applying the Whitewash Finish
The whitewash finish is what transforms this simple pine bench into a piece with genuine farmhouse soul. The classic DIY whitewash recipe is elegantly simple: mix one part white latex paint with one part water in a small container until thoroughly combined. This diluted mixture is thin enough to sink into the wood grain and show off the natural texture, knots, and character of the pine rather than sitting on top of the surface as a solid coat of paint would. The result is a luminous, layered finish that looks both aged and fresh at the same time — a balance that is the hallmark of good farmhouse style.
Apply the whitewash mixture with a wide, flat paintbrush, working in long strokes in the direction of the wood grain. Work in small sections — approximately 12 inches at a time — so the mixture does not dry before you have a chance to manipulate it. Immediately after brushing on the diluted paint, use a clean cotton cloth or an old t-shirt to wipe off the excess, rubbing in the direction of the grain. The wiping step is crucial: it prevents the finish from looking too opaque and allows the natural wood color and grain to show through in varying degrees of intensity, which gives the surface its characteristic depth and dimension.
Build up your whitewash in thin layers rather than trying to achieve full coverage in one application. Two to three coats, each wiped back while still wet, will give you a finish with beautiful variation and translucency. Pay extra attention to the scalloped edges of the apron and the decorative arch cutouts on the legs — these areas tend to collect more paint and can look heavier than the flat surfaces if not carefully wiped. Once you are happy with the depth of color, allow the bench to dry completely for at least four hours, then seal the entire piece with a coat of clear matte wax or a water-based matte polyurethane to protect the finish from everyday wear.
Whitewash Finish Variations to Consider
- For a more weathered look, lightly sand the dried whitewash with 220-grit sandpaper to reveal the raw wood beneath on edges and high points, mimicking natural wear patterns.
- Adding a small amount of raw umber craft paint to your whitewash mixture creates a warmer, more antique-toned finish that reads as vintage rather than crisp and coastal.
- A gray-tinted whitewash using light gray instead of white paint lends a more contemporary farmhouse look that works beautifully in modern interiors.
- For the most rustic effect, apply the first layer of whitewash, allow it to dry, then lightly distress all edges with sandpaper before applying a second, slightly heavier coat.
Styling and Decorating Your Finished Bench
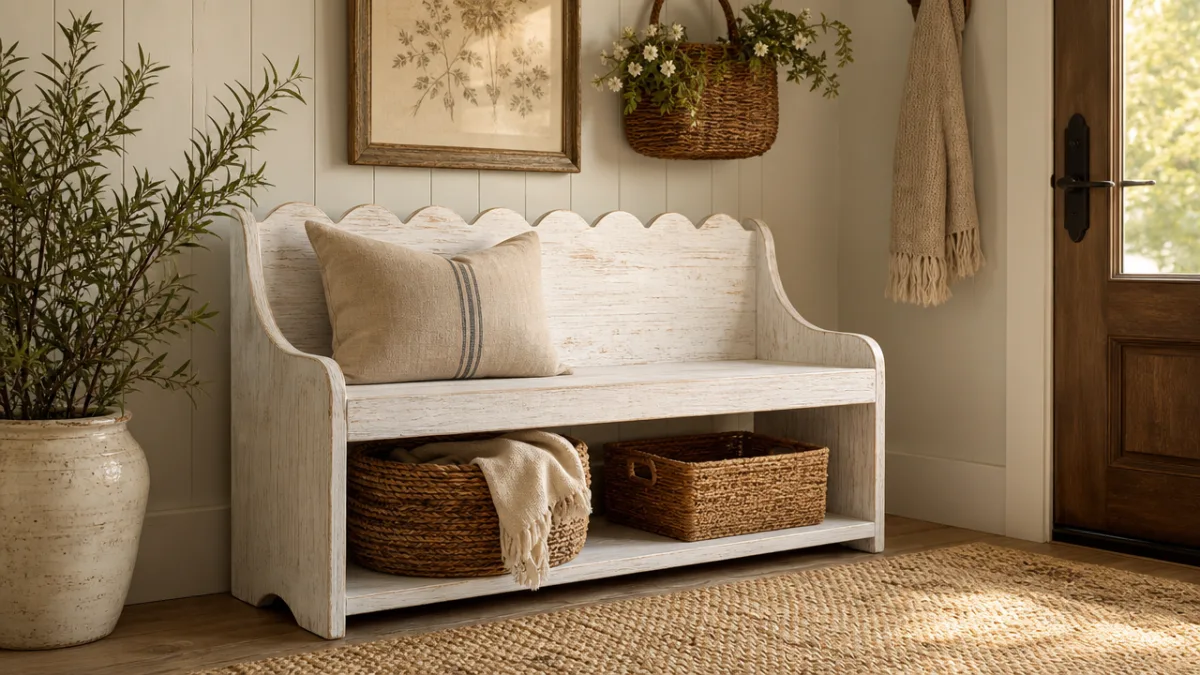
Once your bench is built and beautifully finished, the real fun begins: styling it within your home. A whitewashed scalloped bench is an incredibly versatile piece that adapts to a wide range of interior settings. In an entryway, it provides a practical perch for putting on shoes while a collection of woven baskets tucked underneath keeps scarves, gloves, and seasonal accessories organized. Topped with a linen throw pillow in a neutral stripe or a simple grain sack print, it immediately sets a welcoming, country-inspired tone for the rest of the home.
At the foot of a bed, this style of bench serves both aesthetic and functional purposes. It anchors the sleeping area and provides a surface for folding and laying out clothing at the start or end of the day. A chunky knit blanket casually draped over one end of the bench adds texture and warmth, while a small stack of books or a simple tray with a candle brings personality without clutter. The whitewashed finish coordinates effortlessly with white and cream bedding, and the farmhouse styling bridges the gap between rustic and refined that defines the popular modern farmhouse bedroom aesthetic.
In dining rooms or kitchen spaces, a bench of this style can replace one side of a traditional dining chair setup, creating a more relaxed and casual seating arrangement that feels gathered and lived-in. Style it alongside a farmhouse dining table and mix in a few mismatched wooden chairs on the opposite side for a collected, curated look. Adding a cushion upholstered in a durable outdoor fabric or a classic ticking stripe protects the seat surface and adds comfort for extended meals. No matter where you choose to place it, this bench will serve as a testament to what patient, thoughtful DIY craftsmanship can achieve.
Caring for Your Whitewashed Wood Bench Over Time
A well-built and properly sealed farmhouse bench can last for many years with minimal maintenance, but understanding how to care for the whitewash finish will help you keep it looking its best. Regular dusting with a soft, dry cloth is the most important daily maintenance step. Avoid abrasive cleaning pads or harsh chemical sprays, which can break down the matte sealant and cause the whitewash layer beneath to absorb moisture and discolor. For spills, blot immediately with a clean, slightly damp cloth and follow up with a dry one — never scrub at a fresh spill, as this can force liquid into the finish rather than lifting it away.
Over time, especially in high-use spots like an entryway or a dining area, the bench may show signs of wear along its top surface or on the front edge where hands and clothing regularly make contact. This natural aging is part of the bench’s charm, and many farmhouse enthusiasts embrace the gradual patina as evidence of a well-loved piece. If the wear becomes more than you prefer, the bench is easily refreshed: a light sanding, a single coat of fresh whitewash, and a new layer of protective sealant will bring it back to near-original condition in an afternoon.
Seasonally, it is worth applying a fresh coat of matte furniture wax to the entire bench to renew the protective layer and keep the wood hydrated. This is particularly important if the bench lives in a dry interior environment or near a heat source like a fireplace or radiator, where the wood can dry out and begin to show small surface cracks over time. A quality paste wax buffed to a low sheen will maintain the matte, natural look of the whitewash while providing meaningful protection against daily use. With this small investment of care each season, your handmade bench will remain a cherished centerpiece of your home for decades to come.
Quick Maintenance Summary
- Dust regularly with a soft, dry microfiber cloth to prevent particle buildup in carved details and scalloped edges.
- Blot liquid spills immediately and avoid saturating the wood surface with water during cleaning.
- Reapply a thin coat of matte furniture wax or water-based sealant once or twice a year to maintain protection.
- Touch up worn areas with diluted whitewash paint as needed, blending into surrounding areas for a seamless repair.
- Keep the bench away from prolonged direct sunlight, which can cause the whitewash to yellow slightly over many years.








What do you think?
It is nice to know your opinion. Leave a comment.