










How to Paint a Door Mat: A Complete Step-by-Step Guide
Introduction: Why Paint Your Own Door Mat?
Painting your own door mat might just be one of the best bang-for-your-buck home projects out there. Instead of hunting through stores for something that’s almost-but-not-quite right, you get to make exactly what you want — your colors, your design, your style. Bold geometric shapes, a cheerful “hello,” a detailed botanical print — honestly, the sky’s the limit when you’re the one holding the brush.
There’s also something genuinely satisfying about a handmade piece at the front door. Every time someone comes to visit, the first thing they see is something you created — something that says a little something about who you are and what your home feels like inside. It’s a small touch, but it lands. And fair warning: once you’ve made one, you’ll almost certainly want to make one for every season.
This guide covers the whole process from start to finish — choosing your materials, laying down your design, and sealing everything so it holds up for months. Even if you’ve never attempted a home craft project before, this one is very manageable. And if you’re a more experienced crafter, there’s plenty of room here to push things further and get as detailed as you like.
Gathering Your Materials and Tools
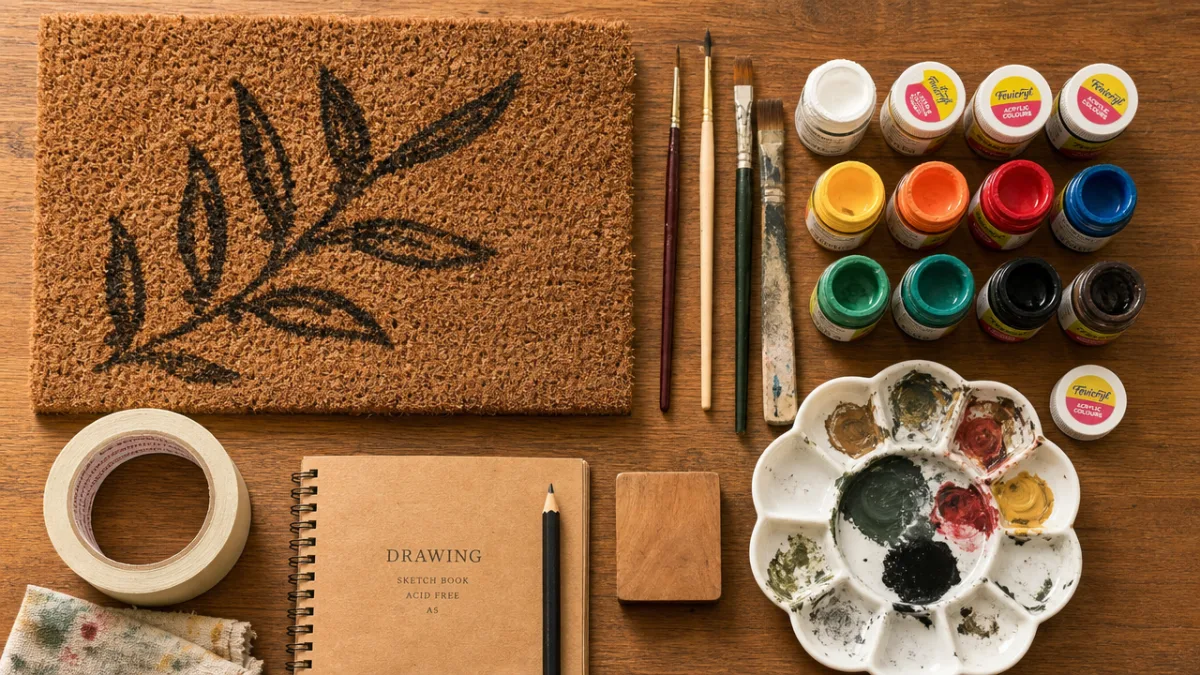
Getting all your supplies together before you start will save you a lot of headaches later. The mat itself is your most important decision. A natural coir mat — the kind made from coconut husk fibers — is the go-to for this project. The coarse, textured surface grips paint really well and gives the finished design a lovely, slightly rustic quality. You can find them at most home improvement stores, craft shops, or online for very reasonable prices.
For paint, outdoor latex or craft acrylic are both great choices. They dry quickly, bond well to natural fibers, and come in basically every color imaginable. Steer clear of oil-based paints — they tend to stay tacky on coir and don’t hold up well outside. If you’re planning a multi-color design, pick your palette ahead of time and make sure the colors work well together before you commit.
Beyond the mat and paint, you’ll want to round up a few other things before you get started:
- Painter’s tape or masking tape for creating clean, crisp lines
- A foam roller or stiff-bristled paintbrush for applying base coats
- Smaller detail brushes for lettering or intricate design work
- A stencil (store-bought or homemade from cardstock or acetate)
- A hard, flat surface to work on, such as a piece of cardboard or a drop cloth
- A sponge or stippling brush for applying paint through the stencil
- Outdoor Mod Podge or a clear outdoor sealant for finishing
- Paper towels and a cup of water for quick cleanup
Having everything laid out before you open a single paint bottle makes such a difference. The process stays smooth and fun instead of getting interrupted every five minutes because you forgot something across the room. Less scrambling, more creating.
Preparing Your Mat and Work Surface
Prep work isn’t the glamorous part, but it genuinely makes or breaks the final result. Start by giving your coir mat a good shake or a few firm taps to knock out any loose dirt or dust hiding in the fibers. A stiff brush works well for this too. Paint won’t stick properly to a dirty surface, and anything trapped underneath can cause uneven texture or peeling later on — so this step is worth the extra two minutes.
Once the mat is clean, set it up on your work surface somewhere with good airflow. Painting outside on a calm, dry day is ideal — fumes can build up indoors and the mat needs air moving around it to dry properly between coats. If you’re working inside, open some windows, crack a door, and keep a fan running nearby. Lay down a drop cloth, some old newspaper, or a sheet of cardboard underneath to catch any drips.
If you’re using a stencil, get it positioned and secured before any paint comes out. Press it firmly onto the mat and tape around the edges to hold it in place. The bumpy texture of coir means there will be small gaps where paint can sneak underneath, so the more contact you get between the stencil and the mat, the cleaner your lines will be. For really detailed stencils, a light spritz of spray adhesive on the back of the stencil before you place it can help it hug the surface and cut down on bleed.
Applying the Base Coat and Initial Design
If your design needs a solid background color, start there with a foam roller. The roller gives you the most even coverage on a coarse coir surface and actually pushes the paint down into the fibers rather than just sitting on top. Pour a bit of paint into a roller tray, load the roller evenly, and apply it with firm, consistent pressure. Expect to do two or three coats to get a fully opaque base — lighter colors especially need the extra layers to cover the natural tan of the coir.
Let each coat dry completely before adding the next. This is where a lot of beginners get impatient and end up with streaky, uneven coverage from applying wet paint over wet paint. Most craft acrylics and outdoor latex paints are dry to the touch in thirty to sixty minutes under normal conditions, though humidity and temperature can slow things down. When in doubt, just wait the full hour — it’s worth it.
Once the base is fully dry, you can move on to the design. If you’re stenciling, secure the stencil in place and load a sponge or stippling brush with a small amount of paint — dab off the excess on a paper towel first. Then apply the paint using a straight up-and-down dabbing motion rather than sweeping strokes. That stippling action is what keeps paint from working its way under the stencil edges, which is the main culprit behind blurry, smudged results. Build up the color in thin layers and be patient with it.
For freehand designs or painted lettering, a slightly thicker paint consistency works better on the rough surface. It also helps to sketch your design first using tailor’s chalk or a chalk pencil, which brushes away cleanly once you’re done. Reach for a stiff-bristled brush over a soft, flexible one — softer brushes tend to drag and skip across the raised fibers instead of laying paint down evenly.
Adding Details, Lettering, and Multiple Colors
Once your main design is in place and dry, the detail work is where things really come together. Thin outlines around shapes, small dot accents made with the end of a brush handle, a pop of a second color for depth — these are the touches that take a painted mat from “fun craft project” to something that looks genuinely intentional. Work with small amounts of paint and take your time here. There’s no rush.
Lettering is probably the most popular element in painted mat designs — everything from “Welcome” and “Hello” to seasonal greetings and family names. If painting letters freehand feels a little nerve-wracking, you can print your text in any font you like, then transfer it to the mat using the carbon paper method or cut it into a stencil from acetate sheet. It takes a bit of extra prep, but the results look clean and polished even if hand lettering isn’t really your thing.
When you’re working with multiple colors, go lightest to darkest and let each color dry fully before moving on. This keeps everything looking bright and clean instead of muddy. When two colors need to sit right up against each other, tape off the boundary with painter’s tape while you paint one side, peel the tape once that section is dry, then paint the other side. That’s the trick to getting those sharp, graphic edges that look so professional.
Don’t get too discouraged if the fine detail work looks a little rough up close. The texture of coir naturally softens the edges of hand-painted lines, and that’s actually part of what gives these mats their charm. Take a step back and look at it from a few feet away — that’s the distance it’ll be seen from most of the time — and you’ll probably find it looks much better than you thought. Trust the process and resist the urge to over-fix things.
Sealing and Protecting Your Finished Design
Sealing is not optional, especially for mats that are going to live outside and deal with foot traffic, rain, sun, and temperature swings. Without it, even a beautifully painted mat can start chipping and fading within a few weeks. A good outdoor sealant is what stands between your hard work and the elements, and it’s genuinely worth the extra step.
Outdoor Mod Podge is a go-to for a lot of crafters because it’s easy to find, simple to apply, dries completely clear, and does a solid job protecting against moisture and light wear. Apply it generously over the whole painted surface with a wide foam brush, working it into the texture of the fibers rather than just skimming the top. Give the first coat at least thirty minutes to dry, then add a second. Some people do three or four coats for mats that are going to see a lot of heavy use, and that’s not a bad idea.
If you’d rather use a spray sealant, a UV-resistant clear acrylic spray varnish is a great alternative. Sprays are especially handy for mats with really fine or delicate details, since there’s no risk of dragging a brush across wet paint and smearing something. Hold the can about twelve inches from the surface and apply it in thin, even passes. Let each coat dry before adding the next, and make sure you’re working somewhere with good ventilation — the manufacturer instructions will spell out the specifics.

Care, Maintenance, and Seasonal Inspiration
With a good seal on it, your mat doesn’t need a lot of fussing over — but a little basic maintenance goes a long way. Shake or tap it regularly to knock out dirt and debris from between the fibers. If it gets soaked, let it dry completely somewhere sunny and well-ventilated before putting it back at the door, since coir that stays damp for too long can develop mold or mildew. For surface cleaning, a stiff brush and a little soapy water will do the job — just don’t soak it and definitely don’t put it in the washing machine.
The biggest threat to painted outdoor surfaces is sustained direct sunlight, which will fade colors over time even with sealant. If you can position your mat under a covered porch or entryway where it gets some shade during the day, it’ll stay vibrant a lot longer. If it does start to fade, touching it up is pretty simple — lightly sand the area, repaint with your original colors, let it dry, and reseal. Once it’s back in place, a little patchiness is usually not noticeable at all.
One of the best parts of learning this skill is realizing you can rotate mats with the seasons. A pumpkin design for fall, snowflakes for winter, a burst of flowers for spring, something bold and tropical for summer. Coir mats are cheap enough that building up a small collection to swap out through the year is totally realistic, and it makes your entryway feel like it’s always been freshened up for whatever’s coming next.
These also make really wonderful gifts. A door mat painted with someone’s family name, a phrase that means something to them, or colors chosen just for their home is a thoughtful, personal present that costs very little but feels like a lot. Pair it with some outdoor planters or a wreath and you’ve got a complete entryway gift set that any new homeowner would genuinely love.








What do you think?
It is nice to know your opinion. Leave a comment.