










How To Make Beautiful Leaf Butterfly Art: A Complete Creative Guide
Introduction to Leaf Butterfly Art
Leaf butterfly art is one of the most enchanting and accessible forms of nature-inspired craft that anyone can explore, regardless of artistic experience. By transforming ordinary leaves gathered from your backyard, local park, or woodland walk into delicate, lifelike butterfly shapes, you create something that bridges the natural world and human creativity in a truly magical way. This art form has deep roots in botanical illustration and nature journaling traditions, yet it remains wonderfully approachable for children and adults alike.
What makes leaf butterfly art so special is the inherent beauty already present in the raw materials. Leaves come in an astonishing variety of shapes, sizes, textures, and colors — particularly in autumn when golden, crimson, and russet tones transform a simple walk into a treasure hunt. Each leaf carries its own unique vein patterns, subtle gradations of color, and organic imperfections that no human hand could replicate. When you arrange these leaves into butterfly forms, those natural characteristics become the very details that give the artwork its life and authenticity.
Beyond its aesthetic appeal, leaf butterfly art is also a deeply mindful and grounding activity. The process of collecting leaves encourages you to slow down, observe the world around you, and develop a genuine appreciation for the intricate designs nature produces without any deliberate intention. Whether you are creating this art as a solo meditative practice, a family weekend project, or a classroom activity, the experience itself is as rewarding as the finished piece. This guide will walk you through every step, from gathering your materials to displaying your completed artwork.
Gathering and Preparing Your Leaves
The foundation of any beautiful leaf butterfly artwork lies in the quality and variety of leaves you collect. The best time to gather leaves for this craft is during autumn, when deciduous trees shed foliage in spectacular colors, though interesting green leaves collected in summer can be equally striking when pressed and dried. Look for leaves in a wide range of sizes — you will need larger leaves for the upper wings of your butterfly and smaller, more delicate leaves for the lower wings. Variety is everything here, so resist the temptation to collect only one type.
When selecting leaves, examine them carefully for interesting characteristics. Leaves with prominent vein structures, unusual lobed edges, or natural color variations make the most visually compelling butterfly wings. Maple leaves, oak leaves, sweet gum, birch, and ginkgo are all excellent choices due to their distinctive shapes. Fern fronds can serve as wonderful body elements or antennae. Avoid leaves that are already decomposing, torn beyond repair, or heavily damaged by insects, though minor imperfections often add authentic character to the finished piece.
Once collected, your leaves must be pressed and dried before they can be effectively arranged into butterfly shapes. Place your gathered leaves between sheets of absorbent paper — newspaper works well — and stack several heavy books on top. Leave them undisturbed for at least one to two weeks, checking occasionally to replace damp paper if needed. Properly pressed leaves will lie completely flat, retain much of their original color, and become slightly papery in texture, making them easy to handle and arrange without crumbling. Patience during this stage will reward you with far superior materials to work with.
- Collect leaves in a wide range of sizes, from very small accent pieces to broad statement leaves for upper wings
- Choose leaves with interesting vein patterns, edge shapes, and natural color variation for maximum visual impact
- Press leaves between absorbent paper under heavy books for one to two weeks until completely flat and dry
- Store pressed leaves in labeled envelopes or between sheets of wax paper until you are ready to create your artwork
- Gather extra leaves of each type since some may break during handling or not suit your final composition

Materials and Tools You Will Need
Creating leaf butterfly art requires only a modest collection of tools and supplies, most of which you likely already have at home or can find easily at any craft store. The simplicity of the materials list is part of what makes this craft so wonderfully accessible. At its most basic, you need your pressed and dried leaves, a sturdy background surface such as watercolor paper or cardstock, and an adhesive to secure the leaves in place. From this minimal foundation, you can build as elaborate or as simple a project as you desire.
For the background, choose a paper or canvas that complements your leaves rather than competing with them. Cream or off-white watercolor paper provides a classic, botanical-illustration feel that lets the natural colors of your leaves take center stage. Dark backgrounds — deep navy, forest green, or matte black cardstock — create a dramatic contrast that makes autumn-colored leaves glow with almost stained-glass luminosity. You might also consider using handmade paper with visible fibers and texture for a more organic, artisanal aesthetic that harmonizes beautifully with natural leaf materials.
Your adhesive choice matters significantly for both the process and the longevity of your finished artwork. PVA glue, also known as white craft glue, is an excellent option because it dries clear, remains flexible enough to prevent cracking, and creates a strong bond with both paper and dried plant material. A glue stick can work for lighter leaves but may not hold heavier or more rigid specimens securely over time. Mod Podge applied as a final sealant coat over the entire finished piece protects your artwork from humidity and dust while giving the surface a unified, polished appearance. Tweezers, a small paintbrush for applying glue precisely, and a pencil for lightly sketching butterfly outlines are also tremendously helpful tools.
- Pressed and dried leaves in multiple sizes, shapes, and colors
- Sturdy background paper or canvas — watercolor paper, cardstock, or black mount board
- PVA craft glue or archival-quality adhesive for permanent bonding
- Mod Podge or similar sealant for protecting the finished artwork
- Fine-tipped tweezers for precise placement of delicate leaf pieces
- A small paintbrush for applying glue to leaf surfaces
- Pencil for lightly sketching butterfly wing outlines as placement guides
- Optional: fine-point pens, watercolor paints, or metallic markers for added detail
Designing and Arranging Your Butterfly
Before committing any leaf to glue, spend significant time in the design and arrangement phase. This is where your creative vision takes shape, and the time invested here will pay enormous dividends in the quality of your finished piece. Begin by lightly sketching a butterfly outline on your background paper using a soft pencil. Study reference photographs of real butterflies to understand the proportional relationships between upper and lower wings, the slender body at the center, and the characteristic symmetry that defines the butterfly silhouette. Real butterflies come in hundreds of forms, so do not feel constrained to any single species.
Lay your pressed leaves on the background without any glue first, experimenting with different combinations and arrangements. Think of the upper wings as your opportunity to use your largest and most dramatic leaves — a broad maple leaf with gorgeous autumn coloring can serve as a single upper wing, with its stem tucked beneath the central body area. Smaller, more delicate leaves work beautifully as lower wings, while tiny leaves, seeds, or slender twigs can form the body and antennae. Move elements around freely at this stage, stepping back frequently to assess the overall composition from a distance as you would when viewing a finished artwork.
Symmetry is the key visual principle in butterfly design, but perfect symmetry can actually feel mechanical and lifeless when working with organic natural materials. Instead, aim for near-symmetry — two leaves of similar size and shape that are not identical, positioned to mirror each other while retaining their individual character. This is precisely the effect that makes leaf butterfly art feel so alive and authentic rather than manufactured. Pay attention to how the veins of paired leaves relate to each other, since veins that radiate outward from the wing’s center create a sense of movement and energy that brings the butterfly to life on the page.
Color harmony within your butterfly composition deserves careful thought. You might choose a monochromatic approach using leaves in varying shades of a single color family — all the warm golds and ambers of autumn, for instance — which creates a sophisticated, unified elegance. Alternatively, a complementary color pairing such as russet-orange leaves against forest-green accents produces vibrant visual tension that catches the eye immediately. Some artists prefer to mix dried green summer leaves with vivid autumn specimens to suggest the way actual butterfly wings combine multiple colors and patterns. Whatever palette you choose, ensure that the color relationships feel intentional and considered rather than random.
Step-by-Step Assembly Process
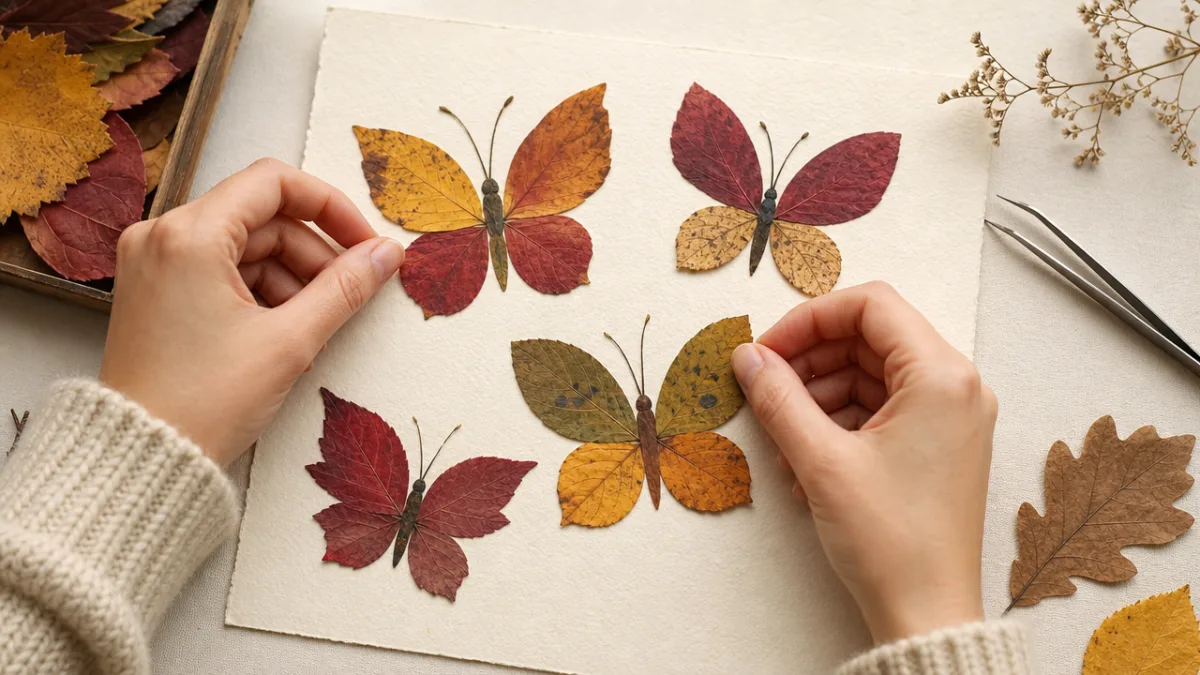
Once you are satisfied with your dry-run arrangement and have a clear vision of your composition, you are ready to begin the gluing process. Work systematically from the background elements forward, securing the pieces that will sit beneath others first. If your design includes any overlapping leaves — for example, a small leaf layered over a larger one to create depth and dimension in the wing — glue the bottom layer first and allow it to set before proceeding. Use your small paintbrush to apply a thin, even coat of PVA glue directly to the back surface of each leaf, taking care to coat all the way to the edges so that they bond completely rather than lifting over time.
Press each glued leaf firmly onto your background paper, holding it in place with gentle pressure for thirty to sixty seconds. If your leaf has a tendency to curl at the edges — a common challenge with larger or thicker specimens — place a piece of wax paper over the leaf and set a small heavy object on top while the glue cures. Work through your composition methodically, gluing one element at a time and allowing adequate drying time between layers. Rushing this stage is the most common mistake beginners make, and it invariably results in shifted elements, wrinkled leaves, and a composition that fails to achieve the precision you planned during the arrangement phase.
The body of your butterfly deserves special attention, as it is the visual anchor that holds the entire composition together and gives the piece its identity as a butterfly rather than simply an arrangement of leaves. A slender twig, a rolled piece of brown paper, a carefully folded leaf, or even a dried grass stem can serve effectively as the body. Position this element last, laying it vertically at the center point where the wings meet, covering the inner edges of your wing leaves and completing the illusion of a living insect. The antennae can be formed from fine twigs, grass stems, or even painted lines extending upward from the head in graceful curves.
After all elements are securely bonded and completely dry — ideally leaving your piece overnight before proceeding — apply a protective coat of Mod Podge or a similar archival varnish over the entire surface. Use a wide, soft brush to apply the sealant in smooth, even strokes, working in one direction to avoid disturbing or shifting any of your leaf elements. This coating serves multiple purposes: it unifies the surface appearance, protects the delicate dried leaves from moisture and physical damage, and helps preserve the colors against fading over time. A matte finish sealant maintains the natural, organic quality of the leaves, while a gloss finish creates a more polished, gallery-ready look.
Creative Variations and Advanced Techniques
Once you have mastered the fundamental leaf butterfly, a whole world of creative variations opens up before you. One of the most popular advanced approaches is the mixed-media butterfly, in which pressed leaves are combined with other natural elements such as flower petals, seed pods, bark fragments, and moss to create richly textured compositions that go far beyond simple leaf arrangements. A single butterfly might incorporate the delicate translucency of a pressed honesty seed pod, the velvety texture of a dried rose petal, and the graphic simplicity of a pressed fern frond, all working together to create something that feels both natural and deliberately designed.
Another compelling variation involves creating entire scenes or collections of butterflies rather than a single isolated specimen. A group of three butterflies of different sizes arranged as though in flight across a large piece of watercolor paper creates a sense of movement and narrative. You might pair your leaf butterflies with pressed flower arrangements, creating a complete botanical tableau that resembles an antique naturalist’s collection. Working at very small scale — creating tiny butterflies from the smallest leaves you can find and arranging them in a delicate cluster — requires tremendous patience but produces results of extraordinary delicacy and refinement.
Adding painted details to your leaf butterflies can elevate them to a new level of sophistication and allow for greater artistic expression. Using fine watercolor washes applied over dried leaves, you can subtly shift colors, add the suggestion of wing patterns, or unify leaves of disparate colors into a more cohesive composition. Metallic gold or silver markers can be used to trace the major veins of your leaf wings, creating an effect that references both natural butterfly wing patterns and traditional decorative art. White or cream paint applied with a very fine brush can add the small circular eye-spots that appear on many real butterfly species, immediately making your piece more recognizably specific and zoologically informed.
- Create collections of multiple butterflies in varying sizes to suggest movement and establish visual narrative across the composition
- Combine leaf butterflies with pressed flowers, seed pods, and botanical specimens for rich mixed-media natural arrangements
- Use watercolor washes over dry leaves to unify color palettes and add subtle painted wing patterning
- Apply metallic markers along vein lines to add luminosity and reference traditional decorative art aesthetics
- Experiment with working at miniature scale using the smallest leaves you can find for delicate, jewel-like results
- Create seasonal series using leaves gathered across different seasons to document the changing colors of your local landscape
Displaying and Preserving Your Finished Artwork
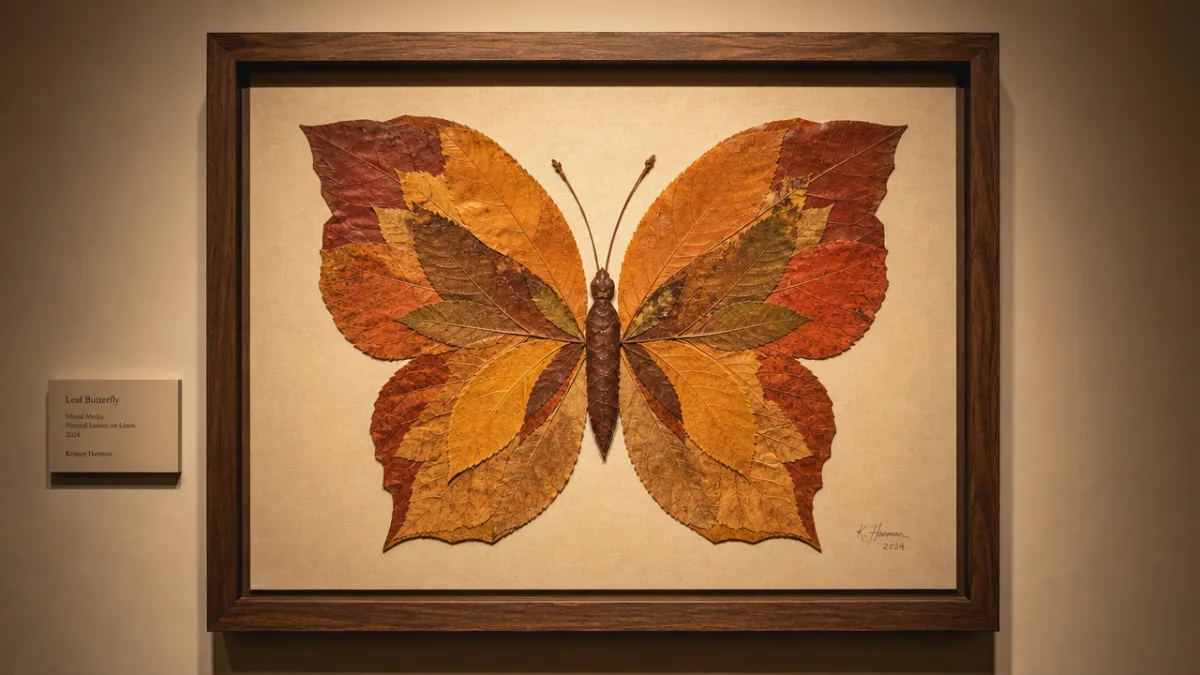
A beautifully executed leaf butterfly artwork deserves thoughtful display that protects its delicacy while showcasing its natural beauty. Framing is almost always the best option for long-term preservation and display. Choose a frame with a deep enough rebate to accommodate the slight three-dimensional texture of your leaf artwork without the glass pressing directly onto the surface, which could damage the leaves over time and flatten the subtle dimensionality that gives the piece so much of its character. A simple, natural wood frame in oak or walnut complements the organic materials of the artwork without competing for visual attention.
The placement of your framed artwork within your home significantly affects both its visual impact and its longevity. Avoid hanging leaf butterfly art in direct sunlight, as UV radiation will cause the natural colors of dried leaves to fade considerably over time, even when protected behind glass. A well-lit wall that receives indirect natural light, or gentle artificial lighting such as a picture light mounted above the frame, will display your artwork beautifully while protecting it from harmful UV exposure. Museum-quality UV-protective glass is available at framing shops and represents a worthwhile investment for any piece you intend to display long-term.
Beyond traditional wall framing, leaf butterfly art offers numerous other display possibilities that suit different spaces and aesthetics. Mounting your work in a shadow box frame adds depth and drama, particularly effective when your butterfly composition incorporates elements of varying thickness. Small leaf butterfly pieces look charming displayed in sets of three or five on a floating shelf, propped in simple frames of varying sizes. You might also consider creating leaf butterfly artwork on sturdy cards to use as handmade gifts, seasonal decorations, or keepsake botanical cards that the recipient can frame themselves. The handcrafted nature of these pieces makes them particularly meaningful as personal gifts for nature lovers.
For those who create leaf butterfly art regularly as an ongoing practice, developing a proper archival storage system for both your pressed leaves and finished artwork is enormously valuable. Store flat finished pieces in large portfolios between sheets of acid-free tissue paper, which prevents any residual oils or acids in the paper from causing long-term discoloration. Keep a seasonal journal documenting where you collected particular leaves, the date and conditions, and any special characteristics of that collection. Over time, this practice transforms leaf butterfly art from a simple craft into something approaching a genuine naturalist’s discipline — a sustained, attentive engagement with the living world around you that produces beautiful artifacts of that relationship.








What do you think?
It is nice to know your opinion. Leave a comment.