










Fabric Covered Pegboard: Adding Texture, Style, and Function to Any Space
The Creative Appeal of Fabric Covered Pegboard
Pegboard has long been a staple of organized spaces, from garages and workshops to craft rooms and home offices. But in recent years, a creative twist on this utilitarian material has taken the world of interior design and DIY decor by storm: wrapping or covering pegboard in fabric. This simple yet transformative technique elevates a functional organizing tool into a genuine design statement, adding warmth, texture, and personality to any wall it adorns. Whether you prefer bold prints, soft neutrals, or richly textured wovens, fabric covered pegboard offers an accessible and affordable way to bring your aesthetic vision to life.
The beauty of this project lies in its versatility. Unlike painted pegboard, which adds color but little dimension, fabric introduces tactile quality and visual depth that makes a wall feel intentional and curated. A linen-covered pegboard in a home studio reads as sophisticated and calm, while a vibrant floral print in a craft room feels playful and inspiring. The choice of fabric becomes part of your decor language, communicating your style even before a single hook or accessory is added. This makes the project appealing not just to seasoned DIYers but also to anyone looking for a weekend upgrade with significant visual payoff.
Beyond aesthetics, fabric covered pegboard serves the same organizational purposes as its bare counterpart. Hooks, bins, shelves, and accessories all attach to the standard pegboard holes just as easily through most lightweight to medium-weight fabrics. This means you lose nothing in functionality while gaining everything in style. It is the rare home improvement project that truly delivers on both fronts simultaneously, making it a favorite among interior decorators, bloggers, and craft enthusiasts alike. The low cost of materials and the relatively short time investment make it especially attractive for renters and homeowners on a budget.
Choosing the Right Fabric for Your Pegboard Project
Selecting the right fabric is arguably the most important decision you will make in this project, and it deserves careful thought. The fabric you choose will set the tone for the entire space, so consider your existing color palette, the mood you want to create, and the practical demands of the environment. For high-traffic areas or spaces that accumulate dust, tightly woven fabrics are preferable because they resist snagging and are easier to clean. Cotton canvas, duck cloth, and linen blends are all excellent choices that offer both aesthetic appeal and durability. For a more luxurious look, upholstery-weight fabric adds incredible texture but may require a heavier-duty adhesive or stapling technique.
Pattern scale matters more than many beginners anticipate. A large-scale botanical print might look stunning in the fabric store but can feel overwhelming when stretched across an entire pegboard panel, especially if the board is relatively small. Conversely, a tiny allover pattern may visually disappear at a distance, losing its intended effect. As a general guideline, medium-scale patterns tend to translate most successfully from bolt to board. Geometric prints, simple stripes, and tone-on-tone textures are perennial favorites because they complement rather than compete with the items you plan to hang on the pegboard. Swatching against your wall paint and existing furniture before committing is always a wise step.
You should also consider the weight and drape of the fabric in relation to how you plan to attach it. Lightweight cotton voile or muslin can work beautifully for a softer, more ethereal look, but these materials require more careful application to avoid bunching or transparency issues. Medium-weight fabrics are the sweet spot for most DIYers because they are forgiving during application, cover the board evenly, and hold their position reliably over time. If you have your heart set on a heavier fabric, consider whether the pegboard will still be functional — very thick fabrics can sometimes impede hook insertion, so test your hooks through a fabric sample before purchasing yards of material.
- Cotton canvas and duck cloth: durable, widely available, easy to work with, and accepts hooks without difficulty.
- Linen and linen blends: offer a sophisticated, natural texture that suits minimalist and Scandinavian-inspired interiors beautifully.
- Upholstery fabric: provides rich texture and a high-end look, but verify hook compatibility before committing to this option.
- Quilting cotton: offers endless pattern options and is budget-friendly, though it may show wear more quickly in busy workspaces.
- Burlap or jute: delivers a rustic, farmhouse-style aesthetic and is extremely inexpensive, making it ideal for large pegboard installations.
Materials and Tools You Will Need
Gathering your materials before you begin is essential for a smooth and enjoyable project experience. The core materials are straightforward and easy to source from any hardware store or craft retailer. You will need a sheet of standard pegboard in your desired size, available at most home improvement stores in a range of dimensions. Additionally, you will need your chosen fabric cut slightly larger than the pegboard to allow for wrapping around the edges — approximately two to three inches of extra fabric on each side is the standard recommendation. Fabric adhesive spray, a staple gun with fine staples, or both will serve as your attachment method depending on your preferred technique and the weight of your chosen fabric.
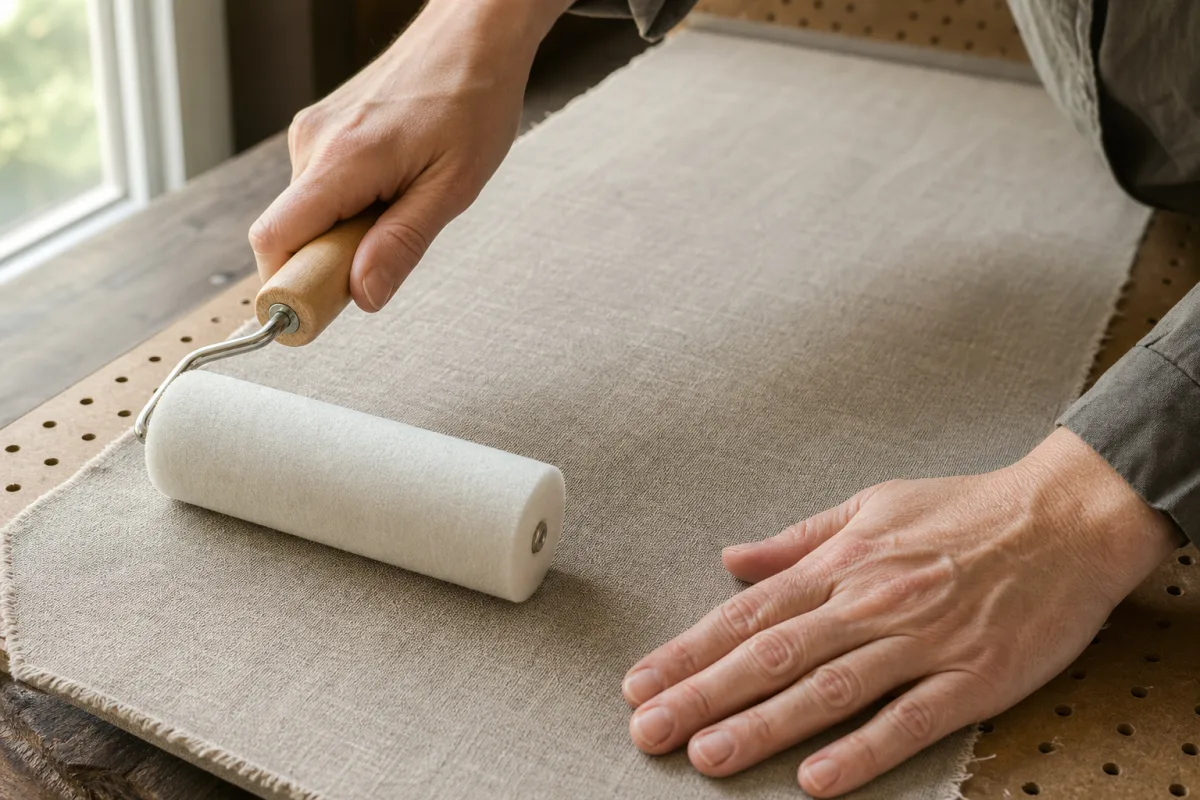
Beyond the core materials, a few additional tools will make the process significantly easier. A foam roller or brayer helps smooth fabric onto adhesive-treated surfaces without introducing air bubbles or wrinkles. Sharp fabric scissors are non-negotiable — dull scissors will fray edges and make clean cuts nearly impossible, leading to a messy finished product. A ruler or measuring tape ensures your fabric is cut straight and centered on the board. If you plan to hang the finished pegboard on a wall, wall anchors and screws appropriate for your wall type are essential, and pegboard standoffs — small spacers that hold the board slightly away from the wall — are strongly recommended to allow hook insertion and accessory attachment.
For those who want a particularly polished result, a few additional finishing touches are worth considering. Iron-on hem tape can be used to create neat, folded edges around the back of the board before stapling, preventing fraying over time. A piece of thin batting or foam placed between the fabric and the board creates a padded, upholstered effect that looks exceptionally refined. Decorative trim, ribbon, or washi tape applied along the edges of the board can frame the finished piece beautifully and cover any raw fabric edges visible from the front. These additions are optional but can elevate the project from a functional DIY to something that genuinely looks like a professionally designed piece.
- Pegboard sheet in your desired size (standard, tempered, or colored varieties are all suitable).
- Fabric cut two to three inches larger than the pegboard on all sides.
- Fabric adhesive spray or a staple gun with fine staples for attachment.
- Foam roller or brayer to smooth fabric and eliminate bubbles during application.
- Sharp fabric scissors for clean, precise cuts.
- Pegboard standoffs and appropriate wall hardware for installation.
- Optional: thin batting, iron-on hem tape, and decorative trim for a polished finish.
Step-by-Step Instructions for Covering Your Pegboard
Begin by preparing your workspace and your materials. Lay the pegboard flat on a clean, dry surface — a large table or the floor works well. Iron your fabric to remove any creases or wrinkles, as these will be nearly impossible to smooth out once the fabric is adhered to the board. Center the pegboard on the wrong side of your fabric, leaving equal amounts of fabric extending beyond each edge. Use a ruler to confirm that the board is positioned squarely and that the fabric pattern, if any, is running straight and centered as you intend it to appear on the finished piece. Taking time at this preparation stage will save you frustration during the actual application process.
If you are using fabric adhesive spray, apply an even coat to the front face of the pegboard, working in sections to prevent the adhesive from drying before the fabric is applied. Carefully flip the board onto the fabric, pressing it down firmly and smoothing from the center outward toward the edges to push out any air pockets. Use your foam roller to apply consistent pressure across the entire surface. Allow the adhesive to set for the manufacturer’s recommended time before proceeding. If you are skipping adhesive and going straight to a stapled finish, position the board on the fabric, fold one edge of fabric over to the back, pull it taut but not so tight that it distorts the pattern, and staple it in place every two to three inches.
Work around the board in an organized manner, doing opposite sides in pairs — front to back, then left to right — just as you would when stretching a canvas. This approach keeps the fabric tension even and prevents puckering at the corners. Speaking of corners, they require the most attention. Fold the corner fabric neatly, mitering it as you would when wrapping a gift or making a bed with hospital corners, then staple securely. Trim away any excess fabric bulk at the corners to reduce thickness. Once all edges are secured, flip the board over to admire the front and check for any areas that appear loose, wrinkled, or uneven. Make any necessary adjustments before the adhesive fully cures or while staples can still be repositioned.
The final step before installation is to locate the pegboard holes through the fabric. In most cases, the fabric will have compressed slightly into the holes rather than covering them completely, making them visible from the back. Use a small awl, seam ripper, or the tip of a pencil to gently poke through the fabric at each hole location, ensuring that the holes are clear and accessible for your hooks and accessories. Be careful not to tear the fabric — a gentle, twisting motion works better than direct puncturing force. Once all holes are cleared, your fabric covered pegboard is ready for installation on the wall and for the fun part: styling and organizing.
Styling and Organizing Your Fabric Covered Pegboard
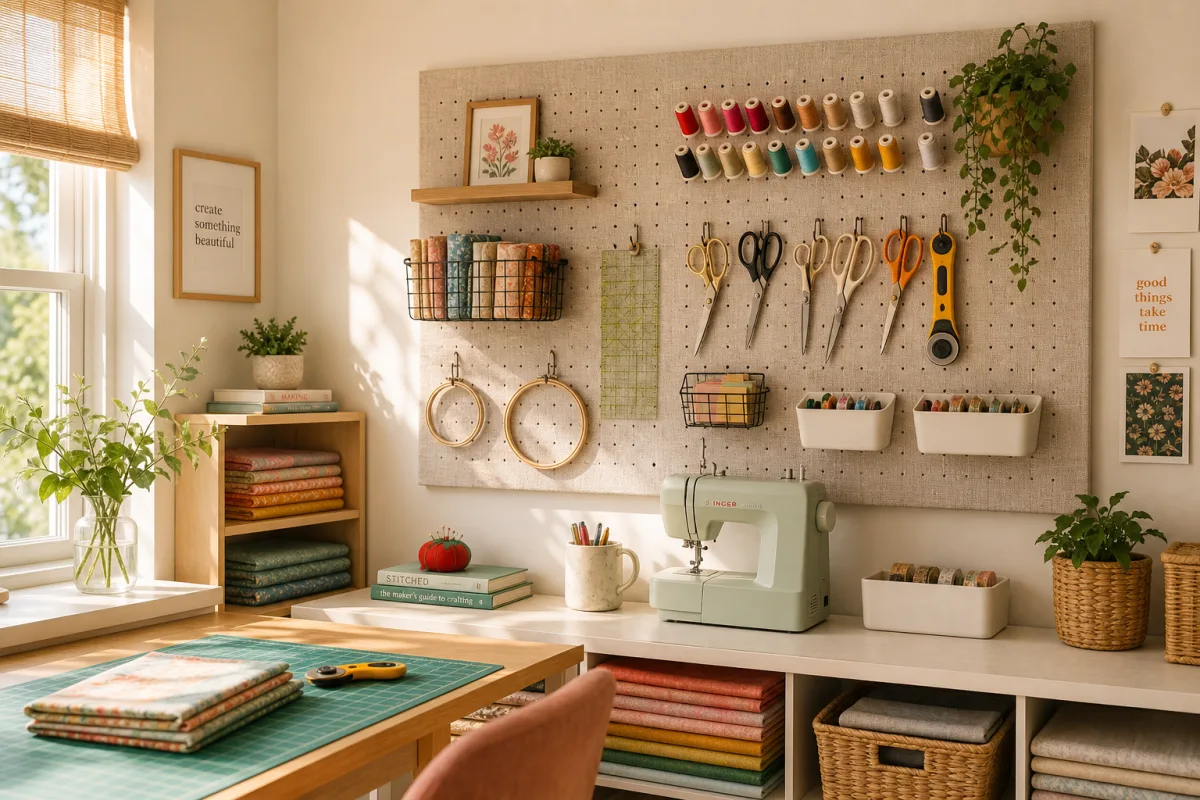
Once your fabric covered pegboard is mounted on the wall, the real creative work begins. The way you style and organize the board will determine whether it functions as a purely practical tool or as a genuine focal point of the room. Consider the items you plan to hang and think about them not just as functional objects but as visual elements in a composition. Mixing different types of hooks — straight hooks, double hooks, and J-hooks — creates visual interest and accommodates a range of item sizes. Pegboard shelves and bins add three-dimensional layering that makes the arrangement feel dynamic and intentional rather than flat and utilitarian.
Color coordination between your items and your fabric is a simple but effective strategy for achieving a cohesive, design-forward look. If your fabric is a soft blush linen, consider using brass or gold hardware and hooks alongside white ceramic containers for a warm, refined palette. A bold graphic fabric might call for pops of matching color in your accessories — a few items in the dominant print colors will tie the look together without requiring everything to match exactly. Plants are a wonderful addition to pegboard displays, as trailing varieties like pothos or string of pearls can be hung in small pots or macrame hangers, softening the geometry of the arrangement and bringing life to the wall.
Functionality should always remain a core consideration even as you pursue a beautiful aesthetic. Arrange items you use most frequently at eye level and within easy reach. Group related items together — all writing tools in one zone, all reference materials in another — so the board works as efficiently as possible. Leave intentional negative space in parts of the arrangement to prevent the display from feeling cluttered or overwhelming. A well-edited pegboard with breathing room between groupings reads as sophisticated and deliberate, while an overfilled board can undermine even the most beautiful fabric choice. Periodically refreshing the arrangement, swapping items in and out as your needs change, keeps the display feeling current and relevant.
Creative Variations and Advanced Ideas
Once you have mastered the basic technique of fabric covered pegboard, a world of creative variations opens up. One popular approach involves using multiple smaller pegboard panels covered in coordinating or contrasting fabrics, arranged as a gallery-wall-style grouping rather than a single large board. This modular approach allows you to mix patterns — perhaps a stripe alongside a floral alongside a solid texture — in a way that is visually exciting without being chaotic. Each panel can serve a different organizational purpose, and the grouping as a whole becomes a genuine artwork that happens to also be useful.
Another variation that has gained significant popularity is the fabric covered pegboard headboard. A large panel of pegboard wrapped in a soft, luxurious fabric and mounted above a bed serves as both a decorative headboard and a functional bedside organizer. Reading lights, small shelves for books and glasses, charging hooks for devices, and even small planters can all be attached, turning the headboard into a complete bedside management system. This is particularly appealing in smaller spaces where every surface and every square foot must work hard. The padded, upholstered appearance of a fabric covered board suits the soft, intimate aesthetic of a bedroom far better than bare pegboard ever could.
For the most ambitious DIYers, fabric covered pegboard can be used to create an entire accent wall or room divider. Floor-to-ceiling pegboard panels covered in a single continuous fabric create a dramatic, immersive effect that rivals any wallpaper installation. Used as a freestanding room divider in an open-plan space, fabric covered pegboard panels provide both visual separation and organizational storage on both sides. This application works particularly well in studio apartments, open-plan home offices, and creative workspaces where the need for defined zones is real but the desire for permanent walls is absent. The result is a flexible, functional, and genuinely beautiful architectural feature.
- Gallery-wall groupings of multiple small panels in coordinating fabrics for a curated, modular look.
- Fabric covered pegboard headboards that combine decorative and organizational functions in the bedroom.
- Seasonal fabric swaps — changing the fabric to reflect seasonal palettes keeps the display feeling fresh year-round.
- Chalkboard fabric covering for a functional writable surface combined with pegboard organization.
- Floor-to-ceiling accent walls or freestanding room dividers for maximum visual impact and storage capacity.
Maintenance, Updates, and Long-Term Care
One of the most practical advantages of fabric covered pegboard is how easy it is to maintain and update over time. Unlike wallpaper or painted surfaces, which require significant effort to change, a fabric covered pegboard can be refreshed with a new fabric in an afternoon. Simply remove the hooks and accessories, detach the board from the wall, and either unstaple the existing fabric or cut and re-cover the board with a fresh piece. This ease of updating makes the project an excellent investment even if your tastes change over time, as the pegboard itself remains usable through multiple fabric iterations. Many enthusiasts keep a small collection of favorite fabrics and rotate them seasonally or whenever they feel like a fresh look.
Day-to-day care is straightforward. Dust the fabric surface periodically with a soft brush attachment on a vacuum cleaner or with a clean, dry microfiber cloth. For spot cleaning, a slightly damp cloth with a small amount of mild dish soap will address most stains on cotton and linen fabrics — test in an inconspicuous area first if you are unsure how your specific fabric will respond to moisture. Avoid soaking the fabric or using harsh cleaning products, as these can cause colors to bleed, fabric to shrink, or adhesive to release from the board. If your pegboard is located in a kitchen or other high-humidity environment, consider treating the fabric with a fabric protector spray before installation to guard against moisture and staining.
Over time, fabric can loosen slightly, particularly around the edges and corners where tension is greatest. A periodic check and re-stapling of any loose areas takes only minutes and keeps the board looking crisp and professional. If you used adhesive spray without staples and find the fabric beginning to lift, a small amount of fresh adhesive carefully applied under the lifted area and pressed firmly in place will usually solve the problem. Keeping a few extra staples and a small amount of matching trim on hand means any minor repairs can be made immediately, before a small loose area becomes a larger problem. With minimal attention, a well-made fabric covered pegboard will remain beautiful and fully functional for many years.








What do you think?
It is nice to know your opinion. Leave a comment.