










Easy DIY String Fringe Tutorial: Transform Your Home and Wardrobe with Handmade Texture
There’s something deeply satisfying about making something beautiful with your own hands, and string fringe is one of those crafts that gives you a lot of bang for your buck — visually speaking, at least. Whether you want to add a boho vibe to a plain tote bag, give a tired throw pillow a second life, or make a wall hanging that people actually ask about, string fringe is a surprisingly simple way to get there. This technique has been around for centuries, showing up in everything from traditional weavings to modern fashion runways, and honestly? It’s way easier to learn than you’d expect.
What I love most about string fringe is how adaptable it is. You can work with cotton twine for that natural, earthy look, switch to embroidery floss when you want something finer and more colorful, or go full glam with metallic thread. The texture, length, and color choices are completely yours, which makes this one of the most personal DIY projects out there — and one that works for beginners and experienced crafters alike. If you’re just starting out, you’ll pick up the basic technique in minutes. If you’ve been crafting for years, there’s a whole world of layering, dyeing, and knotting variations to dig into.
This tutorial covers everything from gathering your supplies and picking the right string for your project, to cutting, attaching, finishing, and a bunch of ideas for where to actually use your fringe. By the time you reach the end, you’ll have everything you need to jump in. So grab your scissors, pull out your favorite skeins, find a comfortable spot to work, and let’s get into it.
Understanding Your Materials: Choosing the Right String and Tools
Before you cut a single strand, it’s worth taking a minute to think about your materials, because the string you choose will have a huge impact on how your finished fringe looks and feels. Cotton macramé cord is the go-to for most DIY crafters, and it’s easy to see why. It’s affordable, you can find it at pretty much any craft store or online, and when you brush it out it unravels into the most beautifully soft, fluffy strands. The natural off-white of unbleached cotton has that organic, boho charm that works on everything from wall hangings to plant basket hangers. It also takes dye really well if you want to add some color.
Embroidery floss and yarn are both great options too, each with their own personality. Embroidery floss is cheap, comes in hundreds of colors, and creates fine, silky fringe that’s perfect for smaller projects like bookmarks, keychains, hair accessories, and fabric edges. Yarn opens up a whole different world — chunky wool gives you bold, dramatic fringe with a cozy, rustic feel, while fine acrylic comes out sleeker and more polished. If you’re going for a farmhouse or cottagecore aesthetic, jute twine is your material. It’s rugged, natural-looking, and has a texture that really leans into that style.
As for tools, you genuinely don’t need much, which is one of the best things about this craft. A sharp pair of fabric scissors is non-negotiable — clean cuts make a real difference in how the finished fringe looks. A ruler or a piece of cardboard cut to your desired strand length is a game-changer for getting consistent sizing without measuring every single piece. Beyond that, a comb or stiff bristle brush comes in handy for unraveling and fluffing twisted cords, fabric glue or a hot glue gun works well for certain attachment methods, and a tapestry needle is useful if you’re weaving fringe through fabric. A cutting mat under your work protects your surface when you’re doing final trims.
- Cotton macramé cord (3mm or 5mm thickness works best for most projects)
- Embroidery floss in your chosen color palette
- Chunky yarn for bold, textural statements
- Sharp fabric scissors
- Ruler or cardboard template for consistent strand lengths
- Stiff bristle brush or pet slicker brush for unraveling cord
- Hot glue gun or fabric glue
- Tapestry needle for woven attachment methods
Preparing Your Strands: The Art of Cutting and Organizing
Prep work is where a lot of beginners accidentally make things harder for themselves, so a few extra minutes here will save you a lot of headaches later. The most important thing to figure out before you start cutting is the finished length you’re going for, because you’ll need to cut each strand roughly twice that length plus a little extra. That’s because the standard lark’s head knot — the most common way to attach fringe — folds each strand in half before securing it, which effectively cuts your usable length in half.
The cardboard wrap method is honestly one of the smartest tricks for cutting a big batch of uniform strands without losing your mind. Cut a piece of cardboard to the width of your desired strand length, wrap your string around it over and over until you have enough for your project, then slide your scissors along one edge and cut all the loops at once. You end up with a tidy pile of perfectly matched strands in a fraction of the time it would take to measure each one individually. Depending on how dense you want your fringe, a standard pillow cover trim might need anywhere from 50 to 150 strands.
Getting organized before you start attaching saves a lot of confusion, especially when you’re working with multiple colors or textures. Sort your cut strands into groups by color or type and keep them in small rubber band bundles or draped over a dowel rod until you need them. If you’re planning an ombre or gradient effect, lay your shades out in order from lightest to darkest before you begin — it makes the transition look intentional rather than random. For really long fringe, loosely braiding the strands together temporarily is a great way to keep them from tangling while you work.

Step-by-Step Attachment Techniques: From Lark’s Head Knots to Weaving
The lark’s head knot is the foundation of string fringe attachment, and once you get the hang of it, there’s something almost meditative about the rhythm of tying them one after another. Here’s how it works: fold a strand of string in half so you have a loop at the midpoint. Hold your attachment point — whether that’s a dowel rod, a folded fabric hem, or the edge of a woven piece — and push the folded loop up through or over it. Then pull both loose ends down through the loop and tighten. That’s it. You get a neat, secure knot that holds firmly without any glue or stitching required.
For fabric items like tote bags, scarves, denim jackets, or pillow covers, you have two solid options. The first involves folding a small hem at the edge of your fabric and using a tapestry needle to weave fringe strands directly through the woven structure of the fabric, then securing each one with a simple overhand knot on the inside. This gives you the most seamless, professional-looking result because the fringe looks like it genuinely grows from the fabric. The second option is faster: use fabric glue or a hot glue gun to adhere the knotted tops of your strands directly to the underside of a folded hem. It’s not quite as durable through repeated washing, but it’s a great choice when you need to move quickly.
When you’re attaching fringe to rigid or semi-rigid surfaces — picture frames, baskets, lampshades, decorative mirrors — hot glue is your best friend. Work in small sections of about two to three inches at a time, apply a thin line of hot glue along the edge, then quickly press the folded midpoints of your strands into the glue before it sets. Hold each section for about thirty seconds so it fully adheres. Overlap your sections slightly as you go to avoid any gaps in coverage. For a really polished look, glue a thin strip of coordinating ribbon or twill tape over the attachment row to hide the knotted tops.
- Fold each pre-cut strand in half to find the midpoint
- Push the folded loop over or through your attachment point
- Pull both loose ends through the loop and tighten to secure
- Repeat at consistent intervals across the entire edge
- Trim the finished fringe to a perfectly even length using sharp scissors and a ruler
- For cotton cord, brush out the strands with a stiff bristle brush to create fluffy texture
Finishing Techniques: Trimming, Fluffing, and Styling Your Fringe
Once all your strands are attached, the finishing stage is where everything really comes together. Your first move should almost always be a final trim, because even if you were super careful during the cutting phase, small variations in knot placement and strand tension mean the raw ends will rarely hang perfectly even on their own. Lay your piece flat on a cutting mat, mark your desired finished length with a ruler, and trim across the fringe using long, smooth scissor strokes rather than short choppy snips. It’s faster and gives you a much cleaner edge.
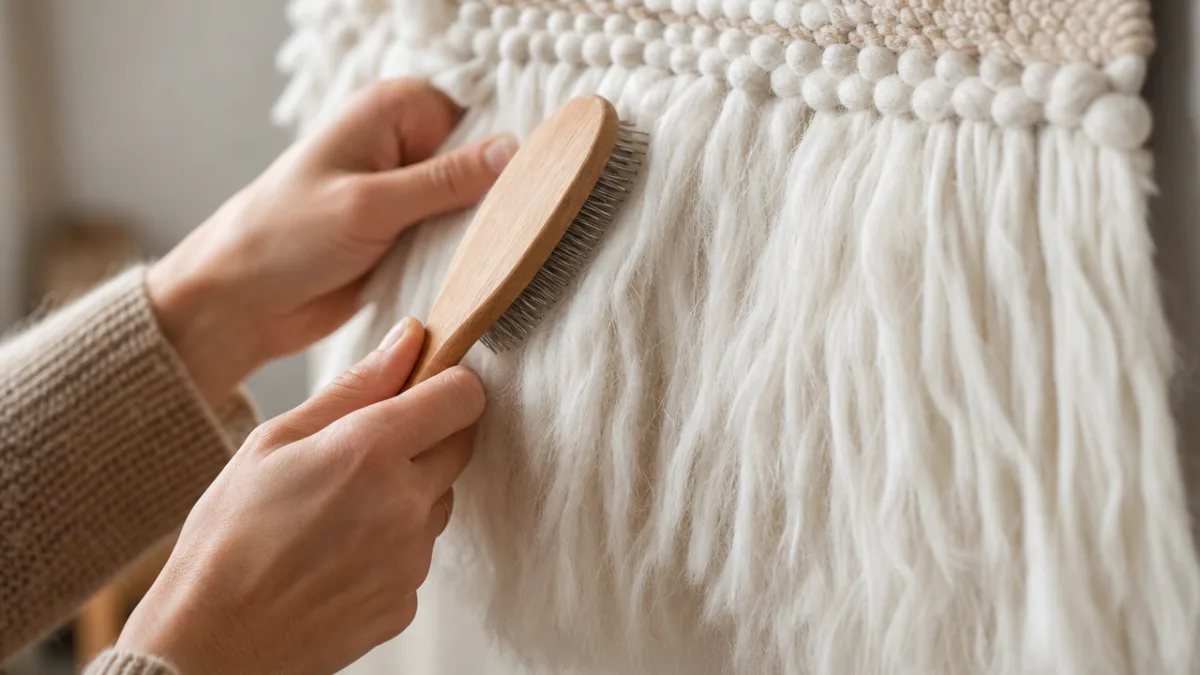
If you’re working with twisted cotton macramé cord, brushing out the strands is where the magic really happens. When you untwist and brush out cotton cord, it fans into this cloud of soft, fluffy fibers that gives your fringe a feathery, bohemian texture that looks completely different from the tight, twisted raw cord. Use a pet slicker brush or any stiff bristle brush and work from the bottom of the strands upward in short, firm strokes. It takes a while on larger projects, but the effect is genuinely stunning. You can also control how full and fluffy the result gets — some people love a partially brushed look where the strand retains some twist near the knot and opens into fluff only at the tips.
From there, the styling options are really up to you. A straight horizontal cut is the classic choice and it always looks clean and elegant, but don’t be afraid to play around. A V-shaped cut creates a lovely chevron silhouette, and graduated lengths that taper from long in the center to shorter at the edges give a romantic, waterfall-like drape. You can also thread beads onto individual strands and knot them in place, or weave thin ribbons horizontally through the hanging strands for an interesting woven-fringe hybrid texture. And if you’re working with undyed cotton, this is the perfect moment to dip-dye the tips in fabric dye for an ombre effect that looks like it took way more effort than it did.
Creative Project Ideas: Where to Use Your Handmade Fringe
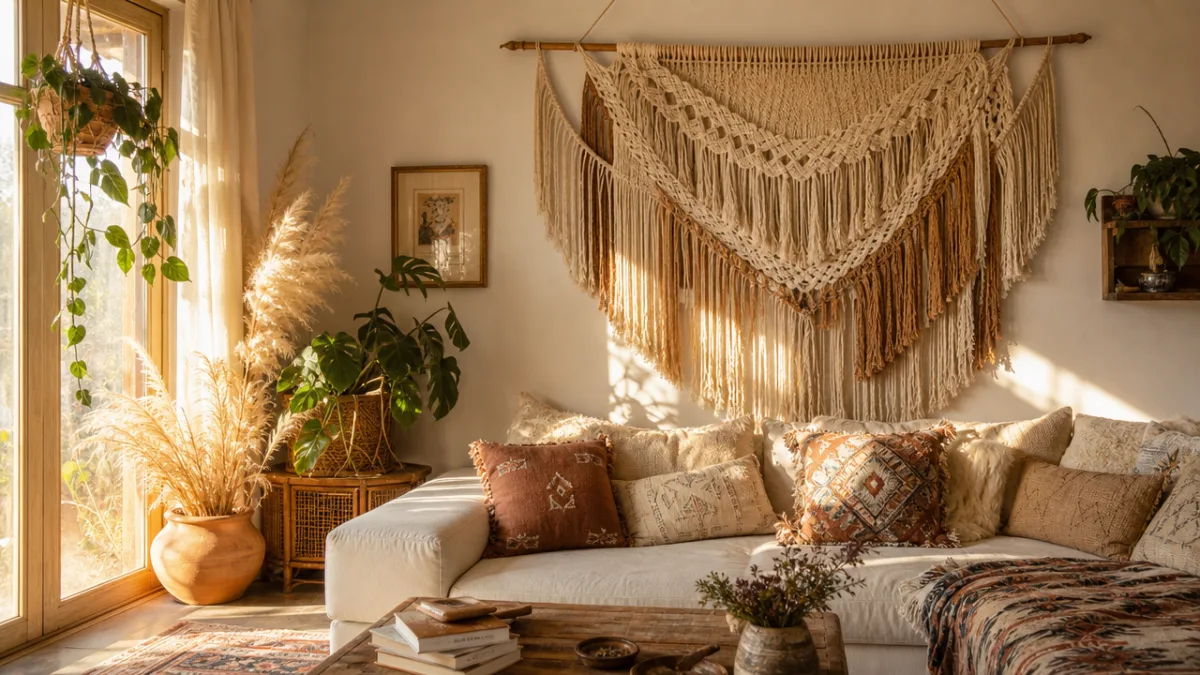
Once you’ve got the basic technique down, you’ll genuinely start seeing fringe potential everywhere — and the list of things you can elevate with it is longer than you’d think. Wall hangings are probably the most classic application and a fantastic starting point for beginners, because there’s no sewing or gluing involved. Cut a dowel rod or find a sturdy branch, attach your strands in rows using lark’s head knots, and add some optional macramé knotting between the fringe sections if you want more visual interest. A large-scale fringe wall hanging can completely transform a bare wall, and it costs a fraction of what similar pieces go for in boutique home décor shops.
Wearable fringe projects are such a fun way to personalize your wardrobe without having to actually construct a garment. A plain denim jacket becomes a festival statement piece with fringe along the back yoke, sleeve hems, and front pockets. A simple tote bag turns into a boho accessory with fringe sewn or glued along the bottom edge. You can even upgrade plain sandals by weaving leather cord or suede strips around the straps. For smaller accessories like keychains and bag charms, colorful embroidery floss fringe bundles make quick, inexpensive gifts that feel genuinely thoughtful and handmade.
Home décor applications go way beyond wall hangings. Fringe glued around the edge of a lampshade creates a dreamy, layered effect that casts beautiful shadows when the lamp is on. Plain throw pillows get instant personality when fringe is sewn along all four seams or just the bottom edge. Table runners look polished and finished with fringe at each short end — natural cotton works beautifully for a casual dining space, and metallic thread version can dress up a more formal table setting. Even fabric plant pot covers and woven baskets get a nice upgrade with a row of fringe around the rim.
- Boho wall hangings on dowel rods or driftwood branches
- Fringe-trimmed throw pillows and cushion covers
- Customized denim jackets and vests
- Fringe-bottom tote bags and market bags
- Lampshade fringe for atmospheric lighting
- Table runners with fringed ends for casual or formal dining
- Keychains and bag charms made from embroidery floss bundles
- Fringe-edged festival headdresses and hair accessories
- Plant basket covers with decorative fringe trim
Tips for Troubleshooting and Taking Your Fringe to the Next Level
Even if you’ve been crafting for years, string fringe will occasionally throw you a curveball — and knowing how to handle the common issues keeps you from losing steam. One of the most frequent problems is uneven coverage, where gaps show up between strands once the piece is hung or worn. This usually just means the strands were spaced a bit too far apart during attachment, and the fix is simple: go back and fill in the gaps with extra strands using the same lark’s head knot. For future projects, it’s better to err toward closer spacing, especially for wall hangings where gravity creates a lot of movement between strands.
Persistent tangling is another common frustration, especially on wearable items that get a lot of movement and washing. A surprisingly effective fix is tying a small loose overhand knot at the tip of each fringe strand. That little knot acts as a gentle weight that pulls the strand downward, and it also stops the individual plies of the cord from unraveling past that point. If you want the airy, unraveled look but need to prevent tangling, a tiny dab of fray check sealant on each cut tip does the job without making the strand stiff. Cotton fringe that tends to curl or clump can also be lightly misted with water and hung to air dry vertically — it encourages the strands to fall straight and really does help.
If you want to take your fringe work from fun craft project to something that feels genuinely artisanal, it’s worth looking into the rich fiber arts traditions that surround this technique. Mexican rebozo weaving, Native American fringe beadwork, and the intricate knotted fringe on antique Persian carpets are all incredible sources of inspiration that connect your work to a long and beautiful human history. Try coloring your cotton fringe with natural plant-based dyes like indigo, madder, or turmeric — the depth and variation you get from natural dyes is something synthetic dyes just can’t replicate. And if you’re ready to really push things, experimenting with macramé knotting, weaving, and fiber sculpture alongside fringe can lead you to three-dimensional textile pieces that are genuinely works of art. There’s a lot of possibility sitting in that humble strand of string.








What do you think?
It is nice to know your opinion. Leave a comment.