










Spring Crochet Shawl for Beginners: Free Pattern & Video Tutorial
Why a Spring Shawl Is the Perfect Beginner Crochet Project
If you have ever wanted to learn crochet but felt intimidated by complex patterns, a spring shawl might be exactly the project to change your mind. Shawls are wonderfully forgiving pieces — they do not require precise sizing the way a sweater or pair of gloves does, and small inconsistencies in tension simply add to their handmade charm. A spring shawl is lightweight, quick to work up, and immediately useful once complete, making it deeply satisfying for anyone just starting their crochet journey.
Spring shawls carry a particular magic because they sit at the intersection of function and beauty. As the weather turns warmer but evenings still carry a chill, a lacy crocheted shawl is exactly what you want to drape over your shoulders at an outdoor dinner or a morning farmers market. Unlike heavy winter wraps, spring designs tend to feature open stitch patterns that let air flow through while still providing a layer of warmth, which means you are practicing beautiful, visually impressive stitches right from the very beginning of your crochet life.
The beauty of starting with a shawl is also the freedom it offers in terms of yarn choices and color palettes. Spring invites soft pastels, botanical greens, warm creams, and gentle lavenders — all widely available in beginner-friendly yarn weights. You can customize your shawl to match your wardrobe without needing to alter the pattern, simply by swapping colors or adding a stripe. This kind of creative flexibility keeps the project exciting and personal, which is exactly the motivation a new crocheter needs to keep their hooks moving.
Understanding the Materials You Will Need
Before you cast on your first stitch, gathering the right materials will set you up for a smooth and enjoyable experience. For a spring shawl, you generally want a yarn that is lightweight and has a soft drape. DK weight or fingering weight yarns in natural fibers like cotton, bamboo, or a cotton-linen blend are ideal choices. These materials breathe well, feel lovely against bare skin, and create the airy, flowing look that defines a beautiful spring accessory. Avoid thick, bulky yarns for this project, as they will produce a stiff result that does not move the way a shawl should.
The hook size you choose should correspond to your yarn label’s recommendation, though many crocheters go up one size when working shawls to encourage a looser, more drapey fabric. A 4mm to 5mm hook is a common starting point for DK weight cotton or bamboo yarn. If you are newer to crochet and your tension tends to run tight, definitely consider sizing up. The difference between a beautifully flowing shawl and a stiff, dense one often comes down to just half a millimeter of hook diameter, so this small adjustment matters more than many beginners expect.
Beyond yarn and hook, you will want a few additional supplies to make the process seamless. A tapestry needle for weaving in ends is essential, as is a pair of sharp scissors. Stitch markers — even simple loops of contrasting yarn — help you keep track of important points in the pattern, especially when you are working increases at the center spine of a triangular shawl. A measuring tape is useful for checking your gauge swatch, and blocking mats with rust-proof pins will transform your finished shawl from a crumpled piece into a polished, professional-looking accessory once you are done.
- Lightweight yarn: DK or fingering weight in cotton, bamboo, or linen blend, approximately 400–600 yards
- Crochet hook: 4mm to 5mm, or one size up from your yarn label’s recommendation
- Tapestry needle for weaving in ends neatly
- Stitch markers to track increases and pattern repeats
- Rust-proof blocking pins and blocking mats for finishing
- Sharp scissors and a measuring tape

Reading the Free Pattern: A Step-by-Step Breakdown
Free crochet patterns can look intimidating at first glance because they use abbreviations and shorthand that beginners have not yet internalized. The good news is that most shawl patterns for beginners rely on a small handful of stitches repeated in a rhythmic, predictable way. The most common stitches you will encounter in a spring shawl pattern are the chain (ch), slip stitch (sl st), single crochet (sc), half double crochet (hdc), double crochet (dc), and the chain-space (ch-sp). Once you know these six elements, you can decode a surprisingly wide range of patterns with confidence.
Most beginner spring shawl patterns begin with a simple foundation chain and build outward from a central spine or starting edge. A triangular shawl, for instance, typically starts with just three or five chains and grows through regular increases on either side of a center chain space. Each row or round adds a little more width, creating that familiar wedge shape. The pattern will tell you exactly where to place your increases, and as long as you follow those instructions carefully and use your stitch markers to keep track of your center point, you will find the rhythm comes naturally within the first few rows.
When working from a written pattern, it helps enormously to read through the entire document before making a single stitch. Identify the stitch abbreviations listed at the beginning, note any special stitches or clusters, and get a general sense of how the pattern is structured — whether it works in rows or rounds, where the increases happen, and how the border is handled at the end. Many free patterns also include a stitch count at the end of each row so you can double-check your work as you go. If your count is off, catching the error at row three is far easier than unraveling a nearly finished shawl.
Following the Video Tutorial: Tips for Getting the Most Out of It
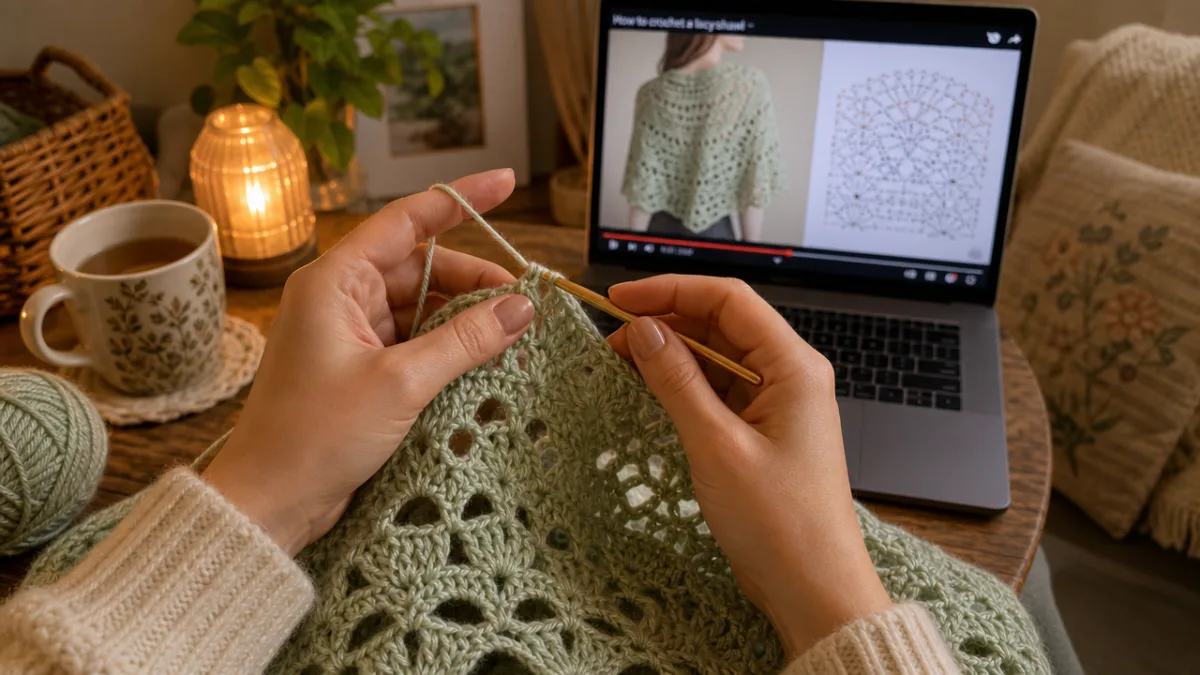
Video tutorials are one of the greatest gifts the internet has given to the modern crocheter, and pairing a written pattern with a companion video dramatically increases your chance of success. When watching a crochet tutorial, resist the urge to simply play it through while you work. Instead, watch the full video once before picking up your hook. This first viewing is purely observational — you are learning the overall structure, seeing how the finished piece looks, and noting which parts of the technique seem most unfamiliar or tricky to you. Come back a second time with your materials in hand and ready to pause frequently.
Playback speed controls are your best friend as a beginner following a video tutorial. Most platforms, including YouTube, allow you to slow the video down to 0.75 or even 0.5 times the normal speed without distorting the audio too badly. Use this feature liberally, especially during stitch transitions, the beginning of new rows, and any sections involving clusters or special techniques. There is no shame in pausing and rewinding repeatedly — experienced crocheters do it too when learning new patterns, and it is far better to take twice as long and get it right than to rush ahead and have to frog (undo) large sections of work.
Pay particular attention to how the tutorial creator holds their yarn and hook, manages their tension, and handles their work as it grows larger and heavier. Tension — the consistent tightness or looseness with which you hold your yarn — is one of the most important and most personal aspects of crochet, and it takes time to develop. If your stitches look significantly tighter or looser than those in the video, try adjusting how you wrap the yarn around your fingers before picking up tension with the hook. A gauge swatch worked in the pattern’s main stitch before you begin the shawl itself can save you from major sizing disappointments later.
Working the Pattern: Common Stitches and Techniques Explained
The foundation of most beginner spring shawls is the double crochet stitch, and it is worth taking a moment to really understand it before you dive into the pattern. A double crochet is taller than a single crochet, which means fabric grows more quickly and has a more open, airy texture — both ideal qualities for a spring shawl. To work a double crochet, you yarn over before inserting your hook into the stitch, pull up a loop so you have three loops on your hook, then yarn over and pull through two loops, leaving two on the hook, then yarn over and pull through the remaining two loops. That sequence becomes second nature surprisingly quickly.
Many spring shawl patterns incorporate a shell stitch or fan stitch as their primary decorative element. A shell is simply a group of double crochets — usually five or seven — all worked into the same stitch or chain space. This creates a lovely scalloped, petal-like shape that is unmistakably beautiful and yet entirely beginner-accessible once you understand that you are just repeating the same stitch multiple times in one spot. Shells are often separated by chain spaces and single crochets, which creates the lacy grid that gives spring shawls their characteristic lightness and elegance.
Increases in a triangular shawl typically happen at the beginning, middle, and end of rows, adding a set number of stitches each time to create the growing triangular shape. Pay close attention to the pattern’s instructions for where exactly to place these increases, as an increase worked one stitch off from where it should be will gradually distort the shape of your shawl over many rows. Using a stitch marker in the center chain space at the end of each row makes it easy to find your increase point without having to count from either edge — a small habit that prevents a common and frustrating beginner mistake.
- Begin with your foundation chain as specified and work the first row carefully, counting your stitches at the end.
- Place a stitch marker in the center chain space before turning your work at the end of each row.
- Work shell stitches into chain spaces and single crochets into shells, following the pattern repeat precisely.
- Perform your increases at the beginning, center, and end of each row as instructed to maintain the triangular shape.
- Check your stitch count at the end of every row using the pattern’s stitch count guide.
- Weave in your ends as you go to avoid a large finishing task at the end of the project.
Finishing, Blocking, and Wearing Your Spring Shawl
Once you have worked your final row and fastened off your yarn, the shawl will likely look slightly crumpled and less impressive than you imagined. Do not be discouraged — this is completely normal and expected with lacework, and it is exactly why blocking exists. Blocking is the process of wetting your finished shawl, gently stretching it to its final dimensions, pinning it in place on blocking mats, and allowing it to dry fully. For cotton and plant-based fibers, soaking the shawl in cool water for about twenty minutes and then gently squeezing out the excess moisture before blocking works beautifully.
When you pin your shawl to the blocking mats, take time to open up the lace pattern deliberately, pinning each shell and chain space point individually if your pattern has a pronounced lacy edge. This is where the magic happens — those compressed, slightly tangled-looking stitches open up into crisp, defined shapes, and the shawl grows to its intended dimensions. A shawl that measured 40 inches wide before blocking might stretch to 52 inches afterward, which is entirely normal and part of the design. Leave the shawl pinned and completely undisturbed until it is fully dry to the touch, which may take anywhere from several hours to overnight depending on your climate.
Once your shawl is blocked and dry, remove the pins and hold your finished work up to see what you have made. The sense of pride that comes from completing your first crochet shawl is genuinely difficult to overstate. You have learned foundational stitches, followed a written pattern, interpreted a video tutorial, and produced a wearable, beautiful item entirely with your own hands. Wear it draped over your shoulders like a traditional shawl, wrapped loosely around your neck like a scarf, or even tied around your waist as a bohemian wrap. A handmade spring shawl is endlessly versatile, and it is proof that you are already a crocheter — not a beginner trying to become one, but someone who makes things.

Adapting the Pattern and Growing Your Skills
Once you have successfully completed your first spring shawl, you may find yourself looking at the pattern differently — not as a set of instructions to follow but as a framework you can begin to modify and make your own. One of the simplest adaptations is to change the size of your shawl by working more or fewer pattern repeats before binding off. Adding extra rows increases both the length along the top edge and the depth of the triangle, giving you a larger, more dramatic wrap. Reducing the rows produces a delicate neck shawlette that works beautifully as a lightweight accessory for summer evenings.
Color is another powerful way to adapt a simple pattern. A classic gradient effect can be achieved by starting with a deep, saturated hue at the top edge and gradually transitioning to a pale tint at the bottom point, either by using a commercial gradient yarn or by switching balls of solid-colored yarn every few rows. Stripes worked in two or three complementary spring colors — soft coral and mint, for example, or lavender and warm white — add visual interest without requiring you to learn any new stitches. Simply join the new color at the beginning of a row, work the row through, and change again as desired.
Beyond color, you might eventually want to experiment with the border. Most beginner patterns include a simple single crochet or slip stitch border, but as your confidence grows, you can replace this with a picot edge, a shell border, or even a row of reverse single crochet for a neat, corded finish. Each of these border options requires only a stitch or two beyond what you already know, and each dramatically changes the character of the finished shawl. This is how crocheters grow — not by abandoning patterns they love, but by returning to them again and again with slightly more skill and slightly more curiosity each time.








What do you think?
It is nice to know your opinion. Leave a comment.