










“`html
DIY Fringe Chandelier Tutorial: Create a Stunning Boho Statement Piece for Your Home
Introduction: Why a DIY Fringe Chandelier Transforms Any Space
There’s something almost magical about a fringe chandelier swaying gently above a dining table or tucked into a cozy reading corner. These handmade lighting fixtures have taken off in recent years, and honestly, it’s easy to see why — the bohemian and maximalist design movements have us all craving more texture, movement, and pieces that actually feel handmade. Unlike the pendant lights you’d grab off a shelf, a DIY fringe chandelier has a warmth to it that mass-produced stuff just can’t replicate.
What I love most about this project is how flexible it is. You can tweak every single element to fit your space — the fringe colors, the frame size and shape, all of it. Whether your home leans into neutral, earthy tones or you’re more of a bold-jewel-tones-and-eclectic-layering person, this project adapts without much fuss. The end result feels genuinely custom, like it was made specifically for your room. Because it was.
And here’s the really good news: this project is approachable for just about any skill level. You don’t need to know how to sew, build furniture, or rewire your house. Most of the work is knotting, wrapping, and attaching — techniques you can pick up in a matter of minutes. For a relatively modest investment of time and materials, you can create a centerpiece that would easily run you a few hundred dollars at a boutique home décor shop.
Materials and Tools You Will Need
Getting your materials together before you start is one of those steps that’s easy to skip but really does make the whole process smoother. The good news is that everything you need is pretty easy to find at craft stores, fabric shops, or online, and none of it will break the bank. Spending a little extra on quality materials up front is worth it — the assembly will be more enjoyable, and the finished piece will hold up so much better.
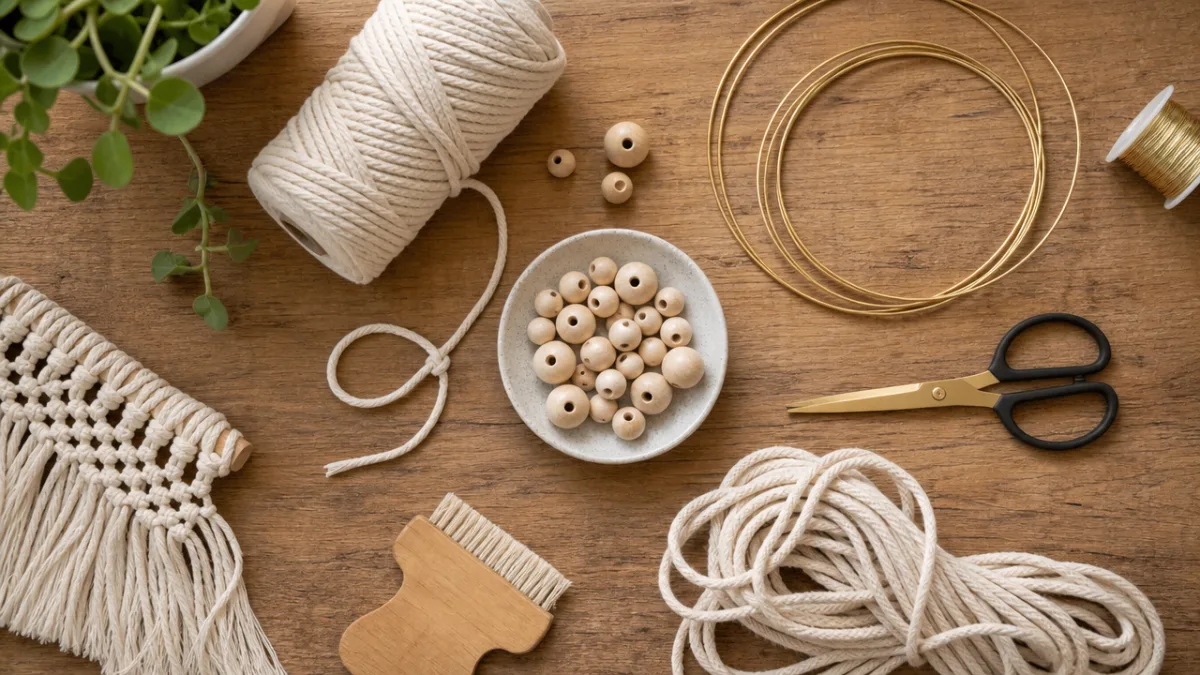
The frame is the heart of the whole thing, and a wire wreath ring or wooden embroidery hoop works beautifully for most DIY versions. They’re lightweight, affordable, and easy to wrap and attach things to. You’ll also want a ceiling canopy kit or a pendant light cord kit, which you can find at hardware stores or online — these typically come with the cord, socket, and canopy you need to safely hang and power your chandelier. If you’d rather skip the electricity entirely and make a purely decorative piece, you can leave all of that out and just hang the frame with a decorative cord or ribbon.
For the fringe itself, you’ve got a great range of options depending on the look you’re going for. Macramé cord, yarn, raffia, satin ribbon, leather lacing, and even paper twine can all create gorgeous fringe effects. Lots of crafters layer a few different textures together for a richer, more dimensional look. Beyond the fringe material, you’ll want sharp scissors, a tape measure, a lighter or fray-check solution for sealing cord ends, and any fun embellishments you want to tuck in — wooden beads, feathers, shells, dried florals, whatever feels right.
- Wire wreath ring or wooden embroidery hoop (12–18 inches in diameter works well for most spaces)
- Pendant light cord kit or decorative hanging cord
- Macramé cord, yarn, or fringe material of your choice in your preferred colors
- Sharp fabric scissors or craft scissors
- Tape measure and marking tool
- Optional embellishments: wooden beads, feathers, dried flowers, shells
- Lighter or fray-check sealer for finishing cord ends
- Ceiling hook or swag hook rated for your fixture’s weight
Preparing Your Frame and Planning the Design
Before you cut a single strand of fringe, it’s really worth taking some time to plan your design — trust me, it pays off. Start by deciding on the overall silhouette you’re going for. A tiered waterfall effect, where multiple rings of different sizes hang at varying heights for a cascading look, is one of the most popular styles. Others go for a single-ring design with long, dramatic fringe that sweeps nearly to the floor for a real statement-making effect. Even a rough sketch on paper helps you get a feel for the proportions and figure out how much material you’ll actually need.
Once you’ve landed on a direction, prepare your frame by wrapping it completely with your chosen cord or ribbon. This wrapped base does two things: it gives the fringe strands something clean to knot onto, and it makes the frame itself look finished so no bare wire or wood peeks through in the final piece. Start at one point on the ring and work your way around steadily, keeping your tension even so the wraps sit flat and uniform. Secure the start and end points with a dab of strong craft glue or a tight overhand knot tucked to the inner side of the ring where it won’t be seen.
This is also the time to attach your hanging hardware if you’re making an electrified version. Thread the pendant cord through the center of the ring before you start wrapping and tying fringe — trying to add it afterward is genuinely a headache and can mess up your finished work. If you’re going the purely decorative route, attach three or four equal-length cords at evenly spaced points around the ring, then gather them at the top and knot them together at the height where you want the fixture to hang from. This gives you that classic gathered-top silhouette you’ve probably seen in so many gorgeous boho chandeliers.
Step-by-Step Fringe Attachment Technique
Now we get to the most satisfying part of the whole project: attaching the fringe. Cut your fringe material to roughly twice the finished length you’re going for, since the lark’s head knot you’ll use to attach each piece folds the strand in half. So if you want twelve-inch fringe, cut your pieces to twenty-four inches. If you’re going for a layered or uneven hem, cut pieces at a few different lengths on purpose — it adds great visual interest and gives the finished piece a lovely natural movement.
The lark’s head knot is the technique you’ll be using throughout, and it’s wonderfully simple once you’ve done it a couple of times. Fold a cut length of cord in half to find the midpoint, lay that loop over the top of the wrapped ring, then pull both loose ends through the loop from front to back and tug them down to tighten the knot against the frame. Work your way around the entire ring, pushing the knots together snugly so there aren’t any gaps between strands. The more consistently you space them, the fuller and more lush the fringe will look when it’s done.
As you go, hold the piece up every so often and take a look at it from a distance to check the density and flow. Some people love an extremely dense, almost solid curtain of fringe; others prefer something a little airier that lets light filter through. You can always add more strands to fill things in, but it’s much harder to remove them once they’re knotted, so add gradually rather than over-stuffing the ring right away. Once all your fringe is attached, run your fingers through the strands to separate and fluff them out — this makes a huge difference in how full and textured the piece looks.
- Cut all fringe strands to your planned length, keeping cuts clean and straight.
- Fold each strand in half and create a lark’s head knot over the wrapped frame.
- Space knots consistently around the entire ring, pushing them together for fullness.
- Hold the piece up periodically to check density and adjust as needed.
- Fluff and separate strands once all fringe is attached.
- Trim the bottom hem of the fringe to your desired length and shape using sharp scissors.

Adding Embellishments and Finishing Touches
This is the stage where your personality really gets to come through and turn a lovely craft project into something that feels genuinely one-of-a-kind. There are basically no rules here, and the most visually interesting chandeliers tend to be the ones where the maker just followed their instincts. Some of the most popular choices: threading wooden or clay beads onto individual fringe strands at different heights, tying in bundles of dried pampas grass or preserved eucalyptus, tucking in long feathers for a dramatic boho touch, or weaving in a few strands of metallic thread that catch the light in the best way.
To add beads, just slide each one up from the bottom of a strand to your desired height and tie a simple overhand knot just beneath it to hold it in place. For feathers, wrap the quill end with a small bit of thin wire or floral tape and use that to tie the feather securely to a cluster of fringe strands. Dried botanicals work well when you bundle them with florist wire and tuck them into the fringe near the top of the frame, where the strands partially hide them for an organic, peek-a-boo effect that looks wonderfully natural and effortless.
To finish everything off, trim the bottom hem of the fringe into whatever shape feels right to you. A clean, straight horizontal cut gives a more modern look; a gentle V or pointed shape adds some drama; and a relaxed, intentionally uneven cut has an organic quality that mimics natural grasses. Seal all cord ends with a lighter flame or fray-check solution to keep things from unraveling over time. Give the whole piece one last fluff and shape, and your handmade fringe chandelier is officially ready to hang.
Hanging, Styling, and Caring for Your Fringe Chandelier
Hanging your chandelier correctly matters both for safety and for how it looks. If your fixture has a light kit, make sure your ceiling electrical box is rated to support the weight. For most DIY fringe chandeliers — which tend to be pretty lightweight — this usually isn’t an issue, but it’s always worth a quick check. If you’re not comfortable working with ceiling wiring, an electrician can take care of the connection in a short visit. For non-electrified versions, a simple ceiling hook or swag hook rated for a few pounds is all you need, and it takes just minutes to install with a stud finder and a basic drill.
Where you place the chandelier in a room has a real effect on how it reads visually. Over a dining table, aim for the bottom of the fringe to hang about thirty to thirty-six inches above the tabletop, assuming the size is proportional to the table. In a bedroom, a lot of people hang their fringe chandelier low and close to a wall as a glowing decorative alternative to a sconce, especially when using a canopy-style pendant kit. In entryways and corners, a long, dramatic fringe chandelier can be a breathtaking vertical focal point that draws the eye upward and makes the ceiling feel taller than it actually is.
Caring for your chandelier is pretty low-key. Give it a gentle shake every now and then to knock loose any settled dust, and go over it a few times a year with a soft-bristled brush or the low-suction upholstery attachment on your vacuum for a more thorough clean. If you used natural materials like raffia or jute, keep in mind that high-humidity spots like bathrooms can cause natural fibers to swell, discolor, or develop mildew over time. Most synthetic and cotton cord materials are quite durable, though, and will look great for years with minimal effort — a very good return on your initial creative investment.
- Confirm your ceiling hook or electrical box is rated for the fixture’s weight before hanging.
- For electrified versions, consult an electrician if you are unfamiliar with ceiling wiring.
- Hang over dining tables with thirty to thirty-six inches of clearance above the surface.
- Use in entryways, bedrooms, nurseries, and reading nooks for maximum visual impact.
- Dust regularly with a soft brush and avoid placement in high-humidity rooms if using natural fibers.
One of the best things about finishing this project is realizing just how many directions you can take it from here. Once you’ve made one fringe chandelier, the variations feel endless. You might try a tiered three-ring version with hoops of descending sizes, or play with an ombre effect that blends shades from dark at the top to light at the bottom. Metallic gold and silver cords make stunning holiday versions, and tiny chandeliers made from small embroidery hoops are absolutely adorable as nursery mobiles or tabletop ornaments. This is exactly the kind of project that sticks with you — once you’ve learned it, it becomes a go-to in your creative toolkit.

“`








What do you think?
It is nice to know your opinion. Leave a comment.