










Ultimate Garage Gym Design Ideas: Transform Your Space Into a Functional Home Gym
Why a Garage Gym Is the Smart Investment You’ve Been Waiting For
Building a garage gym is one of the most rewarding investments a fitness enthusiast can make. Unlike commercial gym memberships that drain your wallet month after month, a home gym pays for itself over time while giving you the freedom to train on your schedule, in your own space, without waiting for equipment or navigating crowded locker rooms. For millions of people, the garage represents untapped potential — a blank canvas ready to be transformed into a world-class training facility.
The psychological benefits of having a dedicated workout space at home are substantial and often underestimated. When your gym is steps away rather than a 20-minute drive, the barrier to working out drops dramatically. Studies in behavioral psychology consistently show that reducing friction in habit formation leads to dramatically higher rates of follow-through. Your garage gym becomes a space that signals your brain it’s time to work, helping you build a consistent fitness routine faster than any app or accountability partner can.
Beyond convenience, a garage gym gives you complete control over your environment. You choose the music, the temperature, the equipment, and the vibe. Whether you’re an early-morning lifter who doesn’t want to disturb the neighborhood or a night-owl athlete who trains at midnight, your garage gym is always open. This autonomy is genuinely transformational for long-term fitness success, and it all starts with a thoughtful, well-executed design.
Assessing Your Space: What You’re Working With
Before purchasing a single piece of equipment, take the time to thoroughly assess your garage space. Measure the square footage, ceiling height, and door clearances. A standard two-car garage offers roughly 400 to 500 square feet, which is more than enough for a fully functional gym. Single-car garages around 200 square feet can still work beautifully with smart equipment selection and space-saving design strategies. Knowing your exact dimensions prevents costly mistakes and helps you visualize the layout realistically.
Ceiling height is particularly critical and deserves careful attention. For overhead pressing movements, pull-up bars, and rope attachments, you’ll want a minimum of eight feet of clearance, with ten or more feet being ideal. If your garage has low ceilings, you may need to modify your equipment choices — opting for a half rack instead of a full power rack, for example, or avoiding tall cable machines. Noting the location of garage door tracks, lighting fixtures, and electrical outlets will also influence your final floor plan significantly.
Don’t overlook the condition of the existing floor, walls, and insulation. Bare concrete floors are hard on joints, difficult to clean, and prone to cracking under heavy equipment. Drafty walls and inadequate insulation will make training in winter miserable and summer sessions unbearably hot. Taking stock of these structural factors early lets you budget appropriately for the improvements that will make your garage gym genuinely comfortable and functional throughout every season of the year.
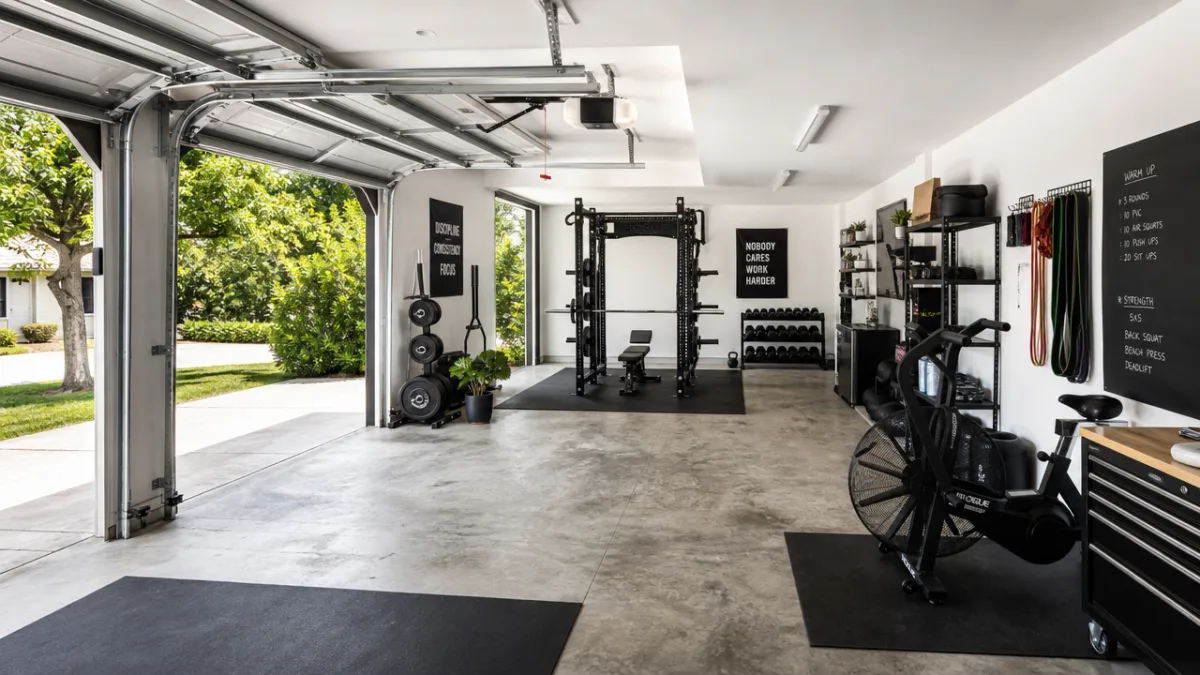
Flooring, Insulation, and the Essential Infrastructure Upgrades
The foundation of any great garage gym is the floor. Rubber flooring is the gold standard for home gym spaces, offering cushioning, noise reduction, durability, and easy maintenance all in one solution. Horse stall mats — typically 3/4 inch thick and sold in 4×6 foot panels — are a favorite among home gym builders for their exceptional value. They’re dense enough to protect concrete from dropped weights, provide solid footing for lifting, and cost a fraction of purpose-built gym tiles. For a standard two-car garage, you can cover the entire floor for well under $300.
Insulation is the upgrade that separates a garage gym you’ll actually use year-round from one that collects dust every winter. Spray foam insulation on walls and the garage door itself makes a dramatic difference in temperature regulation. For the garage door specifically, insulation kits are affordable and straightforward to install as a weekend DIY project. Adding a mini-split heating and cooling unit provides precise climate control without the bulk and ductwork requirements of traditional HVAC systems, and it runs efficiently even in extreme temperatures.
Electrical upgrades are often overlooked but absolutely essential for a well-designed gym. At minimum, you’ll want adequate outlets for a sound system, fans, and any cardio equipment. If you plan to install a sauna, heavy-duty cable machines, or electric garage heaters, you may need a dedicated circuit or even a subpanel upgrade. Hiring a licensed electrician for this stage of the project is money well spent — it’s a safety-critical improvement that also adds value to your home. Proper lighting, ideally bright LED shop lights or adjustable track lighting, transforms the atmosphere and keeps you energized throughout your training session.
Smart Storage Solutions That Keep Your Gym Organized
Organization is the difference between a garage gym that feels professional and one that feels chaotic. Wall-mounted storage systems are your best friend in this space. Pegboards, slat walls, and dedicated weight plate trees keep equipment accessible without consuming valuable floor space. A well-organized gym is also a safer gym — tripping over loose kettlebells or searching for collars mid-workout is both frustrating and potentially dangerous. Treating storage as a design priority from the start will save you enormous headaches as your equipment collection grows.
Vertical wall space is one of the most underutilized assets in a garage gym. Installing a dedicated barbell wall mount keeps your bars off the floor and protected from damage, while a wall-mounted dumbbell rack or shelving system organizes smaller implements neatly. For resistance bands, jump ropes, and accessories, simple hooks and bins mounted at eye level keep things tidy and immediately accessible. Many experienced home gym owners recommend labeling storage spots so that everything has a designated home and the cleanup habit becomes second nature over time.
Consider the flow of your gym when planning storage. Equipment you use at the start of every workout — foam rollers, resistance bands, jump ropes — should be stored near the entrance or warm-up area. Barbells and plates belong near the squat rack. Cardio machines can anchor one end of the space, with their associated accessories nearby. Thinking about your actual training workflow and designing storage around it creates a gym that feels intuitive and professional every time you walk through the door, reinforcing the habit and the mindset you’re working to build.
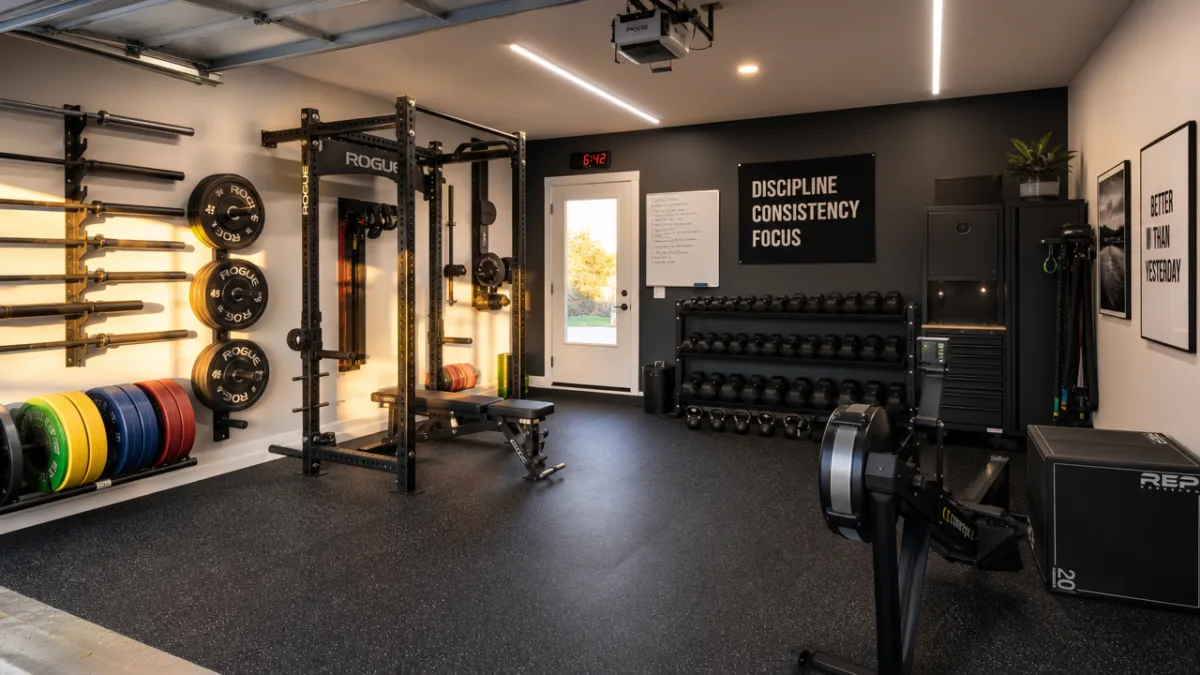
Choosing the Right Equipment for Your Training Goals
Equipment selection is the most personal and consequential part of designing your garage gym. The key principle is to buy for how you actually train, not how you imagine you might train someday. A powerlifter needs a heavy-duty squat rack, a competition-spec barbell, and plenty of weight plates. A CrossFit athlete prioritizes a pull-up rig, bumper plates, and open floor space for movement. Someone focused on general fitness and aesthetics might build around an adjustable dumbbells set, a cable machine, and a quality cardio option. Defining your goals before opening your wallet prevents expensive, space-consuming mistakes.
For most home gym builders, a solid foundation consists of a few high-impact, versatile pieces. A good power rack or squat stand, a quality Olympic barbell with 300 pounds of plates, and a set of adjustable dumbbells cover the vast majority of strength training needs. Adding a flat-to-incline adjustable bench unlocks dozens of additional exercises without requiring multiple dedicated benches. From this core foundation, you can layer in specialty equipment — kettlebells, a cable attachment system, gymnastics rings, or a rowing machine — based on your specific programming and budget.
Quality matters enormously with gym equipment, and the used market is your greatest ally. Platforms like Facebook Marketplace, Craigslist, and dedicated gym equipment resale sites frequently list commercial-grade equipment at a fraction of retail cost. Commercial gym equipment — designed for thousands of daily uses — is often far more durable than consumer-grade home gym products. Patience pays off here. Waiting for a good deal on a commercial power rack or a set of Rogue plates can save you hundreds of dollars while getting you a superior product that will last decades with basic maintenance.
Building a Cardio Zone That You’ll Actually Use
Cardio equipment is often the most space-hungry category in a home gym, so choose wisely. Rowing machines are extraordinarily efficient for conditioning, delivering a full-body cardiovascular workout in a compact footprint, and many models fold vertically for storage. Assault bikes and ski ergs offer brutal, effective conditioning sessions without requiring much floor space. Treadmills and ellipticals are popular choices, though they require more dedicated square footage and tend to become expensive clothes hangers if cardio isn’t genuinely part of your regular training routine.
Jump ropes deserve recognition as one of the most underrated cardio tools available. A quality weighted jump rope and a few square feet of clear floor space can deliver a more demanding conditioning session than most cardio machines at a cost of under $50. Similarly, a pull-up bar, a set of kettlebells, and an interval timer can replace an entire cardio machine section for athletes focused on metabolic conditioning. Thinking creatively about your conditioning work often leads to a more functional, better-designed space than simply replicating the cardio section of a commercial gym.
If you’re serious about building endurance and have the space and budget, consider a curved treadmill or a ski erg as premium cardio additions. These machines deliver exceptional training stimulus, hold their value well, and are genuinely enjoyable to use in a way that makes sustained cardio training easier to maintain over time. Placing cardio equipment near a window or opposite a wall-mounted television can also significantly improve the experience, making longer sessions more mentally sustainable and turning conditioning work from a chore into a genuinely anticipated part of your training week.
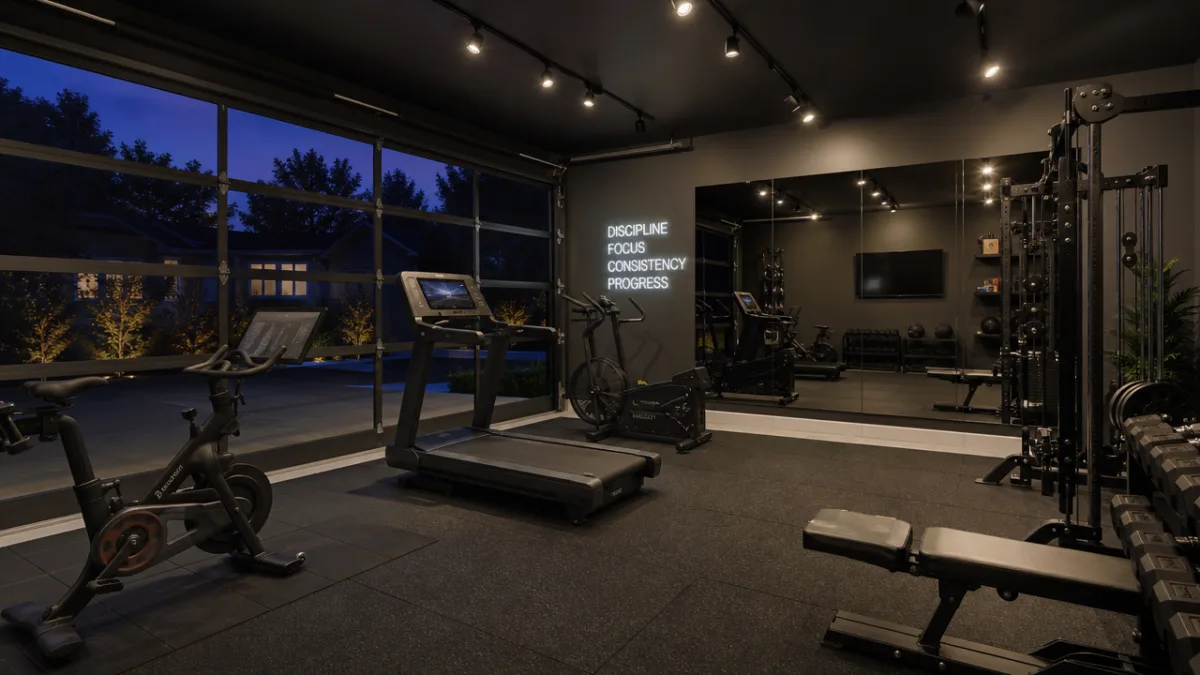
Designing the Atmosphere: Mirrors, Lighting, and Motivational Elements
The aesthetic atmosphere of your garage gym has a more significant impact on your training consistency than most people realize. A space that feels inspiring and professional puts you in the right mindset before you’ve done a single rep. Mirrors are a foundational design element — full-length mirrors on one or two walls serve both practical purposes (checking form and depth) and aesthetic ones, making the space feel larger, brighter, and more dynamic. Budget-friendly options include frameless glass panels from hardware stores or large acrylic mirror tiles that install easily and cost a fraction of custom gym mirrors.
Lighting design dramatically shapes the mood and energy of a training environment. Bright, cool-spectrum LED shop lights mounted to the ceiling deliver excellent visibility for safety and form checking. Consider supplementing with warm accent lighting along the walls or under benches for a more dynamic atmosphere. Controllable smart lighting systems allow you to dial in different intensities for different types of training — bright and energizing for intense lifting sessions, lower and more focused for mobility work or stretching. The ability to control your environment completely is one of the greatest advantages of a home gym.
Personal touches transform a garage into your gym. A motivational quote painted directly on the wall, photos of athletes who inspire you, a whiteboard for tracking programming and personal records, or a well-chosen playlist playing through a quality Bluetooth speaker system — these details make the space genuinely yours. Many serious home gym owners describe their garage gym as a sanctuary, a place they genuinely look forward to entering. That psychological attachment to the space is powerful and self-reinforcing. When you love where you train, you train more, and when you train more, you get better results.
Safety Considerations Every Home Gym Builder Must Prioritize
Safety is non-negotiable in a home gym environment, particularly because you’re often training alone without spotters or staff present. Spotter arms on your power rack should never be an afterthought — they’re essential safety equipment that must be set correctly every single time you squat or bench press near your maximum. Learning to bail safely from failed lifts is a skill worth practicing, and your equipment setup should make safe bailouts possible from every exercise you perform at heavy loads. Never compromise on this aspect of your gym setup regardless of budget constraints.
Proper weight storage is both a safety and a longevity issue. Plates and dumbbells left on the floor are trip hazards that can cause injuries completely unrelated to your actual training. Wall-mounted plate trees keep heavy weight off the floor and organized by size. Locking collars should be used on every barbell set, every single time — loose plates shifting during a lift can cause catastrophic loss of control even with relatively light loads. Building good safety habits from the beginning of your home gym journey is far easier than trying to correct dangerous shortcuts after they’ve become ingrained practices.
A well-stocked first aid kit, a reliable phone mount for recording lifts and emergency access, and ideally a security camera that allows someone to check on you remotely are all sensible additions to a home gym safety system. Many home gym users train early in the morning or late at night when no one else is awake, making these precautions especially relevant. Carbon monoxide detectors and smoke alarms should also be present and functional, particularly if your gym includes any gas-powered heaters. Taking safety seriously from day one ensures your garage gym remains a place of progress and accomplishment rather than a source of preventable injury.
Budgeting, Phasing, and Getting Started Without Overwhelm
One of the most common mistakes new home gym builders make is trying to build their dream gym all at once, leading either to budget paralysis or to overspending on equipment they later wish they’d chosen differently. The smarter approach is to phase your build strategically over time, starting with the infrastructure and the highest-impact equipment, then adding specialty items as your experience and preferences become clearer. A thoughtfully phased approach also lets you learn how you actually use the space before committing to a permanent layout.
A realistic Phase 1 budget for a functional starter garage gym — covering rubber flooring, a basic power rack, an Olympic barbell with plates, and an adjustable bench — can come in between $1,000 and $2,000 if you shop wisely and leverage the used market. Phase 2 might add dumbbells, a pull-up rig, and a conditioning option for another $500 to $1,000. Phase 3 could bring specialty equipment, upgraded lighting, mirrors, and atmosphere improvements. This phased model makes the project financially manageable while ensuring each addition is deliberate and genuinely needed based on your actual training experience in the space.
The best time to start building your garage gym is now, even if you can only afford the flooring and one piece of equipment. A barbell, some plates, and a mat to work on can deliver transformative training results, and starting small builds the habit of using the space daily. Every piece you add from that foundation feels like a meaningful upgrade that re-energizes your training. The journey of building your gym becomes its own form of investment in yourself — each improvement reflecting your commitment to health, performance, and the lifestyle you’re actively choosing to build, one training session at a time.
- Phase 1 Essentials: Rubber flooring, power rack or squat stand, Olympic barbell and plates, adjustable bench, basic lighting.
- Phase 2 Additions: Adjustable dumbbells or dumbbell set, pull-up bar or rig attachment, kettlebells, conditioning equipment, wall storage systems.
- Phase 3 Upgrades: Mirrors, upgraded lighting, sound system, specialty barbells, cable machine, sauna, climate control improvements.
- Ongoing Investments: Maintenance supplies, programming resources, safety equipment, supplemental accessories.
Final Thoughts: Your Garage Gym Is a Reflection of Your Commitment
A garage gym is more than a collection of equipment in a room — it’s a physical manifestation of your commitment to your health and your future. Every time you walk past it, every time you lace up your shoes and step inside, you’re reinforcing an identity as someone who prioritizes their physical wellbeing. The design choices you make — the flooring you lay, the equipment you choose, the atmosphere you cultivate — all communicate something to yourself about who you are and what you value. That message, repeated daily, is one of the most powerful forces in building lasting fitness habits.
The process of designing, building, and continuously improving a home gym also builds valuable skills beyond fitness — project planning, budgeting, spatial reasoning, mechanical familiarity with equipment, and the satisfaction of creating something functional and meaningful with your own hands. Many garage gym owners describe the build process as deeply gratifying and find that their pride of ownership in the space translates directly into more consistent, higher-quality training. You take better care of what you’ve built yourself, and you show up more reliably for something that genuinely feels like yours.
Whatever your starting point — a bare concrete slab and a single barbell or a half-finished space waiting for its final touches — the path forward is clear. Invest in good infrastructure, choose equipment that matches how you actually train, build an atmosphere that energizes and inspires you, and prioritize safety in every decision you make. Your garage gym will reward every dollar and hour you invest in it with years of productive, convenient, high-quality training that supports every other aspect of a healthy, capable life. Start today, build progressively, and enjoy the journey of creating the training environment you’ve always wanted.








What do you think?
It is nice to know your opinion. Leave a comment.